Lesson 98-4: Fading an LED Light Using Arduino: Brightness Control
LEDs are everywhere — indicators, displays, decorative lighting — but most beginners stop at simply turning one on and off. This project takes the next step: smoothly fading an LED in and out using Arduino's built-in PWM (Pulse Width Modulation) capability. Instead of a harsh blink, you get a gradual rise and fall in brightness that mimics natural dimming, breathing effects, and analog-like control from a purely digital pin. It's one of the most satisfying first projects because you can see the result immediately, and the same technique underpins motor speed control, audio volume, and backlight dimming in real products.

Once you understand fading, you can apply it to a wide range of practical builds:
- Creating a "breathing" status indicator on a device that pulses gently instead of blinking distractingly
- Dimming an LED nightlight automatically based on ambient light or time of day
- Controlling the brightness of a backlight on an LCD or OLED display
- Building mood lighting or decorative lamps with smooth transitions between brightness levels
- Simulating a slow sunrise alarm clock that gradually brightens to wake you naturally
- Adding speed control to small DC motors or fans (the same PWM principle applies)
This tutorial is part of the Robojax Arduino Step-by-Step Course, and specifically covers Project 4 of 10: Fading an LED Light Using Arduino. The full program is available for download below the article.
Hardware and Components
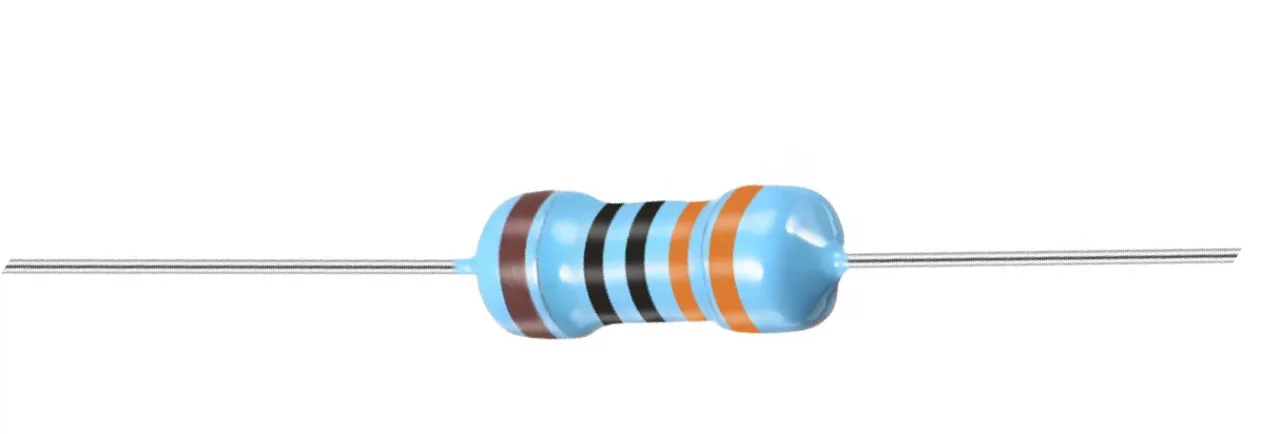
The parts list for this project is minimal — if you've done any Arduino work before, you likely already have everything you need:
- 1× Arduino board (Uno, Nano, Mega, or any compatible board)
- 1× LED (5mm or 3mm, any color)
- 1× Resistor (200Ω to 1000Ω — a 300Ω to 1kΩ range works well)
- Breadboard and DuPont jumper wires
- USB cable for programming and power
One important note about the LED: the longer leg is the anode (positive), and the shorter leg — or the side with the flat edge on the plastic casing — is the cathode (negative). Getting this backwards means the LED simply won't light up, so double-check before powering on.
For the resistor value, the transcript walks through the math at (in video at 03:49): a typical LED drops about 2V and needs roughly 10mA of current. With a 5V supply, the remaining 3V must be dropped across the resistor, giving R = V/I = 3V / 0.01A = 300Ω. In practice, anything from 300Ω up to 1000Ω will work — higher values just produce a dimmer LED. For fading, this is actually fine, since you're varying brightness anyway.
Wiring Guide


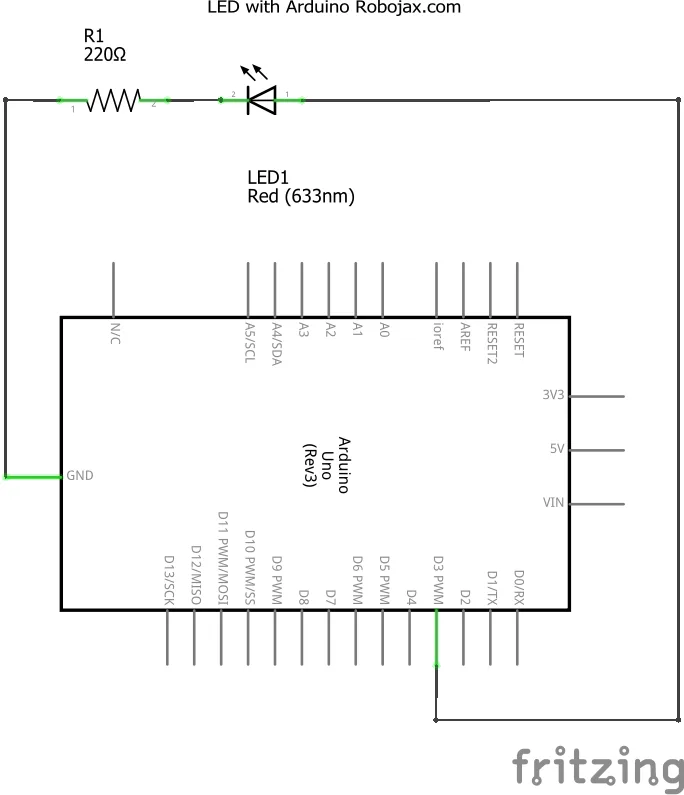
The wiring is about as simple as it gets. The LED's anode connects through a resistor to a PWM-capable pin on the Arduino — in this project, pin 3. The cathode connects to ground.
Why pin 3 specifically? Because not all Arduino pins support PWM. On most Arduino boards, the PWM-capable pins are marked with a tilde symbol (~) — typically pins 3, 5, 6, 9, 10, and 11 on an Uno. If you use a non-PWM pin, analogWrite() won't produce a variable output; the LED will just be on or off.
Connect the circuit as follows:
- Insert the LED into the breadboard, noting which leg is the anode (longer) and which is the cathode (shorter/flat side).
- Connect the LED's anode to Arduino pin 3 through the resistor.
- Connect the LED's cathode to the Arduino's GND pin.
- Plug the Arduino into your computer via USB.
Code Explanation
The sketch for this project is based on the classic Arduino "Fade" example, with a few tweaks. Rather than explaining every line, let's focus on the parts you'll want to adjust for your own experiments.
User-Configurable Variables
At the top of the code, three variables control the entire behavior:
int led = 3;           // the PWM pin the LED is attached to
int brightness = 0;    // how bright the LED is
int fadeAmount = 3; // how many points to fade the LED byled— This defines which pin the LED is connected to. The default is pin 3, but you can change it to any PWM-capable pin (marked with ~ on your board). If you move the LED to a different pin, update this value to match.brightness— This is the current brightness level, ranging from 0 (off) to 255 (full brightness). The code starts it at 0, but you could start it anywhere in that range.fadeAmount— This is the most interesting one to play with. It controls how many brightness "steps" are taken each cycle. A small value like 3 produces a slow, gradual fade. A larger value like 20 makes the LED fade in and out very quickly. The transcript demonstrates this at (in video at 22:37) — changing from 5 to 20 dramatically speeds up the effect.
How the Fading Works
The core of the fading happens in two lines inside loop():
analogWrite(led, brightness);
brightness = brightness + fadeAmount;
Each pass through the loop, the current brightness value is written to the LED using analogWrite(), then the brightness is incremented by fadeAmount. The analogWrite() function uses PWM to simulate an analog voltage — it rapidly switches the pin on and off, and the ratio of on-time to off-time determines the perceived brightness.
When brightness reaches either 0 or 255, the code reverses direction by flipping the sign of fadeAmount:
if (brightness <= 0 || brightness >= 255) {
  fadeAmount = -fadeAmount;
}
This is what makes the LED fade in, then fade out, then fade in again — a continuous breathing cycle. The delay(30) at the end of the loop controls the overall speed of the animation. A shorter delay makes the fade faster; a longer delay slows it down.
Experimenting with the Values
Two variables give you the most control over the visual effect:
- Increase
fadeAmountfor a faster, more dramatic fade. Try 10 or 20. - Decrease
fadeAmountfor a slow, gentle breathing effect. Try 1 or 2. - Adjust the
delay()value to change the pacing. Smaller delays make the whole cycle quicker; larger delays stretch it out.
Combining a small fadeAmount with a short delay produces an extremely smooth, almost organic fade — great for ambient lighting. A large fadeAmount with a short delay creates a fast pulsing effect.
Live Project Demonstration
Once the code is uploaded, you'll see the LED slowly brighten from off to full brightness, then dim back down, repeating indefinitely. The transcript shows the default behavior at (in video at 22:25) — a smooth, moderate-speed fade.
When the fadeAmount is changed to 20, the LED fades in and out very rapidly — almost like a flicker. When set to 3, the fade takes noticeably longer, creating a relaxed, gradual transition. This is demonstrated clearly in the video at (in video at 23:02).
The beauty of this project is that you can see the effect of your code changes immediately — no wiring changes needed, just edit the variables and re-upload. That tight feedback loop makes it an excellent way to build intuition for how PWM and timing interact.
If you want to take this further by triggering the fade with a push button instead of letting it run continuously, that's covered in a separate tutorial — see the related projects section below.
Related projects from this video
- Lesson 98-1: How to Turn On and Off an LED with Arduino
- Lesson 98-2: How to Turn On and Off an LED Using a Push Button with Arduino
- Lesson 98-3: How to Turn On/Off a Toggle LED Using a Push Button with Arduino
- Lesson 98-5: Fade Light When a Button Is Pressed Using Arduino
- Lesson 98-6: Seesaw LED Game with Arduino
- Lesson 98-7: Walking Light Using Arduino and 5 LEDs
- Lesson 98-8: Walking Light with Push Button and LEDs with Arduino
- Lesson 98-9: LED Voltage Level Meter Using Arduino or walking light with potentiometer
- Lesson 98-10: Arduino Traffic Light
Chapters
- [00:00] Overview of the 10 Arduino LED projects
- [01:22] Introduction to the course and required components
- [02:29] Understanding LEDs: symbols, polarity, and types
- [03:49] Calculating the LED resistor value using Ohm's law
- [05:53] Project 1: Turning an LED on and off
- [12:43] Project 2: LED control with a push button
- [17:13] Project 3: Toggle LED with push button
- [20:12] Project 4: Fading an LED — code walkthrough
- [22:25] Fading demonstration and adjusting fade speed
- [23:20] Project 5: Fading LED with push button trigger
- [27:32] Project 6: Seesaw LED effect
- [30:47] Project 7: Walking light with 5 LEDs
- [36:41] Project 8: Walking light controlled by push button
- [42:25] Project 9: LED voltage level meter with potentiometer
- [49:25] Project 10: Arduino traffic light
Images

This code has not been parsed yet. Please return to the admin panel to parse it.Nko o na nki.
-
AmazonSunFounder Arduino Learning Kit on AliExpresss.click.aliexpress.com
-
Amazon
-
Amazon
-
Amazon
Mokili na bisika
-
DokumentasiDocumentation for SunFounder 3 in 1 IoT/Smart Car/Learning Kitdocs.sunfounder.com
-
L'extérieur
-
L'extérieur
-
L'extérieur
Fichiers📁
Maktabat ya Arduino (zip)
-
Code source du kit d'apprentissage de voiture intelligente 3-en-1 de SunFounder
3in1-kit-main-v2.zip12.80 MB
Manuel de l'utilisateur
-
Manuel d'assemblage de la voiture intelligente Arduino 3-en-1 SunFounderCe document montre l'assemblage étape par étape de la voiture intelligente Arduino 3-en-1 SunFounder
SunFounder_car_assembly_manual.pdf1.20 MB