第14/31-5课:Arduino编程map()示例2
本教程演示了如何使用Arduino的map()函数,通过百分比值(0–100%)来控制LED的亮度,而不是使用analogWrite()所需的原始0–255范围。这是一项基础技术,可以简化你的代码并使其更加直观,因为你可以用百分比来思考,而不是任意的字节值。
这项技能对于任何需要缩放传感器读数或控制信号的项目都至关重要。例如,你可以用它来:
- 根据电位器的读数控制LED的亮度或电机的速度。
- 将温度传感器的输出(例如0–1023)转换为摄氏或华氏范围。
- 将操纵杆的模拟输入映射为控制舵机的位置。
- 创建一个简单的用户界面,用百分比值来设置设备的功率级别。
学完本课后,你将能够编写更简洁、更易维护、更易阅读和调整的代码。
硬件/组件
本项目使用的组件很少,非常适合初学者。你需要:
- 一块Arduino板(例如Uno)。
- 一个LED。
- 一个220欧姆电阻。
- 跳线。
- 一块面包板(可选但推荐)。
接线指南
本项目的接线非常简单,如视频所示(视频20:47处)。LED通过一个220欧姆的限流电阻连接到Arduino的3号引脚。
将LED的阳极(长脚)通过电阻连接到3号引脚。将LED的阴极(短脚)连接到Arduino上的接地(GND)引脚。
代码解释
本示例重点介绍一个用户自定义函数,用于简化LED亮度的控制。代码围绕一个名为pwmValue()的自定义函数构建,这是使代码直观的关键。
让我们分解代码中可配置的部分:
int LEDpin = 3; //定义LED的引脚此行定义了LED所连接的Arduino引脚。你可以将数字3改为Arduino板上任何其他支持PWM的引脚。
项目的核心是自定义函数pwmValue()。该函数接收一个百分比值作为输入,并将其转换为analogWrite()使用的0–255范围。这就是map()函数发挥神奇作用的地方。
int pwmValue(int percent)
{
  if(percent >=0 && percent <=100)
  {
    return map(percent, 0,100,  0,255);
  }else
  {
    return 0;
  }
}要使用此函数,只需用你想要的亮度百分比调用它。该函数将返回analogWrite()的正确值。例如,pwmValue(60)将返回153,对应255的60%。该函数还包含安全检查,确保输入的百分比在0到100之间,如果超出此范围则返回0。
在setup()函数中,你可以看到如何使用它:
int b=5;//60%亮度
Serial.println( pwmValue(b)   );//在串口监视器上打印
analogWrite(LEDpin, pwmValue(b));//以60%亮度点亮LED这里,变量b被设置为你想要的亮度百分比。然后使用函数pwmValue(b)将映射后的值打印到串口监视器,并设置LED的亮度。要改变LED的亮度,你只需修改b的值。map()函数会为你处理所有必要的计算。
实际项目/演示
在视频中,演示者通过改变b变量的值并将代码上传到Arduino来展示项目。当b设置为60时,代码将其映射为153,LED以60%的亮度点亮。将b改为90会映射为229,使LED明显更亮。将其设置为100会映射为255,即最大亮度。演示清楚地展示了map()函数如何让你使用直观的百分比值来控制LED,同时串口监视器确认了发送到引脚的确切0–255值(视频21:29处)。
本视频中的相关项目
- 第14/31-1课:Arduino Millis(无延迟)和map函数 | SunFounder Robojax
- 第14/31-2课:Arduino millis()编码示例2带事件
- 第14/31-3课:Arduino millis()编码示例3带按钮
- 第14/31-4课:Arduino map()编码示例1
章节
- [00:00] Millis和map函数简介
- [01:19] 什么是Millis以及为什么使用它
- [05:46] 使用Millis配合事件来执行操作
- [08:35] Millis示例2带按钮
- [12:14] Millis示例3检查两次按钮按下
- [17:20] map()函数简介
- [19:47] 将百分比映射到LED亮度的代码示例
- [20:47] map()函数的实际演示
- [22:41] 创建自定义函数来处理映射
图像
/*
Lesson 14/31-5: Arduino coding map( ) example-2
Get this code and watch video Download and resource page https://robojax.com/RJT597
YouTube video https://www.youtube.com/watch?v=lqgzQohNiIM


 * This code is "AS IS" without warranty or liability. Free to be used as long as you keep this note intact.*
 * This code has been download from Robojax.com
    This program is free software: you can redistribute it and/or modify
    it under the terms of the GNU General Public License as published by
    the Free Software Foundation, either version 3 of the License, or
    (at your option) any later version.

    This program is distributed in the hope that it will be useful,
    but WITHOUT ANY WARRANTY; without even the implied warranty of
    MERCHANTABILITY or FITNESS FOR A PARTICULAR PURPOSE.  See the
    GNU General Public License for more details.

    You should have received a copy of the GNU General Public License
    along with this program.  If not, see <https://www.gnu.org/licenses/>.
 */
int LEDpin = 3; //defind pin for LED


 void setup() {
    Serial.begin(9600);//initialzie serial monitor with 9600 baud
    pinMode(LEDpin, OUTPUT);//set pin as output
    int b=5;//60% brightness

    Serial.println( pwmValue(b)   );//print it on serial monitor
    analogWrite(LEDpin, pwmValue(b));// turn the LED on with 60% brightness
 }

 void loop() {


 }

/*
 * pwmValue(int percent)
 * @param precent is value between 0 to 100
 * @return it returns the mapped value from 0 to 255
 * written by Ahmad Shamshiri on Dec 9, 2022
 *
 */
 int pwmValue(int percent)
 {
  if(percent >=0 && percent <=100)
  {
    return map(percent, 0,100,  0,255);
  }else
  {
    return 0;
  }
 } //pwmValue end
|||您可能需要的东西
-
亚马逊SunFounder Arduino Learning Kit on AliExpresss.click.aliexpress.com
-
亚马逊
-
亚马逊
-
亚马逊
-
其他
资源与参考
-
外部购买SunFounder的3合1智能汽车学习套件sunfounder.com
文件📁
用户手册
-
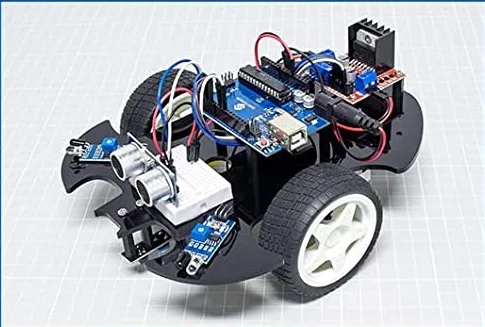
SunFounder 3合1 Arduino智能车组装手册本文档逐步展示SunFounder 3合1 Arduino智能车的组装过程
SunFounder_car_assembly_manual.pdf1.20 MB