Lesson 14/31-2: Arduino coding millis() example 2 with event
In this tutorial, you will learn how to use the Arduino millis() function to trigger an action only after a specified period of time has elapsed, all without blocking the rest of your program. This is a fundamental technique for creating responsive Arduino projects where multiple tasks need to run concurrently, such as blinking LEDs while reading sensors or monitoring button presses. This specific example focuses on triggering an event after five seconds, but the logic can be applied to countless real-world scenarios.
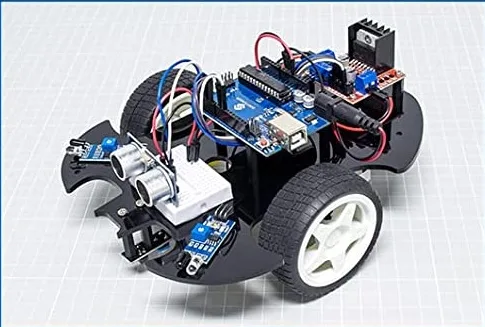
Here are a few practical examples of how you might use this pattern in your own projects:
- Delayed activation: Turn on a fan or pump only after a system has been running for a set time.
- Safety interlocks: Require a button to be pressed and held for a duration before performing a dangerous action, like starting a motor.
- Time-based alerts: Trigger an alarm or notification if a sensor reading hasn't changed within a certain window.
- Non-blocking timers: Create a "watchdog" timer that resets a device if it becomes unresponsive.
The core problem this solves is the limitation of the delay() function. When you use delay(5000), the Arduino stops executing any other code for those five seconds. This is fine for simple sketches, but it becomes a major problem in more complex projects where you need to read sensors, update displays, or listen for button presses while waiting. The millis() function, which counts the milliseconds since the board was powered on, allows you to check the time without pausing the program.
Hardware Required
- Arduino board (Uno, Nano, Mega, etc.)
- A push button
- Jumper wires
Wiring Guide
The wiring for this example is very simple. It uses an internal pull-up resistor, so no external resistor is needed for the button.
- Connect one leg of the push button to the GND pin on the Arduino.
- Connect the other leg of the push button to digital pin 2 on the Arduino.
Because we use INPUT_PULLUP in the code, the pin will read HIGH when the button is not pressed and LOW when it is pressed, connecting the pin to ground. (in video at 08:29)
Understanding the Code
This code demonstrates a simple event-based timer. The program continuously prints the current millis() value to the Serial Monitor. When the push button is pressed and held, and the Arduino has been running for at least 5 seconds, it will print "Take action" to the Serial Monitor. The key is that the millis() check does not stop the continuous printing of the time.
Let's break down the user-configurable parts of the code:
unsigned long event = 5000;// 5 secondsThis is the most important variable to configure. It defines the duration of your "event" in milliseconds. In this example, it's set to 5000, which equals 5 seconds. To change the delay, simply modify this number. For instance, setting it to 10000 would make the action trigger after 10 seconds. It is crucial to use the unsigned long data type, as the value of millis() can grow very large and will eventually exceed the maximum value of a standard int variable, causing errors in comparison. (in video at 05:46)
pinMode(2,INPUT_PULLUP);This line configures digital pin 2 as an input and activates its internal pull-up resistor. This is a key configuration step that allows you to connect a button without an external resistor. The pin will read HIGH by default and will go LOW when the button is pressed, connecting it to ground. If you wish to use a different pin, change the number 2 here and in the digitalRead(2) line within the loop. (in video at 08:46)
The logic inside the loop() is straightforward. It reads the state of the button. If the button is pressed (pb == LOW), it then checks if the current time (millis()) is greater than or equal to your defined event time. If both conditions are true, it prints the action message. The rest of the loop, which prints the time, continues to run uninterrupted, demonstrating the power of millis() over delay().
This example checks the time from the moment the Arduino starts. The third example in the video series builds on this by recording the time of the first button press and triggering an action only if a second press occurs at least 5 seconds later. That logic is covered in Lesson 14/31-3: Arduino coding millis() example 3 with push button.
Live Project Demonstration
Once you upload the code and open the Serial Monitor (at 9600 baud), you will see a continuous stream of numbers, representing the milliseconds since the board was powered on. If you press and hold the push button before 5 seconds have passed, nothing will happen. However, if you press and hold the button after the 5-second mark, you will see the message "Take action" printed in the Serial Monitor. The action will continue to print as long as the button is held. This demonstrates a non-blocking timer that allows other code (the printing) to run seamlessly. (in video at 10:52)
Related projects from this video
This video is part of a multi-part series on Arduino timing and mapping functions. Explore the other tutorials created from this same source material:
- Lesson 14/31-1: Arduino Millis (no delay) and map functions | SunFounder Robojax
- Lesson 14/31-3: Arduino coding millis() example 3 with push button
- Lesson 14/31-4: Arduino coding map() example 1
- Lesson 14/31-5: Arduino coding map() example 2
Chapters
- [00:00] Introduction to millis() and the SunFounder Kit
- [01:19] What is millis() and why use it instead of delay()?
- [03:06] Practical demonstration: printing the millis() value
- [05:46] Creating an event with millis() and unsigned long
- [08:29] Wiring and coding a push button with INPUT_PULLUP
- [10:52] Running the event example with a push button
- [12:14] Preview of example 3: detecting a second button press
- [17:20] Introduction to the map() function
- [19:47] Coding and demonstrating the map() function with an LED
Images
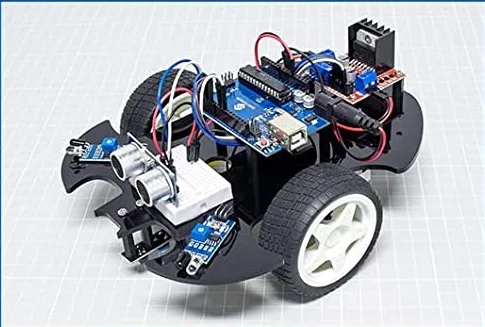
/*
Lesson 14/31: Arduino coding millis() example 2 with event
Get this code and watch video Download and resource page https://robojax.com/RJT597
YouTube video https://www.youtube.com/watch?v=lqgzQohNiIM


 * This code is "AS IS" without warranty or liability. Free to be used as long as you keep this note intact.*
 * This code has been download from Robojax.com
    This program is free software: you can redistribute it and/or modify
    it under the terms of the GNU General Public License as published by
    the Free Software Foundation, either version 3 of the License, or
    (at your option) any later version.

    This program is distributed in the hope that it will be useful,
    but WITHOUT ANY WARRANTY; without even the implied warranty of
    MERCHANTABILITY or FITNESS FOR A PARTICULAR PURPOSE.  See the
    GNU General Public License for more details.

    You should have received a copy of the GNU General Public License
    along with this program.  If not, see <https://www.gnu.org/licenses/>.
 */


unsigned long event = 5000;// 5 seconds
void setup() {
  Serial.begin(9600);//initialize serial monitor
  Serial.println("Introduction to millis");
  pinMode(2,INPUT_PULLUP);


}

void loop() {
  // Robojax.com millis() example 1
  Serial.println(millis());
  int pb = digitalRead(2);// read pin 2
  if(pb ==LOW)
  {
      if(millis() >= event)
      {
        Serial.println("Take action");
      }// if end
  }// if end

}// loop end
Things you might need
-
AmazonSunFounder Arduino Learning Kit on AliExpresss.click.aliexpress.com
-
Amazon
-
Amazon
-
Amazon
-
Amazon
-
Other
Resources & references
-
ExternalPurchase SunFounder's 3-in-1 Smart car learning kitsunfounder.com
Files📁
User’s Manual
-
SunFounder 3-in-1 Arduino Smart Car assembly manualThis document shows step by step assembly of SunFounder 3-in-1 Arduino Smart Car
SunFounder_car_assembly_manual.pdf1.20 MB