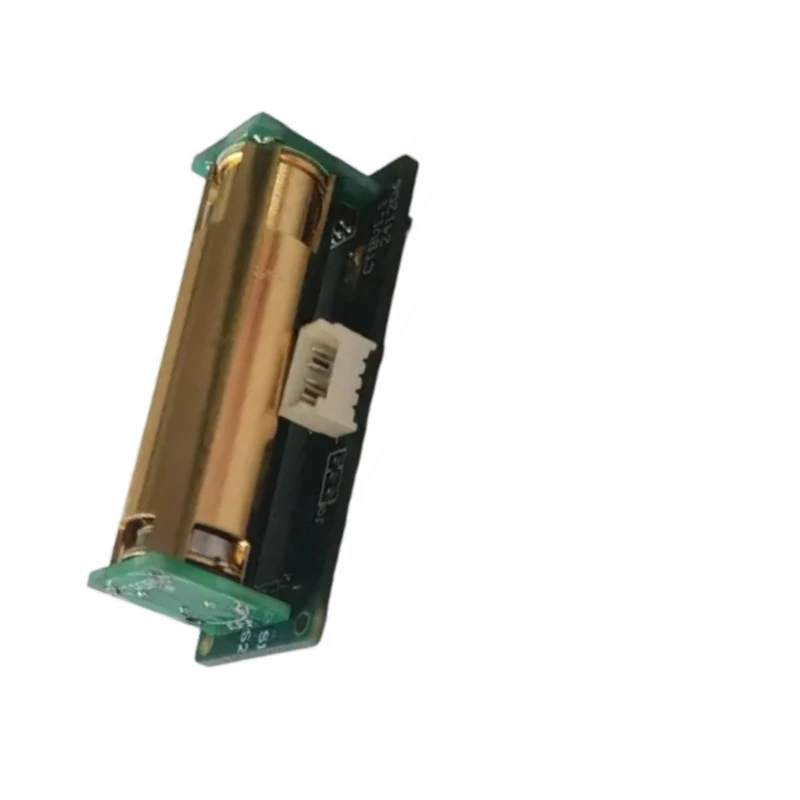
Lesson 96-4: Barometric Pressure, Temperature, and Approximate Altitude Sensor BMP390 with Arduino as a Thermostat
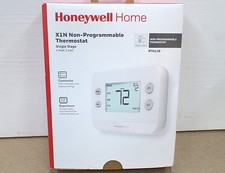
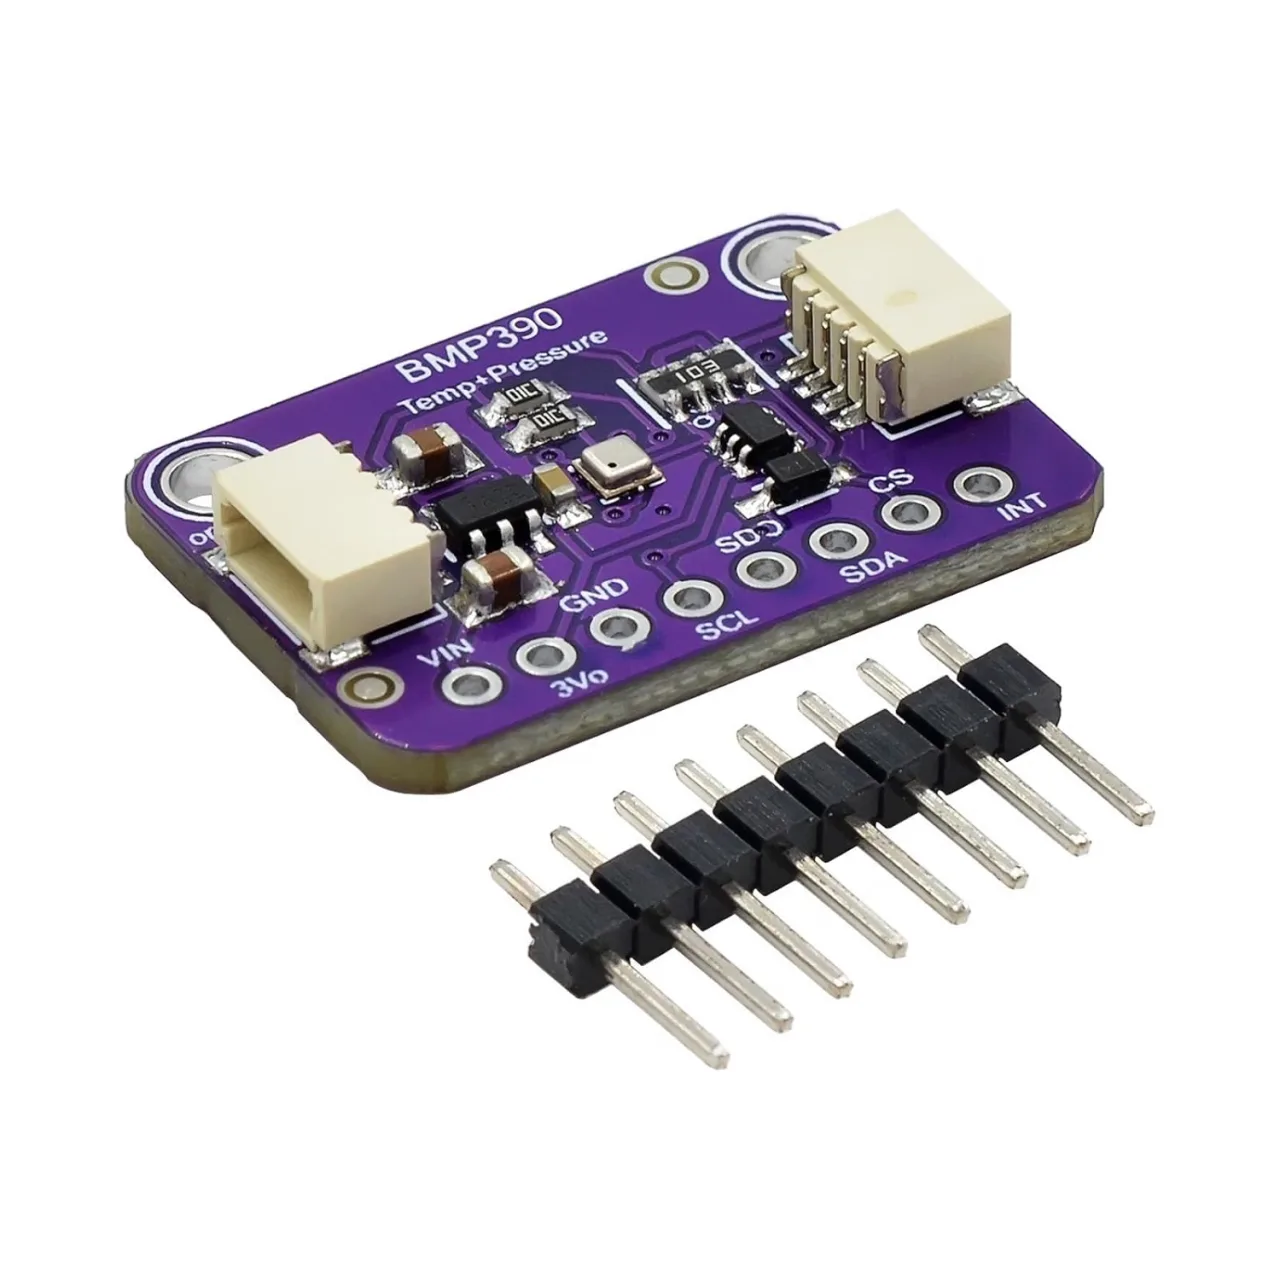
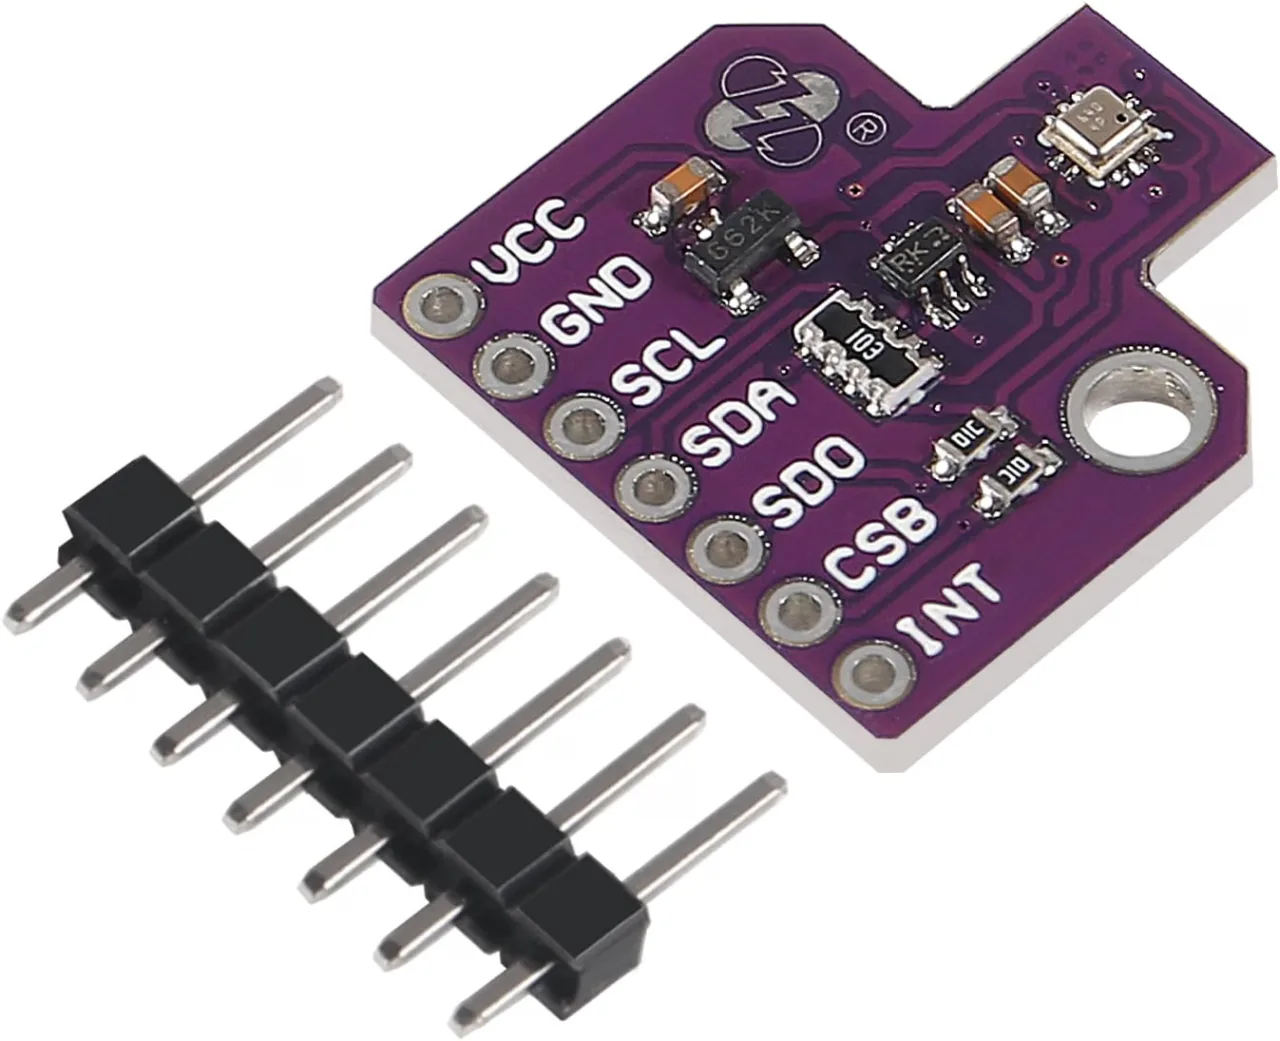
This tutorial demonstrates how to build a smart thermostat using the BMP390 barometric pressure, temperature, and approximate altitude sensor with an Arduino. The BMP390 is a highly precise sensor from Bosch that can measure temperature, pressure, and calculate approximate altitude based on sea-level pressure. In this project, we'll use it to control a relay that can turn a heater or cooler on and off based on temperature thresholds, creating a fully functional thermostat system.
This project has several practical applications, including:
- Creating a smart home thermostat to maintain a comfortable room temperature
- Building a temperature-controlled greenhouse ventilation system
- Protecting sensitive electronics from overheating
- Controlling an incubator for eggs or reptiles
- Monitoring and regulating temperature in a wine cellar or storage room
Hardware Required
- Arduino Uno (or compatible board)
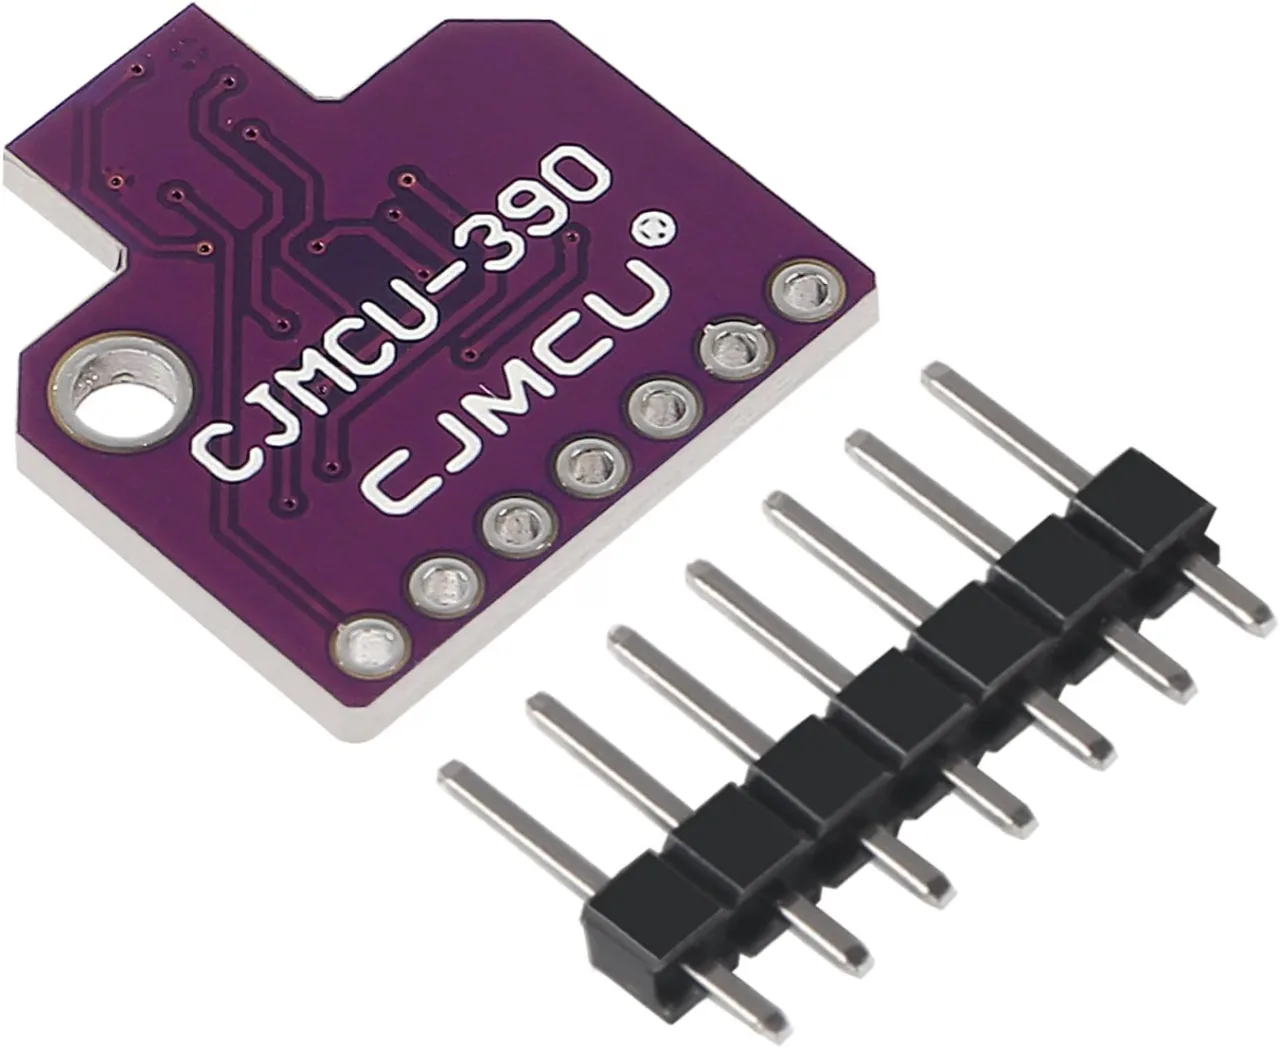
- BMP390 barometric pressure sensor module
- Relay module (for controlling the heater/cooler)
- Heater or cooler device to control
- Jumper wires
- Breadboard (optional)
Understanding the BMP390 Sensor
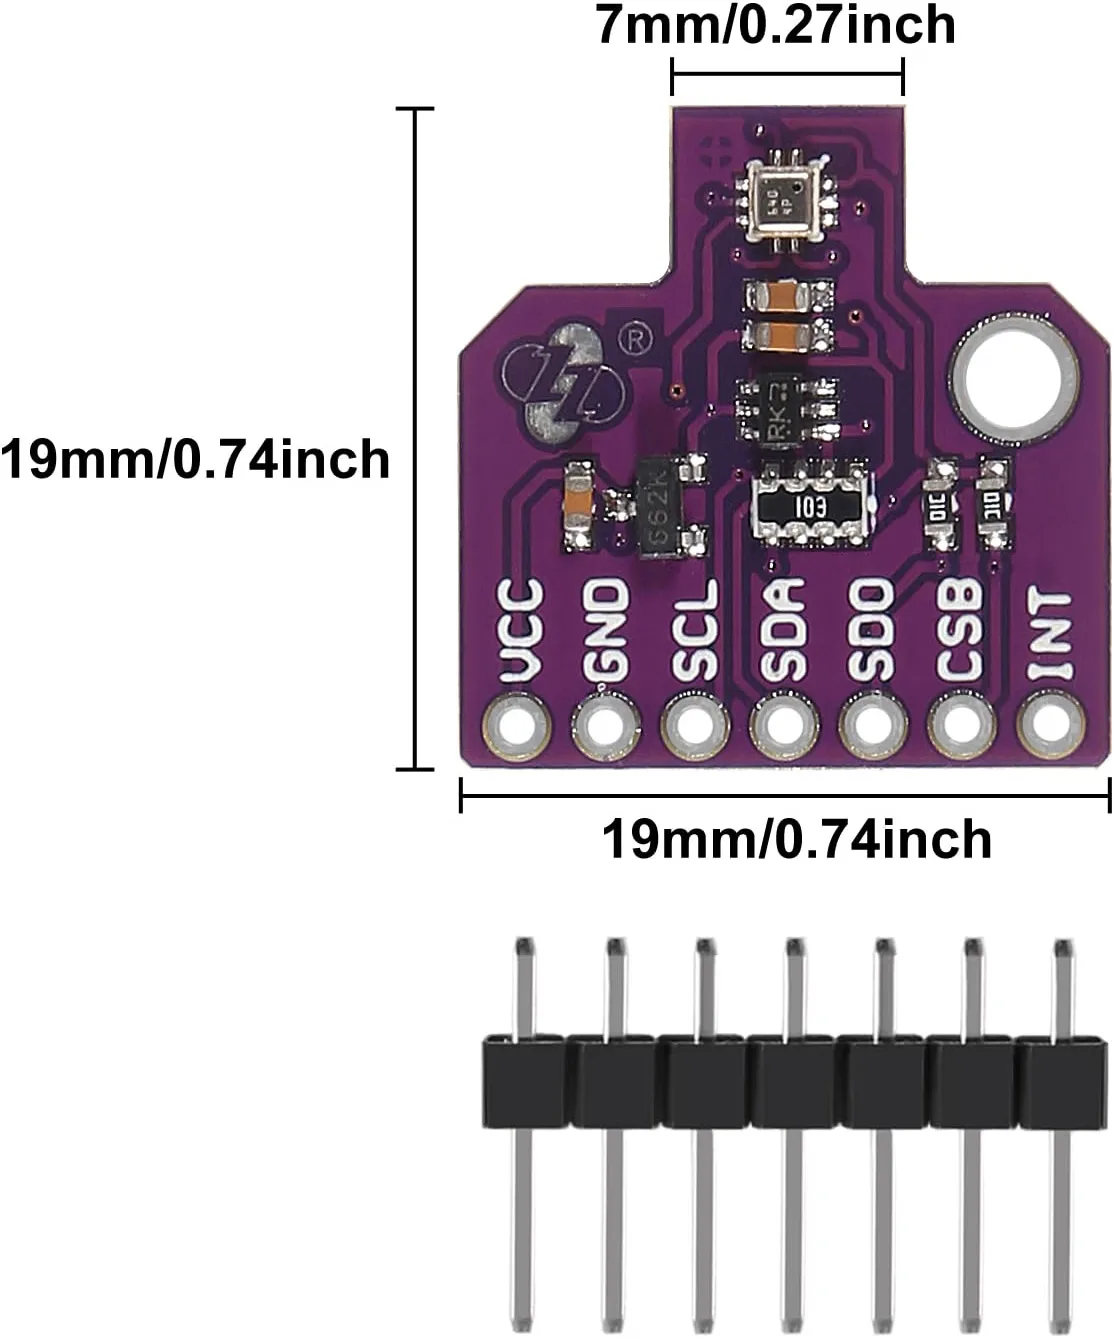
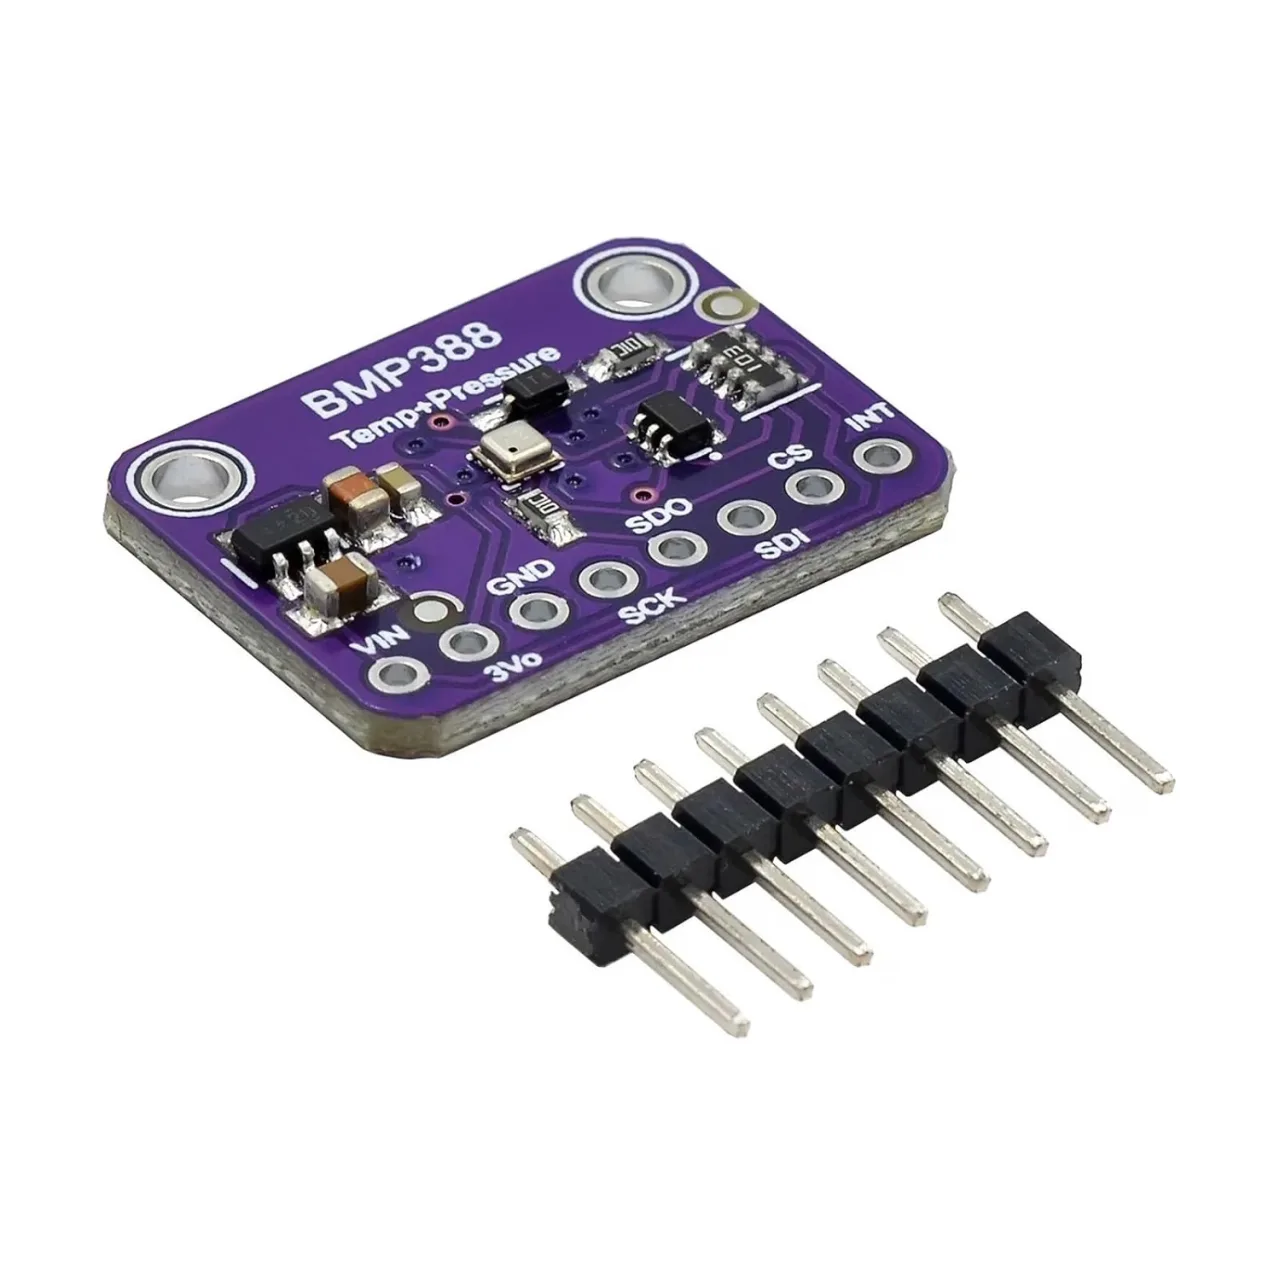
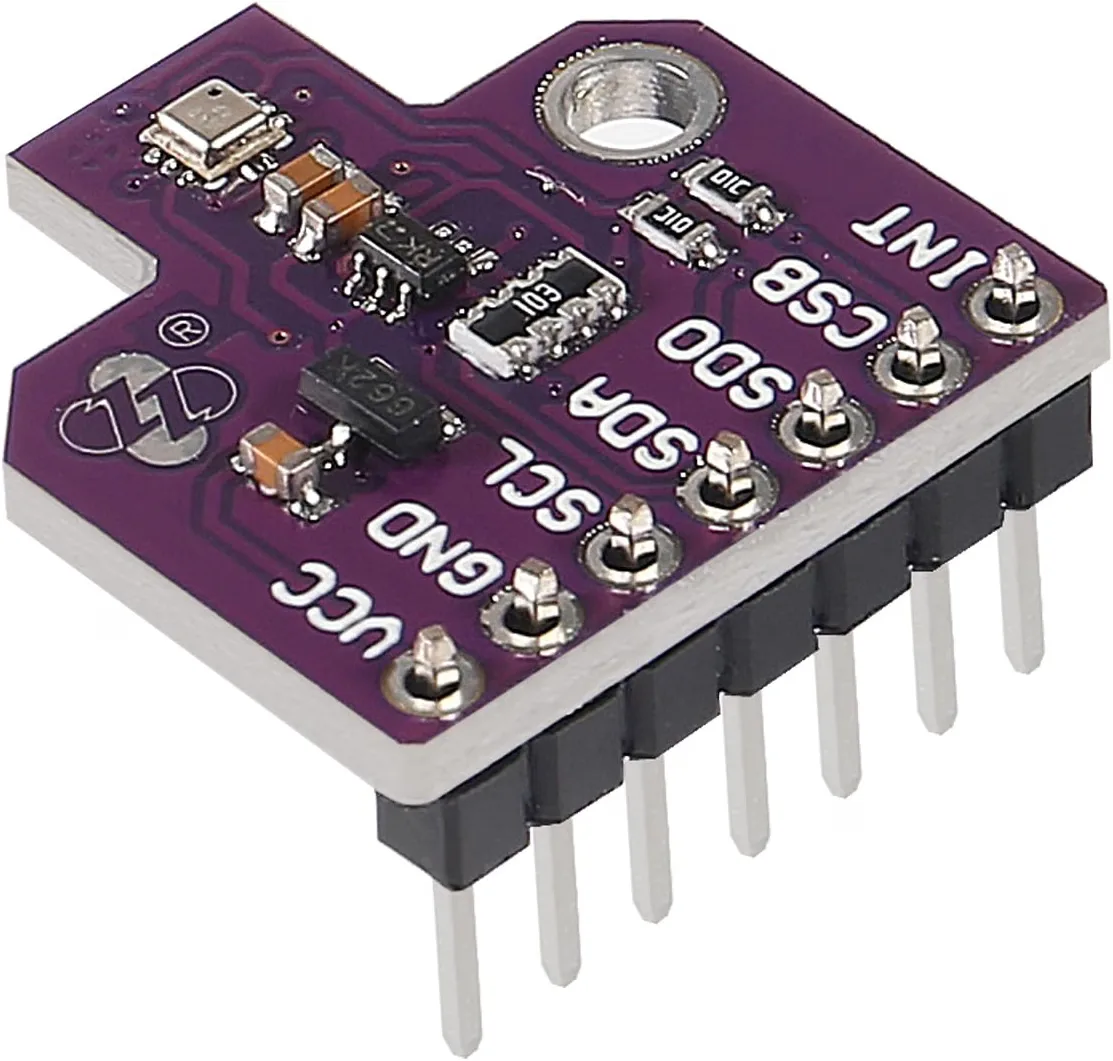
The BMP390 is a highly precise barometric pressure sensor manufactured by Bosch. The actual sensor measures just 2mm x 2mm x 0.75mm, making it incredibly compact. The breakout board you'll use includes all the necessary supporting components like pull-up resistors, a voltage regulator, and a logic level converter, allowing you to power it with either 3.3V or 5V (in video at 01:44).
The sensor can measure pressure from 300 to 1250 hectopascals with an absolute accuracy of ±0.5 hPa between 0 to 65 degrees Celsius. Its relative accuracy is even better at ±0.03 hPa, which translates to approximately ±25 centimeters of altitude difference. The sensor also features a maximum sampling rate of 200 Hz, making it suitable for applications requiring fast readings (in video at 04:10).
Wiring Guide
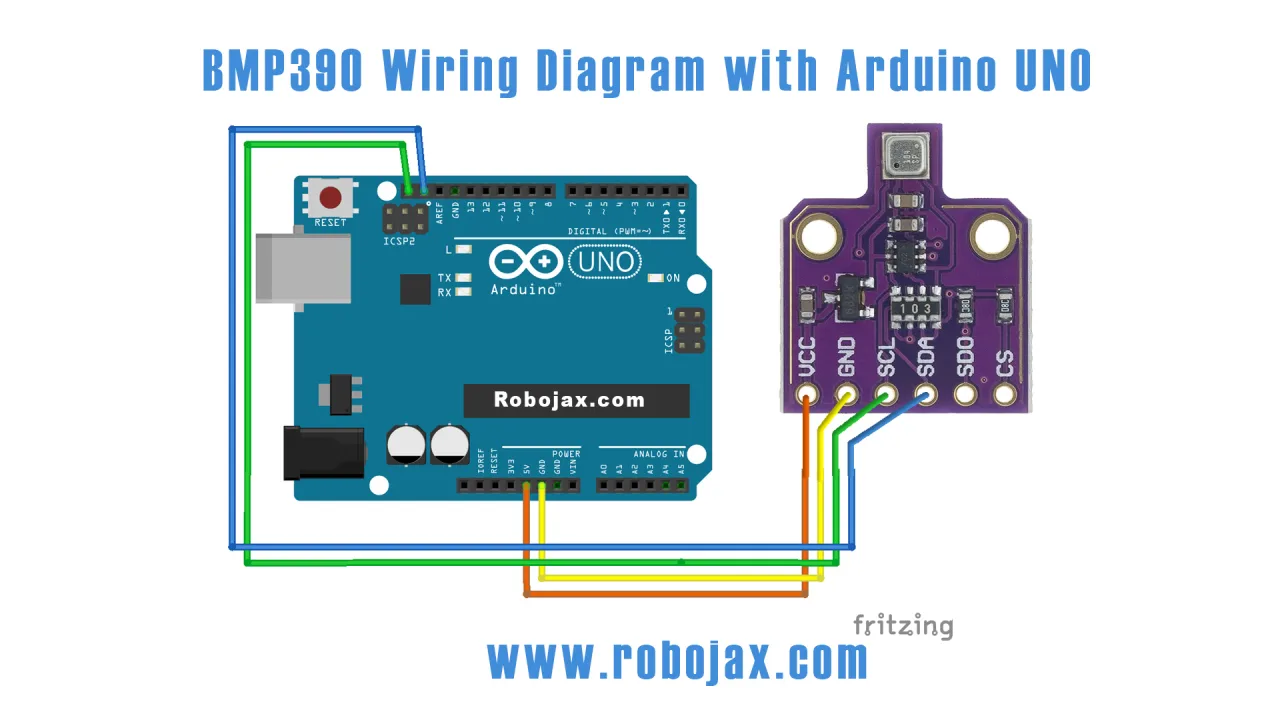
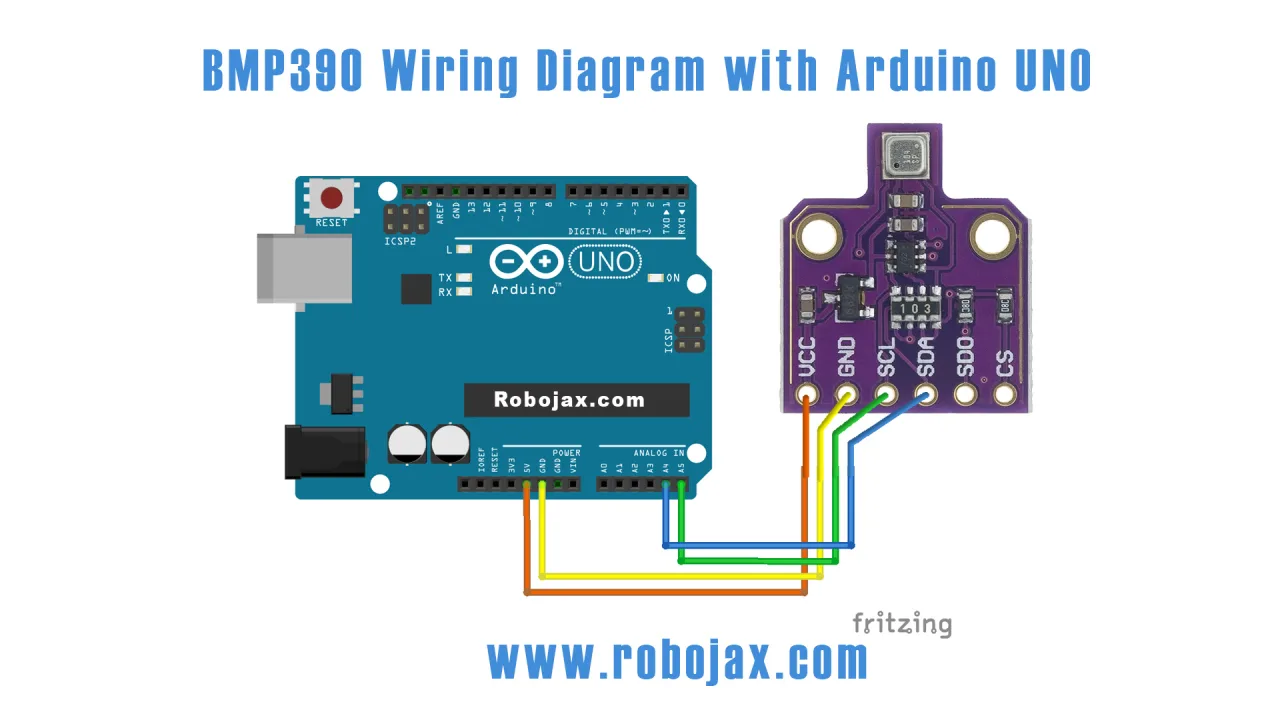
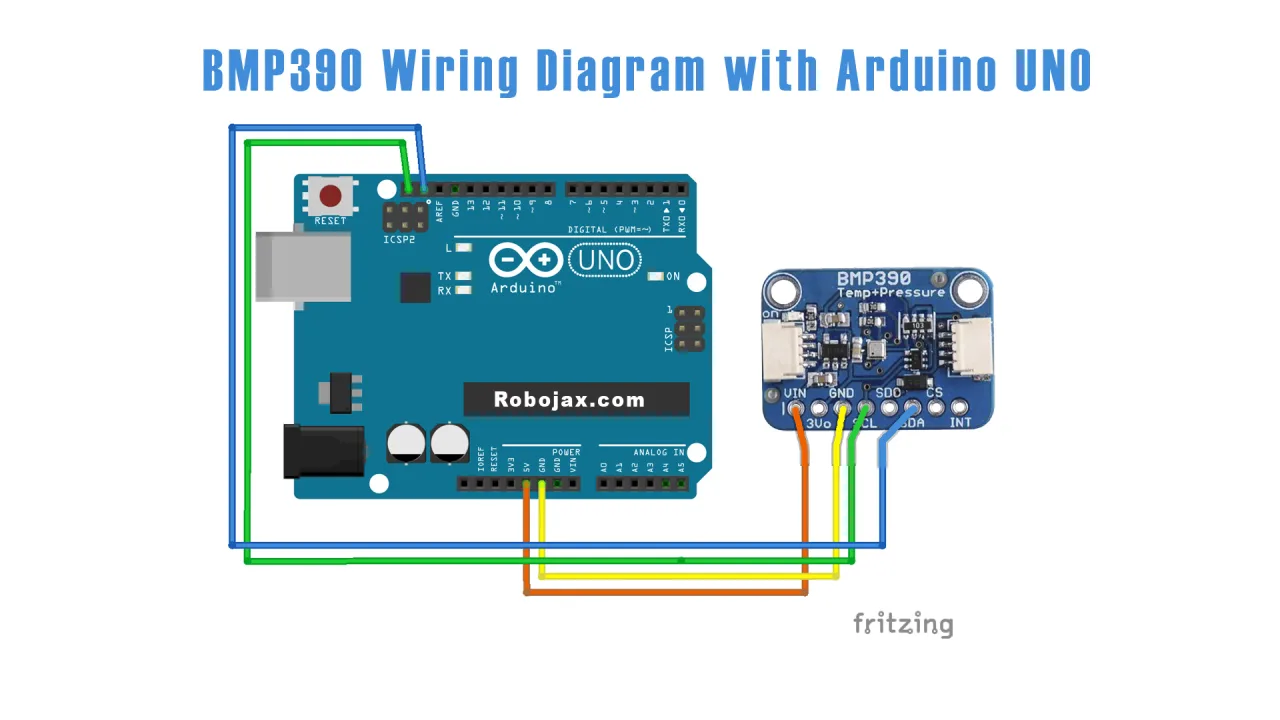
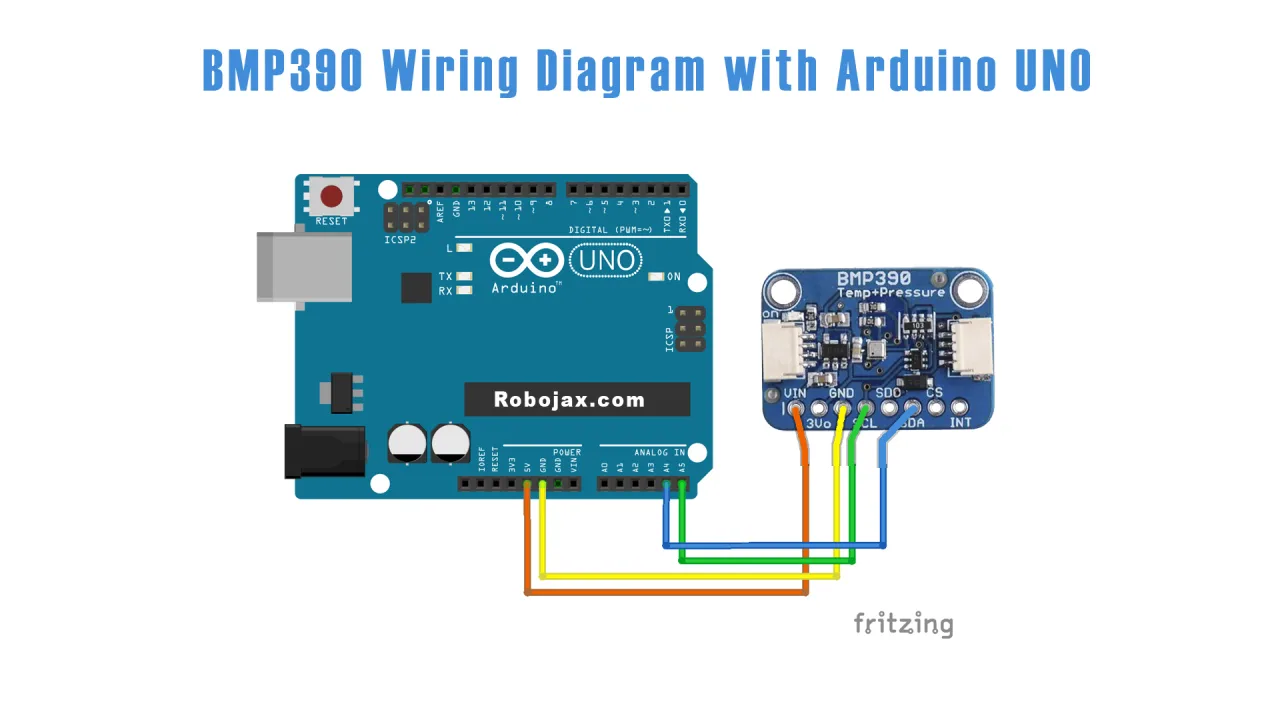
Connecting the BMP390 to your Arduino is straightforward using the I2C interface, which only requires two wires for data communication plus power connections. The sensor's VIN pin connects to 5V (or 3.3V) on the Arduino, ground connects to ground, SCL connects to the SCL pin (A5 on Uno), and SDA connects to the SDA pin (A4 on Uno) (in video at 05:45).
For the relay module, you'll connect its control pin to digital pin 8 on the Arduino, VCC to 5V, and ground to ground. The device you want to control (heater or cooler) connects to the relay's output terminals.
One unique feature of this project is that the code defines pin 12 as a power output for the BMP390 module. This means you can power the sensor directly from an Arduino pin without needing a separate breadboard power rail (in video at 08:46). The code sets this pin HIGH in the setup to provide 5V to the sensor.
Installing the Required Libraries
Before uploading the code, you'll need to install the Adafruit BMP3XX library. Open the Arduino IDE, go to Sketch → Include Library → Manage Libraries, search for "Adafruit BMP3XX," and click Install (in video at 10:29). This library handles all the low-level communication with the BMP390 sensor.
Code Explanation
The code for this thermostat project is designed to be highly configurable. Let's examine the key user-configurable settings at the top of the program.
Pin Definitions
You can change which Arduino pins are used for the sensor power and relay control:
int bmpVCCPin = 12;//define pin 12 as VCC for bmp sensor
const int relayPin = 8;
The bmpVCCPin provides 5V power to the BMP390 module. The relayPin controls the relay module that switches your heater or cooler.
Thermostat Settings
These constants define how your thermostat behaves:
const int TEMPERATURE_UNIT = 1;//1=Celsius, 2=Fahrenheit, 3=Kelvin
const float START_TEMPERATURE = 32.0;//unit above
const float STOP_TEMPERATURE = 45.0;//unit above
const int CONTROL_TYPE = 2;// 1= heater, 2=cooler- TEMPERATURE_UNIT: Sets the temperature scale. Use 1 for Celsius, 2 for Fahrenheit, or 3 for Kelvin.
- START_TEMPERATURE: The temperature at which the relay turns on (for heater mode) or off (for cooler mode).
- STOP_TEMPERATURE: The temperature at which the relay turns off (for heater mode) or on (for cooler mode).
- CONTROL_TYPE: Set to 1 for heater control (turns on when cold) or 2 for cooler control (turns on when hot).
For example, in the demonstration, the start temperature is set to 30°C and stop temperature to 45°C so you can quickly test the behavior with a heat gun. In a real application, you'd set these closer together, like 20°C and 23°C, to maintain a comfortable room temperature (in video at 30:07).
Custom Functions
The code includes several custom functions you can use and modify:
- loadControl(): This function implements the thermostat logic. It compares the current temperature to your START and STOP thresholds and calls
relayControl()accordingly. The behavior changes based on whether you set CONTROL_TYPE to 1 (heater) or 2 (cooler). - relayControl(int state): This function turns the relay on or off and prints the status to the serial monitor. Pass it either
relayONorrelayOFF. - readValues(): This function reads the sensor and stores temperature, pressure, and altitude in global variables. It automatically converts the temperature to your chosen unit.
- printTemperature(): This function prints the temperature reading with the appropriate unit symbol to the serial monitor.
How the Thermostat Works
The thermostat logic works by comparing the current temperature to your configured thresholds. In heater mode (CONTROL_TYPE = 1), when the temperature drops to or below the START_TEMPERATURE, the relay turns on to activate your heating device. The heater stays on until the temperature rises to the STOP_TEMPERATURE, at which point the relay turns off. This creates a hysteresis effect that prevents rapid on/off cycling (in video at 31:04).
In cooler mode (CONTROL_TYPE = 2), the logic is reversed. The relay turns on when the temperature reaches or exceeds the STOP_TEMPERATURE, and turns off when it drops back to the START_TEMPERATURE.
The demonstration in the video shows this working with a heat gun. When the temperature reached 45°C, the relay turned off and the indicator light went out. After cooling down to 30°C, the relay activated again to turn the heater back on (in video at 31:53).
Live Project Demonstration
The video includes a practical altitude test of the BMP390. The presenter took the sensor to a location in Ajax, Ontario, Canada, and measured the altitude at ground level near an ice skating field. The sensor initially read approximately -15 meters, which represents the difference between the local sea-level pressure calibration and the actual elevation of that spot (in video at 33:04).
Taking the sensor to the 25th floor of a nearby building, the reading changed to approximately 57.2 meters. The difference of about 72 meters between the ground floor and the 25th floor demonstrates the sensor's ability to detect meaningful altitude changes. This test confirms the BMP390's usefulness for applications requiring elevation monitoring (in video at 36:16).
The thermostat demonstration shows the relay turning off when the temperature exceeded the 45°C stop threshold, with the indicator light turning off. After cooling the sensor back down below 30°C, the relay activated again, demonstrating reliable hysteresis-based temperature control (in video at 31:04).
Related projects from this video
- Lesson 96-1: Barometric Pressure, Temperature, and Approximate Altitude Sensor BMP390 with Arduino Basic Code
- Lesson 96-2: Barometric Pressure, Temperature, and Approximate Altitude Sensor BMP390 with Arduino on LCD1602
- Lesson 96-3: Barometric Pressure, Temperature, and Approximate Altitude Sensor BMP390 with Arduino on LCD2004
Chapters
- [00:00] Introduction to the BMP390 sensor project
- [01:19] Understanding the BMP390 sensor specifications
- [05:45] Wiring diagram for BMP390 with Arduino Uno
- [10:29] Installing the Adafruit BMP3XX library
- [11:38] Code explanation for basic sensor reading
- [15:51] Adding relay control for thermostat operation
- [17:30] Setting up the LCD display (optional)
- [22:52] Displaying pressure and altitude on LCD
- [30:07] Thermostat demonstration with heat gun
- [32:12] Altitude test at 25th floor
Images
/*
 * Lesson 96: Using BMP390  as  thermostat
 * with Arduino using it as a Thermostat to control a heater or cooler
 * Download and resource page https://robojax.com/RJT457

 * Watch video instruction on YouTube:  https://youtu.be/XevQYG_A5xA
 *
 * Code updated by Ahmad Shamshiri for Robojax.com
 * on Jan 13, 2022 at 17:10 in Ajax, Ontario, Canada

  This video is part of the Arduino Step by Step Course which starts here: https://youtu.be/-6qSrDUA5a8


If you found this tutorial helpful, please support me so I can continue creating content like this
and make a donation using PayPal http://robojax.com/L/?id=64


  This is a library for the BMP390 temperature & pressure sensor

  Designed specifically to work with the Adafruit BMP388 Breakout
  ----> http://www.adafruit.com/products/3966

  These sensors use I2C or SPI to communicate; 2 or 4 pins are required
  to interface.

  Adafruit invests time and resources providing this open source code,
  please support Adafruit and open-source hardware by purchasing products
  from Adafruit!

  Written by Limor Fried & Kevin Townsend for Adafruit Industries.
  BSD license, all text above must be included in any redistribution
 **************************************************************************
 */
#include <Wire.h>

#include <Adafruit_Sensor.h>
#include "Adafruit_BMP3XX.h"


#define SEALEVELPRESSURE_HPA (1013.25)

Adafruit_BMP3XX bmp;
int bmpVCCPin = 12;//define pin 12 as VCC for bmp sensor

// all thermostat settings

const int relayPin =8;
const int relayON = HIGH;//
const int relayOFF = LOW; //
int relayState = relayOFF;//initial state of relay

const int TEMPERATURE_UNIT =1;//1=Celsius, 2=Fahrenheit, 3=Kelvin
const float START_TEMPERATURE = 32.0;//unit above
const float STOP_TEMPERATURE = 45.0;//unit above
const int CONTROL_TYPE = 2;// 1= heater, 2=cooler

//do not change the line below
float temperature, pressure, altitude;


void setup() {
  Serial.begin(9600);
  while (!Serial);
  Serial.println("Adafruit BMP388 / BMP390 test");

  pinMode(bmpVCCPin, OUTPUT);// set pin as output
  digitalWrite(bmpVCCPin,HIGH);// always keep it high (5V) for BMB390 module
  delay(500);//wait for the bmpVCCPin to turn ON.


  pinMode(relayPin, OUTPUT);//pin for relay
  digitalWrite(relayPin, relayState);//change initial state of relay


  if (!bmp.begin_I2C()) {   // hardware I2C mode, can pass in address & alt Wire
  Serial.println("Could not find a valid BMP3 sensor, check wiring!");
    while (1);
  }

  // Set up oversampling and filter initialization
  bmp.setTemperatureOversampling(BMP3_OVERSAMPLING_8X);
  bmp.setPressureOversampling(BMP3_OVERSAMPLING_4X);
  bmp.setIIRFilterCoeff(BMP3_IIR_FILTER_COEFF_3);
  bmp.setOutputDataRate(BMP3_ODR_50_HZ);


}

void loop() {
  if (! bmp.performReading()) {
    Serial.println("Failed to perform reading :(");
    return;
  }
    readValues();
    printTemperature();

  Serial.println();
   loadControl();

   //do extra action if temperature is greater than 89.5
   if(temperature >=89.5)
   {
    ///and your code here
   }
  delay(2000);//wait 2 seconds or make is less or more
}


/*
 * loadControl()
 * @brief controls the load based
 * @param state can be either : relayON or relayOFF

 * @return returns none
 * Written by Ahmad Shamshiri for robojax.com
 * on Jan 15, 2022 at 08:11 in Ajax, Ontario, Canada
 */
void loadControl()
{
//Robojax.com heater/cooler with BMP390 Thermocoupler
     // Serial.print("Start: ");
     // Serial.print(START_TEMPERATURE);
     // Serial.print(" Stop: ");
      //Serial.println(STOP_TEMPERATURE);
  if(CONTROL_TYPE ==1)
  {
    if(START_TEMPERATURE >= temperature && STOP_TEMPERATURE >=temperature)
    {
      relayControl(relayON);
    }
    if(STOP_TEMPERATURE <=temperature)
    {
      relayControl(relayOFF);
    }
  }else{
    if(START_TEMPERATURE >= temperature && STOP_TEMPERATURE >=temperature)
    {
      relayControl(relayOFF);
    }
    if(STOP_TEMPERATURE <=temperature)
    {
      relayControl(relayON);
    }
  }

//Robojax.com heater/cooler with BMP390 Thermocoupler
}//loadControl()


/*
 * relayControl(int state))
 * @brief turns the relay ON or OFF
 * @param state is "relayON" or "relayOFF" defined at the top of the code
 * @return returns none
 * Written by Ahmad Shamshiri for robojax.com
 * on May 20, 2020 at 15:23 in Ajax, Ontario, Canada
 */
void relayControl(int state)
{
  //Robojax.com heater/cooler with BMP390 Thermocoupler
  if(state ==relayON)
  {
    digitalWrite(relayPin, relayON);
    Serial.println("Relay ON");
  }else{
   digitalWrite(relayPin, relayOFF);
    Serial.println("Relay OFF");
  }
  //Robojax.com heater/cooler with BMP390 Thermocoupler

}//relayControl()


/*
 *  readValues()
 * @brief reads the temperature based on the TEMPERATURE_UNIT
 * @param average temperature

 * @return returns one of the values above
 * Written by Ahmad Shamshiri for robojax.com
 * on Jan 15, 2022 at 08:02 in Ajax, Ontario, Canada
 */
void readValues()
{
 //Robojax.com heater/cooler with BMP390 Thermocoupler

  altitude =  bmp.readAltitude(SEALEVELPRESSURE_HPA);// read altitude
  pressure = bmp.pressure / 100.0F; // get  pressure in hecto pascal


  if(TEMPERATURE_UNIT ==2)
   {
   temperature = bmp.temperature *9/5 + 32;//convert to Fahrenheit
   }else if(TEMPERATURE_UNIT ==3)
   {
    temperature = bmp.temperature + 273.15;//convert to Kelvin
   }else{
    temperature = bmp.temperature;// return Celsius
   }
 //Robojax.com heater/cooler with BMP390 Thermocoupler
}// readValues()


/*
 * printTemperature()
 * @brief prints  temperature on serial monitor
 * @param character type
 * @param "type" is character
 *     C = Celsius
 *     K = Kelvin
 *     F = Fahrenheit
 * @return none
 * Written by Ahmad Shamshiri for robojax.com
 * on Jan 15, 2022 at 08:09 in Ajax, Ontario, Canada
 * www.Robojax.com
 */
void printTemperature()
{
//Robojax.com heater/cooler with BMP390 Thermocoupler
   Serial.print(temperature);
    printDegree();
  if(TEMPERATURE_UNIT ==2)
   {
     Serial.print("F");
    }else if(TEMPERATURE_UNIT ==3)
   {
     Serial.print("K");
   }else{
     Serial.print("C");
   }
  Serial.println();
//Robojax.com heater/cooler with BMP390 Thermocoupler
}//printTemperature()

/*
 * @brief prints degree symbol on serial monitor
 * @param none
 * @return returns nothing
 * Written by Ahmad Shamshiri on July 13, 2019
 * for Robojax Tutorial Robojax.com
 */
void printDegree()
{
    Serial.print("\\xC2");
    Serial.print("\\xB0");
}
Things you might need
-
Amazon
-
AliExpressBMP388 High Precision Digital Atmospheric Pressure on AliExpresss.click.aliexpress.com
-
AliExpressPurchase it from AliExpresss.click.aliexpress.com
-
BanggoodPurchase it from Banggoodbanggood.com
Resources & references
-
ExternalBMP390 Bosch official product pagebosch-sensortec.com
-
ExternalPurchase it from AliExpresss.click.aliexpress.com
-
External
-
ExternalPurchase it from Amazon Canadaamzn.to
-
ExternalPurchase it from Amazon, USAamzn.to
-
ExternalPurchase it from Banggoodbanggood.com