Lesson 96-1: Barometric Pressure, Temperature, and Approximate Altitude Sensor BMP390 with Arduino Basic Code
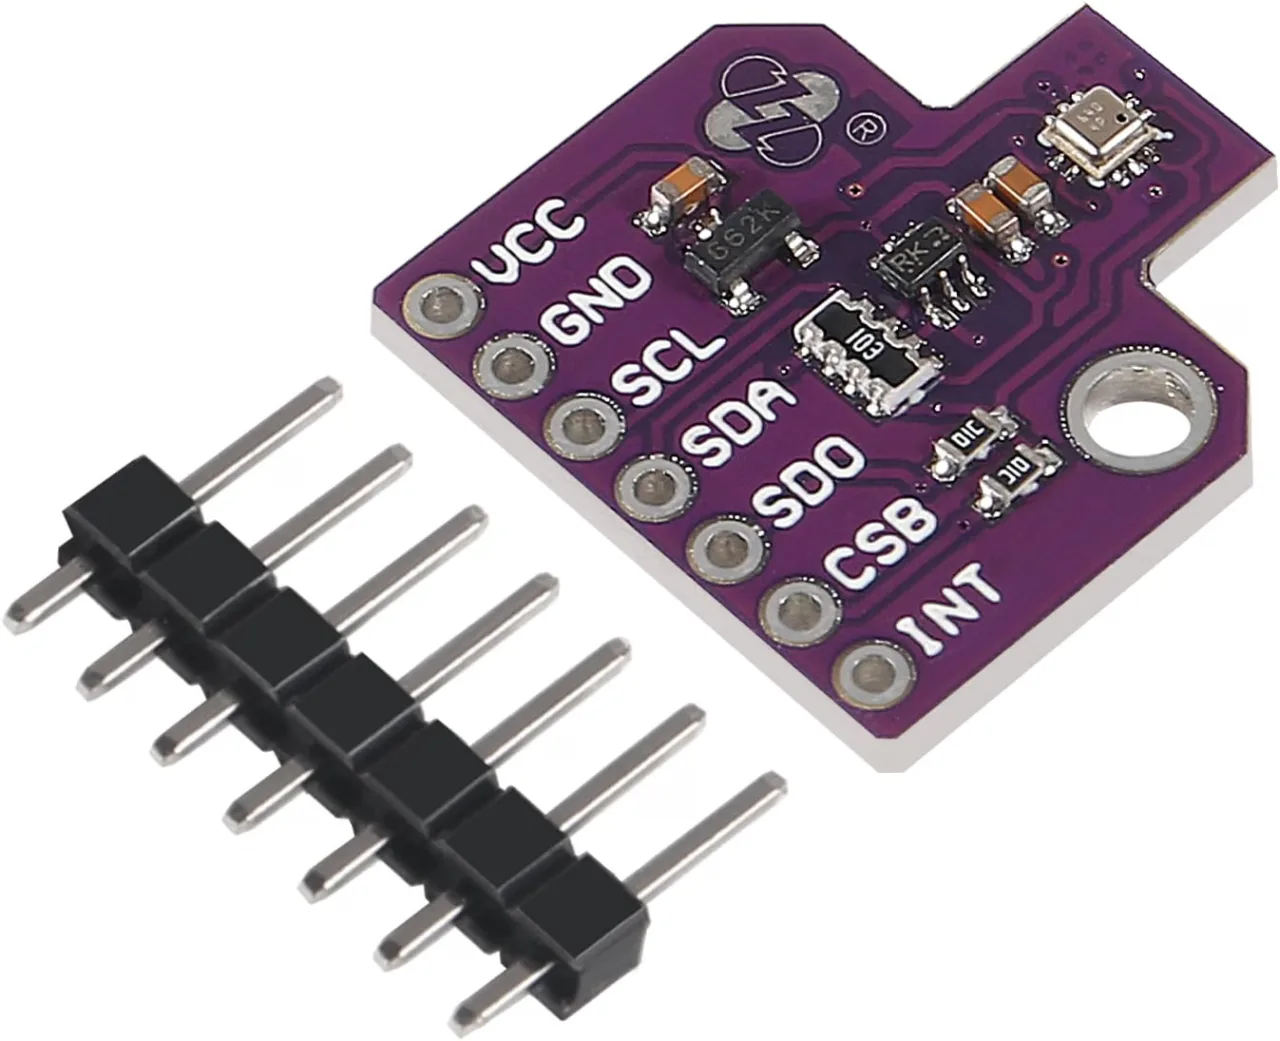
This guide walks you through building a highly accurate environmental monitoring system using the Bosch BMP390 sensor and an Arduino. Unlike older sensors like the BMP180 or BMP280, the BMP390 offers exceptional precision, making it ideal for projects where small changes in pressure or altitude matter. This tutorial will show you how to read temperature, pressure, and approximate altitude, display this data on serial monitors and LCD screens, and even use the readings to control other devices like relays.
This project is perfect for a wide range of applications. Here are a few ideas to get you started:
- Weather Station: Build a compact, precise home weather station to track barometric pressure trends and local temperature.
- Elevation & Altitude Logger: Create a device to measure and log altitude changes, useful for hiking, drone flights, or even verifying the floor of a building.
- Smart Thermostat Controller: Use the temperature reading to control a heater or cooler via a relay, maintaining a specific temperature range.
- Environmental Enclosure Monitor: Keep an eye on the conditions inside a server rack, greenhouse, or 3D printer enclosure and trigger alarms or fans when thresholds are crossed.
-
BMP380_pink-module-gravitiy-1
Hardware Components
To follow along with this project, you will need the following components. The sensor is the star of the show, but the display and relay options allow you to expand its functionality.
- Arduino Uno (or similar board)
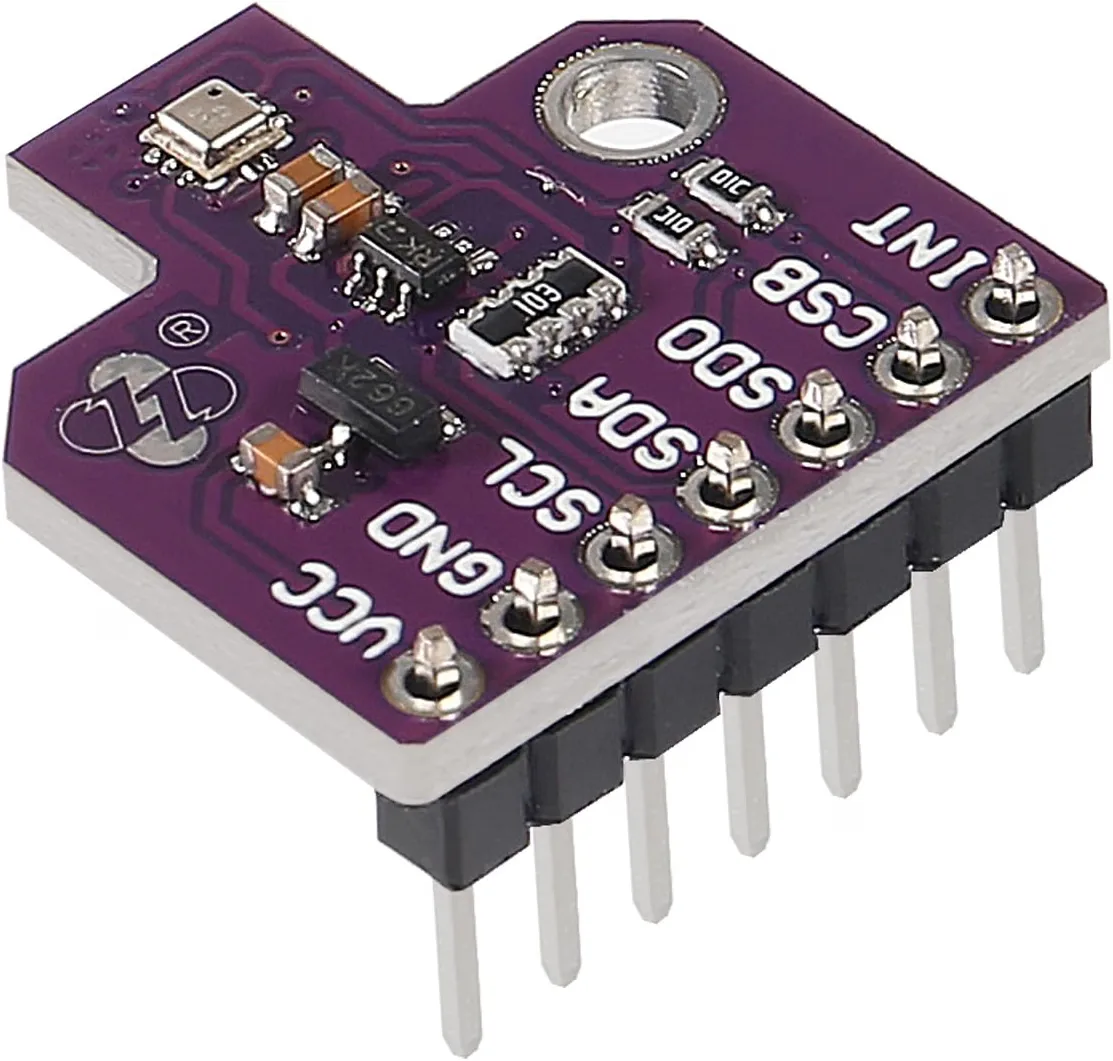
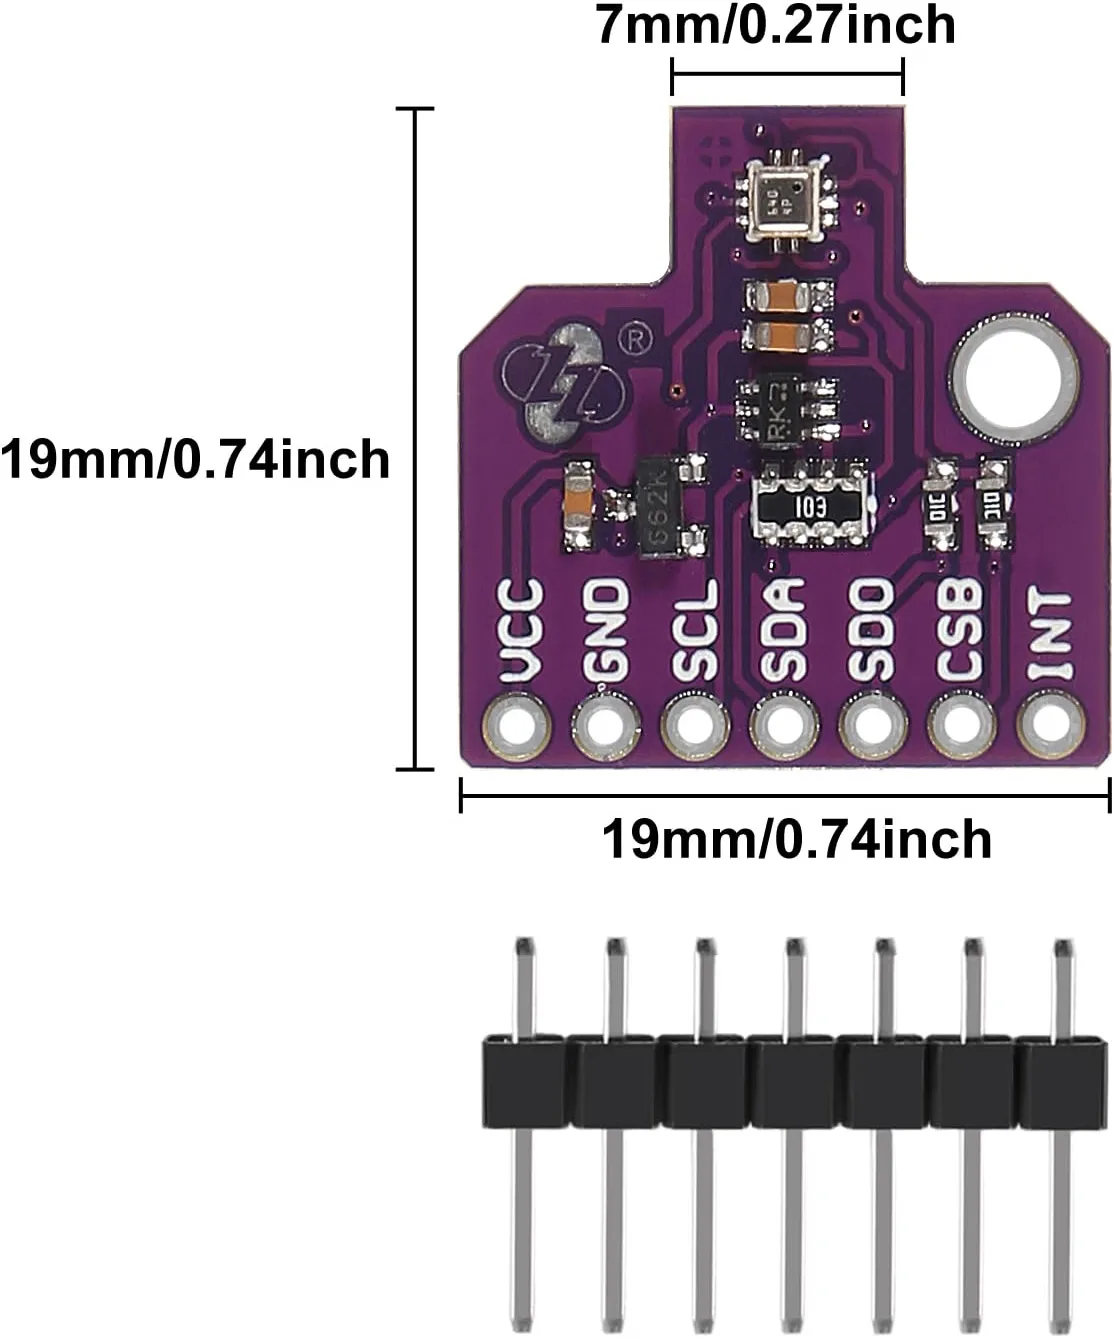
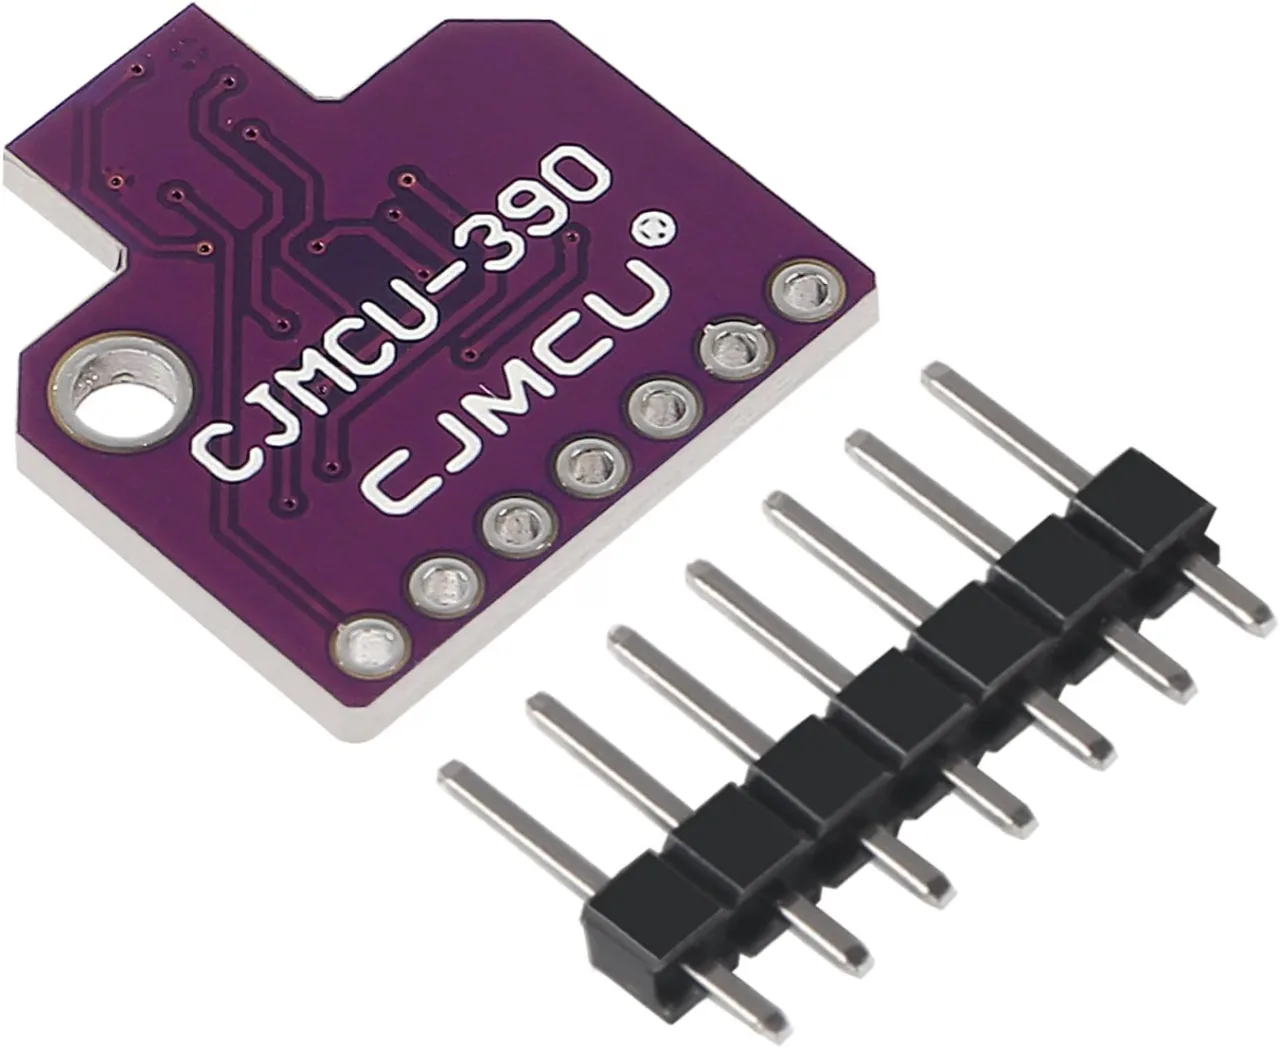
- BMP390 Barometric Pressure Sensor Module
- LCD1602 (16x2) or LCD2004 (20x4) with I2C interface
- Relay Module (for the control demonstration)
- Jumper Wires
- Breadboard (optional, for easy connections)
Understanding the BMP390 Sensor
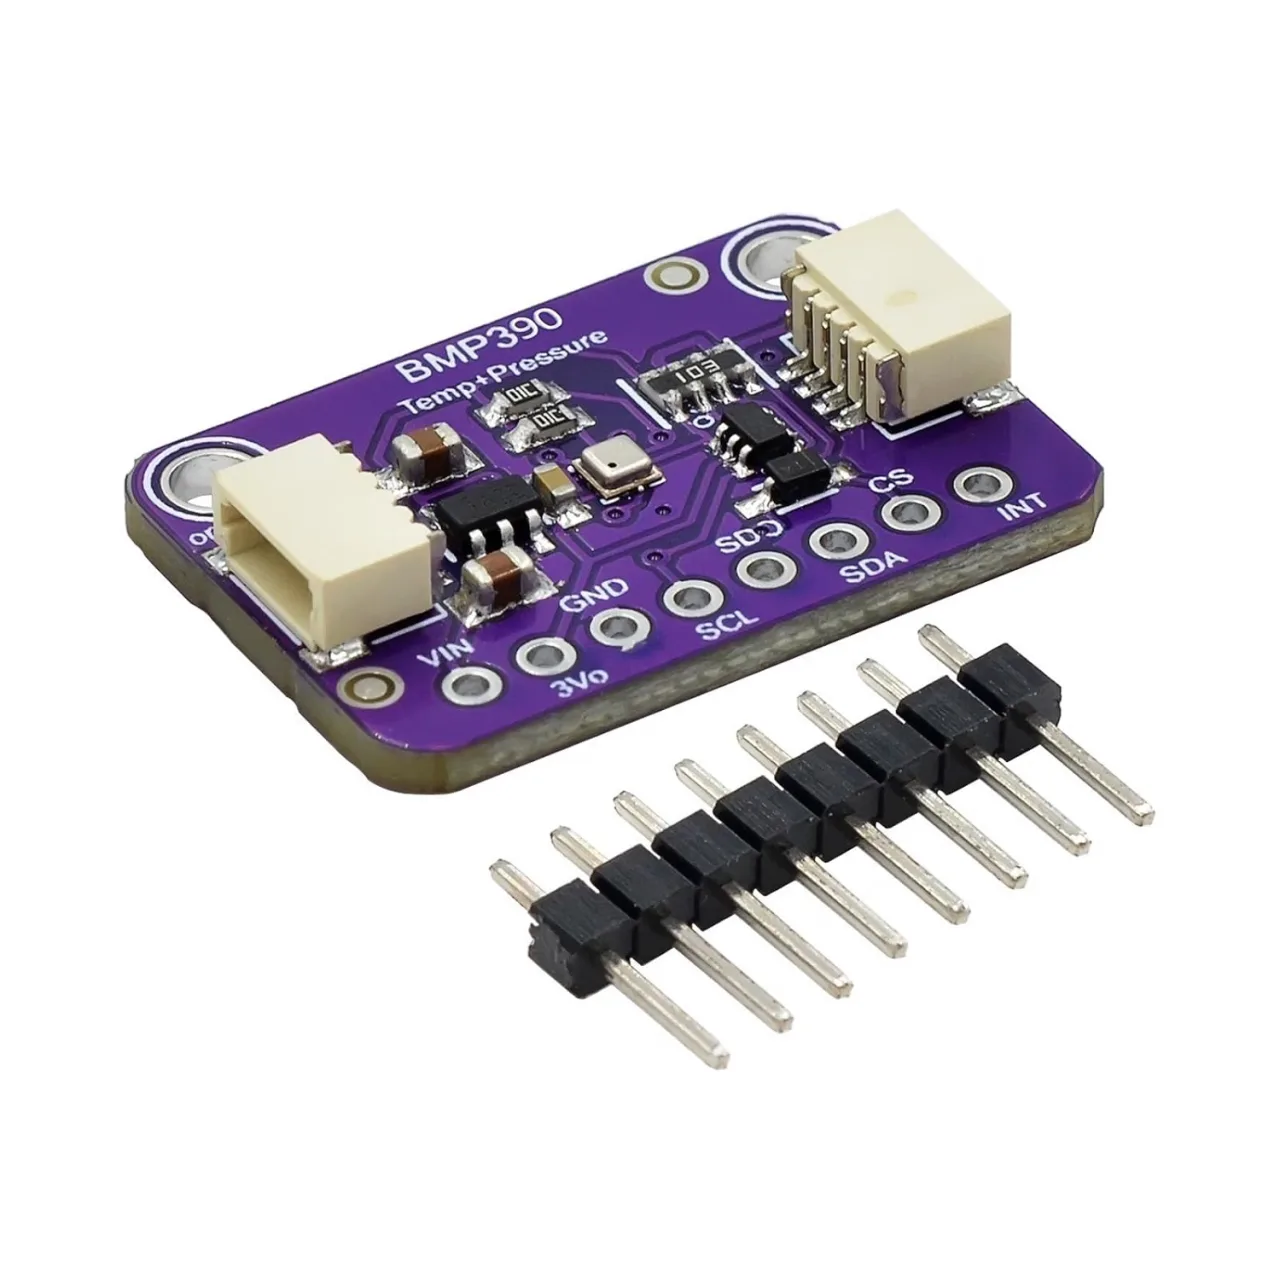
The BMP390 is a very small, high-precision sensor from Bosch. Its tiny size (2.0 x 2.0 x 0.75 mm) belies its impressive capabilities. It can measure pressure from 300 hPa to 1250 hPa with an absolute accuracy of ±0.5 hPa. This translates to an incredible relative altitude accuracy of just ±0.25 meters, making it a significant upgrade over its predecessors. The module you purchase typically includes a voltage regulator and logic level converter, meaning it is safe to use with both 3.3V and 5V logic and power, simplifying your wiring. It communicates via I2C or SPI, and we'll be using the simpler I2C protocol for this project.
Wiring Guide
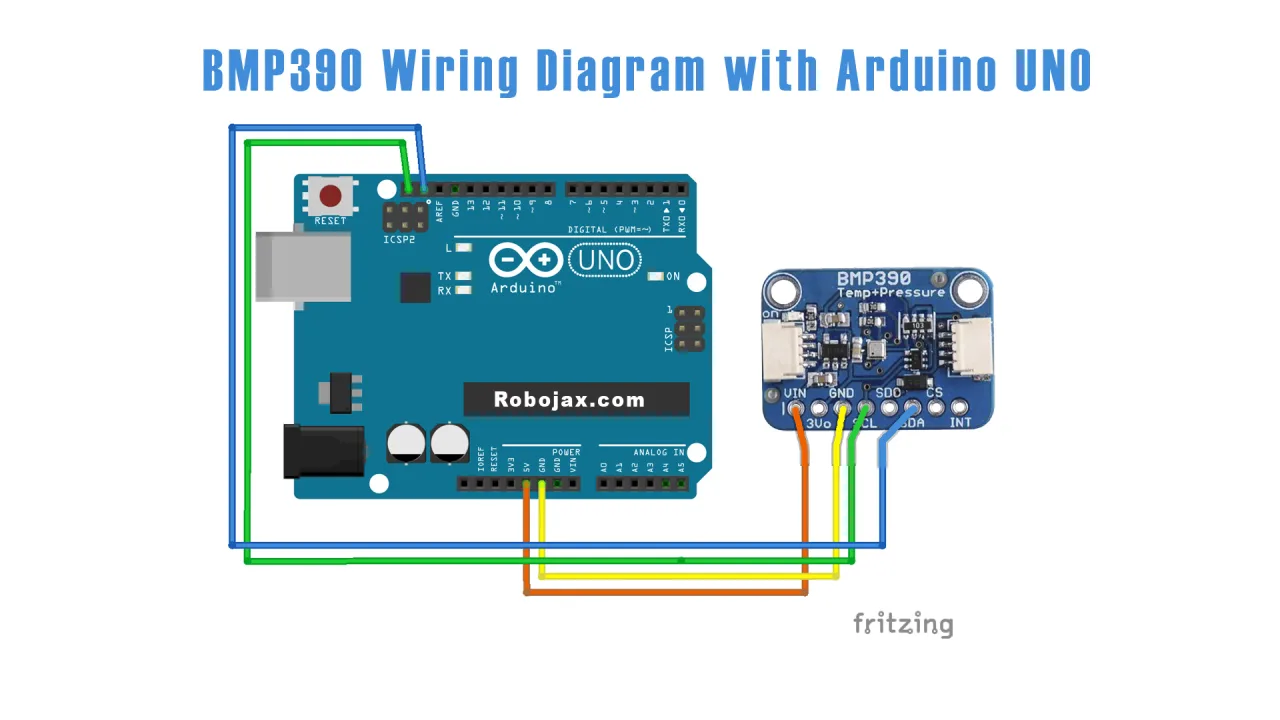
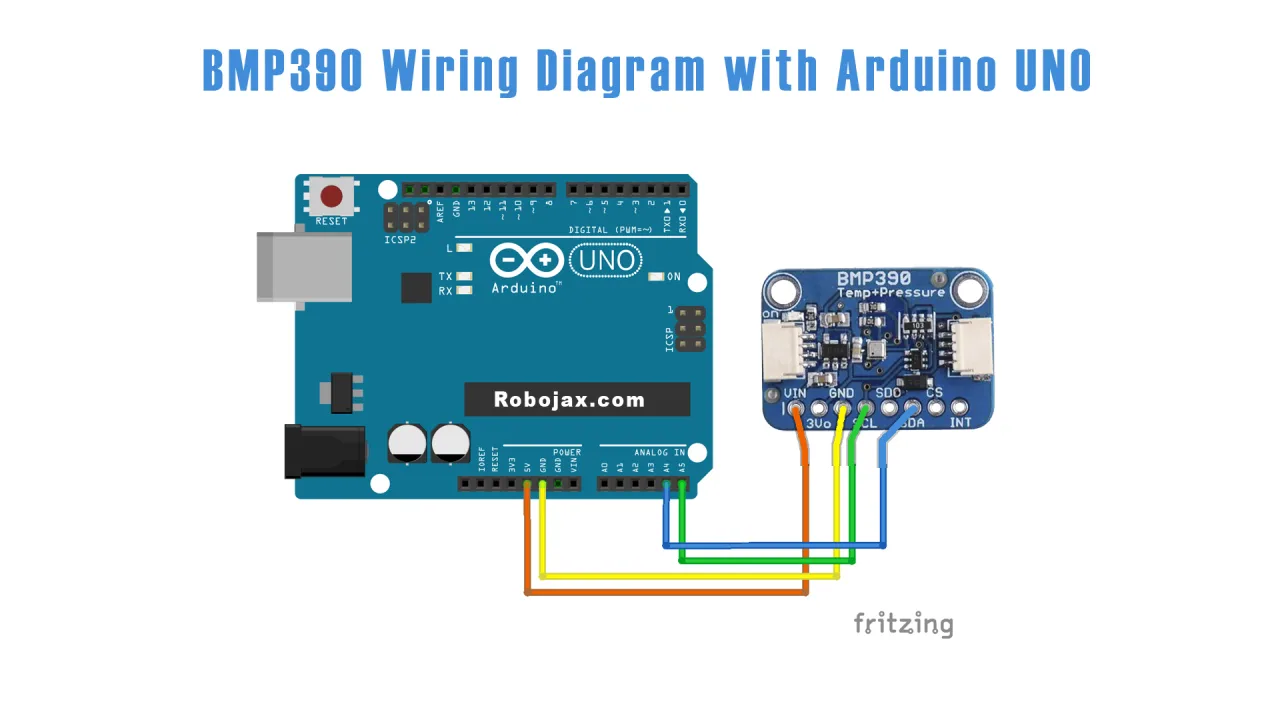
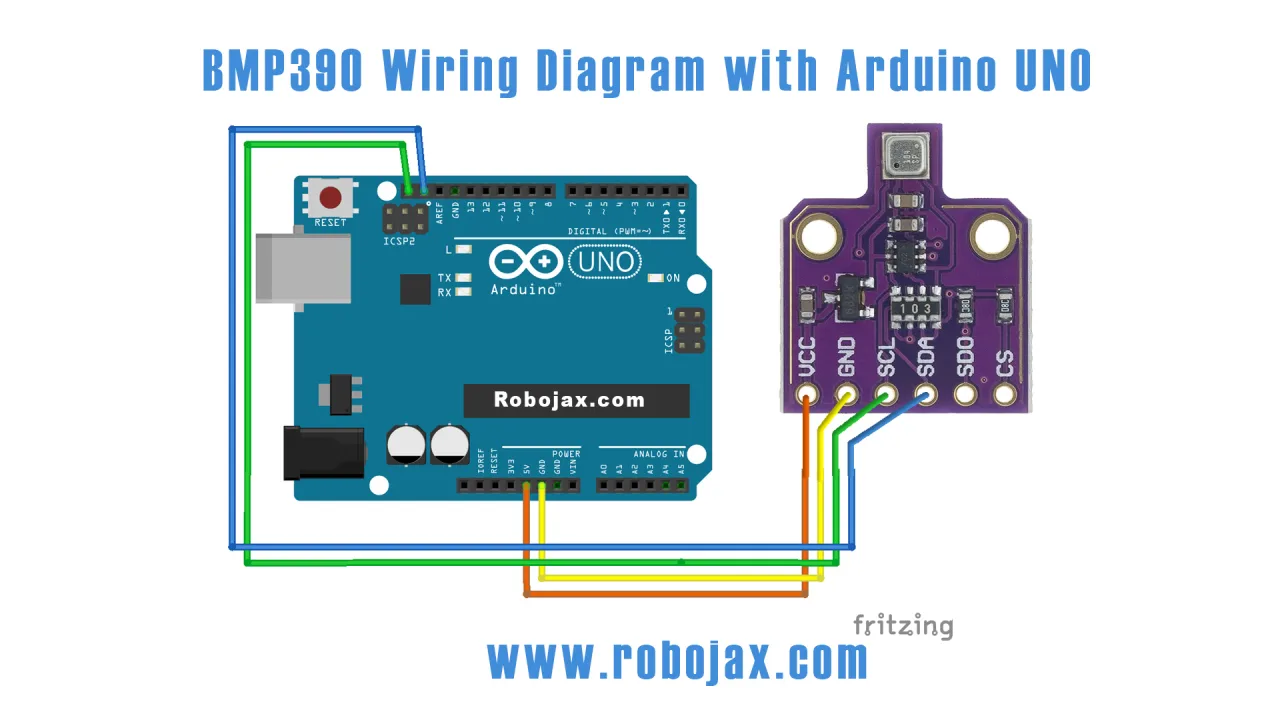
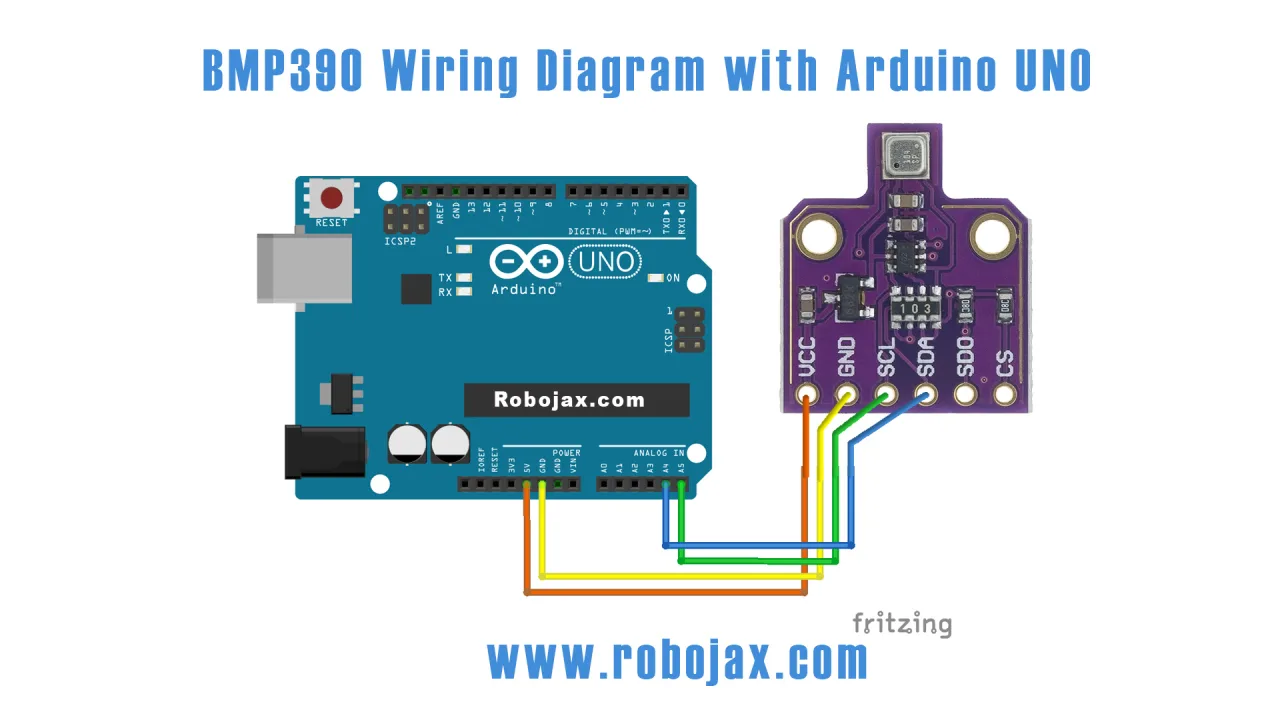
Connecting the BMP390 is straightforward. For this guide, we will use the I2C interface, which requires only four wires. The wiring diagram below shows the connections for an Arduino Uno.
Here is the connection table for the BMP390 module:
| BMP390 Module | Arduino Uno |
|---|---|
| VIN (or VCC) | 5V (or 3.3V) |
| GND | GND |
| SDA | A4 (SDA) |
| SCL | A5 (SCL) |
Important Note for LCD Projects: If you are also using an LCD display, you can power the sensor from an Arduino digital pin. In the video, pin 12 is defined as a power pin for the sensor, which is set to HIGH in the setup to provide 5V. This is a clever way to manage power without a breadboard. The LCD's SDA and SCL are also connected to A4 and A5, respectively.
Code Explanation
The code for this project is designed to be modular and easy to adapt. Below are the key user-configurable sections. The full program is available for download below the article.
1. Library and Object Initialization
First, we need to include the necessary libraries for the I2C communication and the sensor itself. We then create an object for the sensor.
#include <Wire.h>
#include <Adafruit_Sensor.h>
#include "Adafruit_BMP3XX.h"

Adafruit_BMP3XX bmp; // Create an object named 'bmp'
You can change the object's name from bmp to anything you like, but you must update all references to it in the code. The Wire.h library is essential for I2C communication.
2. Sea Level Pressure Calibration
This constant is crucial for accurate altitude readings. The sensor calculates altitude by comparing the current pressure to this reference pressure. You should update this value to the current sea level pressure for your location for the most accurate results.
#define SEALEVELPRESSURE_HPA (1013.25)3. LCD Configuration
If you are using an LCD, you will need to configure its I2C address and dimensions. The code uses the LiquidCrystal_I2C library. You can find your LCD's address using an I2C scanner sketch, as shown in the video.
LiquidCrystal_I2C lcd(0x3F, 16, 2); // Address 0x3F, 16 chars, 2 linesIf you are using a 20x4 LCD, change 16, 2 to 20, 4. The I2C address 0x3F is common, but it can vary. If your display doesn't work, run an I2C scanner to find the correct address.
4. Control Logic (Relay Example)
This section shows how to use the sensor data to take action. The code checks if the temperature exceeds a threshold and turns on a relay connected to pin 10. You can modify the threshold and the pin number to suit your needs.
if(temperatureC >38.0)
{
 digitalWrite(10, HIGH); // Turn on relay
}else{
 digitalWrite(10, LOW); // Turn off relay
}
5. Custom Function: readValues()
This custom function is used to read the sensor and store the values in global variables. It simplifies the main loop and makes the code cleaner. It reads temperature in Celsius and also calculates Fahrenheit and Kelvin.
void readValues()
{
  temperatureC = bmp.temperature; // Read temperature in Celsius
  temperatureF = bmp.temperature * 9/5 + 32; // Convert to Fahrenheit
  temperatureK = bmp.temperature + 273.15; // Convert to Kelvin
  altitude = bmp.readAltitude(SEALEVELPRESSURE_HPA); // Read altitude in meters
  pressure = bmp.pressure / 100.0F; // Read pressure in hPa
}
Live Project Demonstration
In the video, Robojax demonstrates several real-world tests of the sensor. First, he applies heat to the sensor with a heat gun, showing the temperature reading on the serial monitor climbing from room temperature to over 60°C and then slowly cooling back down. This confirms the sensor's responsiveness.
Next, he shows the data being displayed on both a 16x2 and a 20x4 LCD, cycling through temperature in Celsius and Fahrenheit, pressure in hPa, and approximate altitude. He then demonstrates the relay control application, setting a start temperature of 30°C and a stop temperature of 45°C. Applying heat to the sensor causes the relay to turn off once the temperature exceeds 45°C, and it turns back on when the temperature drops below 30°C.
Finally, he performs an impressive altitude test. He first measures the altitude at ground level (an ice skating rink), which reads about -15 meters. He then travels to the 25th floor of a nearby building and takes another measurement. The sensor reports an altitude of approximately 57.2 meters. The difference between the two readings is roughly 72 meters, which aligns well with the expected height of a 25-story building. This demonstrates the sensor's practical ability to measure approximate altitude changes.
Chapters
- [00:00] Introduction and Project Overview
- [01:19] Introducing the BMP390 Sensor and its Features
- [03:43] Sensor Specifications from the Manufacturer
- [05:45] Wiring Diagram for BMP390 with Arduino Uno
- [07:48] Wiring Diagram for BMP390 with LCD Display
- [09:46] Wiring for SPI Communication
- [10:29] Installing the Required Libraries
- [11:38] Explanation of the Basic Code
- [15:46] Adding Control Logic (e.g., Turning on a Relay)
- [17:30] Code Explanation for LCD Display
- [25:09] Code for 20x4 LCD and SPI Communication
- [26:22] Live Demonstration: Heating the Sensor
- [28:05] Demonstration with LCD Displays
- [29:42] Demonstration with 20x4 LCD
- [30:07] Relay Control Demonstration with Heat Gun
- [32:12] Real-World Altitude Test at a 25th Floor Building
Images
++
/*
 * Lesson 96: Using Precision BMP390 Barometric Pressure and Temperature Sensor
 * with Arduino
Download and resource page https://robojax.com/RJT454


 * Watch video instruction on YouTube:  https://youtu.be/XevQYG_A5xA
 *
 * Code updated by Ahmad Shamshiri for Robojax.com
 * on Jan 13, 2022 at 17:10 in Ajax, Ontario, Canada

  This video is part of Arduino Step by Step Course which starts here: https://youtu.be/-6qSrDUA5a8


  This is a library for the BMP390 temperature & pressure sensor

  Designed specifically to work with the Adafruit BMP388 Breakout
  ----> http://www.adafruit.com/products/3966

  These sensors use I2C or SPI to communicate, 2 or 4 pins are required
  to interface.

  Adafruit invests time and resources providing this open source code,
  please support Adafruit and open-source hardware by purchasing products
  from Adafruit!

  Written by Limor Fried & Kevin Townsend for Adafruit Industries.
  BSD license, all text above must be included in any redistribution
 **************************************************************************
 */

#include <Wire.h>

#include <Adafruit_Sensor.h>
#include "Adafruit_BMP3XX.h"


#define SEALEVELPRESSURE_HPA (1013.25)
float temperatureC, temperatureK, temperatureF, pressure, altitude;

Adafruit_BMP3XX bmp;

void setup() {
  Serial.begin(9600);
  while (!Serial);
  Serial.println("Adafruit BMP388 / BMP390 test");

  if (!bmp.begin_I2C()) {   // hardware I2C mode, can pass in address & alt Wire
  Serial.println("Could not find a valid BMP3 sensor, check wiring!");
    while (1);
  }

  // Set up oversampling and filter initialization
  bmp.setTemperatureOversampling(BMP3_OVERSAMPLING_8X);
  bmp.setPressureOversampling(BMP3_OVERSAMPLING_4X);
  bmp.setIIRFilterCoeff(BMP3_IIR_FILTER_COEFF_3);
  bmp.setOutputDataRate(BMP3_ODR_50_HZ);
}

void loop() {
  if (! bmp.performReading()) {
    Serial.println("Failed to perform reading :(");
    return;
  }
  readValues();

 Serial.print("Temperature C: ");
 Serial.print(temperatureC);
 printDegree();
 Serial.println(" C");

 Serial.print("Pressure: ");
 Serial.print(pressure);
 Serial.println(" hPa");

 Serial.print("Approximate Altitude: ");
 Serial.print(altitude);
 Serial.println(" m");
 Serial.println();


  if(temperatureC >38.0)
  {
   digitalWrite(10, HIGH);


  }else{
    digitalWrite(10, LOW);
  }
  delay(2000);
}


/*
 *  readValues()
 * @brief reads the temperature based on the TEMPERATURE_UNIT
 * @param average temperature
 * @return returns one of the values above
 * Written by Ahmad Shamshiri for robojax.com
 * on Jan 15, 2022 at 08:02 in Ajax, Ontario, Canada
 */
void readValues()
{
 //Robojax.com  BMP390

  temperatureC = bmp.temperature;// return Celsius
  temperatureF = bmp.temperature *9/5 + 32;//convert to Fahrenheit
  temperatureK = bmp.temperature + 273.15;//convert to Kelvin
  altitude =  bmp.readAltitude(SEALEVELPRESSURE_HPA);// read altitude
  pressure = bmp.pressure / 100.0F; // get  pressure in hecto pascal


}// readValues()


/*
 * @brief prints degree symbol on serial monitor
 * @param none
 * @return returns nothing
 * Written by Ahmad Shamshiri on July 13, 2019
 * for Robojax Tutorial Robojax.com
 */
void printDegree()
{
    Serial.print("\\xC2");
    Serial.print("\\xB0");
}
Things you might need
-
Amazon
-
AliExpressBMP388 High Precision Digital Atmospheric Pressure on AliExpresss.click.aliexpress.com
-
AliExpressPurchase it from AliExpresss.click.aliexpress.com
-
BanggoodPurchase it from Banggoodbanggood.com
Resources & references
-
ExternalBMP390 Bosch official product pagebosch-sensortec.com
-
ExternalPurchase it from AliExpresss.click.aliexpress.com
-
External
-
ExternalPurchase it from Amazon Canadaamzn.to
-
ExternalPurchase it from Amazon, USAamzn.to
-
ExternalPurchase it from Banggoodbanggood.com