MPU-6050 сенсорының деректерін Arduino көмегімен LCD 1602 немесе LCD2004 дисплейінде көрсету
Бұл оқулықта біз Arduino көмегімен MPU-6050 сенсорының деректерін LCD 1602 немесе LCD2004 дисплейінде көрсетуді үйренеміз. MPU-6050 - бұл 3 осьті гироскоп пен 3 осьті акселерометрді біріктіретін әмбебап сенсор, ол қозғалысты анықтау және бағдарлау сияқты әртүрлі қолданбалар үшін өте қолайлы. Осы сенсорды LCD дисплейге қосу арқылы біз бұрыштар мен температураны қоса алғанда, нақты уақыттағы сенсор деректерін визуализациялай аламыз.

Осы жобаны орындау барысында біз қажетті аппараттық құрамдастарды, сымдарды қосу мәліметтерін және кодты іске асыруды қарастырамыз. Бұл MPU-6050 орнатуды және оның нәтижесін LCD дисплейде көрсетуді түсінуге көмектеседі. Код туралы қосымша түсінік алу үшін бейнені (00:00-дегі бейнеде) міндетті түрде қараңыз.
Аппараттық құрамдастар түсіндірмесі
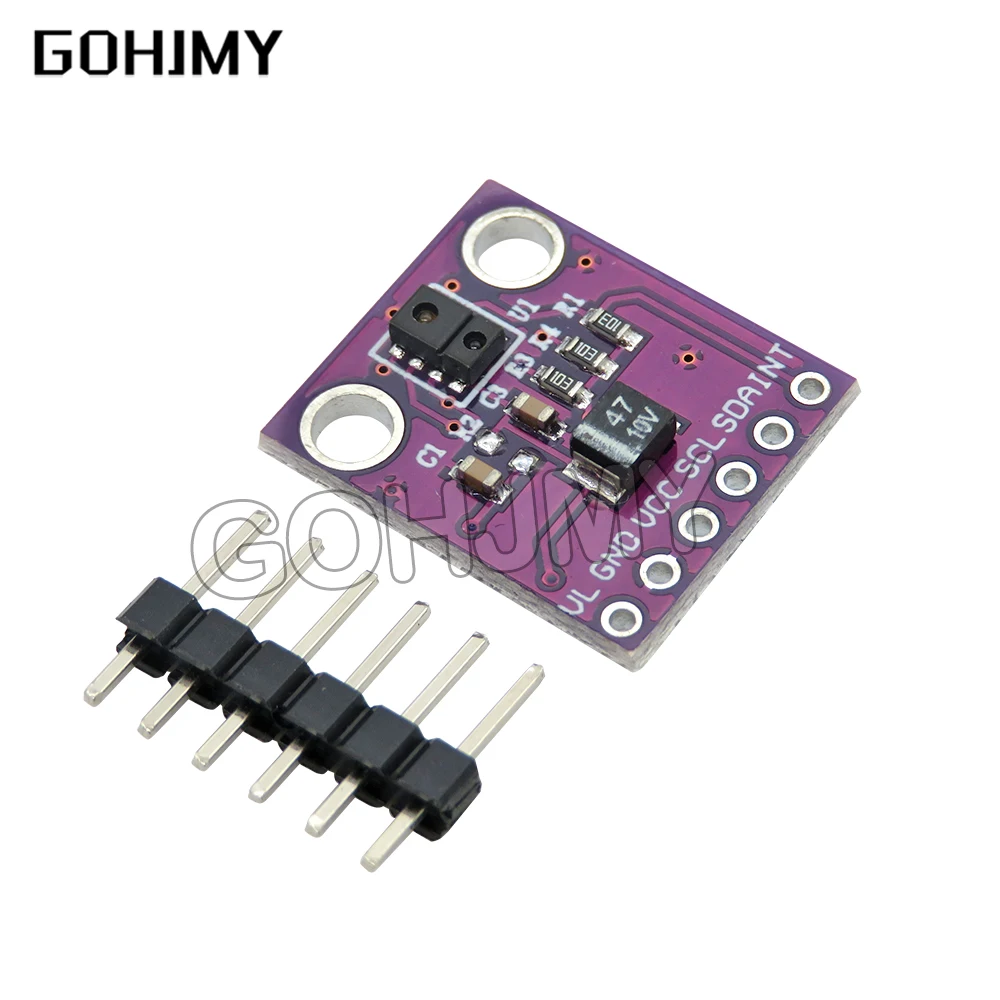
Бұл жобаның негізгі құрамдастары - Arduino тақтасы, MPU-6050 сенсоры және LCD дисплей (1602 немесе 2004). Arduino - MPU-6050 деректерін өңдейтін және оны LCD дисплейге жіберетін микроконтроллер ретінде қызмет етеді.
MPU-6050 сенсоры Arduino-ға деректерді жіберу үшін I2C байланысын пайдаланады. Ол қозғалыс пен бағдарды сезуге мүмкіндік беретін акселерометр мен гироскопты қамтиды. LCD дисплей сенсор деректерінен алынған бұрыштарды көрсету үшін қолданылады. Ол Arduino-ға I2C арқылы қосылады, бұл сымдарды қосуды және байланысты жеңілдетеді.
Деректер парағының мәліметтері
| Өндіруші | Invensense |
|---|---|
| Бөлшек нөмірі | MPU-6050 |
| Логика/IO кернеуі | 3.3 В / 5 В |
| Қоректендіру кернеуі | 3.3 В - 5 В |
| Шығыс деректер жылдамдығы | 1 кГц (макс) |
| Температура диапазоны | -40 - +85 °C |
| Қаптама | QFN |
| Ескертпелер / нұсқалар | Гироскоп пен акселерометр біріктірілген |
- Көрсетілген кернеу диапазонында дұрыс қоректендіруді қамтамасыз етіңіз.
- Қажет болса, I2C желілерінде жоғары тарту резисторларын пайдаланыңыз.
- Орнатуыңызбен үйлесімділік үшін I2C мекенжайын тексеріңіз.
- Дәл көрсеткіштер алу үшін сенсорды калибрлеңіз.
- Қысқа тұйықталуды болдырмау үшін сымдарды қосуда абай болыңыз.
Сымдарды қосу нұсқаулары

MPU-6050-ді Arduino-ға қосу үшін MPU-6050-дің VCC түйреуішін Arduino-дағы 5V түйреуішіне қосудан бастаңыз. Әрі қарай, MPU-6050-дің GND түйреуішін Arduino-дағы GND түйреуіштерінің біріне қосыңыз. I2C байланысы үшін MPU-6050-дің SDA түйреуішін Arduino-дағы аналогтық A4 түйреуішіне, ал SCL түйреуішін A5 аналогтық түйреуішіне қосыңыз.
LCD дисплей үшін VCC түйреуішін Arduino-дағы 5V түйреуішіне, ал GND түйреуішін Arduino-дағы GND түйреуішіне қосыңыз. LCD-дің SDA түйреуішін MPU-6050 үшін қолданылатын сол A4 түйреуішіне, ал LCD-дің SCL түйреуішін A5 түйреуішіне қосыңыз. Осылайша, MPU-6050 мен LCD бірдей I2C желілерін бөліседі, бұл сымдарды қосуды жеңілдетеді.

Қосылымдардың сенімді екеніне және бос сымдардың жоқтығына көз жеткізіңіз. Егер LCD немесе сенсор қосылмаса, сымдар мен қосылымдарды қайта тексеріңіз.
Код мысалдары мен түсіндірмесі
Кодта біз MPU-6050 және LCD үшін қажетті кітапханаларды қосудан бастаймыз:
#include
#include
#include
Мұнда біз MPU-6050 және LCD үшін нысандар жасаймыз. MPU-6050 I2C байланысы үшін `Wire` кітапханасымен инициализацияланады, ал LCD өз мекенжайы мен өлшемдерімен орнатылады.
Орнату функциясында біз сенсор мен LCD-ді инициализациялаймыз:

void setup() {
  Serial.begin(9600);
  Wire.begin();
  mpu6050.begin();
  lcd.begin();
  lcd.backlight();
  lcd.clear();
}
Бұл код қателерді жою үшін сериялық байланысты орнатады, I2C байланысын инициализациялайды және LCD-ді көрсетуге дайындайды. Дисплейді көрінетін ету үшін артқы жарық қосылады.
Цикл функциясында біз MPU-6050-ден деректерді үздіксіз оқып, оларды LCD-де көрсетеміз:
void loop() {
  mpu6050.update();
  lcd.clear();
  lcdDisplay(mpu6050.getAngleX(), mpu6050.getAngleY(), mpu6050.getAngleZ());
  delay(100);
}
Бұл фрагмент сенсор деректерін жаңартады және әр 100 миллисекунд сайын жаңа көрсеткіштер үшін LCD-ді тазартады. LCD-де бұрыштарды көрсету үшін `lcdDisplay` функциясы шақырылады.
Толық түсіну үшін толық код көрсетілген тиісті бейнені қараңыз (00:00-дегі бейнеде).
Демонстрация / Не күтуге болады
Барлығы дұрыс орнатылғанда, LCD X, Y және Z осьтері үшін бұрыштарды нақты уақытта көрсетуі керек. Өзгерістерді дисплейде көру үшін MPU-6050 сенсорын еңкейте аласыз. Егер ақаулар туындаса, сымдарды қосудағы полярлықтың ауысуын тексеріңіз немесе I2C мекенжайларының дұрыс орнатылғанына көз жеткізіңіз.
LCD-дегі мәндерді бақылау сенсордың қозғалыс пен бағдар өзгерістеріне қалай жауап беретінін көруге мүмкіндік береді. Егер мәндер статикалық немесе қате болып көрінсе, қосылымдарды тексеріп, сенсордың дұрыс жұмыс істеп тұрғанына көз жеткізіңіз.
Суреттер
/*
 *
 * This code is basic usage of the MPU-6050 accelerometer and gyroscope.
 * Running this code, you will get angles only.
 * The angles at X, Y, and Z are displayed on the LCD2004-I2C display module.
 *
 * Library and code have been taken from:
 * https://github.com/tockn/MPU6050_tockn
 *
 * Updated by Ahmad Shamshiri on July 07, 2018 at 13:43 in Ajax, Ontario, Canada
 * for Robojax.com
 * Get this code from Robojax.com
 * Watch video instruction for this code at: https://youtu.be/ixe--SXemp8
 *
 * You will need to watch two videos before following the instructions in this video:
 * 1-MPU6050 Introduction video and code: https://youtu.be/uhh7ik02aDc
 * 2-LCD1602 with I2C module video and code: https://youtu.be/q9YC_GVHy5A
 */
#include <MPU6050_tockn.h>
#include <Wire.h>

MPU6050 mpu6050(Wire);

#include <LiquidCrystal_I2C.h>
// Set the LCD address to 0x27 for a 20 chars and 4 line display
LiquidCrystal_I2C lcd(0x27, 20, 4);

void setup() {
  Serial.begin(9600);
  Wire.begin();
  mpu6050.begin();
  mpu6050.calcGyroOffsets(false);

  // initialize the LCD,
  lcd.begin();
  // Turn on the backlight and print a message.
  lcd.backlight();
  lcd.clear();
   lcd.setCursor (0,0); //
   lcd.print("Robojax MPU-6050");
   lcd.setCursor (0,1); //

   lcd.print("Please Wait - 3");
   lcd.setCursor (0,1); //
   delay(1000);
   lcd.print("Please Wait - 2");
   delay(1000);
   lcd.setCursor (0,1); //
   lcd.print("Please Wait - 1");
   delay(1000);
}

void loop() {

  mpu6050.update();
  Serial.print("angleX : ");
  Serial.print(mpu6050.getAngleX());
  Serial.print("\tangleY : ");
  Serial.print(mpu6050.getAngleY());
  Serial.print("\tangleZ : ");
  Serial.println(mpu6050.getAngleZ());

  lcd.clear();// clearn previous values from screen
   lcdDisplay(
            mpu6050.getAngleX(), // send angle X
            mpu6050.getAngleY(), // send angle Y
            mpu6050.getAngleZ()  // send angle Z
            );
   delay(100);

}// loop end

/*
 * Written by Ahmad Shamshiri for Robojax.com
 * lcdDisplay(float x, float y, float z)
 * displays value and title on LCD2004-I2C display
 * How to use:
 * just pass the three values and it will display them.
 * lcdDisplay(mpu6050.getAngleX() , mpu6050.getAngleY() , mpu6050.getAngleZ() )
 */
void lcdDisplay(float x, float y, float z)
{
   // Robojax.com MPU6050 Demo with LCD2004-I2C Display
   lcd.setCursor (0,0); //
   lcd.print("Robojax MPU-6050");

   lcd.setCursor (0,1); //character zero, line 1
   lcd.print("Angle X:");
   lcd.setCursor (9,1); //
   lcd.print(x);

   lcd.setCursor (0,2); //character zero, line 2
   lcd.print("Angle Y:");
   lcd.setCursor (9,2); //
   lcd.print(y);

   lcd.setCursor (0,3); //character zero, line 3
   lcd.print("Angle Z:");
   lcd.setCursor (9,3); //
   lcd.print(z);

}/*
*
* This code is basic usage of the MPU-6050 accelerometer and gyroscope.
*
* This code displays data on the LCD2004 display based on
* the option you set. See below.
*
*
* Library and code have been taken from:
* https://github.com/tockn/MPU6050_tockn
*
* Updated by Ahmad Shamshiri on July 03, 2018 in Ajax, Ontario, Canada
* for Robojax.com
* Get this code from Robojax.com
* Watch video instructions for this code at: https://youtu.be/ixe--SXemp8
*
* You will need to watch two videos before following the instructions in this video:
* 1-MPU6050 Introduction video and code: https://youtu.be/uhh7ik02aDc
* 2-LCD1602 with I2C module video and code: https://youtu.be/q9YC_GVHy5A
*/
#include <MPU6050_tockn.h>
#include <Wire.h>
MPU6050 mpu6050(Wire);
long timer = 0;
#include <LiquidCrystal_I2C.h>
// Set the LCD address to 0x27 for a 20 chars and 4 line display
LiquidCrystal_I2C lcd(0x27, 20, 4);
int typeSelect = 6;// select type . See below
String type[]={ "GyroAng and Ang",// select 0
"GyroAng and Acc",// select 1
"GyroAng and Gyro",// select 2
"AccAng and Acc",// select 3
"AccAng & Gyro",// select 4
"AccAng and Ang",// select 5
"Angle and Temp"// select 6
};
void setup() {
Serial.begin(9600);
Wire.begin();
mpu6050.begin();
mpu6050.calcGyroOffsets(true);
// initialize the LCD,
lcd.begin();
// Turn on the backlight and print a message.
lcd.backlight();
}
void loop() {
mpu6050.update();
if(millis() - timer > 1000){
Serial.println("=======================================================");
Serial.print("temp : ");Serial.println(mpu6050.getTemp());
Serial.print("accX : ");Serial.print(mpu6050.getAccX());
Serial.print("\taccY : ");Serial.print(mpu6050.getAccY());
Serial.print("\taccZ : ");Serial.println(mpu6050.getAccZ());
Serial.print("gyroX : ");Serial.print(mpu6050.getGyroX());
Serial.print("\tgyroY : ");Serial.print(mpu6050.getGyroY());
Serial.print("\tgyroZ : ");Serial.println(mpu6050.getGyroZ());
Serial.print("accAngleX : "); Serial.print(mpu6050.getAccAngleX());
Serial.print("\taccAngleY : ");Serial.println(mpu6050.getAccAngleY());
Serial.print("gyroAngleX : ");Serial.print(mpu6050.getGyroAngleX());
Serial.print("\tgyroAngleY : ");Serial.print(mpu6050.getGyroAngleY());
Serial.print("\tgyroAngleZ : ");Serial.println(mpu6050.getGyroAngleZ());
Serial.print("angleX : ");Serial.print(mpu6050.getAngleX());
Serial.print("\tangleY : ");Serial.print(mpu6050.getAngleY());
Serial.print("\tangleZ : ");Serial.println(mpu6050.getAngleZ());
Serial.println("=======================================================\n");
timer = millis();
}// if
lcd.clear();// clearn previous values from screen
switch (typeSelect)
{
case 0:// display GyroAngle and Angle
lcdDisplay(mpu6050.getGyroAngleX(),mpu6050.getGyroAngleY(),mpu6050.getGyroAngleZ(),
mpu6050.getAngleX(),mpu6050.getAngleY(),mpu6050.getAngleZ()
);
break;
case 1:// display GyroAngle and Acceleration value
lcdDisplay(mpu6050.getAngleX(),mpu6050.getAngleY(),mpu6050.getAngleZ(),
mpu6050.getAccX(),mpu6050.getAccY(),mpu6050.getAccZ()
);
break;
case 2:// display GyroAngle and Gyroscope value
lcdDisplay(mpu6050.getAngleX(),mpu6050.getAngleY(),mpu6050.getAngleZ(),
mpu6050.getGyroX(),mpu6050.getGyroY(),mpu6050.getGyroZ()
);
break;
case 3:// display Acceleration Angle and Acceleration value
lcdDisplay(mpu6050.getAccAngleX(),mpu6050.getAccAngleY(),0.0,
mpu6050.getAccX(),mpu6050.getAccY(),mpu6050.getAccZ()
);
break;
case 4:// display Acceleration Angle and Gyro value
lcdDisplay(mpu6050.getAccAngleX(),mpu6050.getAccAngleY(), 0.0,
mpu6050.getGyroX(),mpu6050.getGyroY(),mpu6050.getGyroZ()
);
break;
case 5:// display Acceleration Angle and Angle
lcdDisplay(mpu6050.getAccAngleX(),mpu6050.getAccAngleY(), 0.0,
mpu6050.getAngleX(),mpu6050.getAngleY(),mpu6050.getAngleZ()
);
break;
case 6:// display angle and Temperature
lcdDisplay(mpu6050.getAngleX(),mpu6050.getAngleY(),mpu6050.getAngleZ(),
mpu6050.getTemp(), 0.0, 0.0
);
break;
}// switch end
delay(100);
}// loop
/*
* Written by Ahmad Shamshiri for Robojax.com
* lcdDisplay(lcdDisplay(float x, float y, float z, float x1, float y1, float z1)
* displays values and titles on the LCD2004-I2C display.
* How to use:
* just pass the 6 values and it will display them.
lcdDisplay(mpu6050.getAccAngleX(),mpu6050.getAccAngleY(),mpu6050.getAccAngleZ(),
mpu6050.getAngleX(),mpu6050.getAngleY(),mpu6050.getAngleZ()
);
*/
void lcdDisplay(float x, float y, float z, float x1, float y1, float z1)
{
// Robojax.com MPU6050 Demo with LCD2004-I2C Display
lcd.setCursor (0,0); //
lcd.print(type[typeSelect]);
lcd.setCursor (17,0); //
String dis = "("+String(typeSelect)+")";
lcd.print(dis);
if(typeSelect !=6){
lcd.setCursor (0,1); //character zero, line 1
lcd.print("X:");
lcd.setCursor (2,1); //
lcd.print(x);
/////////////////////
lcd.setCursor (10,1); //character zero, line 1
lcd.print("X1:");
lcd.setCursor (13,1); //
lcd.print(x1);
lcd.setCursor (0,2); //character zero, line 2
lcd.print("Y:");
lcd.setCursor (2,2); //
lcd.print(y);
////////////////////////
lcd.setCursor (10,2); //character zero, line 1
lcd.print("Y1:");
lcd.setCursor (13,2); //
lcd.print(y1);
lcd.setCursor (0,3); //character zero, line 3
lcd.print("Z:");
lcd.setCursor (2,3); //
lcd.print(z);
//////////////////////
lcd.setCursor (10,3); //character zero, line 3
lcd.print("Z1:");
lcd.setCursor (13,3); //
lcd.print(z1);
}else{
lcd.setCursor (0,1); //character zero, line 1
lcd.print("X:");
lcd.setCursor (2,1); //
lcd.print(x);
/////////////////////
lcd.setCursor (10,1); //character zero, line 1
lcd.print("TMP: ");
lcd.setCursor (15,1); //
lcd.print(x1);
lcd.setCursor (0,2); //character zero, line 2
lcd.print("Y:");
lcd.setCursor (2,2); //
lcd.print(y);
lcd.setCursor (0,3); //character zero, line 3
lcd.print("Z:");
lcd.setCursor (2,3); //
lcd.print(z);
}
}Ресурстар мен сілтемелер
-
СыртқыGet the library from GitHubgithub.com
-
СыртқыManufacturer websiteinvensense.com
Файлдар📁
Arduino кітапханалары (zip)
-
Arduino library for MPU9250
robojax-MPU9250-master.zip3.38 MB
Fritzing файлы
-
LCD LCD1602-I2C module with 4 wires
LCD1602-I2C.fzpz0.01 MB -
MPU-6050 Board GY-521
MPU-6050 Board GY-521.fzpz0.01 MB -
LCD2004-I2C
LCD2004-I2C.fzpz0.02 MB
Басқа файлдар
-
LCD1602 LiquidCrystal Library
robojax-LCD1602_LiquidCrystal.zip -
MPU6050_tockn-masterArduino library for the MPU6050 accelerometer and gyroscope module. Provides functions to read acceleration, gyro, and temperature data, with calibration and angle calculation. Designed for easy integration into motion-sensing projects.
robojax-MPU6050_tockn-master.zip