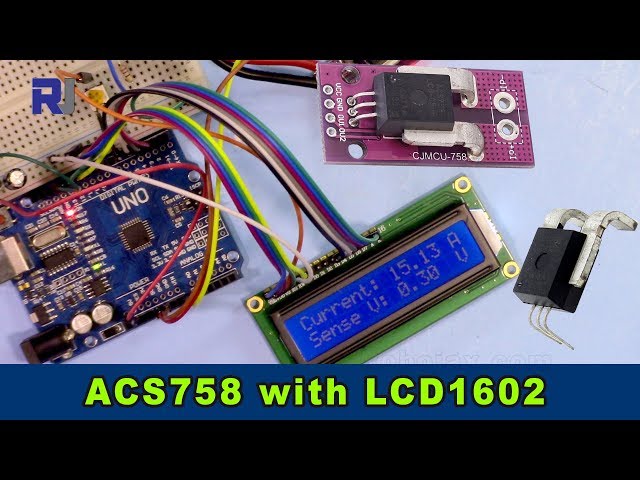
اندازهگیری جریان با استفاده از حساس(حس کننده) جریان Allegro ACS758 و LCD1602 برای آردوینو
این پروژه نشان میدهد چگونه میتوان جریان را با استفاده از حساس(حس کننده) جریان Allegro ACS758 اندازهگیری کرد و قرائتها را روی صفحه LCD1602 متصل به یک آردوینو نمایش داد. ACS758 یک حساس(حس کننده) چندمنظوره است که قادر به اندازهگیری جریان تا 200 آمپر میباشد و آن را برای کاربردهای مختلف مناسب میسازد.

این پروژه روش عملیای برای نظارت بر جریان در یک مدار فراهم میکند که برای کاربردهای مختلف از جمله موارد زیر حیاتی است:
- پایش مصرف برق در دستگاهها
- ساخت یک سیستم مدیریت باتری
- طراحی کنترلکنندهٔ موتور الکتریکی
- ایجاد یک سیستم امنیتی مبتنی بر جریان
این راهنما شما را مرحلهبهمرحله در مورد سختافزار لازم، سیمکشی، شِفر (کود) و یک نمایش زنده راهنمایی خواهد کرد.
پایههای سختافزاری

سختافزار/قطعات
برای ساخت این پروژه به قطعات زیر نیاز خواهید داشت:
- آردوینو اونو (یا سازگار)
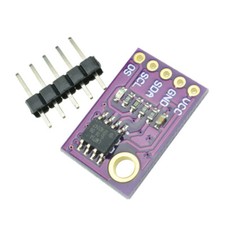
- حساس(حس کننده) جریان Allegro ACS758 (شماره مدل دقیق تعیینکننده حداکثر مقدار جریان قابل اندازهگیری است؛ مطمئن شوید شِفر (کود) را متناسب تنظیم کنید. (در ویدئو در 00:14 و 03:18))
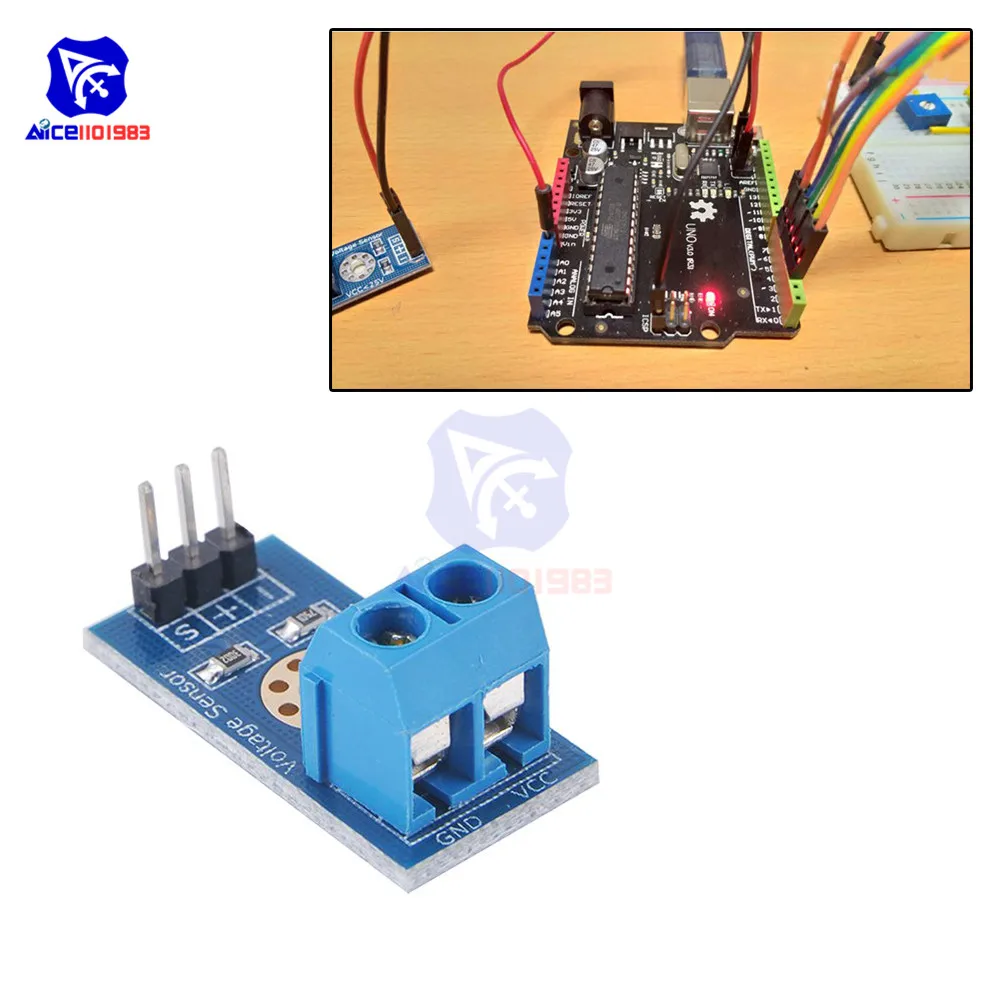
- نمایشگر LCD1602 بدون ماجیول I2C،السیدی 12 سیم دارد.
- سیمهای اتصال
- منبع تغذیه (5V)
- بار (برای آزمایش اندازهگیری جریان)

راهنمای سیمکشی
")
سیمکشی LCD1602 در یک ویدئوی جداگانه توضیح داده شده است (در ویدئو در 01:24). اتصالات کلیدی برای این پروژه بهصورت زیر است (در ویدئو در 01:24):
- ACS758: VCC به 5V، GND به GND، خروجی سیگنال (سیم زرد) به A0 روی آردوینو.
- دو سیم اصلی حساس(حس کننده) ACS758 به صورت سری با بار متصل شدهاند (در ویدئو در 02:09).
توضیح شِفر (کود)
شِفر (کود) آردوینو از دو بخش اصلی تشکیل شده است: یکی برای کار با حساس(حس کننده) ACS758 و دیگری برای تعامل با LCD1602. بخشهای قابل تنظیم توسط کاربر در شِفر (کود) عبارتند از:
#define VIN A0 // define the Arduino pin A0 as voltage input (V in)
const float VCC   = 5.0;// supply voltage 5V or 3.3V. If using PCB, set to 5V only.
const int model = 2;   // enter the model (see below)
float cutOffLimit = 1.00;// reading cutoff current. 1.00 is 1 Amper
آنmodelمتغیر باید مطابق با مدل خاص ACS758 مورد استفاده تنظیم شود (در ویدیو در 03:18). به کامنتهای شِفر (کود) برای نگاشت شماره مدل مراجعه کنید. اینcutOffLimitمتغیر حداقل جریان قابل نمایش را تعیین میکند (در ویدئو در 03:48). این مقدار را تنظیم کنید تا خوانشهای ناچیز فیلتر شوند.
پروژه/نمایش زنده
ویدیو نشان میدهد چگونه آمپرمتر را برای اندازهگیری جریانی که از بار عبور میکند متصل کنیم (در ویدیو در 02:18). شِفر (کود) مقادیر جریان و ولتاژ را روی هر دو LCD1602 و نمایشگر مسلسل نمایش میدهد (در ویدیو در 07:02). نمایش نشان میدهد که خوانشها بهصورت پویا هنگام تغییر جریان بار بهروز میشوند (در ویدیو در 07:14). همچنین نشان میدهد که وقتی جریان زیر حد مشخص میافتد، «No Current» نمایش داده میشود (در ویدیو در 07:59).
فصلها
- [00:06] مقدمه
- [00:34] پیشنیازها
- [01:24] توضیح سیمکشی
- [02:18] نمایش اندازهگیری جریان
- [02:57] توضیح شِفر (کود)
- [07:02] نمایش زنده
- [08:18] نتیجهگیری
تصاویر
/*
 *
 * Arduino Sketch for Allegro ACS758 Current Sensor with LCD1602
 * This sensor can measure current at a range of up to 200A.
 * It operates with 3.3V or 5V.
 * This sketch requires you to watch the following two videos before using this code:
 * 1- ACS758 Sensor https://www.youtube.com/watch?v=SiHfjzcqnU4
 * 2- LCD1602 Display https://www.youtube.com/watch?v=S4ya3Q7uhJs
 *
 *
 * Written by Ahmad Shamshiri on Tuesday, June 22, 2018 at 17:57 in Ajax, Ontario, Canada
 * for Robojax.com
 * View the video instruction for this code at https://youtu.be/Co-DrCa2slk
 * This code has been downloaded from Robojax.com
 */
#define VIN A0 // define the Arduino pin A0 as voltage input (V in)
const float VCC   = 5.0;// supply voltage 5V or 3.3V. If using PCB, set to 5V only.
const int model = 2;   // enter the model (see below)

float cutOffLimit = 1.00;// reading cutoff current. 1.00 is 1 Amper

/*
          "ACS758LCB-050B",// for model use 0
          "ACS758LCB-050U",// for model use 1
          "ACS758LCB-100B",// for model use 2
          "ACS758LCB-100U",// for model use 3
          "ACS758KCB-150B",// for model use 4
          "ACS758KCB-150U",// for model use 5
          "ACS758ECB-200B",// for model use 6
          "ACS758ECB-200U"// for model use 7
Sensitivity array is holding the sensitivity of the ACS758
current sensors. Do not change.
*/
float sensitivity[] ={
          40.0,// for ACS758LCB-050B
          60.0,// for ACS758LCB-050U
          20.0,// for ACS758LCB-100B
          40.0,// for ACS758LCB-100U
          13.3,// for ACS758KCB-150B
          16.7,// for ACS758KCB-150U
          10.0,// for ACS758ECB-200B
          20.0,// for ACS758ECB-200U
         };

/*
 *   Quiescent output voltage is a factor of VCC that appears at the output
 *   when the current is zero.
 *   For bidirectional sensors it is 0.5 x VCC.
 *   For unidirectional sensors it is 0.12 x VCC.
 *   For model ACS758LCB-050B, the B at the end represents Bidirectional (polarity doesn't matter).
 *   For model ACS758LCB-100U, the U at the end represents Unidirectional (polarity must match).
 *   Do not change.
 */
float quiescent_Output_voltage [] ={
          0.5,// for ACS758LCB-050B
          0.12,// for ACS758LCB-050U
          0.5,// for ACS758LCB-100B
          0.12,// for ACS758LCB-100U
          0.5,// for ACS758KCB-150B
          0.12,// for ACS758KCB-150U
          0.5,// for ACS758ECB-200B
          0.12,// for ACS758ECB-200U
          };
const float FACTOR = sensitivity[model]/1000;// set sensitivity for selected model
const float QOV =   quiescent_Output_voltage [model] * VCC;// set quiescent Output voltage for selected model
float voltage;// internal variable for voltage
float cutOff = FACTOR/cutOffLimit;// convert current cut off to mV
 //************ END of ACS785 Settings

//******************** Start of LCD1602
// January 21, 2018 14:25
// original source https://www.arduino.cc/en/Tutorial/HelloWorld
// include the library code:
#include <LiquidCrystal.h>

// initialize the library by associating any needed LCD interface pin
// with the arduino pin number it is connected to
const int rs = 12, en = 11, d4 = 5, d5 = 4, d6 = 3, d7 = 2;
LiquidCrystal lcd(rs, en, d4, d5, d6, d7);

void setup() {
  // Robojax.com ACS758 Current Sensor with LCD1602
    Serial.begin(9600);// initialize serial monitor
    Serial.println("Robojax Tutorial");
    Serial.println("ACS758 Current Sensor");
    Serial.println("with LCD1602 display");
  // set up the LCD's number of columns and rows:
  lcd.begin(16, 2);
  // Print a message to the LCD.
    lcd.clear();
  lcd.print("Robojax");
  lcd.setCursor (0,1); // go to start of 2nd line
  lcd.print("ACS758 Current Sensor");
  delay(2000);
  lcd.clear();
}

void loop() {
  // Robojax.com ACS758 Current Sensor with LCD1602

  float voltage_raw =   (5.0 / 1023.0)* analogRead(VIN);// Read the voltage from sensor
  voltage =  voltage_raw - QOV + 0.007 ;// 0.007 is a value to make voltage zero when there is no current
  float current = voltage / FACTOR;
  if(abs(voltage) > cutOff ){
    Serial.print("V: ");
    Serial.print(voltage,3);// print voltage with 3 decimal places
    Serial.print("V, I: ");
    Serial.print(current,2); // print the current with 2 decimal places
    Serial.println("A");
  //start of loop Robojax code ACS758 with LCD1602 and I2C
  lcd.clear();
  lcd.setCursor (0,0); // set to line 1, char 0
  lcd.print("Current: ");
  lcd.setCursor (9,0); // go to start of 2nd line
  lcd.print(current);
  lcd.setCursor (15,0); // go to start of 2nd line
  lcd.print("A");

  lcd.setCursor (0,1);
  lcd.print("Sense V: ");
  lcd.setCursor (9,1); // go to start of 2nd line
  lcd.print(voltage);
  lcd.setCursor (15,1); // go to start of 2nd line
  lcd.print("V");

 //end of loopcode Robojax code ACS758 with LCD1602 and I2C


  }else{
    Serial.println("No Current");
  lcd.clear();
  lcd.setCursor (0,0);
  lcd.print("No Current");
  }


  delay(500);
  // Robojax.com ACS758 Current Sensor with LCD1602
}
مواردی که ممکن است به آنها نیاز داشته باشید
-
علیاکسپرسخرید حساس(حس کننده) جریان Allegro ACS758 از علیاکسپرسs.click.aliexpress.com
منابع و مراجع
فایلها📁
هیچ فایلی موجود نیست.