第14/31-3課:Arduino編程 millis() 示例3 帶按鈕
你有冇試過需要你嘅Arduino記住幾時發生咗啲嘢——好似撳掣——然後喺一段精確時間之後採取行動,同時又保持你程式其餘部分順暢運行?呢個係Arduino程式設計入面一個經典挑戰,而解決方法就係millis()函數。呢個教學,係Robojax Arduino課程嘅一部分,示範一個實用例子:偵測一個按鈕喺第一次撳咗之後,過咗5秒延遲,會唔會第二次被撳。呢種技術係建立反應靈敏、非阻塞項目嘅基礎,尤其係時間控制好重要嘅時候。
用millis()嚟追蹤時間而唔會停低個程式,呢種模式對於好多真實世界應用嚟講係必不可少嘅。以下有幾個諗法可以啟發你自己嘅項目:
- 防抖按鈕介面:實現一個系統,按鈕要按住一段特定時間(例如3秒)先至可以開機,防止意外撳到。
- 順序動作:建立一個系統,一個事件好似動作感應器觸發,會啟動一個次要動作,而呢個動作只會喺另一個事件喺特定時間窗口內發生先至執行。
- 用戶互動計時器:整一個項目,需要喺設定時間內有「確認」輸入(好似第二次撳掣)先至執行關鍵功能,例如發送指令或者啟動摩打。
- 感應器閘控:用感應器嘅第一個訊號嚟開始一個時間窗口,期間第二個唔同感應器嘅讀數會被視為有效或者被忽略。
所需硬件
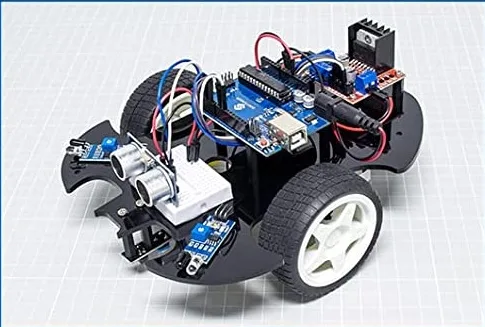
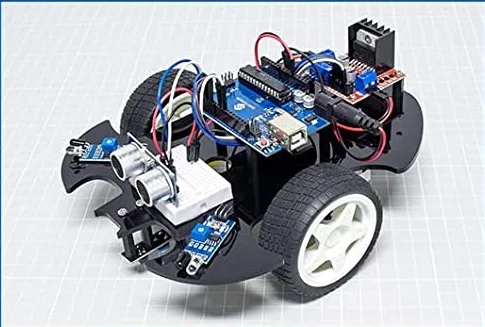
呢個項目用咗SunFounder 3合1 Arduino套件嘅零件,呢個係一個好好嘅學習資源。你需要:
- Arduino板(Uno、Nano等)
- 一個瞬時按鈕
- 跳線
接線指南
呢個例子嘅接線好簡單,全靠Arduino嘅內部上拉電阻,唔使外接電阻。(影片入面08:29位置)
- 將按鈕嘅一隻腳連去Arduino嘅GND針腳。
- 將按鈕嘅另一隻腳連去Arduino嘅數碼針腳2。
透過用INPUT_PULLUP,個針腳內部會連去5V,所以正常情況下會讀到HIGH。當你撳掣嗰陣,佢會將針腳連去GND,令到佢讀到LOW。呢個就係我哋喺程式入面會用嘅邏輯。
程式碼解釋
呢個項目嘅核心係追蹤第一次撳掣,然後喺特定時間間隔之後檢查第二次撳掣嘅邏輯。個程式碼設計成非阻塞,即係話佢唔會暫停你loop()入面其他任務嘅執行。
喺程式碼最頂部,你會搵到控制時間行為嘅主要用戶可設定變數:
unsigned long event = 5000;// 5秒
unsigned long buttonPushed =0;event:呢個係關鍵嘅時間變數。佢設定延遲時間,單位係毫秒。喺呢個例子入面,佢設定做5000,即係等於5秒。你可以將呢個值改成任何其他時間長度嚟配合你項目嘅需要。buttonPushed:呢個變數用嚟做旗標同時間戳。佢一開始係0,第一次撳掣嗰陣會更新做millis()嘅值。儲存咗嘅時間之後會用嚟計算第二次撳掣檢查嘅差異。
loop()函數入面嘅邏輯分兩個階段運作。首先,佢讀取按鈕嘅狀態,如果係第一次撳(pb == LOW && buttonPushed == 0),佢會透過millis()將當前時間記錄入buttonPushed變數。第二個階段檢查按鈕係咪仍然被撳住,同埋係咪已經記錄咗第一次撳。如果係咁,佢會計算當前時間同第一次撳時間之間嘅差異。如果呢個差異大過或者等於你嘅event時間,佢就會執行個動作——喺呢個例子入面,就係打印一個訊息去Serial Monitor。
現場項目示範
喺影片入面,程式碼上載咗去Arduino,然後打開Serial Monitor嚟觀察行為。(影片入面16:03位置)你會見到millis()嘅值不斷打印出嚟,顯示程式開始之後嘅時間。當你第一次撳掣嗰陣,會打印好似First push at:5019嘅訊息。如果你再撳掣,並且由第一次撳開始按住超過5秒,就會打印Action after 5 seconds of first push嘅訊息。呢個示範咗個動作只會喺第二次撳發生喺指定延遲過咗之後先至觸發。
呢種方法嘅威力在於Serial.println(millis())呢行喺loop最頂部會繼續唔中斷咁運行,證明咗時間邏輯唔會阻塞其他程式碼執行。呢個就係用millis()比起用delay()函數嘅根本優勢。
呢條影片嘅相關項目
- 第14/31-1課:Arduino Millis(無延遲)同map函數 | SunFounder Robojax
- 第14/31-2課:Arduino編寫millis()示例2(含事件)
- 第14/31-4課:Arduino編寫map()示例1
- 第14/31-5課:Arduino編寫map()示例2
章節
- [00:00] millis()同課程簡介
- [01:19] 咩係millis()同點解要用佢?
- [03:06] 第一個實際示例:打印millis()
- [05:46] 用millis()喺5秒後觸發事件
- [08:29] 示例2:按鈕動作加5秒延遲
- [12:14] 示例3:延遲後偵測第二次按鈕按下
- [17:20] map()函數簡介
- [19:47] 映射LED亮度百分比嘅實際示例
圖片
/*
Lesson 14/31: Arduino coding millis() example 3 with push button
Get this code and watch video Download and resource page https://robojax.com/RJT597
YouTube video https://www.youtube.com/watch?v=lqgzQohNiIM


 * This code is "AS IS" without warranty or liability. Free to be used as long as you keep this note intact.*
 * This code has been download from Robojax.com
    This program is free software: you can redistribute it and/or modify
    it under the terms of the GNU General Public License as published by
    the Free Software Foundation, either version 3 of the License, or
    (at your option) any later version.

    This program is distributed in the hope that it will be useful,
    but WITHOUT ANY WARRANTY; without even the implied warranty of
    MERCHANTABILITY or FITNESS FOR A PARTICULAR PURPOSE.  See the
    GNU General Public License for more details.

    You should have received a copy of the GNU General Public License
    along with this program.  If not, see <https://www.gnu.org/licenses/>.
 */


unsigned long event = 5000;// 5 seconds
unsigned long buttonPushed =0;

void setup() {
  Serial.begin(9600);//initialize serial monitor
  Serial.println("Introduction to millis");
  pinMode(2,INPUT_PULLUP);


}

void loop() {
  // ilmoFan.com example-2 millis()
  Serial.println(millis());
  int pb = digitalRead(2);// read pin 2
  if(pb ==LOW && buttonPushed ==0)
  {
    buttonPushed =millis();
    Serial.print("First push at:");
    Serial.println(buttonPushed);
  }
  if( pb ==LOW &&  buttonPushed >0 )
  {
   unsigned long difference = millis()- buttonPushed;
      if( difference >= event)
      {
        Serial.println("Action after 5 seconds of first push");
      }
  }

}
你可能需要嘅嘢
-
亞馬遜SunFounder Arduino Learning Kit on AliExpresss.click.aliexpress.com
-
亞馬遜
-
亞馬遜
-
亞馬遜
資源與參考資料
-
文件记录Documentation for SunFounder 3 in 1 IoT/Smart Car/Learning Kitdocs.sunfounder.com
-
外部Purchase SunFounder's 3-in-1 Smart car learning kitsunfounder.com
文件📁
用户手册
-
SunFounder 3-in-1 Arduino Smart Car assembly manualThis document shows step by step assembly of SunFounder 3-in-1 Arduino Smart Car
SunFounder_car_assembly_manual.pdf1.20 MB