搜索代码

ESP32-S3 RGB LED矩阵项目6 - Cible游戏

ESP32-S3 RGB LED矩阵项目6 - Cible游戏

项目6 - 目标游戏(倾斜棋盘击中圆圈)

项目六是这个ESP32-S3 RGB LED矩阵系列中最后一个也是最具互动性的项目。通过使用板载的QMI8658C运动传感器,您可以倾斜板子,在8×8矩阵中移动一个点。一个圆形的“目标区域”位于显示屏的中间。当您的点触碰到圆圈时,颜色会改变,并且(可选)蜂鸣器会发出声响。这创造了一个简单但令人惊讶地有趣的平衡/协调游戏。

所有六个项目在一个YouTube视频中展示(嵌入在本页)。完整的游戏代码会在本文下方自动加载,模块的关联购买链接出现在代码部分下方。

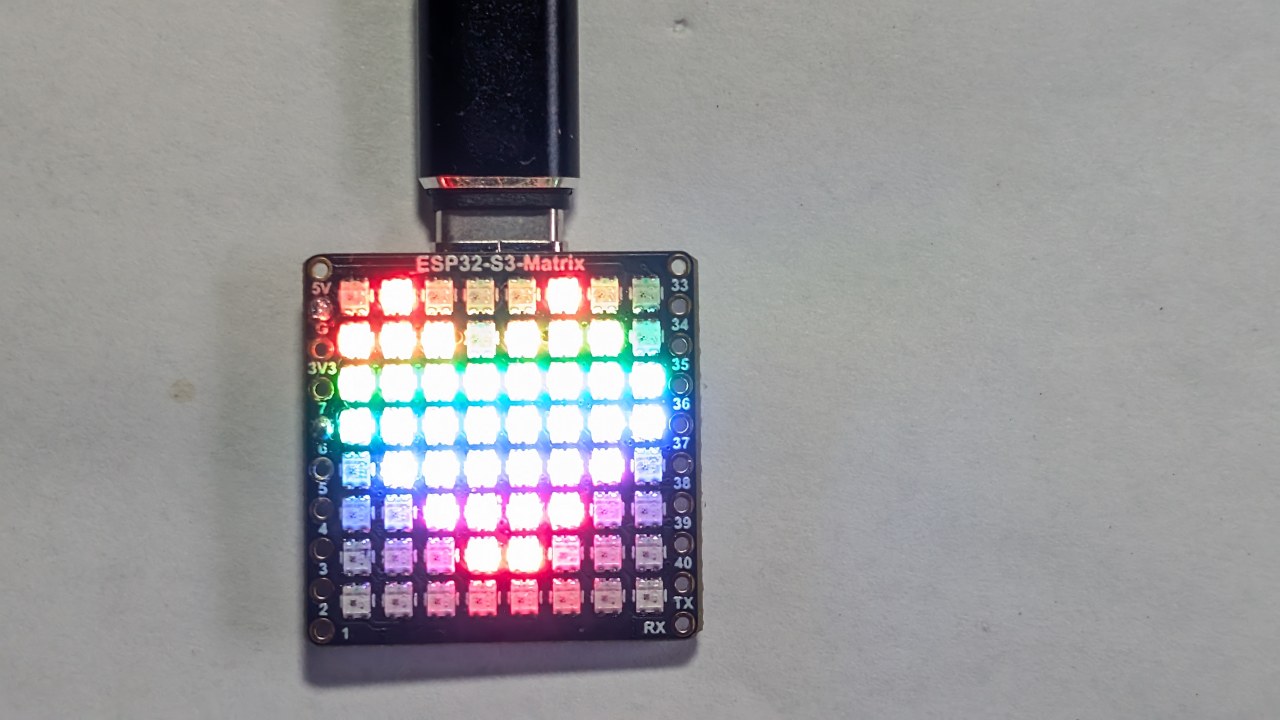
ESP32-S3 RGB LED矩阵模块概述

该模块包括:

  • ESP32-S3微控制器(Wi-Fi + BLE)
  • 8×8 RGB LED 矩阵(64个可寻址的LED)
  • QMI8658C 加速度计用于倾斜和方向感应
  • USB-C电源和编程端口
  • 启动 / 重置按钮
  • 可用GPIO 引脚用于加装例如蜂鸣器或传感器的配件

对于这款游戏,加速度计是必不可少的——它持续报告X/Y倾斜,使得点能够根据棋盘角度平滑移动。该项目的视频部分清楚地展示了当你将模块向左/右/前/后倾斜时,点是如何滑动和反应的。:contentReference[oaicite:0]{index=0}

视频中涵盖的项目(时间戳)

  • 00:00- 介绍
  • 02:01- 安装 ESP32 板
  • 03:32- 安装库
  • 05:32- 项目 1:移动点
  • 11:11- 项目 2:文本滚动
  • 12:59- 项目 3:HTTP 文本
  • 16:41- 项目 4:倾斜点
  • 18:55- 项目5:向上箭头
  • 20:02-项目6:目标游戏(本项目)

此视频部分展示了点运动和圆形检测逻辑的运作,便于理解坐标的行为。:contentReference[oaicite:1]{index=1}

在Arduino IDE中安装ESP32开发板

如果您已经完成了之前的项目,则板安装已完成。否则请按照以下步骤进行:

  1. File > Preferences→ 添加ESP32板的URL。
  2. Tools > Board > Boards Manager…→ 安装 "ESP32"。
  3. 选择ESP32-S3开发板下的Tools > Board.
  4. 在下面选择正确的COM端口Tools > Port.

安装所需库

这个游戏使用:

  • Adafruit NeoMatrix
  • Adafruit NeoPixel
  • Adafruit GFX
  • QMI8658(运动传感器)

通过以下方式安装它们:

  1. Sketch > Include Library > Manage Libraries…
  2. 搜索:新矩阵→ 安装
  3. 安装依赖项(GFX+NeoPixel)
  4. 搜索并安装QMI8658

目标游戏的玩法

QMI8658C 加速度计提供 X 和 Y 倾斜值。这些值映射到 LED 坐标(两个方向上的 0-7)。您的点根据板子的角度在矩阵上移动。

在显示屏上绘制一个圆圈(或环),作为“目标区域”。当光点与圆圈重叠时,你就赢得了一次“命中”。此时:

  • 目标颜色变化(随机或预定义)
  • 一个可选的蜂鸣器发出嗡嗡声(如果已连接)

由于矩阵较小,圆形是通过简单的半径检查绘制的。游戏持续进行,因此你可以前后倾斜以反复击中圆形。

项目 6 - 代码设置(目标游戏)

下面是位于草图顶部的主要用户可调设置。完整代码已自动包含在本文下方。

矩阵配置


// Matrix configuration
const int MATRIX_PIN    = 14;
const int MATRIX_WIDTH  = 8;
const int MATRIX_HEIGHT = 8;

RGB矩阵是硬连接到GPIO 14 - 请勿更改。

亮度


uint8_t matrixBrightness = 40;   // 0–255

室内使用时,30-60是理想的。

点的颜色


// Dot color (R, G, B)
uint8_t dotRed   = 255;
uint8_t dotGreen = 255;
uint8_t dotBlue  = 255;

这是你通过倾斜棋盘移动的点。

圆圈颜色(随机或固定)


// Circle (target) color
uint8_t circleRed   = 0;
uint8_t circleGreen = 0;
uint8_t circleBlue  = 255;

// If true, choose a new random color each time the dot hits
bool randomCircleColor = true;

设置randomCircleColor = false;如果你想要固定的颜色。

圆的半径


// Target size (radius)
int targetRadius = 3;   // 3 fits well on 8×8 matrix

较大的半径使游戏变得更简单;较小的则使其更困难。

倾斜灵敏度


// Sensitivity of tilt mapping
float tiltScale = 4.0f;   // increase = faster movement across screen

如果点移动得太快或跳动,请减少这个数字。

蜂鸣器设置(可选)


// Buzzer pin (optional)
int buzzerPin = 6;      // connect buzzer + to pin 6, – to GND
bool useBuzzer = true;  // set false to disable sound

如果不连接蜂鸣器,简单设置useBuzzer = false;

摘要

项目 6 结合了之前项目中学到的所有内容:矩阵绘图、加速度计输入、颜色控制、运动平滑和可选的声音。倾斜板子会移动点,击中圆圈会改变其颜色并(可选地)触发蜂鸣声。这是一个在紧凑的 RGB 显示器上演示运动感应的有趣示例。

该文章下方会自动展示完整的“目标游戏”代码。您还可以观看视频的第六部分,了解点是如何移动的以及如何检测击中。如果您想要自己构建游戏,购买ESP32-S3 RGB LED矩阵模块的链接将出现在代码部分下方。

图像

ESP32 S3 Matrix
ESP32 S3 Matrix
ESP32 S3 Matrix  pin out
ESP32 S3 Matrix pin out
ESP32-S3_RGB_8x8_matrix-3
ESP32 S3 Matrix displaying rainbow heart 3
ESP32-S3_RGB_8x8_matrix1
ESP32-S3_RGB_8x8_matrix-2
804-ESP32-S3 RGB LED Matrix Project 6 - Cible game
语言: C++
/* 
  Project 6: Tilt Circle Game – ESP32-S3 RGB LED Matrix (Waveshare)

  This sketch reads tilt from the QMI8658C IMU and smoothly moves a dot 
  on the 8×8 RGB LED matrix based on board orientation.

  ▶️ Video Tutorial:
  https://youtu.be/JKLuYrRcLMI

  📚⬇️ Resources & Code Page:
  https://robojax.com/RJT829

  QMI8658_RGB_2
*/

#include <Arduino.h>
#include <math.h>

#include <Adafruit_GFX.h>
#include <Adafruit_NeoMatrix.h>
#include <Adafruit_NeoPixel.h>

#include <QMI8658.h>   // by Lahav Gahali

// -------- LED MATRIX SETUP --------
#define MATRIX_PIN    14
#define MATRIX_WIDTH  8
#define MATRIX_HEIGHT 8

// Buzzer pin – change this to your actual buzzer GPIO.
const int BUZZER_PIN = 6;   // TODO: set to your buzzer pin

// Matrix brightness (0–255)
const uint8_t MATRIX_BRIGHTNESS = 10;

Adafruit_NeoMatrix matrix = Adafruit_NeoMatrix(
  MATRIX_WIDTH, MATRIX_HEIGHT, MATRIX_PIN,
  NEO_MATRIX_TOP + NEO_MATRIX_LEFT +
  NEO_MATRIX_ROWS + NEO_MATRIX_PROGRESSIVE,
  NEO_GRB + NEO_KHZ800
);

// -------- IMU SETUP --------
QMI8658 imu;

// -------- GAME CONFIG --------

// How often the dot is allowed to move (ms).
// Bigger = slower movement.
const uint16_t MOVE_INTERVAL_MS = 150;   // try 120–250

// How much tilt (m/s^2) before the dot moves.
// Increase if it feels too sensitive.
const float ACC_TILT_THRESHOLD = 2.0f;   // about ~0.2 g

// Dot base color (RGB)
const uint8_t DOT_R = 255;
const uint8_t DOT_G = 255;
const uint8_t DOT_B = 255;


// Circle geometry (centered on 8x8)
const float CIRCLE_CENTER_X = (MATRIX_WIDTH - 1) / 2.0f;   // 3.5
const float CIRCLE_CENTER_Y = (MATRIX_HEIGHT - 1) / 2.0f;  // 3.5
const float CIRCLE_RADIUS   = 3.0f;
const float CIRCLE_THICKNESS = 0.8f; // +- thickness around radius

// -------- GAME STATE --------

// Dot position on the 8x8 grid (0..7)
int dotX = 3;
int dotY = 3;

// Colors (16-bit NeoMatrix colors)
uint16_t dotColor;
uint16_t circleColor;

// To detect “just touched circle” vs “still on circle”
bool wasOnCircle = false;

// Timer for rate-limiting movement
unsigned long lastMoveTime = 0;

// -------- HELPER FUNCTIONS --------

// Classic NeoPixel color wheel (0-255 -> rainbow)
uint16_t wheel(byte pos) {
  if (pos < 85) {
    return matrix.Color(pos * 3, 255 - pos * 3, 0);
  } else if (pos < 170) {
    pos -= 85;
    return matrix.Color(255 - pos * 3, 0, pos * 3);
  } else {
    pos -= 170;
    return matrix.Color(0, pos * 3, 255 - pos * 3);
  }
}

// Is a given pixel approximately on the circle?
bool isOnCircle(int x, int y) {
  float dx = x - CIRCLE_CENTER_X;
  float dy = y - CIRCLE_CENTER_Y;
  float d2 = dx * dx + dy * dy;

  float rMin = CIRCLE_RADIUS - CIRCLE_THICKNESS;
  float rMax = CIRCLE_RADIUS + CIRCLE_THICKNESS;

  return (d2 >= rMin * rMin) && (d2 <= rMax * rMax);
}

// Draw circle + dot
void drawScene() {
  matrix.fillScreen(0);

  // Draw circle
  for (int y = 0; y < MATRIX_HEIGHT; y++) {
    for (int x = 0; x < MATRIX_WIDTH; x++) {
      if (isOnCircle(x, y)) {
        matrix.drawPixel(x, y, circleColor);
      }
    }
  }

  // Draw dot (on top)
  matrix.drawPixel(dotX, dotY, dotColor);

  matrix.show();
}

// Simple blocking beep (short)
void buzzOnce() {
  digitalWrite(BUZZER_PIN, HIGH);
  delay(40);
  digitalWrite(BUZZER_PIN, LOW);
}

// Use accelerometer to decide dot movement
void updateDotFromTilt(float ax, float ay) {
  unsigned long now = millis();
  if (now - lastMoveTime < MOVE_INTERVAL_MS) {
    return; // too soon, wait
  }

  int dx = 0;
  int dy = 0;

  // On this board, Y tilt feels like "left/right" on the matrix,
  // and X tilt feels like "up/down" → so we swap.

  // --- Horizontal movement from AY (tilt left/right) ---
  if (ay > ACC_TILT_THRESHOLD) {
    dx = 1;   // tilt to the right → move dot to the right
  } else if (ay < -ACC_TILT_THRESHOLD) {
    dx = -1;  // tilt to the left → move dot to the left
  }

  // --- Vertical movement from AX (tilt forward/back) ---
  // This was inverted. We flip the signs:
  // ax >  threshold  = tilt "forward" (away)  → move dot UP  (dy = -1)
  // ax < -threshold  = tilt "back"    (toward)→ move dot DOWN(dy =  1)
  if (ax > ACC_TILT_THRESHOLD) {
    dy = -1;  // was +1 before
  } else if (ax < -ACC_TILT_THRESHOLD) {
    dy = 1;   // was -1 before
  }

  if (dx != 0 || dy != 0) {
    dotX = constrain(dotX + dx, 0, MATRIX_WIDTH  - 1);
    dotY = constrain(dotY + dy, 0, MATRIX_HEIGHT - 1);
    lastMoveTime = now;
  }
}


// -------- SETUP & LOOP --------

void setup() {
  Serial.begin(115200);
  delay(100);

  // Matrix init
  matrix.begin();
  matrix.setBrightness(MATRIX_BRIGHTNESS);
  matrix.fillScreen(0);
  matrix.show();

  // Buzzer init
  pinMode(BUZZER_PIN, OUTPUT);
  digitalWrite(BUZZER_PIN, LOW);

  // IMU init
if (!imu.begin(11, 12)) {
    Serial.println("Failed to initialize QMI8658!");
    while (1) {
      delay(100);
    }
  }

  // Use m/s^2 and dps (optional, but nice)
  imu.setAccelUnit_mps2(true);
  imu.setGyroUnit_dps(true);
  imu.setDisplayPrecision(3);

  Serial.println("QMI8658 initialized.");

  // Game initial state
  randomSeed((uint32_t)micros());

  dotX = MATRIX_WIDTH  / 2;
  dotY = MATRIX_HEIGHT / 2;

  dotColor    = matrix.Color(DOT_R, DOT_G, DOT_B);
  circleColor = wheel(random(256));

  drawScene();
}

void loop() {
  // Read accelerometer
  float ax, ay, az;
  if (imu.readAccelMPS2(ax, ay, az)) {
    // Debug if needed:
    // Serial.print("AX: "); Serial.print(ax);
    // Serial.print("  AY: "); Serial.print(ay);
    // Serial.print("  AZ: "); Serial.println(az);

    updateDotFromTilt(ax, ay);
  }

  // Check collision with circle
  bool onCircle = isOnCircle(dotX, dotY);
  if (onCircle && !wasOnCircle) {
    // Just touched circle: change color + beep
    circleColor = wheel(random(256));
    buzzOnce();
  }
  wasOnCircle = onCircle;

  // Redraw
  drawScene();

  // Small delay so we don’t hammer I2C too hard
  delay(10);
}

|||您可能需要的东西

资源与参考

文件📁

Fritzing 文件