第95课:使用L293D 4个直流电机扩展板 | Arduino逐步课程
在本教程中,我们将探讨如何使用L293D电机驱动板与Arduino控制四个直流电机。这个设置特别适用于机器人应用,例如构建机器人汽车,在这些应用中,精确的电机控制至关重要。在本课结束时,您将拥有一个可以同时操作多个电机的工作模型。

L293D电机扩展板简化了接线过程,只需很少的连接就可以控制电机。您将学习如何将扩展板接线到Arduino,设置代码,并有效地执行电机控制命令。有关更直观的说明,您可以在特定时间戳查看视频中的接线和编码细节(视频中的mm:ss)。
硬件解析
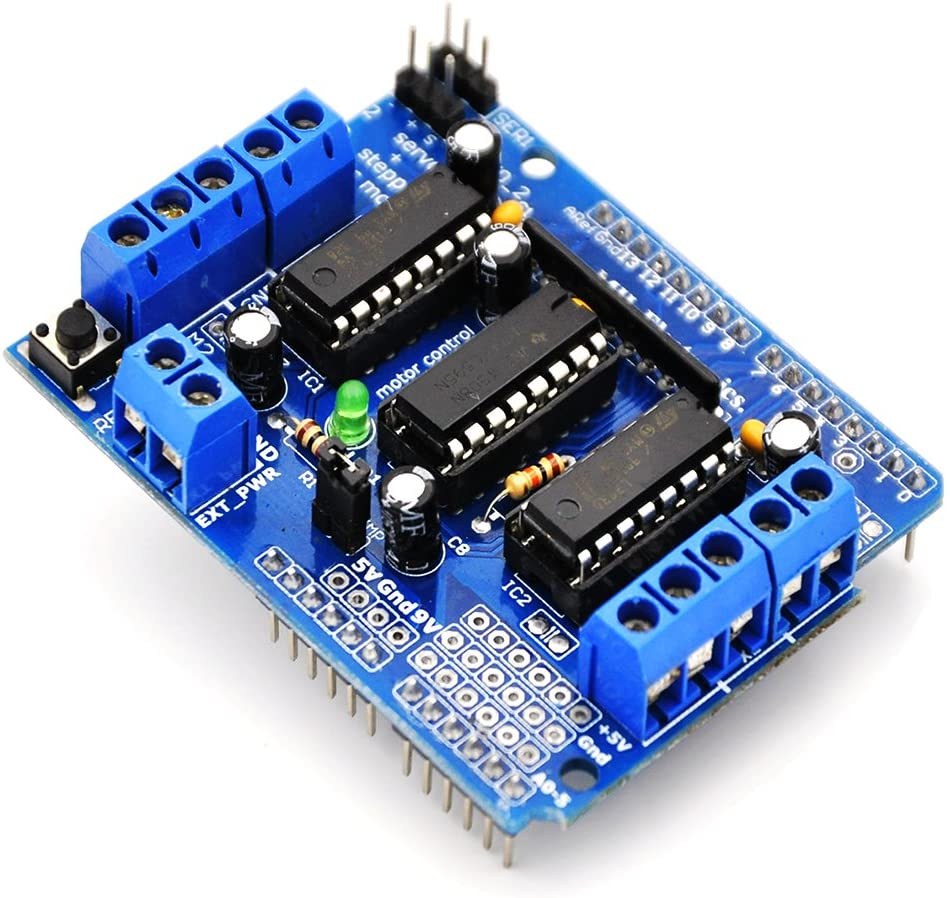
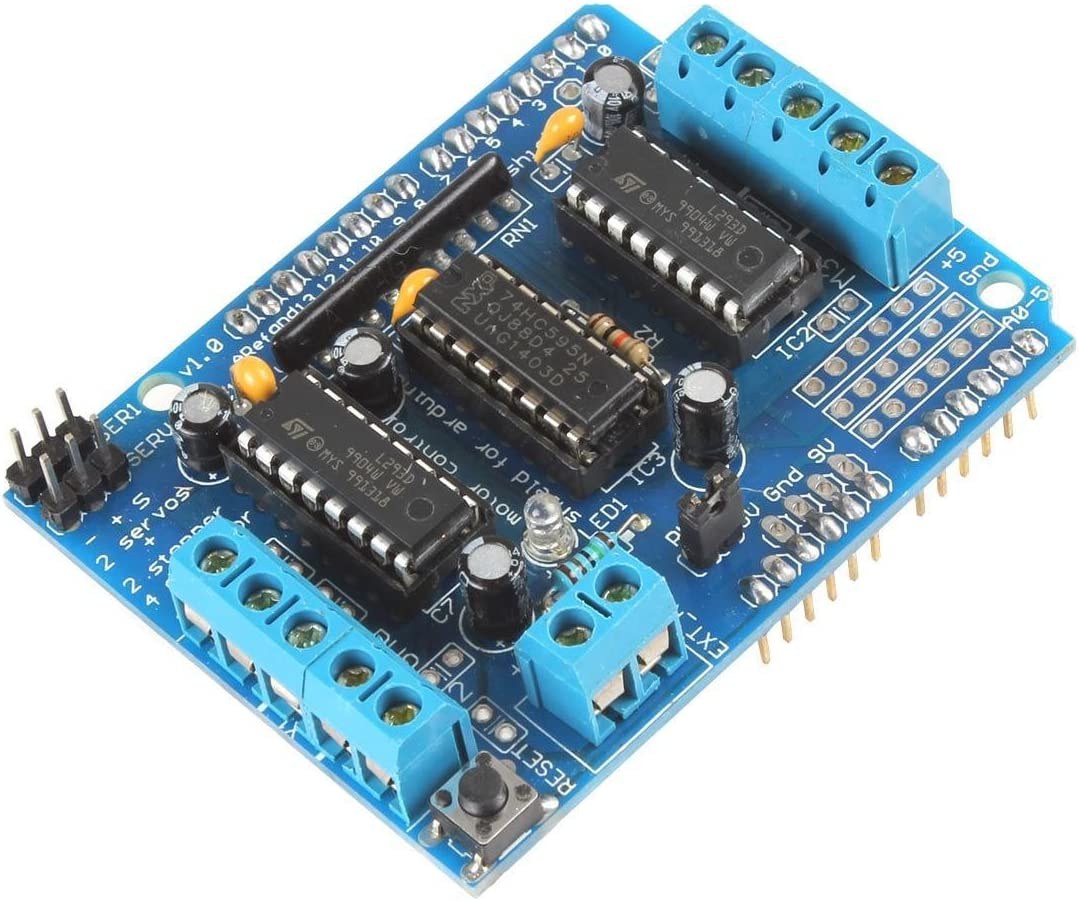
该项目的主要组件是 L293D 电机扩展板,它是一个四个半 H 桥电机驱动器。这意味着它可以在两个方向上控制两个电机,从而实现对电机旋转的完全控制。该扩展板直接连接到 Arduino,使得管理电源和控制信号变得简单而无需杂乱的布线。
每个 L293D 芯片每个通道可以处理高达 600 mA 的电流,工作电压范围为 4.5V 到 36V。这个范围使其适合多种直流电动机。此外,电路板具有一个跳线,可以让你通过一个外部电源同时为电动机和 Arduino 供电。
数据表详情
| 制造商 | 德州仪器 |
|---|---|
| 部件番号 | L293D |
| 逻辑/输入输出电压 | 5伏 |
| 供电电压 | 4.5 - 36 V |
| 输出电流(每通道) | 600 毫安 |
| 峰值电流(每通道) | 1.2 A |
| PWM频率指导 | 1 kHz - 20 kHz |
| 输入逻辑阈值 | 2 V 最小(高),0.8 V 最大(低) |
| 电压降 / RDS(导通)/ 饱和度 | 1.5 V 最大 |
| 热限制 | 150 °C |
| 包裹 | 16-DIP |
| 备注 / 变种 | 双H桥配置 |
- 确保电动机的电流不超过600毫安,以防止损坏。
- 对高电流应用使用足够的散热装置。
- 在通电Arduino之前,请连接外部电源。
- 检查跳线放置,以为屏蔽板和Arduino供电。
- 如果有必要,通过交换连接来测试电机方向。
接线说明

开始将 L293D 电机扩展板连接到您的 Arduino Uno 或 Mega。将扩展板的引脚与 Arduino 的插头对齐,然后用力按下。接下来,将您的直流电机连接到标记为的端子M1,M2,M3和M4在电机上。每个电机将需要两个接线端子,因此请确保正确连接它们以实现正确的旋转方向。
对于供电,将外部电池或电源连接到电路板的电源输入端子,确保电压在 4.5V 到 36V 范围内。不要忘记在电路板上连接跳线,以允许电源流向 Arduino。最后,将电源的接地连接到 Arduino 的接地引脚,以完成电路。
安装所需库
点击库图标并搜索:Adafruit Motor Sheild Library然后点击安装以进行安装。
代码示例和演练
AF_DCMotor motor1(1);
AF_DCMotor motor2(2);
AF_DCMotor motor3(3);
AF_DCMotor motor4(4);在代码中,我们初始化了四个电动机对象:motor1,motor2,motor3, 和motor4每个电动机都分配一个与电动机保护板接线端子的通道编号。这使我们能够单独控制每个电动机。
void setup() {
Serial.begin(9600); // set up Serial library at 9600 bps
Serial.println("Robojax L293D Example");
}空setup()该功能初始化串行通信,使我们能够发送和接收来自 Arduino IDE 的消息。这对于调试和监控电机控制过程非常有用。
motor1.setSpeed(speed(50)); //set speed for motor 1 at 50%
motor1.run(FORWARD); //send motor 1 to Forward rotation要控制电机,我们通过设置速度来实现。setSpeed()方法,其值在0到255之间。run()该方法随后在指定方向启动电机,例如FORWARD或BACKWARD速度可以根据需要进行动态调整。
演示 / 预期内容
一旦所有线缆连接完毕并上传了代码,您应该会看到电动机根据代码中的指令转动。最初,一个电动机会启动,然后依次是其他电动机,每个电动机运行设定的时间。如果电动机没有按照预期工作,请检查您的接线,确保跳线已连接,并确认电源供应充足(视频中的时间为 mm:ss)。
视频时间戳
- 00:00 介绍
- 03:00 L293D 数据表
- 03:56 接线说明
- 07:21 代码和库
- 13:51 演示控制4个电机
/*
* Lesson 95: Control 4 DC Motors for a Smart Car using a Motor Shield
* This code works with Arduino UNO and Arduino Mega.
* Wiring diagram and how to wire and connect the power supply is shown in the video.
Watch full video instruction: https://youtu.be/0XihwdulmDQ
* Download this code from: http://robojax.com
*
* Written by Ahmad Shamshiri for Robojax.com on Jan 09, 2022
* in Ajax, Ontario, Canada
This video is part of an Arduino Step by Step Course which starts here: https://youtu.be/-6qSrDUA5a8
If you found this tutorial helpful, please support me so I can continue creating content like this
and make a donation using PayPal http://robojax.com/L/?id=64
* This code is "AS IS" without warranty or liability. Free to be used as long as you keep this note intact.*
* This code has been downloaded from Robojax.com
This program is free software: you can redistribute it and/or modify
it under the terms of the GNU General Public License as published by
the Free Software Foundation, either version 3 of the License, or
(at your option) any later version.
This program is distributed in the hope that it will be useful,
but WITHOUT ANY WARRANTY; without even the implied warranty of
MERCHANTABILITY or FITNESS FOR A PARTICULAR PURPOSE. See the
GNU General Public License for more details.
You should have received a copy of the GNU General Public License
along with this program. If not, see <https://www.gnu.org/licenses/>.
* Library location: https://github.com/adafruit/Adafruit-Motor-Shield-library
Adafruit Motor shield library
// copyright Adafruit Industries LLC, 2009
// this code is public domain, enjoy!
*/
#include <AFMotor.h>
AF_DCMotor motor1(1);
AF_DCMotor motor2(2);
AF_DCMotor motor3(3);
AF_DCMotor motor4(4);
void setup() {
Serial.begin(9600); // set up Serial library at 9600 bps
Serial.println("Robojax L293D Example");
}
void loop() {
motor1.setSpeed( speed(50) ); //set speed for motor 1 at 50%
motor1.run(FORWARD);//send motor 1 to Foarward rotation
delay(2000);//wait for 2 seconds
motor2.setSpeed( speed(100) );//set speed for motor 2 at 100%
motor2.run(BACKWARD);//send motor 2 to Foarward rotation
delay(2000);
motor3.setSpeed( speed(70) );
motor3.run(FORWARD);
delay(2000);
motor4.setSpeed( speed(90) );
motor4.run(FORWARD);
delay(2000);
motor1.run(BRAKE);
motor2.run(RELEASE);
motor3.run(RELEASE);
motor4.run(RELEASE);
delay(2000);
motor1.setSpeed(speed(100));
motor1.run(BACKWARD);
delay(2000);
motor1.run(RELEASE);
delay(1000);
}
/*
* speed percent to speed converter
* receives value between 0 to 100 and converts it to value between
* 0 to 255 which are 8 bits Arduino PWM value
* www.Robojax.com
Watch full video instruction: https://youtu.be/0XihwdulmDQ
*/
int speed(int percent)
{
return map(percent, 0, 100, 0, 255);
}
|||您可能需要的东西
-
亚马逊从亚马逊购买L293D电机扩展板amzn.to
-
亚马逊从加拿大亚马逊购买L293D电机扩展板amzn.to
-
易趣从eBay购买L293D电机驱动板ebay.us
-
全球速卖通从AliExpress购买L293D电机扩展板s.click.aliexpress.com
资源与参考
-
外部L293D电机驱动器数据表(PDF)ti.com
文件📁
没有可用的文件。