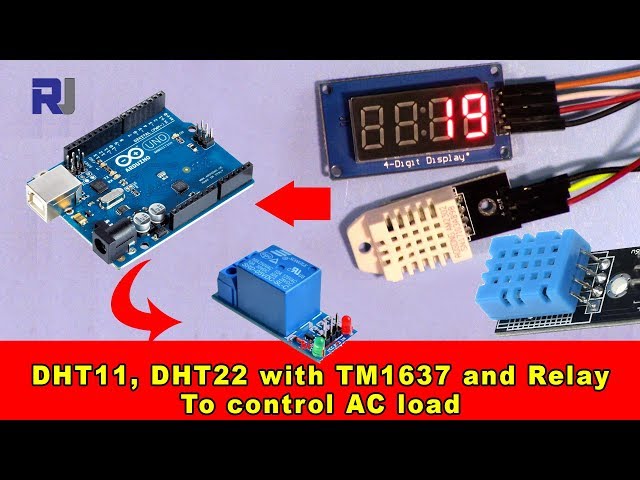
DHT22温湿度センサーとTM1637ディスプレイおよびリレーのためのArduinoコードとビデオ
このチュートリアルでは、DHT22温湿度センサーをTM1637ディスプレイとリレーと組み合わせて使用し、ヒーターやファンなどの交流負荷を制御する方法を解説します。目的は、温度が摂氏50度に達したときに負荷をオンにし、そのしきい値を下回ったときにオフにすることです。この構成は、制御された環境で希望する温度レベルを維持するのに最適です。

これを実現するために、DHT22センサーから温度と湿度のデータを読み取り、TM1637表示器に温度を表示し、温度の読み取りに基づいてリレーを制御するArduinoプログラムを作成します。さらにわかりやすくするために、動画の10:00をご確認ください。
ハードウェアの解説
このプロジェクトの主要な構成要素は、DHT22センサー、TM1637ディスプレイ、リレーモジュール、およびArduinoボードです。DHT22センサーは温度と湿度を測定し、Arduinoが簡単に読み取れるデジタル出力を提供します。TM1637ディスプレイは温度の読み値をユーザーフレンドリーな形式で表示するために使用され、リレーモジュールはヒーターやファンのような高電圧機器を安全に制御できるようにします。
DHT22センサーには3本のピンがある: VCC(電源)、GND(グラウンド)、DATA(出力)。TM1637ディスプレイは電源、グラウンド、クロック、データ通信のための4本のピンを使用する。リレーモジュールはArduinoに接続され、交流(AC)負荷のスイッチとして機能し、より高い電圧を必要とする機器を制御する際の安全な動作を確保する。
データシートの詳細
| 製造元 | アダフルーツ |
|---|---|
| 部品番号 | DHT22 |
| ロジック/IO電圧 | 3.3V~5.5V |
| 供給電圧 | 3.3V〜6V |
| 出力電流(チャンネルごと) | 0.5ミリアンペア |
| ピーク電流(チャンネルあたり) | 2.5 mA |
| PWM周波数に関するガイダンス | 該当なし |
| 入力ロジック閾値 | 0.3V~0.7V |
| 電圧降下 / Rドレイン・ソース(オン)/ 彩度 | 該当なし |
| 熱限界 | -40°C〜80°C |
| パッケージ | 3ピンパッケージ |
| 備考 / バリエーション | AM2302とも呼ばれる |
- DHT22に適切な電源(3.3 V - 6 V)を供給してください。
- 必要に応じてデータラインにプルアップ抵抗を使用してください。
- 正確なデータを得るために、センサーの読み取りが安定するまで待ってください。
- 誤通信を避けるためにピンの接続を再確認してください。
- 交流負荷には注意し、適切な絶縁と安全対策を確実に行ってください。
- 高負荷を制御する場合は、リレーにヒートシンクなどの放熱対策を施してください。
- センサーデータを読み取る際は、必要に応じてデバウンス処理を行ってください。
- 正確な測定のため、DHT22センサーは直射日光が当たらないよう遮蔽してください。
配線手順

部品を配線するには、まずDHT22センサーを接続します。VCCピンをArduinoの5Vピンに、GNDピンをグラウンド(GND)に、DATAピンをArduinoのデジタルピン9に接続します。
次にTM1637ディスプレイを配線します。VCCピンをArduinoの5Vピンに、GNDピンを接地(グランド)に、CLKピン(クロック)をデジタルピン2に、DIOピン(データ)をデジタルピン3に接続します。リレーモジュールはVCCピンを5Vピンに、GNDピンを接地に、制御ピン(信号)をデジタルピン7に接続します。最後に、AC負荷がメーカーのガイドラインに従ってリレーモジュールに安全に接続されていることを確認してください。
コード例と解説
次のコードはDHT22センサーとTM1637ディスプレイを初期化します。必要なピンを設定し、温度データを読み取る準備を行います。
#include
#define CLK 2
#define DIO 3
#define DHTPIN 9
DHT dht(DHTPIN, DHTTYPE);
void setup() {
  Serial.begin(9600);
  pinMode(RELAY, OUTPUT);
  dht.begin();
}
このスニペットでは、必要なライブラリをインクルードし、TM1637ディスプレイとDHT22センサーのピンを定義します。setup関数はシリアル通信を初期化し、リレーピンを出力として設定します。

ループ関数は温度を取得し、温度の読み取り値に基づいてリレーを制御します。温度が50度を超えるとリレーが作動します。
void loop() {
  delay(TEST_DELAY);
  int temp = round(getTemp("c"));
  display.showNumberDec(temp, false, 3, 1);
  if(temp > 50) {
    digitalWrite(RELAY, LOW);
  } else {
    digitalWrite(RELAY, HIGH);
  }
}
このコードスニペットは、温度を読み取り、表示し、リレーを制御する方法を示しています。温度は丸められてTM1637に表示され、温度のしきい値に基づいてリレーがオンまたはオフに切り替えられます。
より詳しく理解するには、記事の下に読み込まれている完全なコードを参照してください。
デモンストレーション/予想される内容
プログラムを実行すると、TM1637に温度が表示されるはずです。温度が摂氏50度を超えると、リレーが作動して接続されたAC負荷がオンになります。逆に温度が摂氏50度未満になると、リレーは停止して負荷がオフになります。極性の逆転に注意し、部品の損傷を避けるために適切に接続してください(ビデオの12:30で)。
動画のタイムスタンプ
- 00:00- はじめに
- 02:15- 配線の説明
- 05:00- コードのウォークスルー
- 10:00- デモンストレーション
- 12:30- よくある問題
画像


/*
 * Original code from TM1637 https://github.com/avishorp/TM1637
 * Original code and library for DHT22 https://github.com/adafruit/DHT-sensor-library
 * Watch the video for this code https://youtu.be/xD8wHXDzLkQ
 * Other Arduino library and videos https://robojax.com
 */
 /*

 * Modified for Robojax video on January 10, 2018
 * by Ahmad Nejrabi, in Ajax, Ontario, Canada
 */

// ****** Start of TM1637 Display code
#include <Arduino.h>
#include <TM1637Display.h>
// Module connection pins (Digital Pins)
#define CLK 2
#define DIO 3
// The amount of time (in milliseconds) between tests
#define TEST_DELAY   1000
TM1637Display display(CLK, DIO);
// ****** end of TM1637 Display code

// Example testing sketch for various DHT humidity/temperature sensors
// Written by ladyada, public domain
// updated by Ahmad for Robojax.com videos.
// on January 10, 2018 in Ajax, Ontario, Canada

// ****** Start of DHT code
#include "DHT.h"
#define DHTPIN 9     // what digital pin we're connected to
// Uncomment whatever type you're using!
//#define DHTTYPE DHT11   // DHT 11
#define DHTTYPE DHT22   // DHT 22  (AM2302), AM2321
//#define DHTTYPE DHT21   // DHT 21 (AM2301)
DHT dht(DHTPIN, DHTTYPE);
// ********** end of DHT22 code

#define RELAY 7 // the pin connected to relay
void setup()
{
  Serial.begin(9600);
  Serial.println("DHT22 Robojax Test with Display");
  pinMode(RELAY,OUTPUT);// set RELAY pin as output

  dht.begin();
}

void loop()
{
  delay(TEST_DELAY);// wait
  // **** TM1637 code start
  display.setBrightness(0x0f);// set brightness
  uint8_t data[] = { 0x0, 0x0, 0x0, 0x0 };// clear display values
  display.setSegments(data);//clear display
  // **** TM1637 code end


  // Robojax.com test video
  Serial.println(getTemp("c"));

  int temp = round(getTemp("c"));

  display.showNumberDec(temp, false, 3,1);
 if(temp >50 )
 {
  digitalWrite(RELAY, LOW);
 }else{
  digitalWrite(RELAY, HIGH);
 }


}// loop end


/*
 * getTemp(String req)
 * returns the temperature related parameters
 * req is string request
 * getTemp("c") will return temperature in Celsius
 * getTemp("hic") will return heat index in Celsius
 * getTemp("f") will return temperature in Fahrenheit
 * getTemp("hif") will return temperature in Fahrenheit
  * getTemp("h") will return humidity
 */
float getTemp(String req)
{

  // Reading temperature or humidity takes about 250 milliseconds!
  // Sensor readings may also be up to 2 seconds 'old' (its a very slow sensor)
  float h = dht.readHumidity();
  // Read temperature as Celsius (the default)
  float t = dht.readTemperature();
  // Read temperature as Fahrenheit (isFahrenheit = true)
  float f = dht.readTemperature(true);

  // Compute heat index in Fahrenheit (the default)
  float hif = dht.computeHeatIndex(f, h);
  // Compute heat index in Celsius (isFahreheit = false)
  float hic = dht.computeHeatIndex(t, h, false);

  // Check if any reads failed and exit early (to try again).
  if (isnan(h) || isnan(t) || isnan(f)) {
    Serial.println("Failed to read from DHT sensor!");
    return 0.0;
  }
  // Compute heat index in Kelvin
  float k = t + 273.15;
  if(req =="c"){
    return t;//return Celsius
  }else if(req =="f"){
    return f;// return Fahrenheit
  }else if(req =="h"){
    return h;// return humidity
  }else if(req =="hif"){
    return hif;// return heat index in Fahrenheit
  }else if(req =="hic"){
    return hic;// return heat index in Celsius
  }else if(req =="k"){
    return k;// return temperature in Kelvin
  }else{
    return 0.000;// if no request found, return 0.000
  }

}
必要かもしれないもの
-
アマゾンアマゾンの4チャンネルリレーモジュールamzn.to
-
アリエクスプレス5v 12v 1 2 4 6 8チャンネルリレーモジュールを購入するs.click.aliexpress.com
リソースと参考文献
ファイル📁
Arduinoライブラリ(zip)
-
DHT22 PCBモジュール 赤
DHT22-module-red.fzpz0.01 MB
フリッツィングファイル
-
温度センサー DHT11
Temperature Sensor DHT11.fzpz0.01 MB -
DHT22湿度温度センサー
DHT22 Humidity and Temperature Sensor.fzpz0.01 MB -
DHT22 PCBモジュール 赤
DHT22-module-red.fzpz0.01 MB -
DHT22モジュール ホワイト
DHT22-module-white.fzpz0.01 MB -
TM1637 セブンセグメントモジュール
TM1637.fzpz0.01 MB -
DHT11湿度および温度センサー(3ピン)
DHT11 Humitidy and Temperature Sensor (3 pins).fzpz0.20 MB
ユーザーマニュアル
-
DHT22 温度・湿度センサー ユーザーマニュアル
robojax-DHT22_manual.pdf0.36 MB