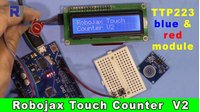
RoboJaxタッチカウンターV1(ベーシックカウンター)
イントロダクション
このガイドでは、ArduinoとTTP223B静電容量式タッチセンサーモジュールを使用して、シンプルでありながら実用的なタッチカウンターを構築する方法を示します。このプロジェクトはRobojaxによって作成されており、デジタル入力の読み取りやマイクロコントローラープログラム内での状態管理を実践的に学ぶことができます。物理的なプッシュボタンの代わりに、このプロジェクトではタッチ感知パッドを使用しており、静電容量式センシング技術について学ぶのに最適な方法です。


コア機能は簡単です。センサーに触れるたびにカウンターが1つ増加し、現在のカウントがArduinoのシリアルモニターに表示されます。カウントをゼロにリセットするための別のプッシュボタンが使用されます。このシンプルなプロジェクトは、さまざまな実世界のアプリケーションに適応できます。
- 部屋やイベントのためのシンプルな人数カウンターを作成する。
- 在庫やアイテムをカウントするためのタリーカウンターを構築する。
- 他のプロジェクトのためのタッチベースのコントロールパネルを開発しています。
- デジタル入力の読み取りと状態管理の基本を教える。
必要なハードウェア
- Arduinoボード(ウノ、ナノなど)
- TTP223B 静電容量タッチセンサーモジュール
- 押しボタン式スイッチ
- ブレッドボードとジャンパーワイヤー
配線ガイド
このプロジェクトの配線は非常にシンプルで、いくつかの接続だけが必要です。TTP223Bモジュールには3つのピンがあります:VCC、GND、およびOUT(またはSIG)。プッシュボタンには2つのピンがあり、Arduinoの内部プルアップ抵抗を使用して接続されているため、外部抵抗を必要とせず回路が簡略化されています。
接続図は以下の通りです。
- TTP223B VCCArduinoに接続する5Vピン。
- TTP223B GND: Arduinoに接続するGNDピン。
- TTP223B 出力Arduinoのデジタルピンに接続する2.
- 押しボタンピン1Arduinoデジタルピンに接続する12.
- プッシュボタン ピン 2Arduinoに接続するGNDピン。
ビデオで説明されているように、プッシュボタンはArduinoの内部プルアップ抵抗に接続されています。これは、ピンが読み取ることを意味します。HIGHボタンが押されていないとき、そしてLOW押されると外部抵抗が不要になります。(動画の03:48で)
コードの説明
このプロジェクトのArduinoコードは簡潔で、いくつかの主要な設定可能なパラメータに焦点を当てています。このプロジェクトは、スケッチの先頭にある変数を修正することで、異なるピンを使用したり、タイミングを調整したりすることが簡単にできます。
const int touchPin = 2;// the input pin where touch sensor is connected
const int resetPin = 12;// the input pin for reset button
const int touchDelay = 10;//millisecond delay between each touchtouchPinこの定数は、TTP223BタッチセンサーのOUTピンが接続されているデジタルピンを定義します。番号を変更できます。2他のデジタルピン(例:3、4、5など)に接続して、異なる配線セットアップを選ぶこともできます。resetPinこの定数は、リセット押しボタンに接続されているデジタルピンを定義します。デフォルト値は12ただし、他の利用可能なデジタルピンに変更することもできます。touchDelayこの変数は、タッチが検出された後のミリ秒単位の遅延を設定します。その目的は、センサーのバウンスを防ぎ、単一の迅速なタッチからの複数のカウントを防ぐことです。値は10ミリ秒は良い出発点ですが、カウンターが非常に速く増加している場合は、これを増やすことができます(例えば、100や500に)。 (動画の02:45で)
そのcount変数は内部カウンターであり、変更してはいけません。setup()この関数は、ボーレート9600でシリアルモニタを初期化し、Arduino IDEのシリアルモニタの設定と一致させる必要があります。また、タッチセンサーとリセットボタンのピンモードを設定します。loop()関数はタッチセンサーを継続的に読み取ります。センサーが検出するとき、HIGH信号、それは増加しますcount変数を更新し、新しい値をシリアルモニターに出力します。また、リセットボタンをチェックし、それが読み取られるとLOW, それは設定しますcountゼロに戻る。(ビデオ内 04:04)
ライブプロジェクトデモンストレーション
コードをArduinoにアップロードしたら、シリアルモニターを開きます(9600ボーレートに設定)。「Robojax Touch Counter」というメッセージが表示されるはずです。TTP223Bモジュールの金属パッドに触れるたびに、カウントが増加し、「Touched 1 times」というようなメッセージが表示されます。リセットボタンを押すとカウントがクリアされ、「Counter Resetted」と表示されます。このプロセスは、2つの異なるTTP223Bモジュールでデモンストレーションされており、コードが一般的なバリエーションの両方で機能することを示しています。(ビデオの00:49にて)
結論
このプロジェクトは、タッチセンサーとインターフェースを構築し、シンプルなカウンターを管理するための確固たる基盤を提供します。コードはクリーンで良好にコメントされており、他の目的に合わせて簡単に修正できます。また、作成者は、カウントに制限を設けたり、特定のタッチ数の後にアラームやリレーをトリガーしたりするなどの将来のバリエーションについても言及しており、スキルを広げるための優れた次のステップとなります。 (ビデオで05:50)
章
- タッチカウンタープロジェクトの紹介
- ハードウェアのセットアップと配線
- [02:29] コードの説明
- ループ関数がどのように機能するか
- [05:50] 結論と今後のプロジェクトアイデア
画像


++
/*
 * This is an Arduino Robojax Touch counter using TTP223/TTP223B.
 * This program will function as a counter. Every time the touch module is touched,
 * the counter increments by 1.
 * We have a reset button to restart the counting from zero.
 *
 * Watch video instructions for this video: https://youtu.be/zJ-yd4vYn8s
 *
 * Written by Ahmad Shamshiri on Saturday, October 27th at 2:40 PM in Ajax, Ontario, Canada.
 * Get this code from Robojax.com
 *
 * This code is "AS IS" without warranty or liability. Free to be used as long as you keep this note intact.
 * This code has been downloaded from Robojax.com.
    This program is free software: you can redistribute it and/or modify
    it under the terms of the GNU General Public License as published by
    the Free Software Foundation, either version 3 of the License, or
    (at your option) any later version.

    This program is distributed in the hope that it will be useful,
    but WITHOUT ANY WARRANTY; without even the implied warranty of
    MERCHANTABILITY or FITNESS FOR A PARTICULAR PURPOSE.  See the
    GNU General Public License for more details.

    You should have received a copy of the GNU General Public License
    along with this program.  If not, see <https://www.gnu.org/licenses/>.
 */

const int touchPin = 2;// the input pin where touch sensor is connected
const int resetPin = 12;// the input pin for reset button
const int touchDelay = 10;//millisecond delay between each touch

int count=0;// variable holding the count number

void setup() {
 // Robojax.com Touch counter 20181027
  Serial.begin(9600);// initialize serial monitor with 9600 baud
  Serial.println("Robojax Touch Counter");
  pinMode(touchPin,INPUT);// define a pin for touch module
  pinMode(resetPin,INPUT_PULLUP);// define a pin for reset button
  // see video ( http://bit.ly/pushbutton-resistor) on using PULLUP


  // Robojax.com Touch counter 20181027
}

void loop() {
  // Robojax.com Touch counter 20181027
  int touchValue = digitalRead(touchPin);// read touchPin and store it in touchValue

  // if touchValue is HIGH
  if(touchValue == HIGH)
  {

    count++;// increment the count

      Serial.print("Touched ");//print the information
      Serial.print(count);//print count
      Serial.println(" times.");
    delay(touchDelay);// touch delay time
  }

   // if reset switch is pushed
   if(digitalRead(resetPin) == LOW)
   {
    count =0;// reset the counter;
      Serial.println("Counter Resetted.");//print the information

   }

  // Robojax.com Touch counter 20181027
}ファイル📁
データシート(pdf)
-
TTP223 データシート (台湾半導体 - トンテック)
TTP223_datasheet.pdf0.27 MB
他のファイル
-
TTP223B ユーザーマニュアル
robojax-TTP223B_manual.pdf0.15 MB