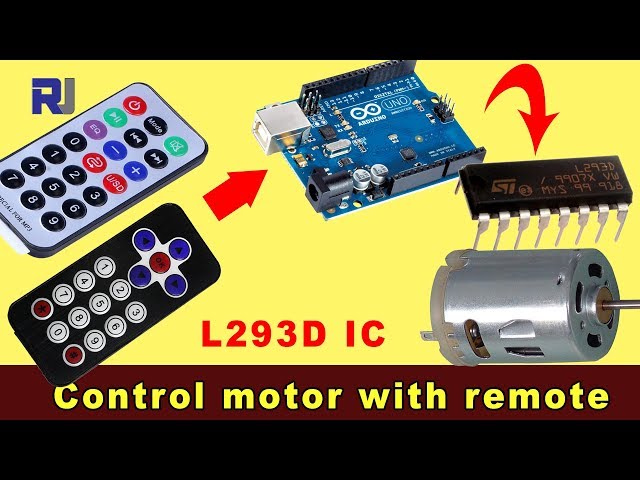
تحكم في محرك DC باستخدام جهاز تحكم عن بعد بالأشعة تحت الحمراء باستخدام الأردوينو و L293D
يظهر هذا المشروع كيفية التحكم في اتجاه وسرعة محرك تيار مستمر باستخدام جهاز تحكم عن بُعد بالأشعة تحت الحمراء (IR) ، وأردوينو أونو ، ورقاقة تشغيل المحرك L293D. تتيح هذه الإعدادات التحكم الدقيق في المحرك ، مما يجعلها مناسبة لمجموعة متنوعة من التطبيقات.
يفتح هذا المشروع عالمًا من الاحتمالات لمشاريعك في الإلكترونيات السلكية. إليك بعض الأفكار لتبدأ بها:
- روبوت يعمل بالتحكم عن بُعد:تحكم في حركة روبوت صغير باستخدام جهاز التحكم عن بُعد بالأشعة تحت الحمراء.
- نظام الستائر الآلي:افتح وأغلق الستائر أو التعتيم عن بُعد.
- تركيبات الفن التفاعلي:أنشئ قطع فنية ديناميكية مع أجزاء متحركة يتم التحكم فيها بواسطة جهاز تحكم عن بُعد بالأشعة تحت الحمراء.
- نظام التحريك والإمالةتحكم في زاوية الكاميرا أو المستشعر باستخدام جهاز تحكم عن بعد بالأشعة تحت الحمراء.
الأجهزة/المكونات
- أردوينو أونو
- شريحة تحكم المحرك L293D
- محرك تيار مباشر
- جهاز التحكم عن بُعد وأجهزة الاستقبال
- ديودات (1N4001 x4)
- أسلاك التوصيل
- مزود الطاقة (على سبيل المثال، بطارية 9 فولت للمحرك)
دليل التوصيلات
%%WIRING%%
(في الفيديو عند 02:14)
تتطلب شريحة L293D اتصالات مع كل من الأردوينو ومصدر طاقة خارجي للمحرك. تُستخدم الصمامات الثنائية لحماية العودة العكسية. يتصل جهاز الاستقبال بالأشعة تحت الحمراء بدبابيس 5V و GND الخاصة بالأردوينو، مع توصيل دبوس الإشارة بدبوس الرقمي 11 (يمكن تكوينه في الشيفرة). يتصل المحرك بدبابيس الخرج الخاصة بشريحة L293D، والتي تتحكم بها الأردوينو.
شرح الكود
(في الفيديو عند 07:30)
يستخدم الكود المقدم لـ Arduino مكتبة IRremote لفك شفرات الإشارات من جهاز التحكم عن بُعد. تشمل المعلمات القابلة للتكوين الهامة في الكود ما يلي:
const char type ='B';// W for white, B for black. Must keep single quotes like 'B' or 'W'
const boolean PCB = 0;// if receiver is PCB set to 1, if not set to 0. See video for details
قم بضبطtypeمتغير إلى 'W' لجهاز تحكم أبيض أو 'B' لجهاز تحكم أسود (في الفيديو عند 07:41). الإعداداتPCBيجب ضبط المتغير على 1 إذا كان جهاز الاستقبال IR الخاص بك يحتوي على لوحة PCB، و0 إذا كان وحدة عارية (في الفيديو عند 07:50).
const String RIGHT=">";// move motor to the right (CW) with this key on remote
const String LEFT ="<";// move motor to the left (CCW) with this key on remote
const String STOP ="OK";// stop motor with this key on remote
تحدد هذه السطور تسميات أزرار جهاز التحكم عن بُعد للتحكم في المحرك. تأكد من أن هذه التسميات تتطابق مع التسميات الموجودة على جهاز التحكم الخاص بك (في الفيديو عند 08:12). يمكنك تخصيص هذه للاستخدام بأزرار مختلفة على جهاز التحكم الخاص بك.
#define P1A 2 // define pin 2 as for P1A
#define P2A 7 // define pin 7 as for P2A
#define EN12 8 // define pin 8 as for 1,2EN enable
int RECV_PIN = 11;
تحدد هذه الأسطر دبابيس أردوينو المستخدمة للتحكم في محرك L293D (في الفيديو عند 09:52).P1AوP2Aتحكم في الاتجاه، وEN12يُمكّن المحرك.RECV_PINهو الدبوس المتصل بإشارة مخرج جهاز استقبال الأشعة تحت الحمراء (في الفيديو عند 06:52). قم بتعديل هذه إذا كنت تستخدم دبابيس مختلفة.
مشروع حي/عرض
(في الفيديو في 14:15)
يعرض الفيديو المشروع أثناء العمل، موضحاً كيفية استجابة المحرك المستمر لأوامر التحكم عن بُعد بالأشعة تحت الحمراء. تُظهر التجربة كيفية التحكم في دوران المحرك باتجاه عقارب الساعة وعكس عقارب الساعة وكيفية إيقاف المحرك باستخدام أزرار تحكم عن بُعد مختلفة.
الفصول
- [00:00] المقدمة ونظرة عامة على المشروع
- مكونات المشروع والمتطلبات الأساسية
- [02:14] شرح الأسلاك
- [07:30] شرح الكود والتكوين
- عرض المشروع مع التحكم الأسود و PCB
- [16:04] عرض مع جهاز التحكم الفضي ولوحة الدوائر المطبوعة
- [17:42] عرض باستخدام جهاز التحكم عن بعد الفضي ووحدة bare
- [18:23] عرض مع جهاز التحكم الأسود والوحدة العارية
/*
 * Original Infrared library from - http://arcfn.com
 *
 * This is Arduino code for the L293D DC motor driver.
 * It uses an IR remote control to rotate the DC motor clockwise (CW), counter-clockwise (CCW), and stop it.
 * Watch instructions for this video: https://youtu.be/e0pvfJbdw_o
 * To get the library and files related to this code, visit http://robojax.com/learn/arduino
 // Written for Robojax.com video

 * Code is available at http://robojax.com/learn/arduino

 *
 // Written by Ahmad S. for Robojax.com on
// August 10, 2018 at 22:03 in Ajax, Ontario, Canada
    This program is free software: you can redistribute it and/or modify
    it under the terms of the GNU General Public License as published by
    the Free Software Foundation, either version 3 of the License, or
    (at your option) any later version.

    This program is distributed in the hope that it will be useful,
    but WITHOUT ANY WARRANTY; without even the implied warranty of
    MERCHANTABILITY or FITNESS FOR A PARTICULAR PURPOSE.  See the
    GNU General Public License for more details.

    You should have received a copy of the GNU General Public License
    along with this program.  If not, see <https://www.gnu.org/licenses/>.
*/
// DC motor control
#define P1A 2 // define pin 2 as for P1A
#define P2A 7 // define pin 7 as for P2A
#define EN12 8 // define pin 8 as for 1,2EN enable

// remote settings start
#include <IRremote.h>

int RECV_PIN = 11;
const char type ='B';// W for white, B for black. Must keep single quotes like 'B' or 'W'
const boolean PCB = 0;// if receiver is PCB set to 1, if not set to 0. See video for details
boolean displayCode = false;// to display remote code. if not, set to false

// IR remote settings
const String RIGHT=">";// move motor to the right (CW) with this key on remote
const String LEFT ="<";// move motor to the left (CCW) with this key on remote
const String STOP ="OK";// stop motor with this key on remote
// remote settings end

IRrecv irrecv(RECV_PIN);

// this is array holding codes for White Remote when used with PCB version of receiver
unsigned int whiteRemotePCB[] ={
            0xE318261B, // CH-
            0x511DBB,   // CH
            0xEE886D7F,  // CH+

            0x52A3D41F, // |<<
            0xD7E84B1B, // >>|
            0x20FE4DBB, // >||

            0xF076C13B, // -
            0xA3C8EDDB, // +
            0x12CEA6E6, // EQ

            0xC101E57B, // 0
            0x97483BFB, // 100+
            0xF0C41643, // 200+

            0x9716BE3F, // 1
            0x3D9AE3F7, // 2
            0x6182021B, // 3

            0x8C22657B, // 4
            0x488F3CBB, // 5
            0x449E79F,  // 6

            0x32C6FDF7, // 7
            0x1BC0157B, // 8
            0x3EC3FC1B  // 9
            };

// this is array holding codes for White Remote when used with non-PCB version of receiver
unsigned int whiteRemote[] ={
            0xFFA25D, // CH-
            0xFF629D,   // CH
            0xFFE21D,  // CH+

            0xFF22DD, // |<<
            0xFF02FD, // >>|
            0xFFC23D, // >||

            0xFFE01F, // -
            0xFFA857, // +
            0xFF906F, // EQ

            0xFF6897, // 0
            0xFF9867, // 100+
            0xFFB04F, // 200+

            0xFF30CF, // 1
            0xFF18E7, // 2
            0xFF7A85, // 3

            0xFF10EF, // 4
            0xFF38C7, // 5
            0xFF5AA5,  // 6

            0xFF42BD, // 7
            0xFF4AB5, // 8
            0xFF52AD  // 9
            };
// key lables of white remote
 String whiteRemoteKey[] ={
            "CH-",
            "CH",
            "CH+",

            "|<<",
            ">>|",
            ">||",

            "-",
            "+",
            "EQ",

            "0",
            "100+",
            "200+",

            "1",
            "2",
            "3",

            "4",
            "5",
            "6",

            "7",
            "8",
            "9"
            };

// this is array holding codes for Black Remote when used with non-PCB version of receiver
 unsigned int blackRemote[] ={
            0xFF629D, // ^
            0xFF22DD,   // <
            0xFF02FD,  // OK
            0xFFC23D, // >
            0xFFA857, // v

            0xFF6897, // 1
            0xFF9867, // 2
            0xF0C41643, // 3

            0xFF30CF, // 4
            0xFF18E7, // 5
            0xFF7A85,  // 6

            0xFF10EF, // 7
            0xFF38C7, // 8
            0xFF5AA5,  // 9

            0xFF42BD, // *
            0xFF4AB5, // 0
            0xFF52AD  // #
            };

// this is array holding codes for Black Remote when used with PCB version of receiver
 unsigned int blackRemotePCB[] ={
            0x511DBB, // ^
            0x52A3D41F,   // <
            0xD7E84B1B,  // OK
            0x20FE4DBB, // >
            0xA3C8EDDB, // v


            0xC101E57B, // 1
            0x97483BFB, // 2
            0xF0C41643, // 3

            0x9716BE3F, // 4
            0x3D9AE3F7, // 5
            0x6182021B,  // 6

            0x8C22657B, // 7
            0x488F3CBB, // 8
            0x449E79F,  // 9

            0x32C6FDF7, // *
            0x1BC0157B, // 0
            0x3EC3FC1B  // #
            };

// Black remote key names
 String blackRemoteKey[] ={
            "^",
            "<",
            "OK",
            ">",
            "v",

            "1",
            "2",
            "3",

            "4",
            "5",
            "6",

            "7",
            "8",
            "9",

            "*",
            "0",
            "#"
            };

decode_results results;


/*
 * Permission granted to share this code given that this
 * note is kept with the code.
 * Disclaimer: this code is "AS IS" and for educational purposes only.
 *
 */

void setup() {
  // L293 Motor Control Code by Robojax.com 2018025
  Serial.begin(9600);// setup Serial Monitor to display information
  pinMode(P1A, OUTPUT);// define pin as OUTPUT for P1A
  pinMode(P2A, OUTPUT);// define pin as OUTPUT for P2A
  pinMode(EN12, OUTPUT);// define pin as OUTPUT for 1,2EN

  Serial.println("Robojax IR Decode");
  Serial.println("Motor Control with Remote");
  irrecv.enableIRIn(); // Start the receiver


  // L293 Motor Control Code by Robojax.com 20180810
}

void loop() {
  // L293d Motor Control Code with IR by Robojax.com 20180810

  if (irrecv.decode(&results)) {
    if(displayCode)Serial.println(results.value, HEX);
    robojaxValidateCode(results.value);// used the "robojaxValidateCode" bellow
    irrecv.resume(); // Receive the next value
  }
  delay(50);// 50 millisecond delay
  // L293d Motor Control Code with IR by Robojax.com 20180810
}//loop end


/*
 * function: robojaxValidateCode
 * validates the remote code and prints the correct key name
 * cd is the code passed from the loop
 * Written by A. S. for Robojax
 */
void robojaxValidateCode(int cd)
{

  // Robojax IR Remote decoder
  int found=0;

 if(type =='W' && !PCB)
 {
    // Robojax IR White Remote decoder
    // if type is set to 'W' (white remote) and PCB=0 then check White remote code
      for(int i=0; i< sizeof(whiteRemote)/sizeof(int); i++)
      {
        if(whiteRemote[i] ==cd)
        {

          Serial.print("Key pressed:");
          Serial.println(whiteRemoteKey[i]);
          motorAction(whiteRemoteKey[i]);// take action
          found=1;
        }// if matched
      }// for
 }else if(type =='W' && PCB){
    // Robojax IR White Remote decoder
    // if type is set to 'W' (white remote) and PCB=1 then check White remote code
      for(int i=0; i< sizeof(whiteRemotePCB)/sizeof(int); i++)
      {
        if(whiteRemotePCB[i] ==cd)
        {

          Serial.print("Key pressed:");
          Serial.println(whiteRemoteKey[i]);
          motorAction(whiteRemoteKey[i]);// take action
          found=1;
        }// if matched
      }// for
 }else if(type =='B' && PCB){
    // Robojax IR Black Remote decoder
       // if type is set to 'B' (black remote) and PCB=1 then check Black remote code
       for(int i=0; i< sizeof(blackRemotePCB)/sizeof(int); i++)
      {
        // Robojax IR black Remote decoder
        if(blackRemotePCB[i] ==cd)
        {

          Serial.print("Key pressed:");
          Serial.println(blackRemoteKey[i]);
         motorAction(blackRemoteKey[i]);// take action
          found=1;
        }// if matched
      }// for
 }else{

      // if type is set to 'B' (black remote) and PCB =0 then check Black remote code
       for(int i=0; i< sizeof(blackRemote)/sizeof(int); i++)
      {
        // Robojax IR black Remote decoder
        if(blackRemote[i] ==cd)
        {

          Serial.print("Key pressed:");
          Serial.println(blackRemoteKey[i]);
          motorAction(blackRemoteKey[i]);// take action

          found=1;
        }// if matched
      }// for
 }// else
  if(!found){
    if(cd !=0xFFFFFFFF)
      {
    Serial.println("Key unknown");
      }
  }// found
}// robojaxValidateCode end

/*
 *
 * motorAction()
 * receives string "value" as input and based on the settings,
 * turns motor CW, CCW or STOP
 */
void motorAction(String value)
{
  // Robojax IR motor control
   if(value == RIGHT)
   {
    L293D('R',1);// rotate motor to the right (CCW)
   }

   if(value == LEFT)
   {
    L293D('L',1);// rotate motor to the left (CW)
   }

   if(value == STOP)
   {
    L293D('R',0);// stop motor
   }
}//motorAction end


/*
 * L293D(char dir, int en)
 * dir is character either L for CW direction
 *  or R for CCW direction
 *  en is integer 1 to rotate, 0 for stop
 */
void L293D(char dir, int en)
{
  if(dir =='L')
  {
    if(en ==0){
       Serial.println("CW Motor Stopped");
    }else{
       Serial.println("Rotating CW");
    }
    digitalWrite(EN12 ,en);// Enable 1A and 2A
    digitalWrite(P1A,HIGH);// send + or HIGH signal to P1A
    digitalWrite(P2A,LOW);// send - or LOW signal to P2A

  }else{
    if(en ==0){
       Serial.println("CCW Motor Stopped");
    }else{
       Serial.println("Rotating CCW");
    }
    digitalWrite(EN12 ,en);// Disable 1A and 2A
    digitalWrite(P1A,LOW);// send + or HIGH signal to P1A
    digitalWrite(P2A,HIGH);// send - or LOW signal to P2A
  }
}//L293D end++
/*
* This is the Arduino code for L293d DC motor Driver
* watch LE18-D80NK video for details https://youtu.be/MrYsmAwzfrM
* Code is available at http://robojax.com/learn/arduino
*
* Written by Ahmad S. for Robojax.com on
* August 9, 2018 at 22:03 in Ajax, Ontario, Canada
*/
// DC motor 1 control
#define P1A 2 // define pin 2 as for P1A
#define P2A 7 // define pin 7 as for P2A
#define EN12 8 // define pin 8 as for 1,2EN enable
/*
* Permission granted to share this code given that this
* note is kept with the code.
* Disclaimer: this code is "AS IS" and for educational purposes only.
*
*/
void setup() {
// L293 Motor Control Code by Robojax.com 2018025
Serial.begin(9600);// setup Serial Monitor to display information
pinMode(P1A, OUTPUT);// define pin as OUTPUT for P1A
pinMode(P2A, OUTPUT);// define pin as OUTPUT for P2A
pinMode(EN12, OUTPUT);// define pin as OUTPUT for 1,2EN
// L293 Motor Control Code by Robojax.com 2018025
}
void loop() {
// L293 Motor Control Code by Robojax.com 2018025
L293D_con('L',1);
delay(4000);
L293D_con('L',0);
delay(2000);
L293D_con('R',1);
delay(4000);
L293D_con('R',0);
delay(2000);
Serial.println("=========== Loop done");
delay(500);
// L293 Motor Control Code by Robojax.com 2018025
}
void L293D_con(char dir, int en)
{
if(dir =='L')
{
if(en ==0){
Serial.println(" CW Motor Stopped");
}else{
Serial.println(" Rotating CW");
}
digitalWrite(EN12 ,en);// Enable 1A and 2A
digitalWrite(P1A,HIGH);// send + or HIGH signal to P1A
digitalWrite(P2A,LOW);// send - or LOW signal to P2A
}else{
if(en ==0){
Serial.println(" CCW Motor Stopped");
}else{
Serial.println(" Rotating CCW");
}
digitalWrite(EN12 ,en);// Disable 1A and 2A
digitalWrite(P1A,LOW);// send + or HIGH signal to P1A
digitalWrite(P2A,HIGH);// send - or LOW signal to P2A
}
}//L293D_con endالموارد والمراجع
-
خارجيتحميل مكتبة لأردوينو (جيتهب)github.com
ملفات📁
لا توجد ملفات متاحة.