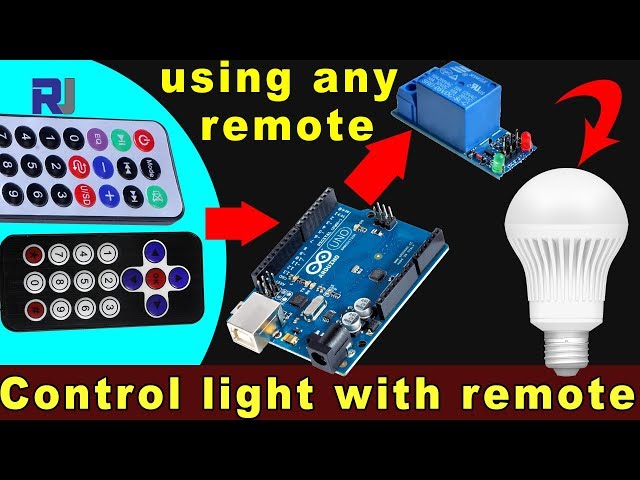
Control an AC bulb using any infrared remote with an Arduino and relay
In this tutorial, we will learn how to use an infrared remote control to operate an AC bulb via an Arduino and a relay module. This project involves decoding the signals from the remote and using them to control the relay, which in turn will switch the AC bulb on and off. By the end of this tutorial, you will be able to use any infrared remote to control your light fixture.
We will be using an infrared receiver to capture the signals from the remote, and the Arduino will interpret these signals to perform specific actions. The code provided will allow you to select the type of remote (black or white) and whether you are using a PCB or bare module for the receiver. Make sure to watch the associated video for additional details and clarifications (in video at 0:00).
Hardware Explained
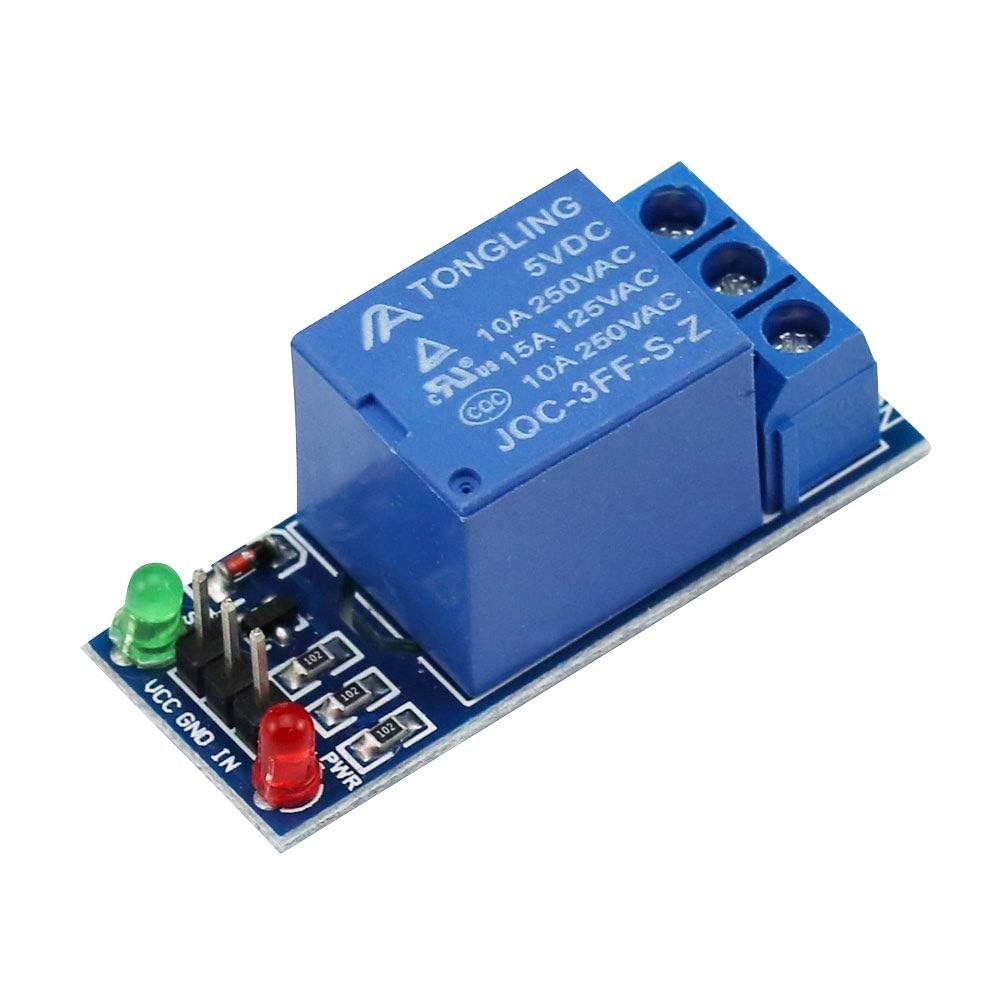
For this project, the main components include the Arduino board, an infrared receiver module, and a relay module. The infrared receiver is responsible for capturing the signals from the remote control and sending them to the Arduino. The relay module acts as a switch to control the AC bulb, allowing it to turn on and off based on the received signals.

The infrared receiver typically operates at a frequency of 38 kHz and can detect signals from a distance of approximately 10 to 15 meters. Once the Arduino receives the signal, it decodes it and uses the relay to control the power to the bulb.
Wiring Instructions

Begin wiring by connecting the infrared receiver module to the Arduino. The VCC pin of the receiver connects to the 5V pin on the Arduino, and the ground pin connects to a GND pin. The signal pin from the infrared receiver should be connected to digital pin 11 on the Arduino.
Next, connect the relay module. The control pin of the relay should be wired to digital pin 2 on the Arduino. Also, connect the relay's VCC and GND pins to the Arduino's 5V and GND, respectively. Finally, wire the AC bulb to the relay according to the relay's specifications to ensure safe operation.
Code Examples & Walkthrough
In the setup phase of the program, we initialize the serial communication and set up the relay pin. The identifier RECV_PIN is set to 11, which is where the infrared receiver's signal pin is connected. This allows us to receive data from the remote control.
void setup() {
  Serial.begin(9600);
  irrecv.enableIRIn(); // Start the receiver
  pinMode(RELAY_PIN, OUTPUT); // define a pin for relay as OUTPUT
  digitalWrite(RELAY_PIN, HIGH); // set relay to OFF at the beginning
}
In the loop function, we continuously check for incoming signals from the remote. When a signal is detected, the value is decoded, and the corresponding action is taken based on the key pressed.
void loop() {
  if (irrecv.decode(&results)) {
    Serial.println(results.value, HEX); // Print the received value
    robojaxValidateCode(results.value); // Validate the code
    irrecv.resume(); // Receive the next value
  }
  delay(100);
}
The robojaxValidateCode function checks the received code against known values for the remote. Depending on which key is pressed, it will execute the corresponding action using the relay.
void robojaxValidateCode(int cd) {
  if (type == 'W' && !PCB) {
    // Check White remote codes
    for (int i = 0; i < sizeof(whiteRemote) / sizeof(int); i++) {
      if (whiteRemote[i] == cd) {
        Serial.print("Key pressed: ");
        Serial.println(whiteRemoteKey[i]);
        relayAction(whiteRemoteKey[i]); // Take action
      }
    }
  }
}
In this function, the code checks if the pressed key corresponds to the defined array values. If a match is found, it calls the relayAction function to either turn the relay on or off, depending on the key pressed.
Demonstration / What to Expect
After completing the wiring and uploading the code, you can use your infrared remote to control the AC bulb. Press the designated keys on the remote, and the relay should activate or deactivate the bulb accordingly. Make sure to test each key to see its response (in video at 5:00).
Video Timestamps
- 00:00 Start
- 00:49 Introduction
- 02:00 Wiring and connection
- 05:27 Arduino code explained
- 09:51 Demonstration of controlling AC bulb with different remote
- 13:13 Using your TV remote to control AC bulb
Images

/*
 * Original library from - http://arcfn.com
 *
 * This Arduino code decodes any remote code and then you can control an AC load using a relay
 * sold on eBay for Arduino.
 * You have to select the type of your remote as Black or White in the code below
 * and also select your receiver 1838 as either a PCB or bare module. See video for details
 *
 * You have to watch this video: https://youtu.be/muAkBQb24NI
 * before proceeding with this code.
 *
 * Modified/Written by Ahmad Shamshiri
 * on July 31, 2018 at 20:33 in Ajax, Ontario, Canada
 * for Robojax.com
 * Watch video instructions for this code: https://youtu.be/j5kb0WBpD30
 * Get other Arduino codes from Robojax.com
 *
 */

#include <IRremote.h>

int RECV_PIN = 11;
const char type ='W';// W for white, B for black. Must keep single quotes like 'B' or 'W'
const boolean PCB = 1;// if receiver is PCB set to 1, if not set to 0. See video for details
boolean displayCode = true;// to display remote code. if not, set to false

//***** Relay settings begins
const int RELAY_PIN = 2;//
const String ON="3";// turn relay ON with + key on remote
const String OFF="1";// turn relay OFF with - key on remote
//**** Relay settings ends

IRrecv irrecv(RECV_PIN);


// this is array holding codes for White Remote when used with PCB version of receiver
unsigned int whiteRemotePCB[] ={
            0xE318261B, // CH-
            0x511DBB,   // CH
            0xEE886D7F,  // CH+

            0x52A3D41F, // |<<
            0xD7E84B1B, // >>|
            0x20FE4DBB, // >||

            0xF076C13B, // -
            0xA3C8EDDB, // +
            0x12CEA6E6, // EQ

            0xC101E57B, // 0
            0x97483BFB, // 100+
            0xF0C41643, // 200+

            0x9716BE3F, // 1
            0x3D9AE3F7, // 2
            0x6182021B, // 3

            0x8C22657B, // 4
            0x488F3CBB, // 5
            0x449E79F,  // 6

            0x32C6FDF7, // 7
            0x1BC0157B, // 8
            0x3EC3FC1B  // 9
            };

// this is array holding codes for White Remote when used with non-PCB version of receiver
unsigned int whiteRemote[] ={
            0xFFA25D, // CH-
            0xFF629D,   // CH
            0xFFE21D,  // CH+

            0xFF22DD, // |<<
            0xFF02FD, // >>|
            0xFFC23D, // >||

            0xFFE01F, // -
            0xFFA857, // +
            0xFF906F, // EQ

            0xFF6897, // 0
            0xFF9867, // 100+
            0xFFB04F, // 200+

            0xFF30CF, // 1
            0xFF18E7, // 2
            0xFF7A85, // 3

            0xFF10EF, // 4
            0xFF38C7, // 5
            0xFF5AA5,  // 6

            0xFF42BD, // 7
            0xFF4AB5, // 8
            0xFF52AD  // 9
            };
// key lables of white remote
 String whiteRemoteKey[] ={
            "CH-",
            "CH",
            "CH+",

            "|<<",
            ">>|",
            ">||",

            "-",
            "+",
            "EQ",

            "0",
            "100+",
            "200+",

            "1",
            "2",
            "3",

            "4",
            "5",
            "6",

            "7",
            "8",
            "9"
            };

// this is array holding codes for Black Remote when used with non-PCB version of receiver
 unsigned int blackRemote[] ={
            0xFF629D, // ^
            0xFF22DD,   // <
            0xFF02FD,  // OK
            0xFFC23D, // >
            0xFFA857, // v

            0xFF6897, // 1
            0xFF9867, // 2
            0xF0C41643, // 3

            0xFF30CF, // 4
            0xFF18E7, // 5
            0xFF7A85,  // 6

            0xFF10EF, // 7
            0xFF38C7, // 8
            0xFF5AA5,  // 9

            0xFF42BD, // *
            0xFF4AB5, // 0
            0xFF52AD  // #
            };

// this is array holding codes for Black Remote when used with PCB version of receiver
 unsigned int blackRemotePCB[] ={
            0x511DBB, // ^
            0x52A3D41F,   // <
            0xD7E84B1B,  // OK
            0x20FE4DBB, // >
            0xA3C8EDDB, // v


            0xC101E57B, // 1
            0x97483BFB, // 2
            0xF0C41643, // 3

            0x9716BE3F, // 4
            0x3D9AE3F7, // 5
            0x6182021B,  // 6

            0x8C22657B, // 7
            0x488F3CBB, // 8
            0x449E79F,  // 9

            0x32C6FDF7, // *
            0x1BC0157B, // 0
            0x3EC3FC1B  // #
            };

// Black remote key names
 String blackRemoteKey[] ={
            "^",
            "<",
            "OK",
            ">",
            "v",

            "1",
            "2",
            "3",

            "4",
            "5",
            "6",

            "7",
            "8",
            "9",

            "*",
            "0",
            "#"
            };

decode_results results;


void setup()
{
  Serial.begin(9600);
  // In case the interrupt driver crashes on setup, give a clue
  // to the user what's going on.
  Serial.println("Robojax IR Decode");
  Serial.println("Control Relay with Remote");
  irrecv.enableIRIn(); // Start the receiver

  pinMode(RELAY_PIN,OUTPUT);// define a pin for relay as OUTPUT
  digitalWrite(RELAY_PIN, HIGH);// set relay to OFF at the begining
}

void loop() {

  if (irrecv.decode(&results)) {
    if(displayCode)Serial.println(results.value, HEX);
    robojaxValidateCode(results.value);// used the "robojaxValidateCode" bellow
    irrecv.resume(); // Receive the next value
  }
  delay(100);
}

/*
 * function: robojaxValidateCode
 * validates the remote code and prints the correct key name
 * cd is code passed from the loop
 * Written by A. S. for Robojax
 */
void robojaxValidateCode(int cd)
{

  // Robojax IR Remote decoder
  int found=0;

 if(type =='W' && !PCB)
 {
    // Robojax IR White Remote decoder
    // if type is set to 'W' (white remote) and PCB=0 then check White remote code
      for(int i=0; i< sizeof(whiteRemote)/sizeof(int); i++)
      {
        if(whiteRemote[i] ==cd)
        {

          Serial.print("Key pressed:");
          Serial.println(whiteRemoteKey[i]);
          relayAction(whiteRemoteKey[i]);// take action
          found=1;
        }// if matched
      }// for
 }else if(type =='W' && PCB){
    // Robojax IR White Remote decoder
    // if type is set to 'W' (white remote) and PCB=1 then check White remote code
      for(int i=0; i< sizeof(whiteRemotePCB)/sizeof(int); i++)
      {
        if(whiteRemotePCB[i] ==cd)
        {

          Serial.print("Key pressed:");
          Serial.println(whiteRemoteKey[i]);
          relayAction(whiteRemoteKey[i]);// take action
          found=1;
        }// if matched
      }// for
 }else if(type =='B' && PCB){
    // Robojax IR Black Remote decoder
       // if type is set to 'B' (black remote) and PCB=1 then check Black remote code
       for(int i=0; i< sizeof(blackRemotePCB)/sizeof(int); i++)
      {
        // Robojax IR black Remote decoder
        if(blackRemotePCB[i] ==cd)
        {

          Serial.print("Key pressed:");
          Serial.println(blackRemoteKey[i]);
         relayAction(blackRemoteKey[i]);// take action
          found=1;
        }// if matched
      }// for
 }else{

      // if type is set to 'B' (black remote) and PCB =0 then check Black remote code
       for(int i=0; i< sizeof(blackRemote)/sizeof(int); i++)
      {
        // Robojax IR black Remote decoder
        if(blackRemote[i] ==cd)
        {

          Serial.print("Key pressed:");
          Serial.println(blackRemoteKey[i]);
          relayAction(blackRemoteKey[i]);// take action

          found=1;
        }// if matched
      }// for
 }// else
  if(!found){
    if(cd !=0xFFFFFFFF)
      {
    Serial.println("Key unknown");
      }
  }// found
}// robojaxValidateCode end

/*
 *
 * relayAction()
 * receives string "value" as input and based on the settings,
 * turns relay pin HIGH or LOW
 */
void relayAction(String value)
{
  // Robojax IR Relay control
   if(value == ON)
   {
    digitalWrite(RELAY_PIN, LOW);// Turn relay ON
    Serial.println("Relay Turned ON");
   }

   if(value == OFF)
   {
    digitalWrite(RELAY_PIN, HIGH);// Turn relay OFF
    Serial.println("Relay Turned OFF");
   }
}//relayAction end
Things you might need
-
Amazon
-
eBay
Resources & references
No resources yet.
Files📁
No files available.