Lesson 20/31: Using LCD1602 with Arduino display text | Robojax
Introduction
The LCD1602 is one of the most popular alphanumeric displays for Arduino projects, and when paired with an I2C backpack, it becomes incredibly easy to use. In this tutorial, you'll learn how to display text, numbers, and custom characters, as well as how to scroll text across the screen. We'll also show you how to combine the LCD with other sensors to create practical monitoring tools. This guide is part of a broader Arduino course and is designed to help you build useful devices for your home, school, or workshop.
Here are a few practical ideas for what you can build with this knowledge:
- A temperature and humidity monitor for a greenhouse or reptile enclosure.
- A simple voltmeter for checking battery levels in your projects.
- A distance sensor for a parking assistant or a smart trash can that shows how full it is.
Hardware Overview
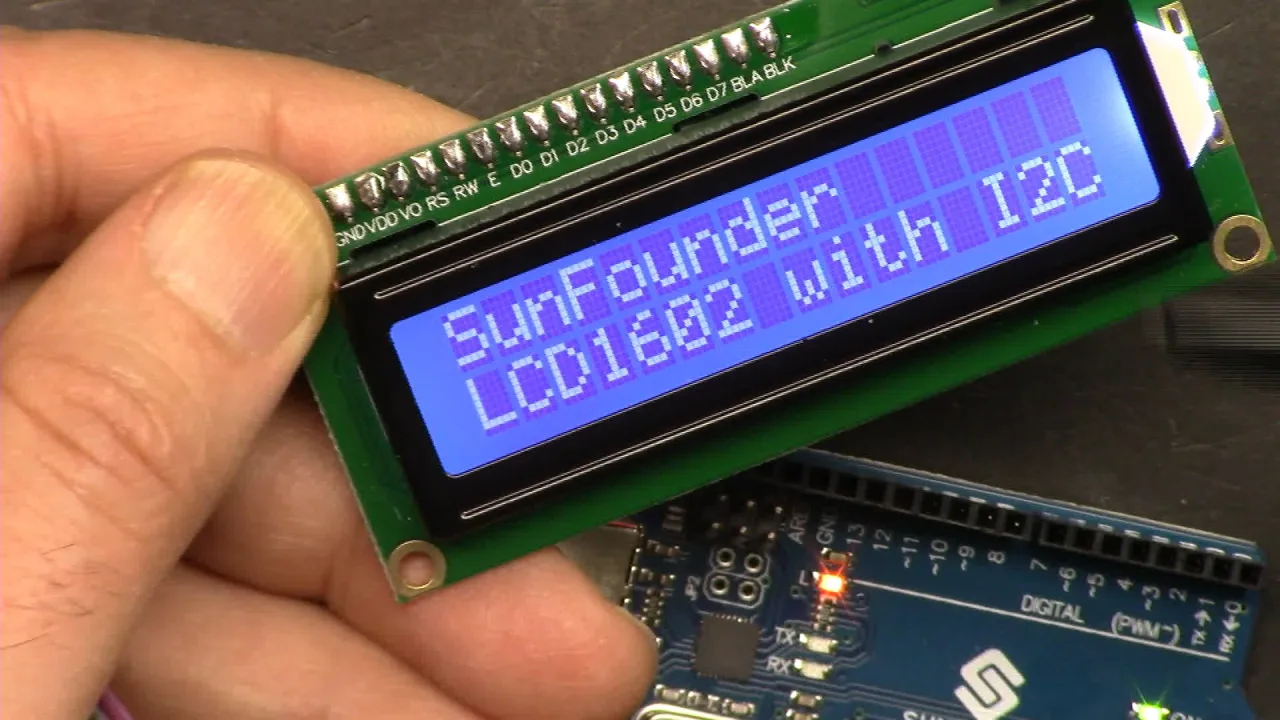
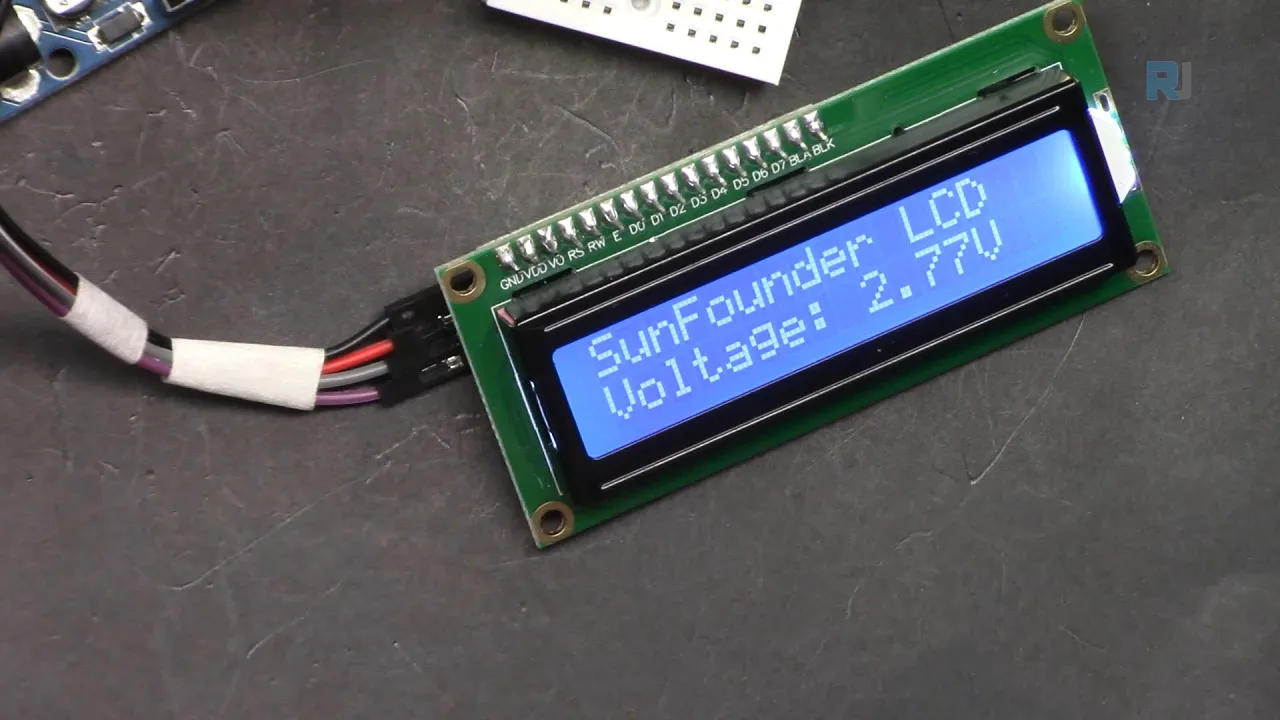
The LCD1602 is a 16-character by 2-line display. The module at the back is an I2C (or I²C) adapter, which reduces the number of wires needed from a standard parallel connection down to just four: Ground, VCC, SDA, and SCL. This makes wiring much simpler and frees up many digital pins on your Arduino.
The display features a backlight, which can be turned on or off via software. It also has a small potentiometer on the I2C module to adjust the contrast. If you power up the display and see nothing, simply rotate this screw until the text becomes visible (in video at 02:47).
There are different versions of this display, such as the LCD2004 which has 20 characters and 4 lines. The I2C address can also be changed by soldering the A0, A1, and A2 jumpers on the module (in video at 03:51). The default address is often 0x27, but it can vary, so it's always a good idea to run an I2C scanner to find the correct one for your specific module.
Hardware Components
To follow along with the main demonstration in this video, you will need the following components:
- Arduino Uno (or any compatible board)
- LCD1602 with I2C module
- Breadboard and jumper wires
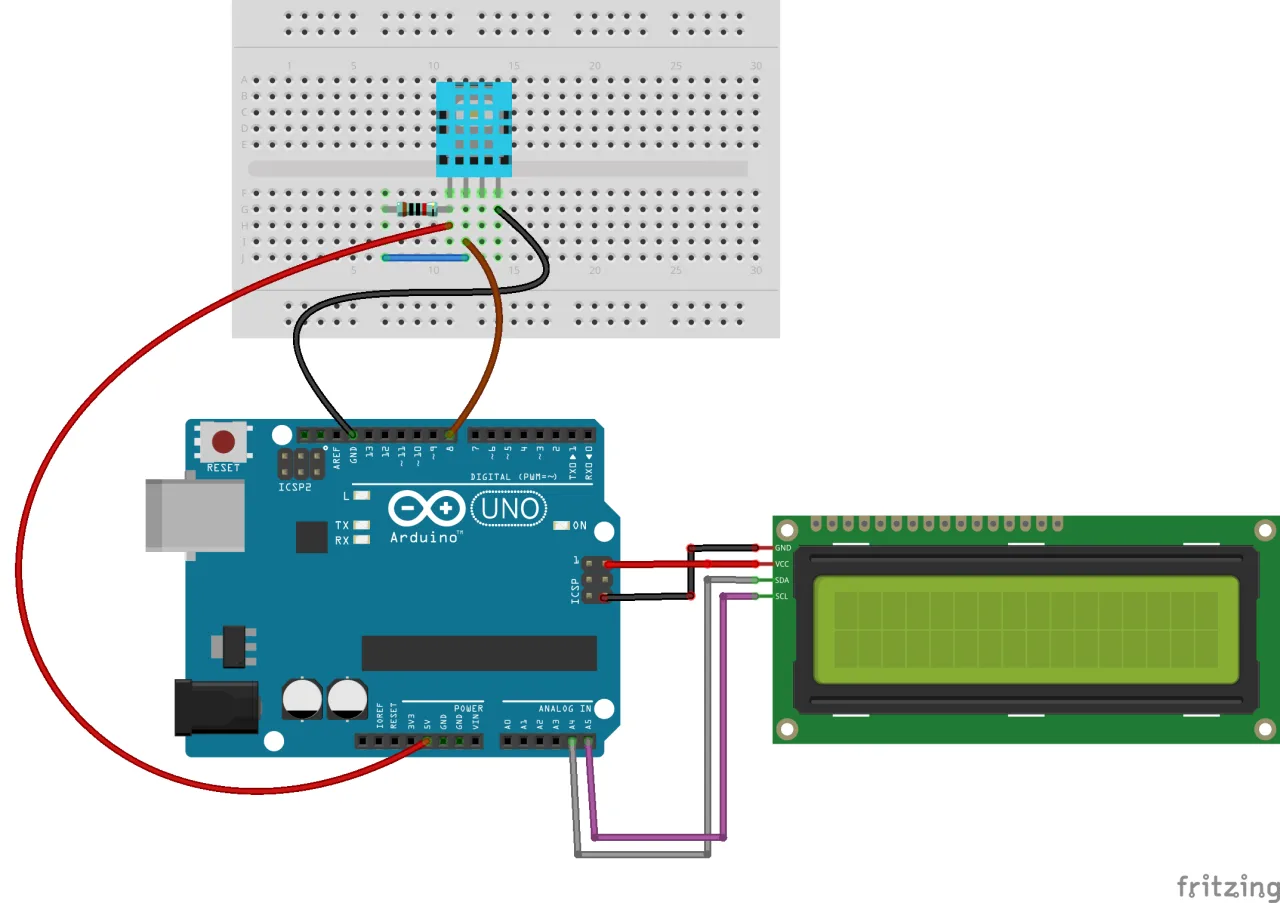
For the later sections, you will also need a DHT11 sensor, a potentiometer, or an ultrasonic sensor, depending on which project you want to build.
Wiring Guide
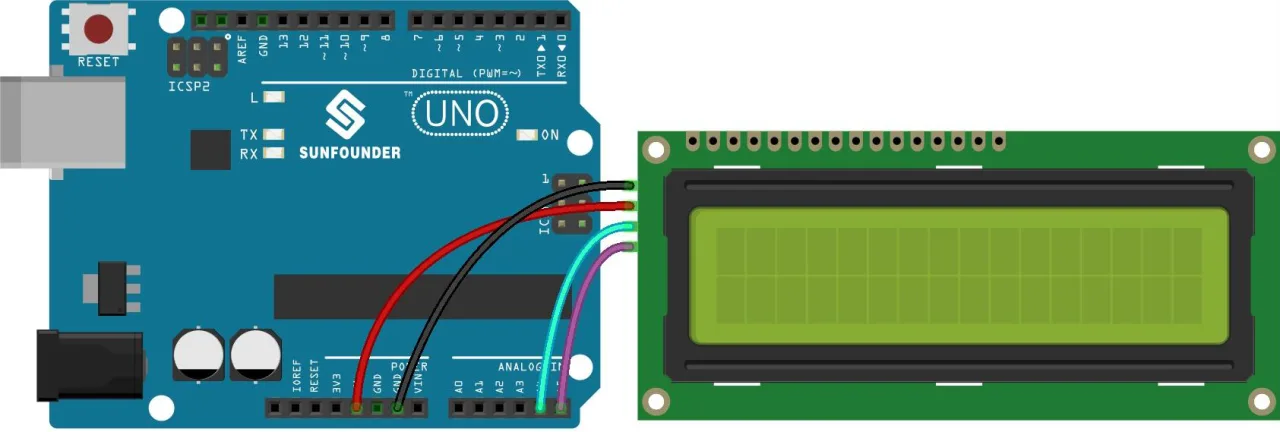
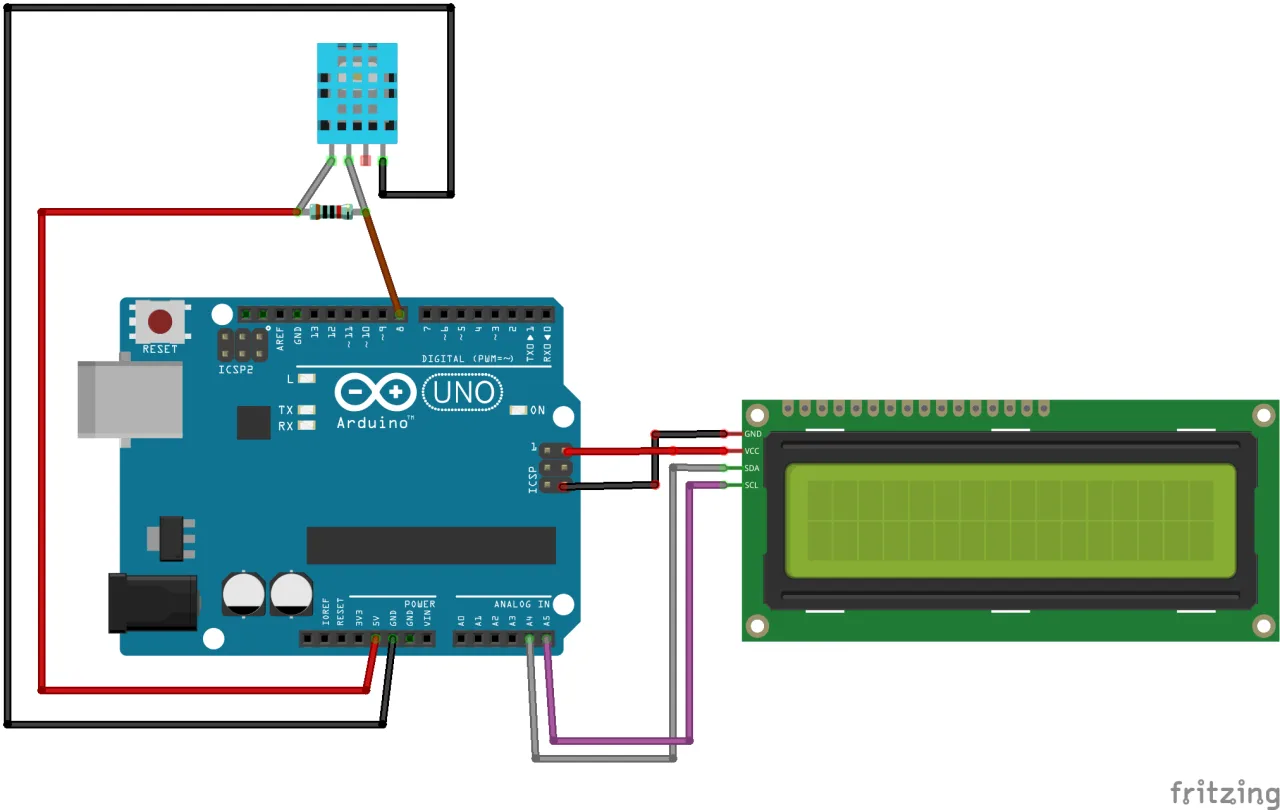
Connecting the LCD is straightforward. The wiring diagram shows the connections clearly.
Connect the pins on the I2C module to your Arduino as follows:
- GND to Arduino GND
- VCC to Arduino 5V
- SDA to Arduino A4
- SCL to Arduino A5
If your Arduino board has dedicated SDA and SCL pins, you can connect to those as well (in video at 05:47).
Installing the Library
This module requires the "Arduino Liquid Crystal I2C" library. You can download it from the link provided in the video description or from the Robojax website. Once downloaded, install it in your Arduino IDE by going to Sketch > Include Library > Add .ZIP Library and selecting the downloaded file (in video at 06:41).
Code Explanation
Since no code snippets were provided, we will explain the general structure of the code used in the video.
The code begins by including the necessary libraries: Wire.h for I2C communication and the LiquidCrystal_I2C.h library for the display. The key part is creating an object for the LCD. You will need to set the correct I2C address and the dimensions of your display:
// Set the LCD address to 0x27 for a 16 chars and 2 line display
LiquidCrystal_I2C lcd(0x27, 16, 2);
If your display shows nothing, you might need to change 0x27 to 0x3F or another address found by your I2C scanner. The 16 and 2 represent the number of columns and rows on your display.
In the setup() function, you initialize the LCD and turn on the backlight:
void setup() {
  lcd.init();
  lcd.backlight();
}
To print text, you use the lcd.setCursor(column, row) function to position the cursor, followed by lcd.print() to display your data. For example, to print on the second line, you would use lcd.setCursor(0, 1). The video also explains how to print special characters like the degree symbol by using lcd.write(223) (in video at 31:42).
Demonstration
The video demonstrates several key features of the LCD. First, it shows the basic "Hello World" text printing and how to use the lcd.scrollDisplayLeft() function to move text across the screen. Later, it combines the LCD with a DHT11 sensor to display temperature and humidity, with a potentiometer to display voltage, and with an ultrasonic sensor to display distance.
For the temperature display, the code reads the sensor and prints the value. To show a whole number without decimals, you can cast the float value to an integer, as shown in the video (in video at 32:21).
For the voltage meter, the code reads the analog value from the potentiometer, scales it to a voltage range of 0-5V, and displays it on the screen (in video at 34:31).
The final demonstration combines the LCD with an ultrasonic sensor to display the measured distance in centimeters (in video at 37:55).
Related projects from this video
This video also contains other project tutorials. You can find them here:
- Lesson 20/31: Displaying Temperature and humidity from DHT11 on LCD screen
- Lesson 20/31: Displaying voltage on LCD1602
Chapters
- [00:00] Introduction to LCD1602 and course overview
- [01:30] Hardware overview of the LCD1602 and I2C module
- [02:47] Adjusting display contrast and backlight
- [03:14] Pin connections and I2C address selection
- [05:28] Wiring diagram for the LCD
- [06:16] Installing the required library
- [07:24] Basic code for printing text
- [11:10] Blinking cursor example
- [13:46] Custom characters and printing special symbols
- [18:51] Serial display example
- [23:16] Scrolling text on the LCD
- [36:51] Combining LCD with an ultrasonic sensor
Images
/*
Lesson 20/31: Displaying text on LCD screen
Get this code and watch video Download and resource page https://robojax.com/RJT603
YouTube video https://www.youtube.com/watch?v=NXAswOc_2zg

*/
/*
This is code for LCD1602 Display with I2C module
 * watch the video for this code https://youtu.be/q9YC_GVHy5A

 * Permission granted to share this code given that this
 * note is kept with the code.
 * Disclaimer: this code is "AS IS" and for educational purpose only.
 * This library is based on work done by DFROBOT (www.dfrobot.com).
 */
/*
 *  This code has been modefied from the Arduino library
 *  Updated by Ahmad Nejrabi on Jan 20, 2018 at 11:09
 *  in Ajax, Ontario, Canada
 *  for Robojax.com
 *
 *  This is code for LCD1602 Display with I2C module
 *  which can display text on the screen.
 */
#include <Wire.h>
#include <LiquidCrystal_I2C.h>

// Set the LCD address to 0x27 for a 16 chars and 2 line display
LiquidCrystal_I2C lcd(0x27, 16, 2);


void setup()
{
  // Robojax code for LCD with I2C
  // initialize the LCD,
  lcd.begin();

  // Turn on the blacklight and print a message.
  //lcd.backlight();
  // Robojax code for LCD with I2C


}

void loop()
{

  lcd.clear();
  lcd.setCursor (0,0);
  lcd.print("SunFounder ");
  lcd.setCursor (0,1);
  lcd.write(244);


  delay(500);
 //end of loopcode Robojax code for LCD with I2C
}
Common Course Links
Common Course Files
Things you might need
-
AmazonBuy LCD1602-I2C from Amazonamzn.to
-
AmazonSunFounder Arduino Learning Kit on AliExpresss.click.aliexpress.com
-
Amazon
-
Amazon
-
Amazon
-
Amazon
-
eBayPurchase LCD1602-I2C from eBayebay.us
-
AliExpressPurchase 10pcs LCD1602-I2C from AliExpresss.click.aliexpress.com
Resources & references
-
DocumentationDocumentation for SunFounder 3 in 1 IoT/Smart Car/Learning Kitdocs.sunfounder.com
-
ExternalLCD library from RoboJax (ZIP)robojax.com
-
ExternalPurchase SunFounder's 3-in-1 Smart car learning kitsunfounder.com
Files📁
Arduino Libraries (zip)
-
SunFounder's 3-in-1 Smart Car learning kit source code
3in1-kit-main-v2.zip12.80 MB