This tutorial is part of: Digital Relative Humidity & Temperature Sensor HTU21D
Videos related to Digital Relative Humidity & Temperature Sensor HTU21D. Links to other videos are below this article.

Lesson 35: Using HTU21D Temperature Sensor with Arduino
Lesson 35: Using HTU21D Temperature Sensor with Arduino
In this tutorial, we will learn how to interface the HTU21D temperature sensor with an Arduino. This sensor allows for the accurate measurement of temperature and humidity using I2C communication, which makes it easy to integrate into various projects. By the end of this lesson, you will be able to read temperature and humidity values from the sensor and display them on the Serial Monitor.

For this project, we will be using the Adafruit library, which provides a straightforward way to communicate with the HTU21D sensor. You will learn how to set up the wiring, write the code, and understand key identifiers used in the program. If you need clarification on any part of the process, you can refer to the video (in video at 0:00).
Hardware Explained
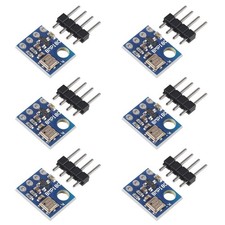
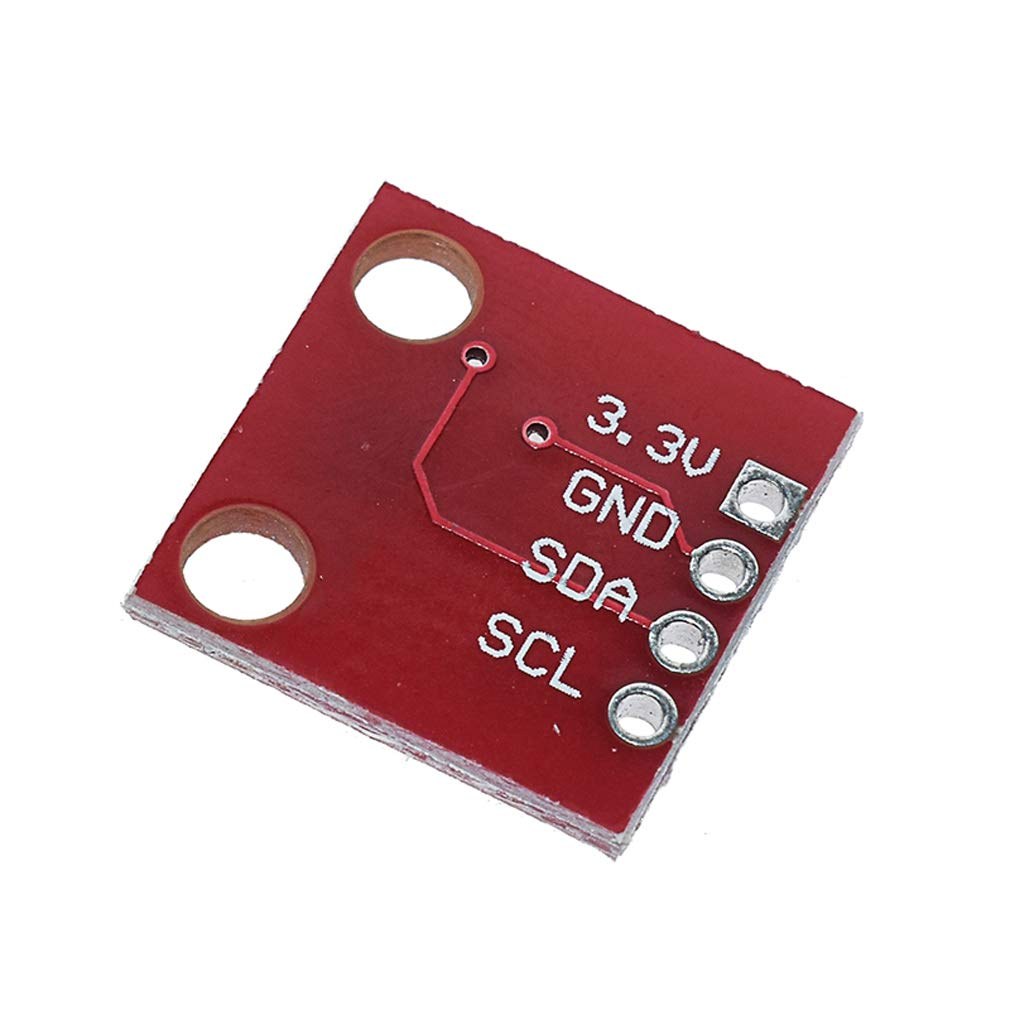
The HTU21D is a digital humidity and temperature sensor. It operates on a voltage range of 1.5V to 3.6V, making it suitable for both 3.3V and 5V systems. The sensor communicates over I2C, requiring only two wires for data transfer: Serial Data Line (SDA) and Serial Clock Line (SCL). The sensor has a very low power consumption, drawing only 0.02 µA when idle and up to 450 µA during measurements.
In addition to the sensor, you will need an Arduino board and some jumper wires to connect everything. The connections are simple: power the sensor, connect the data lines, and you are ready to go. Make sure your connections are secure to avoid any communication issues.
Datasheet Details
| Manufacturer | TE Connectivity |
|---|---|
| Part number | HTU21D-F |
| Logic/IO voltage | 1.5 - 3.6 V |
| Supply voltage | 3.3 V |
| Output current (typical) | 0.02 µA (idle), 450 µA (active) |
| Temperature range | -40 to +125 °C |
| Humidity range | 0 to 100 % RH |
| Resolution (temperature) | 0.01 °C |
| Resolution (humidity) | 0.04 % RH |
| Package | DFN-8 |
- Ensure proper power supply voltage (1.5 - 3.6 V) to avoid damage.
- Use pull-up resistors on SDA and SCL lines if necessary.
- Keep wiring short to minimize noise in I2C communication.
- Check connections carefully to avoid floating inputs.
- Use a heat sink if operating near maximum temperature limits.
Wiring Instructions

To wire the HTU21D sensor to your Arduino, begin by connecting the power pins. Connect the left pin of the sensor to the 3.3V output on the Arduino. The second pin should be connected to the ground (GND). Next, connect the SDA pin of the sensor to the Arduino's A4 pin, which serves as the data line for I2C communication. Finally, connect the SCL pin of the sensor to the A5 pin on the Arduino, which acts as the clock line. Ensure that all connections are secure to maintain reliable communication.
If you are using a different board, the SDA and SCL pins may vary, so check your board's specifications. In the video, alternative wiring options are briefly discussed (in video at 1:30).
Code Examples & Walkthrough
We will now look at the code that interfaces with the HTU21D sensor. First, we need to include the necessary libraries for I2C communication and the HTU21D sensor. The following excerpt shows the setup function:
void setup() {
  Serial.begin(9600);
  if (!htu.begin()) {
    Serial.println("Couldn't find sensor!");
    while (1);
  }
}
Here, we initialize the Serial Monitor at a baud rate of 9600. We then attempt to initialize the sensor with htu.begin(). If the sensor is not found, the program will print an error message and halt.
Next, we continuously read temperature and humidity values in the loop function:
void loop() {
    float temp = htu.readTemperature();
    float rel_hum = htu.readHumidity();
    Serial.print("Temperature: "); Serial.print(temp); Serial.println(" C");
    Serial.print("Humidity: "); Serial.print(rel_hum); Serial.println(" %");
    delay(500);
}
In this loop, we read the temperature using htu.readTemperature() and store it in the temp variable. Similarly, we read humidity with htu.readHumidity(). The values are then printed to the Serial Monitor every 500 milliseconds.
For a more structured approach, you can define functions to handle the readings. The full code will load below this article, providing you with complete access to all functionalities discussed.
Demonstration / What to Expect
When you upload the code to your Arduino and open the Serial Monitor, you should see continuous readings of temperature and humidity. The values will update every half second. If the sensor detects temperatures above its maximum limit of 125 °C, it may display zero or erroneous values. This is a common pitfall to watch for during testing (in video at 4:30).
Video Timestamps
- [00:00] Introduction
- [00:22] Sensor Overview
- [01:22] Datasheet Review
- [02:28] Wiring
- [03:03] Library Installation
- [04:05] Code Explanation (Part 1)
- [08:33] Code Explanation (Part 2)
- [07:34] Live Demonstration
Images

This tutorial is part of: Digital Relative Humidity & Temperature Sensor HTU21D
- Lesson 35-1: Using the HTU21D Temperature Sensor
- Lesson 35-2: Using the HTU21D Temperature Sensor Custom Code
- Lesson 36: Using the HTU21D Temperature Sensor with an LCD Arduino Step-by-Step Course
- Using Two More HTU21DF Humidity and Temperature Sensors with Arduino
- Displaying Temperature from an HTU21D on an LCD
- Displaying Temperature from an HTU21D as a Bar Graph on an LCD
- How to Use the HTU21DF Humidity and Temperature Sensor with Arduino (Basic Code)
- How to Use the HTU21DF Humidity and Temperature Sensor with Arduino (Custom Code)
++
/***************************************************
  This is an example for the HTU21D-F Humidity & Temperature Sensor

  Designed specifically to work with the HTU21D-F sensor from Adafruit
  ----> https://www.adafruit.com/products/1899

  These module use I2C to communicate; 2 pins are required to
  interface
 ****************************************************/

#include <Wire.h>
#include "Adafruit_HTU21DF.h"

// Connect Vin to 3-5VDC
// Connect GND to ground
// Connect SCL to I2C clock pin (A5 on UNO)
// Connect SDA to I2C data pin (A4 on UNO)

Adafruit_HTU21DF htu1 = Adafruit_HTU21DF();//create object for first HTU21DF sensor
Adafruit_HTU21DF htu2 = Adafruit_HTU21DF();//create object for second HTU21DF sensor
//Adafruit_HTU21DF htu3 = Adafruit_HTU21DF();//create object for third HTU21DF sensor (disabled, remove // from begging of code)

void setup() {
  Serial.begin(9600);
  Serial.println("HTU21D-F test for two modules");

  if (!htu.begin()) {
    Serial.println("Couldn't find sensor!");
    while (1);
  }
}

void loop() {
	//get value for sensor 1
    float temp1 = htu1.readTemperature();
    float rel_hum1 = htu1.readHumidity();

	//get value for sensor 2
    float temp2 = htu2.readTemperature();
    float rel_hum2 = htu2.readHumidity();

	//get value for sensor 3
    float temp3 = htu3.readTemperature();
    float rel_hum3 = htu3.readHumidity();

	//print values for sensor 1
    Serial.print("Sensor 1 Temp : "); Serial.print(temp1); Serial.print(" C");
    Serial.print("\t\t");
    Serial.print("Sensor 1 Humidity: "); Serial.print(rel_hum1); Serial.println(" %");

	//print values for sensor 2
    Serial.print("Sensor 2 Temp : "); Serial.print(temp2); Serial.print(" C");
    Serial.print("\t\t");
    Serial.print("Sensor 2 Humidity: "); Serial.print(rel_hum2); Serial.println(" %");

	//print values for sensor 3
    //Serial.print("Sensor 3 Temp : "); Serial.print(temp3); Serial.print(" C");
    //Serial.print("\t\t");
    //Serial.print("Sensor 3 Humidity: "); Serial.print(rel_hum3); Serial.println(" %");

    delay(500);
}
Things you might need
-
Amazon
-
eBayPurchase HTU21D from eBayebay.us
-
AliExpressPurchase HTU21D or SHT21 from AliExpresss.click.aliexpress.com
Resources & references
-
ExternalAdafruit HTU21D Library (GitHub)github.com
-
ExternalDifference between HTU21DF and HTU21D (image)robojax.com
-
External
-
ExternalHTU21D Datasheet (PDF)cdn-shop.adafruit.com
Files📁
Arduino Libraries (zip)
-
Adafruit HTU21DF library (Robojax.com)
robojax_HTU21DF_Adafruit_HTU21DF_Library-master.zip0.01 MB