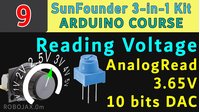
รหัส Arduino สำหรับ MPU-6050 พร้อมจอแสดงผล LCD1602 I2C
ในบทช่วยสอนนี้ เราจะเรียนรู้วิธีการเชื่อมต่อเซนเซอร์วัดความเร่งและไจโรสโคป MPU-6050 กับจอแสดงผล LCD1602 โดยใช้การสื่อสารแบบ I2C MPU-6050 จะให้ค่าการวัดมุมที่จะแสดงบนจอ LCD โปรเจกต์นี้จะช่วยให้คุณเห็นภาพมุมของ MPU-6050 แบบเรียลไทม์ เพิ่มความเข้าใจเกี่ยวกับข้อมูลเซนเซอร์และการเชื่อมต่อจอแสดงผล


เมื่อจบบทช่วยสอนนี้ คุณจะมีการตั้งค่าที่ทำงานได้ซึ่งแสดงมุม X, Y และ Z บนหน้าจอ LCD นี่เป็นวิธีที่ดีในการได้รับประสบการณ์จริงกับข้อมูลเซนเซอร์และเทคโนโลยีจอแสดงผลในโปรเจกต์ Arduino สำหรับคำอธิบายเพิ่มเติม โปรดตรวจสอบวิดีโอที่ (ในวิดีโอที่ 00:00)
อธิบายฮาร์ดแวร์
ส่วนประกอบหลักของโปรเจกต์นี้คือเซนเซอร์ MPU-6050 และโมดูลจอแสดงผล LCD1602 MPU-6050 เป็นเซนเซอร์อเนกประสงค์ที่รวมมาตรวัดความเร่ง 3 แกนและไจโรสโคป 3 แกนเข้าด้วยกัน ให้การวัดมุมแบบเรียลไทม์ มันสื่อสารผ่าน I2C ทำให้สามารถรวมเข้ากับ Arduino ได้อย่างราบรื่น
จอแสดงผล LCD1602 ใช้โปรโตคอล I2C เช่นกัน ซึ่งช่วยลดความซับซ้อนของการเดินสายและลดจำนวนพินที่จำเป็นสำหรับการสื่อสาร อินเทอร์เฟซ I2C อนุญาตให้เชื่อมต่ออุปกรณ์หลายตัวบนบัสเดียวกัน ทำให้มีประสิทธิภาพสำหรับโปรเจกต์ที่มีเซนเซอร์หรือส่วนประกอบหลายตัว
รายละเอียดจาก Datasheet
| ผู้ผลิต | InvenSense |
|---|---|
| หมายเลขชิ้นส่วน | MPU-6050 |
| แรงดันไฟฟ้าลอจิก/IO | 3.3 V / 5 V |
| แรงดันไฟฟ้าจ่าย | 3.3 V ถึง 5 V |
| อัตราข้อมูลเอาต์พุต | 1 kHz (สูงสุด) |
| ช่วงไจโรสโคป | ±250, ±500, ±1000, ±2000 °/วินาที |
| ช่วงมาตรวัดความเร่ง | ±2g, ±4g, ±8g, ±16g |
| แพ็คเกจ | QFN |
| หมายเหตุ/รุ่นต่างๆ | รวมถึง Digital Motion Processor (DMP) |
- ตรวจสอบที่อยู่ I2C (ค่าเริ่มต้นคือ 0x68)
- ตรวจสอบให้แน่ใจว่าแรงดันไฟฟ้าจ่ายถูกต้อง (3.3 V หรือ 5 V)
- ใช้ตัวต้านทาน pull-up สำหรับสาย SDA และ SCL หากไม่มีอยู่บนบอร์ดแล้ว
- พิจารณาใช้ตัวเก็บประจุแยกสัญญาณใกล้กับพินจ่ายไฟเพื่อความเสถียร
- ตรวจสอบการเชื่อมต่อสายไฟเพื่อหลีกเลี่ยงปัญหาการสื่อสาร
คำแนะนำการเดินสายไฟ

ในการเดินสายไฟ MPU-6050 และจอแสดงผล LCD1602 เข้ากับ Arduino ของคุณ ให้ทำตามการเชื่อมต่อเหล่านี้:
- เชื่อมต่อพิน
VCCของ MPU-6050 เข้ากับพิน5Vบน Arduino - เชื่อมต่อพิน
GNDของ MPU-6050 เข้ากับพินGNDบน Arduino - เชื่อมต่อพิน
SDAของ MPU-6050 เข้ากับพินA4บน Arduino - เชื่อมต่อพิน
SCLของ MPU-6050 เข้ากับพินA5บน Arduino - สำหรับจอแสดงผล LCD1602 ให้เชื่อมต่อพิน
VCCเข้ากับ5Vบน Arduino - เชื่อมต่อพิน
GNDของ LCD1602 เข้ากับพินGNDบน Arduino - เชื่อมต่อพิน
SDAของ LCD1602 เข้ากับพินA4เดียวกันที่ใช้สำหรับ MPU-6050 - เชื่อมต่อพิน
SCLของ LCD1602 เข้ากับพินA5เดียวกันที่ใช้สำหรับ MPU-6050
ตรวจสอบการเชื่อมต่อของคุณอีกครั้ง เนื่องจากการเดินสายที่ไม่ถูกต้องอาจทำให้อุปกรณ์ทำงานผิดปกติหรือไม่สามารถสื่อสารได้อย่างถูกต้อง
ตัวอย่างโค้ดและคำอธิบาย
โค้ดเริ่มต้นด้วยการรวมไลบรารีที่จำเป็นสำหรับ MPU-6050 และจอ LCD ตัวอย่างต่อไปนี้แสดงวิธีการเริ่มต้น MPU-6050:
MPU6050 mpu6050(Wire);ที่นี่ เราสร้างออบเจกต์ MPU6050 ซึ่งจะใช้ในการอ่านข้อมูลจากเซนเซอร์ ถัดไป เราจำเป็นต้องตั้งค่าอุปกรณ์ในฟังก์ชัน setup():
void setup() {
  Serial.begin(9600);
  Wire.begin();
  mpu6050.begin();
  mpu6050.calcGyroOffsets(true);
  lcd.begin();
  lcd.backlight();
}
โค้ดนี้เริ่มต้นการสื่อสารแบบอนุกรม บัส I2C และเซนเซอร์ MPU-6050 นอกจากนี้ยังเริ่มต้น LCD และเปิดไฟแบ็คไลท์ ลูปประกอบด้วยลอจิกในการอัปเดตและแสดงมุม:
void loop() {
  mpu6050.update();
  lcd.clear();
  lcdDisplay(0, 0, "X:", 2, 0, mpu6050.getAngleX());
  lcdDisplay(13, 0, "Y:", 0, 1, mpu6050.getAngleY());
  lcdDisplay(7, 1, "Z:", 9, 1, mpu6050.getAngleZ());
  delay(100);
}
ในลูปนี้ มุมสำหรับ X, Y และ Z จะถูกอัปเดตและแสดงบน LCD ฟังก์ชัน lcdDisplay() ถูกใช้เพื่อจัดรูปแบบเอาต์พุตอย่างถูกต้อง คุณสามารถหาโค้ดเต็มได้ที่โหลดไว้ด้านล่างบทความ
การสาธิต / สิ่งที่คาดหวัง
เมื่อการตั้งค่าเสร็จสมบูรณ์และอัปโหลดโค้ดแล้ว คุณควรเห็นมุมสำหรับ X, Y และ Z แสดงบน LCD แบบเรียลไทม์ หากทุกอย่างเชื่อมต่ออย่างถูกต้อง จอแสดงผลจะรีเฟรชทุก 100 มิลลิวินาที โดยแสดงทิศทางปัจจุบันของ MPU-6050
ข้อผิดพลาดทั่วไปรวมถึงการตรวจสอบให้แน่ใจว่าการเชื่อมต่อ I2C ถูกต้องและแหล่งจ่ายไฟมีความเสถียร หาก MPU-6050 ไม่ได้รับการเริ่มต้นอย่างถูกต้อง คุณอาจเห็นข้อมูลที่ไม่ถูกต้องหรือไม่มีข้อมูลบน LCD (ในวิดีโอที่ 01:15)
ภาพ


/*
 *
 * This code is basic usage of the MPU-6050 accelerometer and gyroscope.
 * Running this code, you will get angles only.
 * The angles at X, Y, and Z are displayed on the LCD1602-I2C display module.
 *
 * Library and code have been taken from:
 * https://github.com/tockn/MPU6050_tockn
 *
 * Updated by Ahmad Shamshiri on July 05, 2018 at 22:19 in Ajax, Ontario, Canada
 * for Robojax.com
 * Get this code from Robojax.com
 * Watch video instructions for this code at: https://youtu.be/uIz6WIis4dc
 *
 * You will need to watch two videos before following the instructions in this video:
 * 1-MPU6050 Introduction video and code: https://youtu.be/uhh7ik02aDc
 * 2-LCD1602 with I2C module video and code: https://youtu.be/q9YC_GVHy5A
 */
#include <MPU6050_tockn.h>
#include <Wire.h>

MPU6050 mpu6050(Wire);

#include <LiquidCrystal_I2C.h>
// Set the LCD address to 0x27 for a 16 chars and 2 line display
LiquidCrystal_I2C lcd(0x27, 16, 2);

void setup() {
  Serial.begin(9600);
  Wire.begin();
  mpu6050.begin();
  mpu6050.calcGyroOffsets(true);

  // initialize the LCD,
  lcd.begin();
  // Turn on the backlight and print a message.
  lcd.backlight();
}

void loop() {

  mpu6050.update();
  Serial.print("angleX : ");
  Serial.print(mpu6050.getAngleX());
  Serial.print("\tangleY : ");
  Serial.print(mpu6050.getAngleY());
  Serial.print("\tangleZ : ");
  Serial.println(mpu6050.getAngleZ());

  lcd.clear();// clearn previous values from screen
  lcdDisplay(
             // to print X:
             0, // character 0
             0, // line 0
             "X:",

             // to print AngleX
             2, // character 2
             0, // line 0
             mpu6050.getAngleX()
             );

  lcdDisplay(
             // to print Y:
             13, // character 13
             0, // line 0
             "Y:",

             // to print AngleY
             0, // character 0
             1, // line 1
             mpu6050.getAngleY()
             );

  lcdDisplay(
             // to print Z:
             7, // character 7
             1, // line 1
             "Z:",

             // to print AngleZ
             9, // character 9
             1, // line 0
             mpu6050.getAngleZ()
             );
   delay(100);
}// loop end

/*
 * lcdDisplay(int tc, int tr, String title, int vc, int vr, float value)
 * displays value and title on LCD1602
 * How to use:
 * If you want to display: "Voltage: 13.56mV" starting from the first character
 * on the second row.
 * use:
 * lcdDisplay(0, 1, "Voltage: ", 13.56)
 *
 * tc  is the character number  (0)
 * tr is the row number in the LCD (1)
 * title is the text ("Voltage:")
 * vc is the character number for the value
 * vr is the row number for the value
 * value is the value (13.56)
 */
void lcdDisplay(int tc, int tr, String title, int vc, int vr, float value)
{
   // Robojax.com MPU6050 Demo
   lcd.setCursor (tc,tr); //
   lcd.print(title);

   lcd.setCursor (vc,vr); //
   lcd.print(value);

}
สิ่งที่คุณอาจต้องการ
-
อเมซอนBuy LCD1602-I2C from Amazonamzn.to
-
อเมซอนPurchase MPU-6050 from Amazonamzn.to
-
อีเบย์Purchase LCD1602-I2C from eBayebay.us
-
อาลีเอ็กซ์เพรสPurchase 10pcs LCD1602-I2C from AliExpresss.click.aliexpress.com
แหล่งข้อมูลและเอกสารอ้างอิง
-
ภายนอกManufacturer websiteinvensense.com
ไฟล์📁
ไลบรารี Arduino (zip)
-
ไลบรารี LCD1602 LCD Arduino จาก Robojax
robojax-LCD1602-I2C-library-master.zip0.01 MB -
ไลบรารี Arduino สำหรับ MPU9250
robojax-MPU9250-master.zip3.38 MB
ไฟล์ Fritzing
-
โมดูล LCD LCD1602-I2C แบบ 4 สาย
LCD1602-I2C.fzpz0.01 MB -
บอร์ด MPU-6050 GY-521
MPU-6050 Board GY-521.fzpz0.01 MB
ไฟล์อื่น ๆ
-
MPU6050_tockn-masterไลบรารี Arduino สำหรับโมดูลมาตรความเร่งและไจโรสโคป MPU6050 ให้ฟังก์ชันสำหรับอ่านข้อมูลความเร่ง ไจโร และอุณหภูมิ พร้อมการปรับเทียบและการคำนวณมุม ออกแบบมาเพื่อการรวมเข้ากับโครงการตรวจจับการเคลื่อนไหวได้ง่าย
robojax-MPU6050_tockn-master.zip