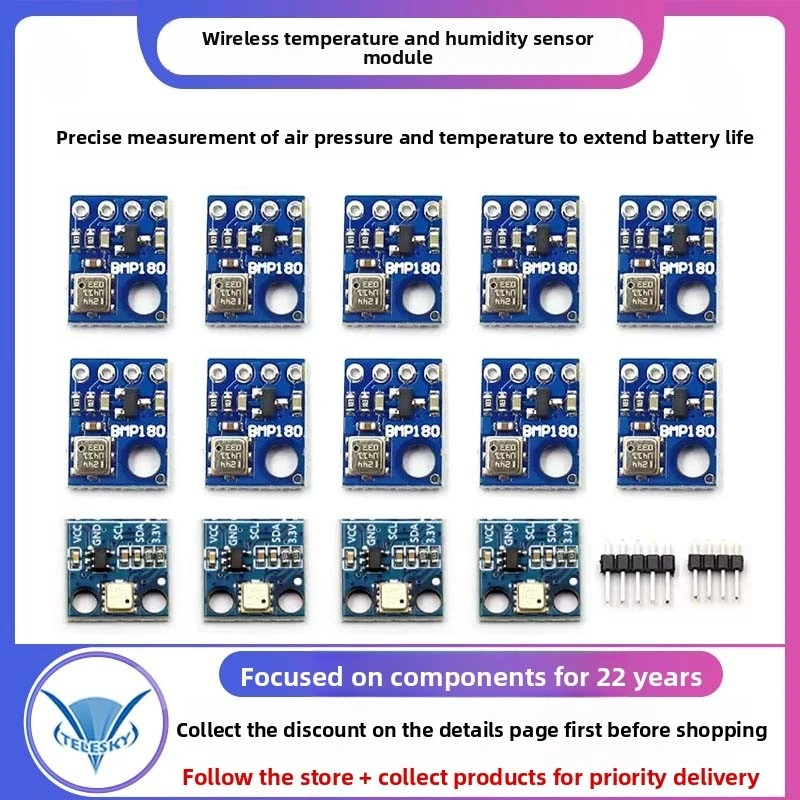
เซนเซอร์วัดอุณหภูมิและความดันบรรยากาศ BMP180 สำหรับ Arduino
เซนเซอร์ BMP180 เป็นอุปกรณ์อเนกประสงค์ที่ใช้วัดอุณหภูมิและความดันบรรยากาศ ทำให้เหมาะสำหรับการใช้งานต่างๆ เช่น การตรวจสอบสภาพอากาศและการวัดระดับความสูง ในบทช่วยสอนนี้ เราจะเชื่อมต่อเซนเซอร์ BMP180 เข้ากับ Arduino อ่านข้อมูลอุณหภูมิและความดัน และแสดงผลลัพธ์ เมื่อสิ้นสุดโปรเจกต์นี้ คุณจะสามารถอ่านค่าอุณหภูมิได้อย่างแม่นยำทั้งในหน่วยเซลเซียสและฟาเรนไฮต์ รวมถึงค่าความดันในหน่วยมิลลิบาร์และนิ้วปรอท

เพื่อให้เข้าใจแนวคิดและขั้นตอนการเขียนโค้ดอย่างชัดเจน ฉันแนะนำให้คุณชมวิดีโอที่เกี่ยวข้องสำหรับคำอธิบายโดยละเอียด (ในวิดีโอที่ 00:00)
อธิบายฮาร์ดแวร์
BMP180 เป็นเซนเซอร์ดิจิทัลที่สื่อสารผ่าน I2C ซึ่งช่วยให้เชื่อมต่อกับไมโครคอนโทรลเลอร์อย่าง Arduino ได้ง่าย มีขาทั้งหมดสี่ขา: Vn (แหล่งจ่ายไฟ), GND (กราวด์), SDA (สายข้อมูล) และ SCL (สายสัญญาณนาฬิกา) เซนเซอร์ทำงานในช่วงแรงดันไฟฟ้า 1.8 ถึง 3.6 โวลต์ แต่สามารถจ่ายไฟด้วยแหล่งจ่าย 5V ที่มีการควบคุมโดยใช้วงจรควบคุมแรงดันไฟฟ้า
ความสามารถของเซนเซอร์นี้ในการวัดความดันบรรยากาศทำให้เหมาะสำหรับการใช้งานที่ต้องการการประมาณระดับความสูงและการตรวจสอบสภาพอากาศ BMP180 ยังมีเซนเซอร์วัดอุณหภูมิในตัว ซึ่งจำเป็นสำหรับการอ่านค่าความดันที่แม่นยำ โดยการวัดอุณหภูมิก่อน เซนเซอร์สามารถชดเชยความแปรปรวนของอุณหภูมิที่ส่งผลต่อการอ่านค่าความดันได้
รายละเอียดจาก Datasheet
| ผู้ผลิต | Bosch |
|---|---|
| หมายเลขชิ้นส่วน | BMP180 |
| แรงดันไฟฟ้าลอจิก/IO | 1.8 - 3.6 V |
| แรงดันไฟฟ้าจ่าย | 1.8 - 5.0 V |
| กระแสเอาต์พุต (ทั่วไป) | 5 μA |
| กระแสสูงสุด (สูงสุด) | 1 mA |
| คำแนะนำความถี่ PWM | N/A |
| เกณฑ์ลอจิกอินพุต | N/A |
| แรงดันตก / RDS(on) / อิ่มตัว | N/A |
| ขีดจำกัดความร้อน | -40 ถึง 85 °C |
| แพ็คเกจ | 3.6 x 3.8 มม. |
| หมายเหตุ / รุ่นต่างๆ | ใช้พลังงานต่ำ |
- ตรวจสอบให้แน่ใจว่าระดับแรงดันไฟฟ้าเหมาะสมเพื่อหลีกเลี่ยงความเสียหายต่อเซนเซอร์
- ใช้ตัวต้านทาน pull-up บนสาย I2C หากจำเป็น
- เก็บเซนเซอร์ไว้ในสภาพแวดล้อมที่มีอุณหภูมิคงที่เพื่อการอ่านค่าที่แม่นยำ
- ปรับเทียบระดับความสูงตามตำแหน่งเฉพาะของคุณเพื่อผลลัพธ์ที่แม่นยำ
- ตรวจสอบแหล่งจ่ายไฟเพื่อให้แน่ใจว่าอยู่ภายในขีดจำกัดที่กำหนด
คำแนะนำการเดินสายไฟ

ในการเดินสายไฟเซนเซอร์ BMP180 เข้ากับ Arduino ของคุณ ให้เริ่มต้นโดยเชื่อมต่อขา Vn ของ BMP180 เข้ากับขา 5V บน Arduino จากนั้นเชื่อมต่อขา GND เข้ากับกราวด์ของ Arduino สำหรับการสื่อสาร I2C ให้เชื่อมต่อขา SDA เข้ากับขาอะนาล็อก A4 ของ Arduino และขา SCL เข้ากับ A5 ตรวจสอบให้แน่ใจว่าการเชื่อมต่อของคุณแน่นหนาเพื่อป้องกันปัญหาการสื่อสาร
หากคุณใช้ Arduino รุ่นอื่น โปรดทราบว่าขา I2C อาจแตกต่างกัน ตัวอย่างเช่น บน Mega2560 ขา SDA และ SCL คือขา 20 และ 21 ตามลำดับ ควรตรวจสอบแผนผังขาของบอร์ดเฉพาะของคุณเสมอเพื่อให้แน่ใจว่าทำงานได้อย่างถูกต้อง
ตัวอย่างโค้ดและคำอธิบาย
#include
#include

SFE_BMP180 pressure;
#define ALTITUDE 90.0 // ความสูงของสำนักงานใหญ่ Robojax
ในโค้ด เราเริ่มต้นด้วยการรวมไลบรารีที่จำเป็น: SFE_BMP180.h สำหรับเซนเซอร์และ Wire.h สำหรับการสื่อสาร I2C เราสร้างอินสแตนซ์ของออบเจกต์ BMP180 ชื่อ pressure และกำหนดความสูงที่เราจะทำการอ่านค่าโดยใช้ค่าคงที่ ALTITUDE
void setup() {
  Serial.begin(9600);
  if (pressure.begin()) Serial.println("BMP180 init success");
  else { Serial.println("BMP180 init fail\n\n"); while(1); }
}
ฟังก์ชัน setup เริ่มต้นการสื่อสารซีเรียลที่ 9600 บอดและพยายามเริ่มการทำงานของเซนเซอร์ BMP180 หากการเริ่มต้นล้มเหลว โปรแกรมจะเข้าสู่ลูปไม่มีที่สิ้นสุดเพื่อหยุดการทำงานเพิ่มเติม ซึ่งบ่งบอกถึงปัญหาการเชื่อมต่อ
void loop() {
  char status;
  double T, P, p0, a;

  status = pressure.startTemperature();
  if (status != 0) {
    delay(status);
    status = pressure.getTemperature(T);
    if (status != 0) {
      Serial.print("temperature: "); Serial.print(T,2);
    }
  }
}
ในฟังก์ชัน loop เราจะเริ่มต้นการอ่านอุณหภูมิโดยเรียกใช้ startTemperature() หากสำเร็จ เราจะรอให้การวัดเสร็จสมบูรณ์และดึงค่าอุณหภูมิด้วย getTemperature(T) โดยที่ T เก็บค่าอุณหภูมิ จากนั้นอุณหภูมิจะถูกพิมพ์ไปยังซีเรียลมอนิเตอร์
การสาธิต / สิ่งที่คาดหวัง
เมื่อจ่ายไฟและเดินสายอย่างถูกต้อง BMP180 จะอ่านและแสดงข้อมูลอุณหภูมิและความดันอย่างต่อเนื่องทุกๆ ห้าวินาที คุณควรเห็นค่าอุณหภูมิทั้งในหน่วยเซลเซียสและฟาเรนไฮต์ รวมถึงค่าความดันสัมบูรณ์และค่าความดันสัมพัทธ์ หากเซนเซอร์ทำงานอย่างถูกต้อง คุณจะได้รับการอ่านค่าโดยไม่มีข้อผิดพลาด ควรระวังปัญหาที่อาจเกิดขึ้น เช่น ระดับแรงดันไฟฟ้าที่ไม่ถูกต้องหรือการเชื่อมต่อที่หลวม ซึ่งอาจทำให้ไม่สามารถรับข้อมูลได้
ภาพ


/*
 *
 * Arduino Sketch for BMP180 Temperature and Barometric Pressure sensor for Arduino
 * to display temperature and pressure and altitude (calculated from pressure)

 *
 *
 * updated by Ahmad Shamshiri on June 27, 2018 at 17:30 in Ajax, Ontario, Canada
 * for Robojax.com

 * This code has been explained in this video: https://youtu.be/76zxBjIK3WM
 * This code has been downloaded from Robojax.com
 */
/* SFE_BMP180 library example sketch

This sketch shows how to use the SFE_BMP180 library to read the
Bosch BMP180 barometric pressure sensor.
https://www.sparkfun.com/products/11824

Like most pressure sensors, the BMP180 measures absolute pressure.
This is the actual ambient pressure seen by the device, which will
vary with both altitude and weather.

Before taking a pressure reading you must take a temperature reading.
This is done with startTemperature() and getTemperature().
The result is in degrees C.

Once you have a temperature reading, you can take a pressure reading.
This is done with startPressure() and getPressure().
The result is in millibar (mb) aka hectopascals (hPa).

If you'll be monitoring weather patterns, you will probably want to
remove the effects of altitude. This will produce readings that can
be compared to the published pressure readings from other locations.
To do this, use the sealevel() function. You will need to provide
the known altitude at which the pressure was measured.

If you want to measure altitude, you will need to know the pressure
at a baseline altitude. This can be average sealevel pressure, or
a previous pressure reading at your altitude, in which case
subsequent altitude readings will be + or - the initial baseline.
This is done with the altitude() function.

Hardware connections:

- (GND) to GND
+ (VDD) to 3.3V

(WARNING: do not connect + to 5V or the sensor will be damaged!)

You will also need to connect the I2C pins (SCL and SDA) to your
Arduino. The pins are different on different Arduinos:

Any Arduino pins labeled:  SDA  SCL
Uno, Redboard, Pro:        A4   A5
Mega2560, Due:             20   21
Leonardo:                   2    3

Leave the IO (VDDIO) pin unconnected. This pin is for connecting
the BMP180 to systems with lower logic levels such as 1.8V

Have fun! - Your friends at SparkFun.

The SFE_BMP180 library uses floating-point equations developed by the
Weather Station Data Logger project: http://wmrx00.sourceforge.net/

Our example code uses the "beerware" license. You can do anything
you like with this code. No really, anything. If you find it useful,
buy me a beer someday.

V10 Mike Grusin, SparkFun Electronics 10/24/2013
V1.1.2 Updates for Arduino 1.6.4 5/2015
*/

// Your sketch must #include this library, and the Wire library.
// (Wire is a standard library included with Arduino.):

#include <SFE_BMP180.h>
#include <Wire.h>

// You will need to create an SFE_BMP180 object, here called "pressure":

SFE_BMP180 pressure;

#define ALTITUDE 90.0 // Altitude of Robojax Headquarter (Ajax, Ontario, Canada)

void setup()
{
  Serial.begin(9600);
  Serial.println("REBOOT");

  // Initialize the sensor (it is important to get calibration values stored on the device).

  if (pressure.begin())
    Serial.println("BMP180 init success");
  else
  {
    // Oops, something went wrong, this is usually a connection problem,
    // see the comments at the top of this sketch for the proper connections.

    Serial.println("BMP180 init fail\n\n");
    while(1); // Pause forever.
  }
}

void loop()
{
  char status;
  double T,P,p0,a;

  // Loop here getting pressure readings every 10 seconds.

  // If you want sea-level-compensated pressure, as used in weather reports,
  // you will need to know the altitude at which your measurements are taken.
  // We're using a constant called ALTITUDE in this sketch:

  Serial.println();
  Serial.print("provided altitude: ");
  Serial.print(ALTITUDE,0);
  Serial.print(" meters, ");
  Serial.print(ALTITUDE*3.28084,0);
  Serial.println(" feet");

  // If you want to measure altitude, and not pressure, you will instead need
  // to provide a known baseline pressure. This is shown at the end of the sketch.

  // You must first get a temperature measurement to perform a pressure reading.

  // Start a temperature measurement:
  // If request is successful, the number of ms to wait is returned.
  // If request is unsuccessful, 0 is returned.

  status = pressure.startTemperature();
  if (status != 0)
  {
    // Wait for the measurement to complete:
    delay(status);

    // Retrieve the completed temperature measurement:
    // Note that the measurement is stored in the variable T.
    // Function returns 1 if successful, 0 if failure.

    status = pressure.getTemperature(T);
    if (status != 0)
    {
      // Print out the measurement:
      Serial.print("temperature: ");
      Serial.print(T,2);
      Serial.print(" deg C, ");
      Serial.print((9.0/5.0)*T+32.0,2);
      Serial.println(" deg F");

      // Start a pressure measurement:
      // The parameter is the oversampling setting, from 0 to 3 (highest res, longest wait).
      // If request is successful, the number of ms to wait is returned.
      // If request is unsuccessful, 0 is returned.

      status = pressure.startPressure(3);
      if (status != 0)
      {
        // Wait for the measurement to complete:
        delay(status);

        // Retrieve the completed pressure measurement:
        // Note that the measurement is stored in the variable P.
        // Note also that the function requires the previous temperature measurement (T).
        // (If temperature is stable, you can do one temperature measurement for a number of pressure measurements.)
        // Function returns 1 if successful, 0 if failure.

        status = pressure.getPressure(P,T);
        if (status != 0)
        {
          // Print out the measurement:
          Serial.print("absolute pressure: ");
          Serial.print(P,2);
          Serial.print(" mb, ");
          Serial.print(P*0.0295333727,2);
          Serial.println(" inHg");

          // The pressure sensor returns abolute pressure, which varies with altitude.
          // To remove the effects of altitude, use the sealevel function and your current altitude.
          // This number is commonly used in weather reports.
          // Parameters: P = absolute pressure in mb, ALTITUDE = current altitude in m.
          // Result: p0 = sea-level compensated pressure in mb

          p0 = pressure.sealevel(P,ALTITUDE); // we're at 90 meters (Boulder, CO)
          Serial.print("relative (sea-level) pressure: ");
          Serial.print(p0,2);
          Serial.print(" mb, ");
          Serial.print(p0*0.0295333727,2);
          Serial.println(" inHg");

          // On the other hand, if you want to determine your altitude from the pressure reading,
          // use the altitude function along with a baseline pressure (sea-level or other).
          // Parameters: P = absolute pressure in mb, p0 = baseline pressure in mb.
          // Result: a = altitude in m.

          a = pressure.altitude(P,p0);
          Serial.print("computed altitude: ");
          Serial.print(a,0);
          Serial.print(" meters, ");
          Serial.print(a*3.28084,0);
          Serial.println(" feet");
        }
        else Serial.println("error retrieving pressure measurement\n");
      }
      else Serial.println("error starting pressure measurement\n");
    }
    else Serial.println("error retrieving temperature measurement\n");
  }
  else Serial.println("error starting temperature measurement\n");

  delay(5000);  // Pause for 5 seconds.
}
แหล่งข้อมูลและเอกสารอ้างอิง
-
ภายนอกProduct details from the manufacturerbosch-sensortec.com
-
ภายนอกSparkFun BMP180 librarygithub.com
ไฟล์📁
ไลบรารี Arduino (zip)
-
BMP180 Arduino library
robojax-BMP180-Library.zip0.02 MB
แผ่นข้อมูล (pdf)
-
Bosch BMP180 Datasheet
https://ae-bst.resource.bosch.com/media/_tech/media/datasheets/BST-BMP180-DS000.pdf0.64 MB