AI Writes a Song and This ESP32 Teaches You to Play It
Ask an AI to write a tune, hear it played, then let the board teach you to play it
Pick a mood, tap WRITE, and an AI composes a short melody. The board plays it, lighting each key as it goes. Then tap LEARN and it turns into a teacher: it lights up one key at a time and waits for you to press it, note by note, until you have played the whole tune yourself.
922-This is AI Music Article (the current article)
923-The Piano project is here.
It is still a full 21-key piano at any moment - just play it.

Robojax_Makerfab at checkout on the MaTouch AI ESP32-S3 product page. It costs you nothing to use, and it helps support the free code and tutorials here.The screen
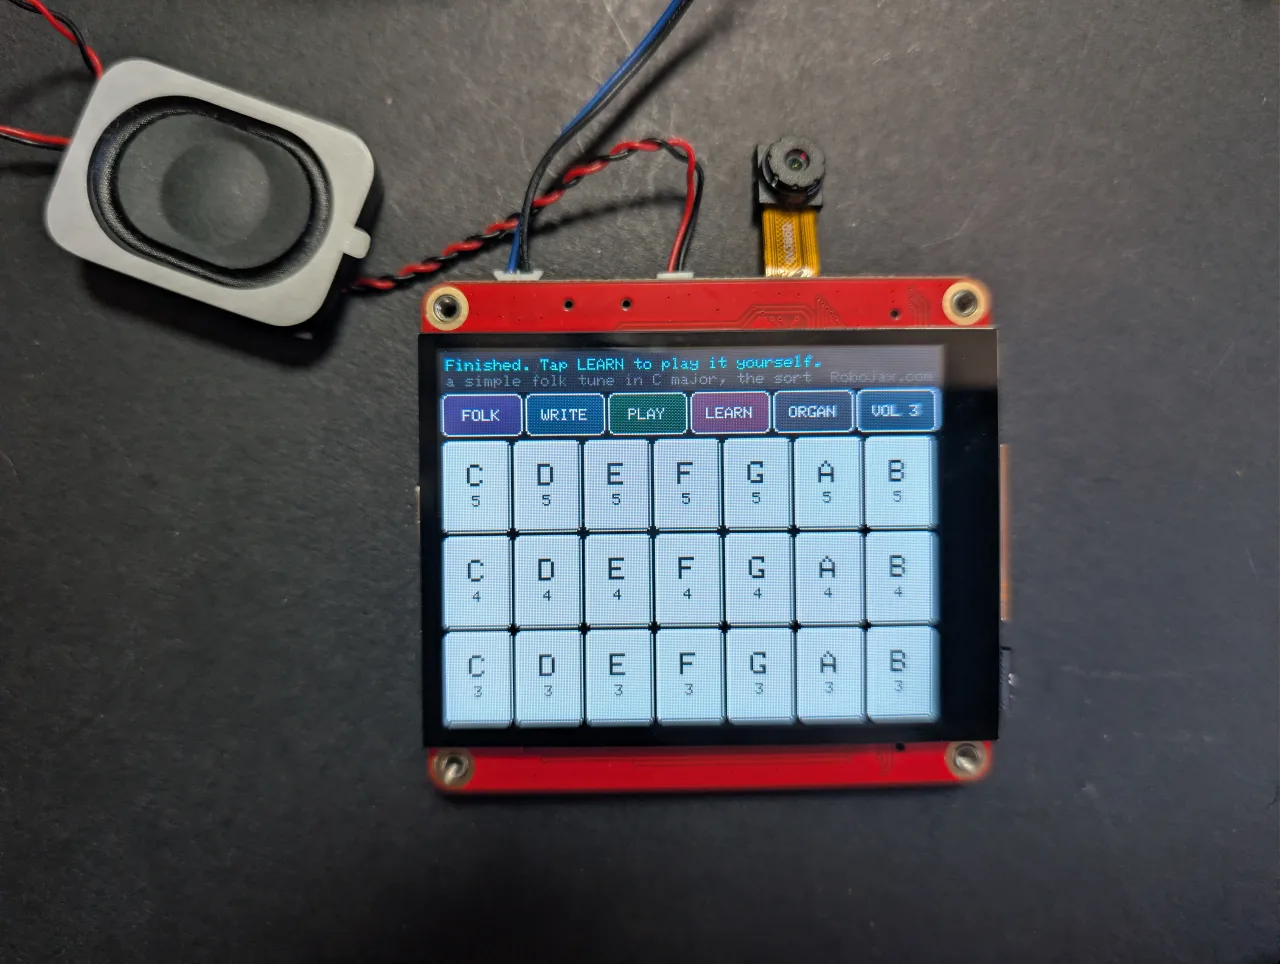

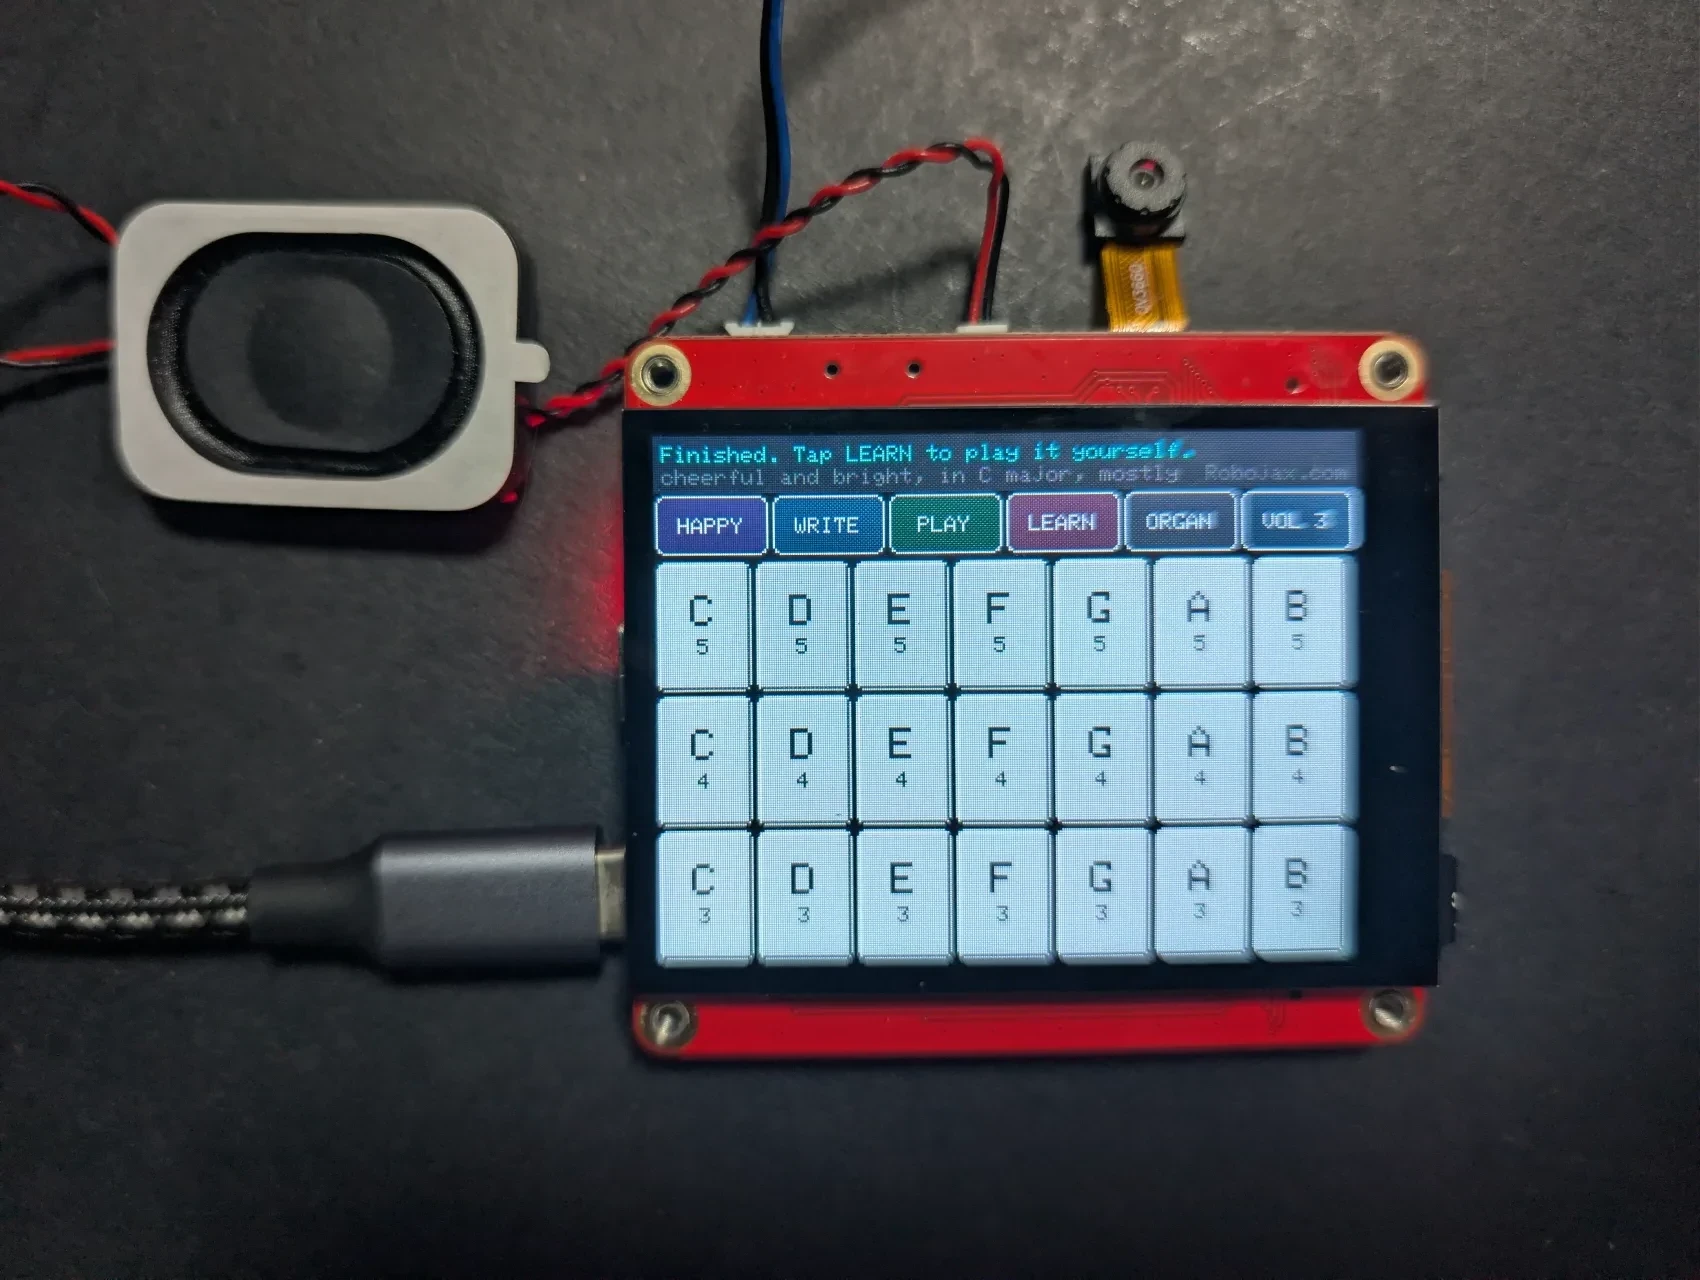
Six buttons across the top, then a 21-key keyboard - three rows of seven, C3 to B5. Unlike the piano project there is no black-and-white layout here, because the AI is restricted to the seven natural notes and the grid is what those notes look like.
| Button | What it does |
|---|---|
| STYLE | Cycles the mood: HAPPY, SAD, SPOOKY, FOLK, LULLABY. This is what gets sent to the AI. |
| WRITE | Asks the AI for a melody in that mood. Shows WAIT while it thinks, then plays what came back. |
| PLAY | Replays the melody currently loaded. Tap again to stop. |
| LEARN | Teaching mode - lights one key and waits for you. |
| WAVE | Tone colour: SOFT, ORGAN or BRIGHT. |
| VOL | Tap to step the volume 1 to 5. The label shows the level. |
The volume the board starts on is set by #define VOLUME near the top of the sketch, so you can compile in the level you prefer and still change it live.
What the AI actually generates
This is the part worth being precise about, because it is easy to overstate. The AI does not generate audio. Producing an actual waveform takes a large model and a graphics card; no microcontroller is doing that, and anyone claiming otherwise is playing a file that was rendered elsewhere.
What it generates is a list of notes, as ordinary text:
[{"n":"C4","ms":300},{"n":"E4","ms":300},{"n":"G4","ms":600}]The board parses that with ArduinoJson and plays it using the same synthesiser as the piano project. One short text request costs a fraction of a cent, and once a melody has arrived it can be replayed forever with the internet unplugged.
Why the prompt restricts the AI
The request tells the model it may only use the 21 notes that physically exist on this keyboard - naturals from C3 to B5, no sharps or flats. That is not a limitation of the synthesiser, which can play any frequency. It is there for two good reasons:
- every note it writes is one the LEARN mode can actually teach you, because there is a key for it
- staying in one key means the result always sounds musical, even when the model is having an uninspired day
Parsing an answer from a language model
Models like to be helpful, which here means wrapping the answer in markdown fences and adding a friendly sentence about what they wrote. The sketch asks firmly for bare JSON and then defensively takes everything between the first [ and the last ] anyway. Any note it cannot place on the keyboard is skipped, and the result is only accepted if at least four usable notes survived. Being tolerant of imperfect output is most of the work in any project that parses AI text.
The empty reply, and how to avoid it
One thing will catch you out if you change the model or the prompt. DeepSeek reasons before it answers, and that thinking is billed against the same max_tokens budget as the answer. Ask it something hard and it can spend the entire budget thinking, then return an empty reply - a successful request that contains nothing.
On this project that showed up as the harder moods failing while the easy ones worked. SPOOKY and LULLABY want a minor key, which is genuinely difficult when every sharp and flat is forbidden, so the model deliberated - and ran out. HAPPY in C major answered immediately.
There are two fixes and this sketch uses both. The request sends "thinking": {"type": "disabled"}, which turns the reasoning off entirely so the whole budget goes to the answer and the reply comes back much faster. And the prompt now tells the model how to sound minor without sharps - centre the melody on A or E, which uses the same notes.
finish_reason. length means it ran out of budget - raise MELODY_TOKENS. stop means the model chose to say nothing, which is a prompt problem instead.The teaching mode
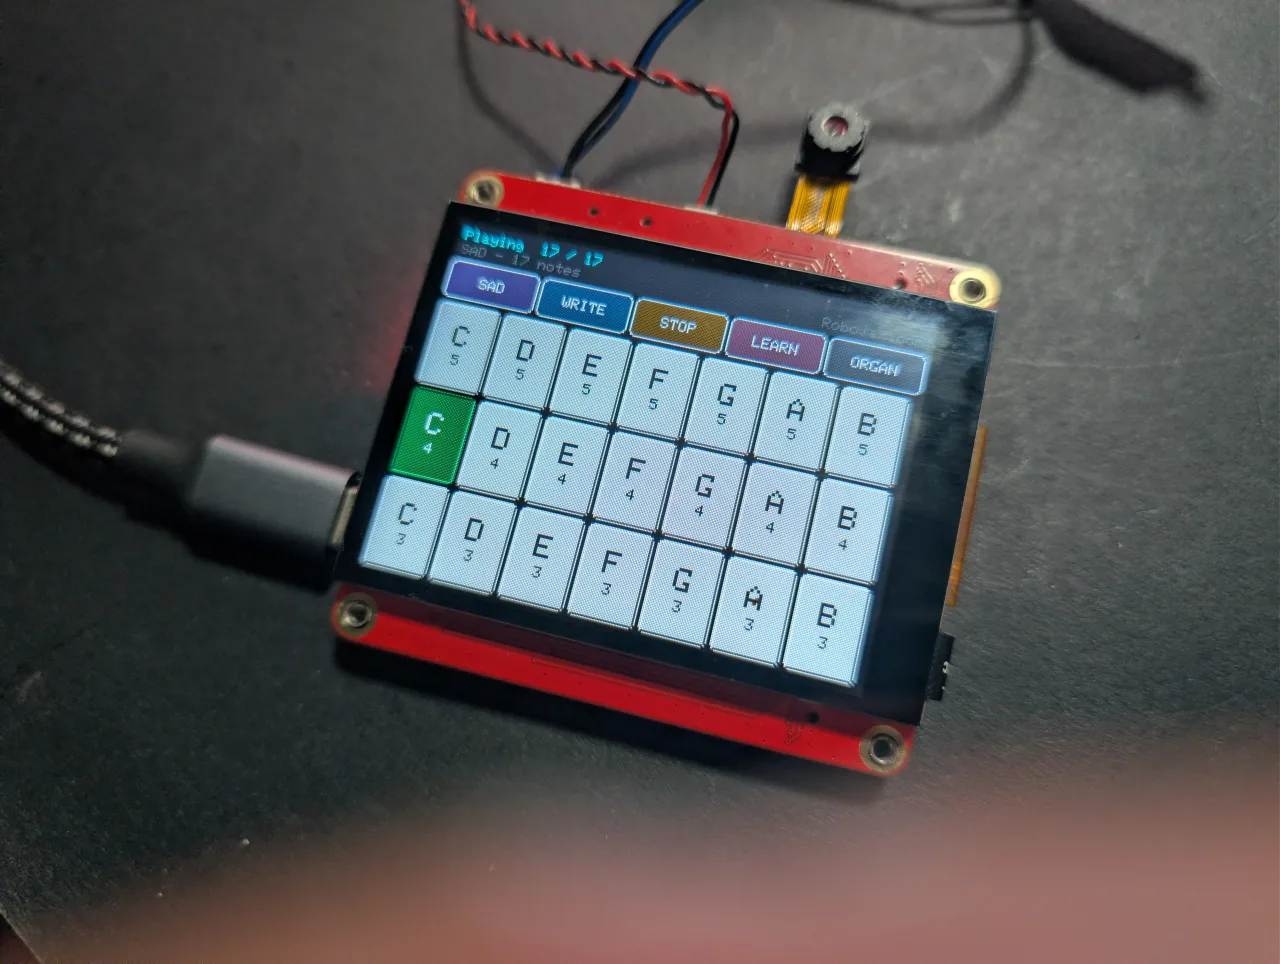
Tap LEARN and one key turns green. Press it and the board advances to the next note. Press the wrong key and it still sounds - it is a piano, after all - but it does not move on. The status bar counts your progress, and when you reach the end it tells you so.
There is no timing pressure and no score. It waits for you as long as you need, which is what makes it genuinely usable for learning a phrase rather than just a novelty.

It works without WiFi too
A tune is built into the sketch, so PLAY and LEARN work with no network at all. Only WRITE needs the internet - and it needs only a DeepSeek key. No Azure or OpenAI account is required for this project.
When you are testing, tap PLAY first: that confirms the audio path and the keyboard before any network is involved, so if WRITE later fails you already know where to look.

Ideas to take further
- Ask for a melody "in the style of a sea shanty" by editing the style list.
- Have it write a second phrase that answers the first.
- Save the melodies to the SD card so the board builds a songbook over time.
- Add the microphones from the voice assistant project so you can speak the request instead of tapping a preset.
About the MaTouch AI ESP32-S3 2.8" board
Every project on this page runs on the MaTouch AI ESP32-S3 2.8" TFT ST7789V from Makerfabs. It is an all-in-one board: a colour touchscreen, a 3 megapixel camera, two microphones and a real speaker amplifier, all driven by an ESP32-S3 with 8 MB of PSRAM. That combination is what makes these AI projects possible on a single board with nothing else attached.
The 8 MB of PSRAM matters more than any other number here. It is what lets the board hold a camera frame, a few seconds of recorded audio, or a base64-encoded photo in memory at the same time - none of which fits in the ESP32’s normal RAM.
Manufacturer documentation: Makerfabs wiki page.
Every other project for this board - the camera, offline face recognition, the AI voice assistant, AI vision and the drawing project - has its own tutorial. Links to all of them are below this article.
Key specifications
- Processor: ESP32-S3, dual core 240 MHz, WiFi 2.4 GHz + Bluetooth 5.0
- Memory: 16 MB flash, 8 MB PSRAM (required by nearly every project here)
- Display: 2.8" IPS, 320×240, ST7789V driver, SPI
- Touch: GT911 capacitive, tracks 5 fingers at once
- Camera: OV3660, 3 megapixel, up to 2048×1536
- Microphones: two INMP441 I2S digital mics (a genuine stereo pair)
- Speaker: MAX98357A class-D amplifier, 3.2 W into 4 Ω
- Storage: microSD card slot (SPI mode)
- Power: USB-C, JST battery connector, TP4056 charger, power switch
- Also on board: WS2812B RGB LED, PCF8563T battery-backed real-time clock, and a MAX17048 battery fuel gauge that is not listed in the official specifications
USB CDC On Boot to Disabled. Use the wrong port and audio will misbehave or uploads will fail.Powering it from a battery? The two USB-C sockets, the TP4056 charger and the power switch are explained in full, with the schematic, in the board test article — including which socket charges and whether the switch should be on or off.
Arduino IDE settings
These settings matter. Most problems people report with this board are one of these being wrong, and they reset when you change the core version, so check them again after any change.
| Setting | Value |
|---|---|
| Board | ESP32S3 Dev Module |
| ESP32 core version | 2.0.17 |
| PSRAM | OPI PSRAM |
| Flash Size | 16MB (128Mb) |
| Partition Scheme | 16M Flash (3MB APP/9.9MB FATFS) |
| USB CDC On Boot | Disabled |
| Upload Speed | 921600 |
| Erase All Flash Before Upload | Disabled |
| Port | the CH340K USB-C port |
If the upload fails: putting the board into download mode by hand
Most of the time you just press Upload and it works. Sometimes it does not - the IDE sits at Connecting...... and then gives up with Failed to connect to ESP32-S3: No serial data received.
That happens because IO0 does three jobs on this board at once: it is the BOOT button, it is the auto-reset line from the CH340K, and it is the data line for the RGB LED. When the sketch already running on the board is driving that LED, it can fight the automatic reset, so the chip restarts into your old sketch instead of into the bootloader.
The fix takes five seconds. Put it into download mode yourself:
- Press and hold the BOOT button.
- While still holding BOOT, press RESET and let go of RESET.
- Now let go of BOOT. The screen goes blank - that is the bootloader waiting.
- Click Upload.
- When it finishes, press RESET once to run the new sketch.
If it still will not connect, drop Upload Speed to 115200 and try again. And check the board’s power switch is on - the CH340K enumerates and gives you a COM port even when the board itself is switched off, which fools people.
Required libraries
This project needs every library in the table below - nothing more, nothing less. Most install straight from Tools → Manage Libraries in the Arduino IDE, but GFX Library for Arduino has to be installed from a ZIP file. The version numbers matter, so please use exactly the ones listed.
| Library | Version | Author | Install from |
|---|---|---|---|
| GFX Library for Arduino | 1.5.6 | moononournation | ZIP file - see below |
| bb_captouch | 1.3.1 | Larry Bank | Library Manager |
| ArduinoJson | 7.x | Benoit Blanchon | Library Manager |
| Adafruit NeoPixel | any recent | Adafruit | Library Manager |
Installing the GFX library from a ZIP file
- Download the ZIP. It is included in this project’s download, or you can get it from the Arduino_GFX repository - click the green Code button, then Download ZIP.
- Save it somewhere you can find it again. Do not unzip it.
- In the Arduino IDE, click Sketch → Include Library → Add .ZIP Library.
- Browse to the ZIP file you downloaded and click Open.
- The IDE installs it and confirms at the bottom of the window. If you already have a 1.6 version installed, delete that folder from
Documents/Arduino/librariesfirst, or the two will conflict.
Setting up secrets.h
Your WiFi details and any API keys go in secrets.h, which is included in the download with placeholder values. Open that tab in the Arduino IDE and replace them with your own.
secrets.h.Getting your API keys
This project talks to a cloud AI service, so you need your own key. If you have never done this before, do not worry - it is the same idea as a password that identifies your account to the service. It takes a few minutes, once.
DeepSeek - the thinking part
DeepSeek is the language model that actually answers your question. It is inexpensive - a few dollars of credit covers thousands of replies.
- Go to platform.deepseek.com and create an account.
- Open API keys in the menu and click Create new API key.
- Copy it immediately. It is shown once and never again - if you lose it, delete that key and make another.
- Add a small amount of credit under Top up. There is no free tier, but the smallest top-up lasts a very long time at this usage.
Put the key into secrets.h as DEEPSEEK_KEY. It starts with sk-.
deepseek-chat and deepseek-reasoner were retired, so most tutorials you find online will fail with a 400 error. Use deepseek-v4-flash, which is what these projects already set.What it costs to run
Very little, but it is not free, and you should know roughly what you are spending before you leave a project running.
| Service | Rough cost |
|---|---|
| DeepSeek | a fraction of a cent per answer - thousands of replies for a few dollars |
Prices change, so treat these as a guide rather than a quote. Every one of these services has a usage page where you can watch what you have spent, and all of them let you set a spending limit - which is worth doing on day one.
Troubleshooting
| Symptom | Cause and fix |
|---|---|
| Screen stays black | Wrong GFX library version (use 1.5.6) or wrong board settings. |
PSRAM alloc failed |
Tools → PSRAM is not set to OPI PSRAM. |
| Nothing uploads / no COM port | Wrong USB-C port, or the CH340 driver is not installed. |
படங்கள்
நீங்கள் தேவைப்படும் எண்ணங்கள்
-
அமேசான்
வளங்கள் மற்றும் மேற்கோள்கள்
-
ஆவணங்கள்Makerfabs MaTouch ESP32-S3 2.8" Camera and Touchscreen: User's Manualwiki.makerfabs.com
-
ஆவணங்கள்
-
வெளியுறுப்புMakerfabs websitemakerfabs.com
கோப்புகள்📁
ஆர்டினோ குறியீடு (.இனோ)
-
makerfabs_ESP32S3_Draw_AI.zip Arduino ஸ்கெட்ச்பின் ஹெடர் மற்றும் சீக்ரெட் ஹெடர் .h கோப்புகளை உள்ளடக்கியது
makerfabs_ESP32S3_Draw_AI.zip0.02 MB
தரவியல் அட்டவணை (பிடிஎப்)
-
ஆங்கிலம் ESP32-S3 தரவுத்தாள்
esp32-s3_datasheet_en[1].pdf1.05 MB