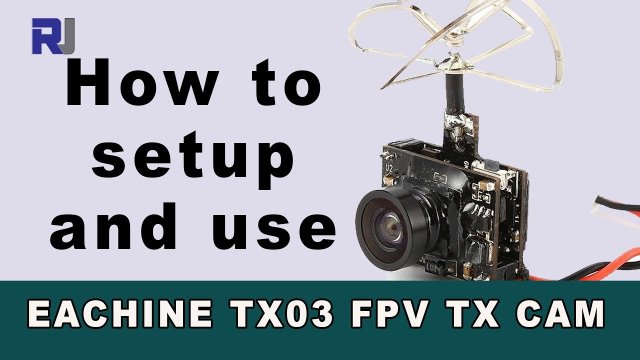
How to setup and use Eachine TX03 3-in-1 FPV Transmitter and Camera
In this guide, we’ll take a close look at the Eachine TX03, a compact and versatile 3-in-1 FPV (First-Person View) system that combines a 600TVL wide-angle camera, a 5.8GHz video transmitter, and a cloverleaf antenna into a single, lightweight unit. Weighing in at just 5 grams, this tiny device is designed for projects where every gram matters, such as mini FPV drones, RC cars, and lightweight robotics.
The TX03 is more than just a camera; it’s a complete video transmission solution. Its real-world value lies in its flexibility and ease of use. Because it operates on a wide voltage range (2.5V to 5V), you can power it directly from a single-cell LiPo battery or a regulated 5V supply. This makes it an excellent choice for a variety of projects, including:
- Building a micro FPV drone: Its light weight and low power consumption make it perfect for tiny whoop-style quadcopters.
- Creating a long-range security or observation bot: Use it on a rover to scout areas and transmit live video back to your screen.
- Adding a first-person view to RC cars and boats: Experience the thrill of driving from the cockpit.
- Prototyping a wireless video streaming system: Its selectable power output (25mW, 50mW, 200mW) lets you balance range against battery life.
In this article, we will explore the TX03’s features, learn how to configure its channels and power output, and demonstrate how to get a live video feed on a standard FPV receiver.
Hardware Overview
The Eachine TX03 is a self-contained unit. The package includes the camera/transmitter module, a power cable, and a cloverleaf antenna. The antenna is pre-soldered to the board, which is convenient but means it's not replaceable if damaged in a crash (in video at 03:21).
The camera features a built-in OLED display that shows critical information like the current channel, band, and power output. This on-screen display (OSD) is extremely helpful for setup and troubleshooting, as you can see your settings without needing an external tool (in video at 02:26).
Wiring Guide
Wiring the TX03 is remarkably simple. Since the transmitter operates on a voltage range of 2.5V to 5V, you can power it directly from a single-cell LiPo battery (which provides around 3.7V to 4.2V) or from a regulated 5V source (in video at 00:43).
The module comes with a pre-wired power cable. To connect it, you simply solder the red wire to the positive terminal of your power source and the black wire to the ground (negative) terminal. In the video, a single-cell 250mAh LiPo battery is used for testing (in video at 02:14).
If a wiring diagram is available, it will be displayed below.
Configuring the Transmitter
All configuration is done via a single push button located on the camera module. The button’s behavior changes based on how long you press it (in video at 04:00).
Changing Channels and Bands
The TX03 has 40 channels spread across 5 bands (A, B, E, F, R). To change the channel within a band, press the button briefly. For example, a short press will cycle from channel 4 to 5, then to 6, and so on (in video at 04:11).
To change the band, press and hold the button for about two seconds. The display will start flashing the band letter. While it's flashing, a short press will cycle through the bands (A, B, E, F, R). After a few seconds of inactivity, the setting is saved and the display returns to normal (in video at 04:27).
Adjusting Power Output
The power output can be set to 25mW, 50mW, or 200mW. To change this, press and hold the button for about five seconds. The display will show a line indicator representing the power level: one line for 25mW, two lines for 50mW, and three lines for 200mW. A short press cycles through these levels, and the setting is saved after a few seconds (in video at 05:34).
Note: The power setting is saved and applied after you stop pressing the button for a few seconds. The display will flicker during the configuration process (in video at 05:49).
Live Demonstration
To test the TX03, a standard FPV receiver was used. The receiver was set to the same band and channel as the transmitter. In the video, the transmitter was on Band A, Channel 3. Once the receiver was tuned to the same frequency, a clear, wide-angle video feed was displayed on the screen (in video at 06:39).
The demonstration showed that even at the lowest power setting (25mW), the video signal was strong enough for close-range testing. The wide-angle lens provides a broad field of view, which is ideal for FPV applications where situational awareness is key (in video at 07:14).
Understanding FPV Channels
FPV channels are grouped into bands (A through H). However, not all channels are compatible with every receiver. Some frequencies are very close to each other, and you may need to experiment to find a clear channel that your receiver can pick up. The TX03 allows you to select any of its 40 channels, giving you the flexibility to find a frequency that works best with your specific setup (in video at 07:54).
Chapters
- [00:05] Introduction to the Eachine TX03
- [01:07] Unboxing and Package Contents
- [02:02] Camera Features and OSD Display
- [03:32] Powering Up and Initial Setup
- [04:00] Changing Channels and Bands
- [05:34] Adjusting Power Output
- [05:56] Live Test with FPV Receiver
- [07:54] Understanding FPV Channels and Bands
- [08:43] Conclusion and Final Thoughts
资源与参考
尚无可用资源。
文件📁
没有可用的文件。