Ce tutoriel fait partie de: Makerfabs MaTouch AI ESP32S3 2.8" Camera
The latest MaTouch AI board integrate I2S voice input/I2S speaker/ 3 million camera OV3660/ 320*240 resolution display, with ESP32S3 strong processor& Wifi ability, to make this board a good tool/platform for AI development with ESP32.
Makerfabs MaTouch ESP32-S3 2.8" camera ESP32-S3 AI Vision: Point the Camera and Ask What It Sees
The board takes a photo, an AI describes what it sees, and it says the answer out loud
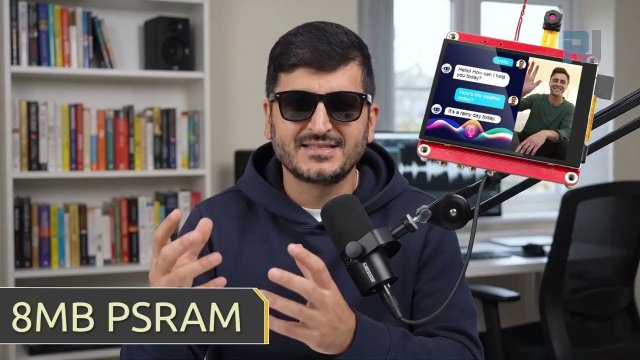
Point the camera at something, tap a button, and an AI tells you what it is looking at - printed on the screen and spoken through the speaker. Two modes: name the objects in view, or describe the person in front of the camera.
 AI Vision - Point It At Something running on the MaTouch AI ESP32-S3 board
How the picture gets there
The camera produces an 800×600 JPEG of about 20-40 KB. The board base64-encodes it in PSRAM, which makes it roughly a third larger as text, and embeds it in the request as a data URI. The 8 MB of PSRAM is what makes this comfortable.
Description, never identification
The PERSON mode describes what it can see - mood, glasses, what someone appears to be doing. It will not tell you who somebody is, and that is deliberate. Identifying people by face is against OpenAI’s usage policies, and Microsoft’s equivalent face-identification service is locked behind an approval process that ordinary developers cannot simply sign up for. Any tutorial promising you cloud face identification is describing something that is not generally available.
If you want a board that recognises specific people, use project 03b - it does it offline and it never sends anyone’s face anywhere.
The camera has to stop for the network
The live viewfinder is switched off while the question is being asked. This is not cosmetic: the running camera driver holds the internal memory that a secure connection needs, and with the preview running the connection simply fails. Turning the camera off frees it. It also means the answer is readable instead of being repainted over 25 times a second.
The answer stays until you dismiss it
The answer remains on screen until you tap CLEAR - there is no timer. While it is showing, a REPLAY button plays the spoken answer again from memory, with no second API call and no extra cost.
About the MaTouch AI ESP32-S3 2.8" board
Every project on this page runs on the MaTouch AI ESP32-S3 2.8" TFT ST7789V from Makerfabs. It is an all-in-one board: a colour touchscreen, a 3 megapixel camera, two microphones and a real speaker amplifier, all driven by an ESP32-S3 with 8 MB of PSRAM. That combination is what makes these AI projects possible on a single board with nothing else attached.
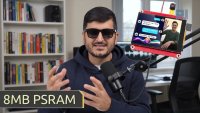
The 8 MB of PSRAM matters more than any other number here. It is what lets the board hold a camera frame, a few seconds of recorded audio, or a base64-encoded photo in memory at the same time - none of which fits in the ESP32’s normal RAM.
Manufacturer documentation: Makerfabs wiki page.
Key specifications
Processor: ESP32-S3, dual core 240 MHz, WiFi 2.4 GHz + Bluetooth 5.0
Memory: 16 MB flash, 8 MB PSRAM (required by nearly every project here)
Display: 2.8" IPS, 320×240, ST7789V driver, SPI
Touch: GT911 capacitive, tracks 5 fingers at once
Camera: OV3660, 3 megapixel, up to 2048×1536
Microphones: two INMP441 I2S digital mics (a genuine stereo pair)
Speaker: MAX98357A class-D amplifier, 3.2 W into 4 Ω
Storage: microSD card slot (SPI mode)
Power: USB-C, JST battery connector, TP4056 charger, power switch
Also on board: WS2812B RGB LED, PCF8563T battery-backed real-time clock, and a MAX17048 battery fuel gauge that is not listed in the official specifications
The two USB-C ports are not the same. The board’s speaker shares its signal pins (IO19 and IO20) with the native USB port, because those pins are the ESP32-S3’s hardwired USB data lines. Always upload and power through the CH340K USB-C port (the one beside the RESET button), and set USB CDC On Boot to Disabled. Use the wrong port and audio will misbehave or uploads will fail.
Arduino IDE settings
These settings matter. Most problems people report with this board are one of these being wrong, and they reset when you change the core version, so check them again after any change.
Setting | Value |
|---|---|
Board | ESP32S3 Dev Module |
ESP32 core version | 2.0.17 |
PSRAM | OPI PSRAM |
Flash Size | 16MB (128Mb) |
Partition Scheme | 16M Flash (3MB APP/9.9MB FATFS) |
USB CDC On Boot | Disabled |
Upload Speed | 921600 |
Erase All Flash Before Upload | Disabled |
Port | the CH340K USB-C port |
Use ESP32 core 2.0.17, not 3.x. Espressif removed the on-device face detection models in core 3, so the face projects will not compile there. Pinning 2.0.17 keeps every project on this page working with one configuration. In Boards Manager, the version dropdown lets you switch back and forth whenever you like.
Use GFX Library for Arduino version 1.5.6, not 1.6.x. The 1.6 releases are built for ESP32 core 3 and can hang at start-up on core 2.0.17. If your screen stays black after uploading, this is the first thing to check.
Required libraries
Install these through Tools → Manage Libraries in the Arduino IDE. Version numbers matter - please use the ones listed.
Library | Version | Author |
|---|---|---|
GFX Library for Arduino | 1.5.6 | moononournation |
bb_captouch | 1.3.1 | Larry Bank |
ArduinoJson | 7.x | Benoit Blanchon |
Adafruit NeoPixel | any recent | Adafruit |
Setting up secrets.h
Your WiFi details and any API keys go in secrets.h, which is included in the download with placeholder values. Open that tab in the Arduino IDE and replace them with your own.
WiFi must be 2.4 GHz. The ESP32-S3 cannot see a 5 GHz network at all. If your router combines both bands under one name (Asus calls this Smart Connect), either turn that off or give the 2.4 GHz band its own name and use that in secrets.h.
Getting your API keys
This project talks to a cloud AI service, so you need your own key. If you have never done this before, do not worry - it is the same idea as a password that identifies your account to the service. It takes a few minutes, once.
A key is not a subscription to a website. Paying for ChatGPT Plus, for example, does not give you an API key - the two are separate products with separate billing. You need an account on the developer platform, described below.
OpenAI - the eyes
OpenAI provides the vision model that looks at pictures. Only projects that send an image need this one.
Go to platform.openai.com/api-keys and sign in or create an account.
Click Create new secret key, give it a name, and create it.
Copy it immediately - like DeepSeek, it is shown only once.
Open Billing and add a small amount of credit. The API is prepaid and separate from any ChatGPT subscription you may already have.
Put the key into secrets.h as OPENAI_KEY.
Microsoft Azure Speech - for listening and talking
Azure turns your speech into text and turns the answer back into a voice. The free tier is generous enough for everything on this page.
Go to portal.azure.com and sign in with a Microsoft account (a free one is fine).
If you have never used Azure before you will see a Welcome to Azure screen offering three choices. Pick Start with an Azure free trial - you need a subscription before Azure will let you create anything. (Students should choose Azure for Students instead: same result, no card required.) Ignore Manage Microsoft Entra ID, which is something else entirely.
Click Create a resource, search for Speech, and choose Speech service published by Microsoft.
Fill in the form: any resource group, any name, and pick a Region near you - write that region down exactly as it appears, for example
eastus.For Pricing tier choose F0 (Free). That allows about five hours of speech-to-text and half a million characters of text-to-speech every month.
Click Review + create, then Create. Wait about a minute, then click Go to resource.
In the left-hand menu open Keys and Endpoint. Copy KEY 1 and the Location/Region.
Put those into secrets.h as AZURE_SPEECH_KEY and AZURE_REGION. For AZURE_STT_HOST, use <region>.stt.speech.microsoft.com - so with the region eastus that is eastus.stt.speech.microsoft.com.
About the credit card. The Azure free trial asks for a card to verify your identity. It does not charge you. You get $200 of credit for 30 days, and after that the account moves to Pay-As-You-Go - but the F0 Speech tier stays free, month after month, and everything in these projects fits comfortably inside it. If you would rather not give a card at all and you are a student, the Azure for Students option gives you credit without one.
It must be a "Speech service" resource. A key from a Translator, Language, or general Cognitive Services resource looks identical and is perfectly valid - but every speech request returns error 401. This caught us during testing and cost an hour. If speech fails with 401 while the key looks right, check which kind of resource you created.
What it costs to run
Very little, but it is not free, and you should know roughly what you are spending before you leave a project running.
Service | Rough cost |
|---|---|
Azure Speech | free tier covers about 5 hours of listening and 0.5 M characters of speaking per month |
DeepSeek | a fraction of a cent per answer - thousands of replies for a few dollars |
OpenAI vision | roughly a cent or two per picture, depending on the model |
Prices change, so treat these as a guide rather than a quote. Every one of these services has a usage page where you can watch what you have spent, and all of them let you set a spending limit - which is worth doing on day one.
Keep your keys private. Anyone who has them can spend your money. Do not put them in a video, a screenshot, a forum post or a public code repository. If a key is ever exposed, delete it on the provider’s website and create a new one - it takes seconds, and it is the only real fix.
Troubleshooting
Symptom | Cause and fix |
|---|---|
Screen stays black | Wrong GFX library version (use 1.5.6) or wrong board settings. |
|
|
Nothing uploads / no COM port | Wrong USB-C port, or the CH340 driver is not installed. |
Camera fails and never recovers | The camera’s reset line is tied to the board RESET button, so software cannot restart it. Press RESET. If it still fails, reseat the camera ribbon cable. |
Download the code
The complete Arduino sketch for this project, together with pins.h and everything else it needs, is free to download.
Unzip it, open the .ino file in the Arduino IDE, check the settings above, and upload through the CH340K USB-C port.
Ce tutoriel fait partie de: Makerfabs MaTouch AI ESP32S3 2.8" Camera
- How to Use Makerfabs ESP32 3.5" TFT Capacitive Touch with Camera
- Makerfabs MaTouch ESP32-S3 2.8" Camera and Touchscreen: 3MP Photos to SD Card
- Makerfabs MaTouch ESP32-S3 2.8" camera Offline Face Detection on ESP32-S3 - No Internet, No API Key
- Makerfabs MaTouch ESP32-S3 2.8" camera Build an AI Voice Assistant on ESP32-S3 (Azure + DeepSeek)
/*
* ===========================================================================
* 05_Vision_AI — MaTouch AI ESP32-S3 2.8" TFT ST7789V
* ===========================================================================
*
* ---------------------------------------------------------------------------
* VIDEO AND WRITTEN INSTRUCTIONS
*
* Watch the video : https://youtu.be/Px3FT47RV2M
* Full article : https://robojax.com/RTJ852
* ("AI Vision" - wiring, settings, screenshots
* and answers to the common problems)
*
* Watching the video first will save you time - it shows the Arduino IDE
* settings and the library versions being set up step by step.
* ---------------------------------------------------------------------------
*
* The board SEES. Point the camera at something, touch a button, and an
* OpenAI vision model tells you what it is looking at - drawn on the screen
* and (optionally) spoken out of the board's own speaker via Azure TTS.
*
* Two modes, two buttons:
*
* OBJECTS "What do you see?" - names the things in front of the lens.
* PERSON Describes the person in frame: glasses, expression, what
* they are doing. DESCRIPTION ONLY - it will not and must not
* try to say WHO someone is. Identifying people by face is
* against OpenAI's usage policies, and it is the right call:
* say this in the video, it is worth 15 honest seconds.
*
* WHY OPENAI FOR THIS DEMO AND NOT DEEPSEEK: DeepSeek's API is text-only.
* It cannot accept an image at all. Azure OpenAI could do it, but plain
* OpenAI is one endpoint with no deployment setup - simplest to follow.
*
* HOW THE IMAGE TRAVELS: the OV3660 gives us a JPEG directly (800x600,
* ~40 KB). We base64-encode it in PSRAM (~55 KB of text) and embed it in
* the JSON request as a data: URI. The 8 MB PSRAM makes this trivial.
*
* ---------------------------------------------------------------------------
* FILL IN secrets.h BEFORE FLASHING
* (needs WIFI_*, OPENAI_*; AZURE_* only if SPEAK_REPLIES is 1).
*
* BOARD SETTINGS (Tools menu - EVERY line matters, wrong = black screen
* or compile errors. These reset when you switch cores - recheck them!)
*
* Board : ESP32S3 Dev Module
* ESP32 core : 2.0.17
* PSRAM : OPI PSRAM <-- required, image buffers live there
* Flash Size : 16MB (128Mb)
* Partition Scheme : 16M Flash (3MB APP/9.9MB FATFS)
* USB CDC On Boot : Disabled <-- speaker shares pins with native USB
* Upload Speed : 921600
* Port : the CH340K USB-C port (the one near RESET)
*
* LIBRARIES
* GFX Library for Arduino v1.5.6 (NOT 1.6.x - that pairs with core 3)
* bb_captouch v1.3.1
* ArduinoJson v7.x
* Adafruit NeoPixel any recent
*
* ---------------------------------------------------------------------------
* FUNCTIONS IN THIS SKETCH
* led(r,g,b) set the RGB status LED colour
* getTouch(&x,&y) read the touch panel, mapped to screen coordinates
* camStart(...) start the camera in a given format/size
* camStartPreview() start the 240x240 RGB565 live-view camera
* captureJpeg(&len) take one 800x600 JPEG into PSRAM (camera stays OFF
* afterwards - caller restarts the preview)
* readHttpResponse() read an HTTPS reply, de-chunking it properly
* askVision(...) send photo + prompt to OpenAI, return the answer
* spkInit() configure the I2S speaker output
* readExact(...) read exactly N bytes from a TLS connection
* speak(text) Azure TTS -> download voice to PSRAM -> play it
* playLastAnswer() replay the kept voice from PSRAM (REPLAY button)
* drawButton(...) draw one side-column button
* drawWifi() WiFi signal bars + dBm readout
* drawButtons() normal side column (the two ask buttons)
* drawClearSide() answer-mode side column (CLEAR + REPLAY)
* showAnswer(text) word-wrapped answer overlay on the viewfinder
* lookAndTell(...) one full cycle: capture -> ask -> show -> speak
* setup() / loop() boot sequence / viewfinder + touch handling
*
* Robojax.com
* ===========================================================================
*/
#define SPEAK_REPLIES 1 // 1 = read the answer aloud with Azure TTS, 0 = screen only
/* Status LED brightness, 0-255. The WS2812 runs from the power rail and is
* uncomfortably bright at full power - 25 is plenty visible on camera. */
#define LED_BRIGHTNESS 15
/* CAMERA ORIENTATION
* 1 = camera faces the SAME way as the screen (how the board ships) - the
* image is mirrored so it looks natural when you point it at yourself.
* 0 = you folded the ribbon so the lens faces AWAY from the screen
* (phone-style, screen to you / camera to the subject).
* If the picture looks left-right reversed, flip this number. */
#define CAMERA_FACES_USER 1
#include <Arduino_GFX_Library.h>
#include <bb_captouch.h>
#include <Adafruit_NeoPixel.h>
#include <ArduinoJson.h>
#include <Wire.h>
#include <WiFi.h>
#include <WiFiClientSecure.h>
#include <HTTPClient.h>
#include "mbedtls/base64.h"
#include "esp_camera.h"
#include "pins.h"
#include "secrets.h"
#if SPEAK_REPLIES
#include "driver/i2s.h"
#define WAV_HEADER_LEN 44
#endif
Arduino_ESP32SPI *bus = new Arduino_ESP32SPI(
TFT_DC, TFT_CS, TFT_SCLK, TFT_MOSI, TFT_MISO, HSPI, true);
Arduino_GFX *gfx = new Arduino_ST7789(bus, TFT_RES, 1, true);
BBCapTouch bbct;
Adafruit_NeoPixel rgb(RGB_LED_NUM, RGB_LED_PIN, NEO_GRB + NEO_KHZ800);
/* --- the two vision prompts ------------------------------------------------
* Keep answers short: they must fit a 320x240 screen and, if spoken, must not
* leave the presenter waiting awkwardly on camera. */
const char *PROMPT_OBJECTS =
"Look at this photo from a small camera. In ONE short sentence of at most "
"20 words, plain text only, name the main object(s) you see.";
const char *PROMPT_PERSON =
"Look at this photo. If there is a person, describe them in ONE short "
"sentence of at most 20 words: mood, glasses or not, what they are doing. "
"Never guess who they are. If no person is visible, say so. Plain text only.";
/* --- layout: viewfinder left, buttons right ------------------------------- */
#define BTN_X 242
#define BTN_W 78
#define BTN_H 52
#define BTN_OBJ_Y 4
#define BTN_PERSON_Y 62
void led(uint8_t r, uint8_t g, uint8_t b) { rgb.setPixelColor(0, rgb.Color(r, g, b)); rgb.show(); }
/* ===========================================================================
* Touch
* =========================================================================== */
bool getTouch(uint16_t *x, uint16_t *y) {
TOUCHINFO ti;
if (!bbct.getSamples(&ti)) return false;
if (ti.count < 1) return false;
*x = ti.y[0];
*y = (ti.x[0] > 240) ? 0 : (240 - ti.x[0]);
return true;
}
/* ===========================================================================
* Camera — RGB565 for the live view; JPEG capture happens by restarting
* the driver, same technique as sketch 02.
* =========================================================================== */
bool mirrored = CAMERA_FACES_USER; // see the define at the top of the file
/* The viewfinder is OFF while a cloud call runs and while the answer is on
* screen. Two reasons, both learned on the bench:
* 1. RAM: the live camera driver eats the internal memory a TLS handshake
* needs - with the preview running, connecting to OpenAI fails (HTTP -1).
* 2. Readability: the viewfinder repaints 25x/s and would wipe the answer.
* The answer STAYS on screen until the user taps CLEAR - no timer. */
bool preview_on = false;
/* The last spoken answer is KEPT in PSRAM so the REPLAY button can play it
* again without another cloud call. Overwritten by the next answer. */
uint8_t *last_audio = nullptr;
size_t last_audio_len = 0;
bool camStart(pixformat_t fmt, framesize_t size, int fb_count, int quality) {
camera_config_t c;
c.ledc_channel = LEDC_CHANNEL_0;
c.ledc_timer = LEDC_TIMER_0;
c.pin_d0 = CAM_PIN_D0; c.pin_d1 = CAM_PIN_D1;
c.pin_d2 = CAM_PIN_D2; c.pin_d3 = CAM_PIN_D3;
c.pin_d4 = CAM_PIN_D4; c.pin_d5 = CAM_PIN_D5;
c.pin_d6 = CAM_PIN_D6; c.pin_d7 = CAM_PIN_D7;
c.pin_xclk = CAM_PIN_XCLK;
c.pin_pclk = CAM_PIN_PCLK;
c.pin_vsync = CAM_PIN_VSYNC;
c.pin_href = CAM_PIN_HREF;
/* Share the I2C bus Wire already drives (the touch panel lives there too)
* instead of letting the camera install a second driver on the same pins -
* that kills touch. Wire.begin() must run before this function. */
c.pin_sccb_sda = -1;
c.pin_sccb_scl = -1;
c.sccb_i2c_port = 0; // Wire = I2C port 0
c.pin_pwdn = CAM_PIN_PWDN;
c.pin_reset = CAM_PIN_RESET;
c.xclk_freq_hz = 20000000;
c.frame_size = size;
c.pixel_format = fmt;
c.grab_mode = CAMERA_GRAB_WHEN_EMPTY;
c.fb_location = CAMERA_FB_IN_PSRAM;
c.jpeg_quality = quality;
c.fb_count = fb_count;
if (esp_camera_init(&c) != ESP_OK) return false;
sensor_t *s = esp_camera_sensor_get();
if (s) {
s->set_hmirror(s, mirrored ? 1 : 0);
s->set_vflip(s, mirrored ? 1 : 0);
s->set_brightness(s, 1);
}
return true;
}
bool camStartPreview() { return camStart(PIXFORMAT_RGB565, FRAMESIZE_240X240, 2, 12); }
/* Capture one SVGA JPEG into a PSRAM buffer the caller owns. */
uint8_t *captureJpeg(size_t *len_out) {
esp_camera_deinit();
delay(120);
if (!camStart(PIXFORMAT_JPEG, FRAMESIZE_SVGA, 1, 12)) { *len_out = 0; return nullptr; }
// a few warm-up frames so exposure settles
for (int i = 0; i < 3; i++) {
camera_fb_t *w = esp_camera_fb_get();
if (w) esp_camera_fb_return(w);
delay(100);
}
uint8_t *copy = nullptr;
*len_out = 0;
camera_fb_t *fb = esp_camera_fb_get();
if (fb && fb->len > 0) {
copy = (uint8_t *)ps_malloc(fb->len);
if (copy) { memcpy(copy, fb->buf, fb->len); *len_out = fb->len; }
}
if (fb) esp_camera_fb_return(fb);
/* Deliberately leave the camera OFF here. The caller restarts the preview
* after the cloud call - a running camera driver starves the TLS handshake
* of internal RAM (that was the "Vision HTTP -1" bug). */
esp_camera_deinit();
delay(120);
return copy;
}
/* ===========================================================================
* HTTP response reader — shared by the cloud calls below.
* Returns the status code and fills body_out. Handles chunked transfer
* encoding PROPERLY: the chunk-size markers must be stripped, or they end
* up embedded inside the JSON and the parse fails. (OpenAI pretty-prints
* its replies so they span several chunks - this bit us on the bench.)
* =========================================================================== */
/* Block until the connection has data (or the budget runs out). Every read
* below goes through this, because the server can go quiet for many seconds
* while it analyses the image - and a bare read() would simply time out. */
static bool waitData(WiFiClientSecure &c, uint32_t ms) {
uint32_t t0 = millis();
while (!c.available()) {
if (!c.connected()) return false;
if (millis() - t0 > ms) return false;
delay(10);
}
return true;
}
static int readHttpResponse(WiFiClientSecure &client, String &body_out, uint32_t idle_ms) {
body_out = "";
if (!waitData(client, idle_ms)) { Serial.println("HTTP: no response at all"); return 0; }
String status_line = client.readStringUntil('\n');
int code = 0;
sscanf(status_line.c_str(), "HTTP/%*s %d", &code);
bool chunked = false;
while (waitData(client, idle_ms)) {
String h = client.readStringUntil('\n');
if (h == "\r" || h.length() <= 1) break; // blank line = end of headers
h.toLowerCase();
if (h.startsWith("transfer-encoding:") && h.indexOf("chunked") >= 0) chunked = true;
}
if (chunked) {
int blanks = 0;
while (true) {
/* Waiting here - instead of letting read() time out - is essential: a
* timed-out read looks exactly like "0" (final chunk), which silently
* truncates the body to nothing while the server is still thinking. */
if (!waitData(client, idle_ms)) {
Serial.println("HTTP: timed out waiting for the next chunk");
break;
}
String szline = client.readStringUntil('\n');
szline.trim();
if (szline.length() == 0) {
if (++blanks > 4) break;
continue;
}
blanks = 0;
long sz = strtol(szline.c_str(), NULL, 16);
if (sz <= 0) break; // genuine final chunk
long got = 0;
while (got < sz) {
if (!waitData(client, idle_ms)) break;
while (client.available() && got < sz) { body_out += (char)client.read(); got++; }
}
if (waitData(client, 3000)) client.readStringUntil('\n');
if (got < sz) { Serial.println("HTTP: short chunk"); break; }
}
} else {
while (waitData(client, idle_ms))
while (client.available()) body_out += (char)client.read();
}
return code;
}
/* ===========================================================================
* OpenAI vision call
* The request body is built by hand in PSRAM rather than through ArduinoJson,
* because embedding a 55 KB base64 string in a JSON document would mean
* holding two copies. Base64 text never needs JSON escaping, so this is safe.
* =========================================================================== */
bool askVision(const uint8_t *jpg, size_t jpg_len, const char *prompt, String &answer_out) {
// --- base64 encode the image into PSRAM ---
size_t b64_cap = ((jpg_len + 2) / 3) * 4 + 16;
unsigned char *b64 = (unsigned char *)ps_malloc(b64_cap);
if (!b64) return false;
size_t b64_len = 0;
if (mbedtls_base64_encode(b64, b64_cap, &b64_len, jpg, jpg_len) != 0) {
free(b64);
return false;
}
// --- assemble the JSON request around it ---
/* Current OpenAI models reject the old "max_tokens" name - it must be
* "max_completion_tokens" (verified against the live API, July 2026). */
const char *head_fmt =
"{\"model\":\"%s\",\"max_completion_tokens\":%d,\"messages\":[{\"role\":\"user\","
"\"content\":[{\"type\":\"text\",\"text\":\"%s\"},"
"{\"type\":\"image_url\",\"image_url\":{\"url\":\"data:image/jpeg;base64,";
const char *tail = "\"}}]}]}";
char head[640];
int head_len = snprintf(head, sizeof(head), head_fmt, OPENAI_MODEL, LLM_MAX_TOKENS, prompt);
size_t body_len = head_len + b64_len + strlen(tail);
char *body = (char *)ps_malloc(body_len + 1);
if (!body) { free(b64); return false; }
memcpy(body, head, head_len);
memcpy(body + head_len, b64, b64_len);
strcpy(body + head_len + b64_len, tail);
free(b64);
// --- send it: manual HTTP, chunk-wise upload (proven pattern from 04) ---
WiFiClientSecure client;
client.setInsecure();
client.setTimeout(25);
if (!client.connect(OPENAI_HOST, 443)) {
Serial.println("Vision: TLS connect failed (is the camera still running?)");
free(body);
return false;
}
client.print(String("POST /v1/chat/completions HTTP/1.1\r\n"
"Host: " OPENAI_HOST "\r\n"
"Authorization: Bearer " OPENAI_KEY "\r\n"
"Content-Type: application/json\r\n"
"Connection: close\r\n"
"Content-Length: ") + String(body_len) + "\r\n\r\n");
size_t sent = 0;
while (sent < body_len) {
size_t n = min((size_t)4096, body_len - sent);
size_t w = client.write((uint8_t *)body + sent, n);
if (w == 0) {
delay(50);
w = client.write((uint8_t *)body + sent, n);
if (w == 0) break;
}
sent += w;
yield();
}
free(body);
if (sent < body_len) {
Serial.printf("Vision: upload stalled at %u/%u bytes\n",
(unsigned)sent, (unsigned)body_len);
client.stop();
return false;
}
/* read the reply with proper de-chunking */
String resp;
int code = readHttpResponse(client, resp, 30000);
client.stop();
if (code != 200) {
Serial.printf("Vision HTTP %d: %s\n", code, resp.c_str());
return false;
}
bool ok = false;
JsonDocument doc;
if (!deserializeJson(doc, resp)) {
const char *content = doc["choices"][0]["message"]["content"];
if (content) {
answer_out = String(content);
answer_out.trim();
ok = answer_out.length() > 0;
}
} else {
Serial.printf("Vision: JSON parse failed, %u bytes received\n", resp.length());
}
return ok;
}
/* ===========================================================================
* Azure TTS — same streaming trick as sketch 04: raw PCM into I2S.
* =========================================================================== */
#if SPEAK_REPLIES
void spkInit() {
i2s_config_t cfg = {
.mode = (i2s_mode_t)(I2S_MODE_MASTER | I2S_MODE_TX),
.sample_rate = 16000,
.bits_per_sample = I2S_BITS_PER_SAMPLE_16BIT,
.channel_format = I2S_CHANNEL_FMT_ONLY_LEFT,
.communication_format = I2S_COMM_FORMAT_STAND_I2S,
.intr_alloc_flags = ESP_INTR_FLAG_LEVEL1,
.dma_buf_count = 8,
.dma_buf_len = 256,
.use_apll = false,
.tx_desc_auto_clear = true,
.fixed_mclk = 0
};
i2s_pin_config_t pins = {
.mck_io_num = I2S_PIN_NO_CHANGE,
.bck_io_num = I2S_SPK_BCLK,
.ws_io_num = I2S_SPK_LRC,
.data_out_num = I2S_SPK_DOUT,
.data_in_num = I2S_PIN_NO_CHANGE
};
i2s_driver_install(I2S_SPK_PORT, &cfg, 0, NULL);
i2s_set_pin(I2S_SPK_PORT, &pins);
i2s_zero_dma_buffer(I2S_SPK_PORT);
}
/* Read exactly n bytes from a client (or until timeout). */
static size_t readExact(WiFiClientSecure &c, uint8_t *dst, size_t n) {
size_t got = 0;
uint32_t t0 = millis();
while (got < n && millis() - t0 < 10000) {
int r = c.read(dst + got, n - got);
if (r > 0) { got += r; t0 = millis(); }
else if (!c.connected() && !c.available()) break;
else delay(2);
}
return got;
}
void playLastAnswer(); // defined below; explicit prototype for the IDE
void speak(const String &text) {
String safe = text;
safe.replace("&", "&");
safe.replace("<", "<");
safe.replace(">", ">");
String ssml = "<speak version='1.0' xml:lang='" AZURE_TTS_LANG "'>"
"<voice name='" AZURE_TTS_VOICE "'>" + safe + "</voice></speak>";
/* Manual HTTP with proper de-chunking: Azure sends this audio chunked, and
* HTTPClient's raw stream leaks the ASCII chunk-size lines into the PCM -
* each one plays as an audible KNOCK. */
WiFiClientSecure client;
client.setInsecure();
client.setTimeout(20);
const char *host = AZURE_REGION ".tts.speech.microsoft.com";
if (!client.connect(host, 443)) { Serial.println("TTS: TLS connect failed"); return; }
client.print(String("POST /cognitiveservices/v1 HTTP/1.1\r\n"
"Host: ") + host + "\r\n"
"Ocp-Apim-Subscription-Key: " AZURE_SPEECH_KEY "\r\n"
"Content-Type: application/ssml+xml\r\n"
"X-Microsoft-OutputFormat: riff-16khz-16bit-mono-pcm\r\n"
"User-Agent: MaTouchRobojax\r\n"
"Connection: close\r\n"
"Content-Length: " + String(ssml.length()) + "\r\n\r\n");
client.print(ssml);
String status_line = client.readStringUntil('\n');
int code = 0;
sscanf(status_line.c_str(), "HTTP/%*s %d", &code);
bool chunked = false;
long content_len = -1;
while (client.connected() || client.available()) {
String h = client.readStringUntil('\n');
if (h == "\r" || h.length() <= 1) break;
h.toLowerCase();
if (h.startsWith("transfer-encoding:") && h.indexOf("chunked") >= 0) chunked = true;
if (h.startsWith("content-length:")) content_len = h.substring(15).toInt();
}
if (code != 200) { Serial.printf("TTS HTTP %d\n", code); client.stop(); return; }
const size_t AUDIO_CAP = 1200 * 1024;
uint8_t *audio = (uint8_t *)ps_malloc(AUDIO_CAP);
if (!audio) { client.stop(); return; }
size_t alen = 0;
if (chunked) {
while (true) {
String szline = client.readStringUntil('\n');
long sz = strtol(szline.c_str(), NULL, 16);
if (sz <= 0) break;
if (alen + sz > AUDIO_CAP) break;
size_t got = readExact(client, audio + alen, sz);
alen += got;
client.readStringUntil('\n');
if (got < (size_t)sz) break;
}
} else if (content_len > 0) {
alen = readExact(client, audio, min((size_t)content_len, AUDIO_CAP));
} else {
uint32_t idle = millis();
while ((client.connected() || client.available()) && millis() - idle < 5000) {
int r = client.read(audio + alen, min((size_t)2048, AUDIO_CAP - alen));
if (r > 0) { alen += r; idle = millis(); }
else delay(5);
}
}
client.stop();
if (alen > WAV_HEADER_LEN) {
/* keep this answer for the REPLAY button (replacing the previous one),
* then play it */
if (last_audio) free(last_audio);
last_audio = audio;
last_audio_len = alen;
playLastAnswer();
} else {
free(audio);
}
}
/* Play the kept answer from PSRAM - used right after download AND by REPLAY. */
void playLastAnswer() {
if (!last_audio || last_audio_len <= WAV_HEADER_LEN) return;
static const uint8_t lead_in[640] = {0}; // 20 ms silence pre-roll
size_t w = 0;
i2s_write(I2S_SPK_PORT, lead_in, sizeof(lead_in), &w, portMAX_DELAY);
i2s_write(I2S_SPK_PORT, last_audio + WAV_HEADER_LEN,
last_audio_len - WAV_HEADER_LEN, &w, portMAX_DELAY);
i2s_write(I2S_SPK_PORT, lead_in, sizeof(lead_in), &w, portMAX_DELAY);
delay(150);
i2s_zero_dma_buffer(I2S_SPK_PORT);
}
#endif // SPEAK_REPLIES
/* ===========================================================================
* UI
* =========================================================================== */
void drawButton(int y, const char *l1, const char *l2, uint16_t colour) {
gfx->fillRoundRect(BTN_X, y, BTN_W, BTN_H, 6, colour);
gfx->drawRoundRect(BTN_X, y, BTN_W, BTN_H, 6, WHITE);
gfx->setTextSize(1);
gfx->setTextColor(WHITE);
gfx->setCursor(BTN_X + 8, y + 14);
gfx->print(l1);
gfx->setCursor(BTN_X + 8, y + 28);
gfx->print(l2);
}
/* WiFi bars + dBm at the bottom of the side column, refreshed from the loop */
void drawWifi() {
gfx->fillRect(BTN_X, 188, BTN_W, 52, BLACK);
bool up = (WiFi.status() == WL_CONNECTED);
long rssi = up ? WiFi.RSSI() : -100;
int bars = rssi > -55 ? 4 : rssi > -65 ? 3 : rssi > -75 ? 2 : rssi > -85 ? 1 : 0;
for (int b = 0; b < 4; b++) {
int bh = 6 + b * 6;
uint16_t col = (b < bars) ? GREEN : gfx->color565(60, 60, 60);
gfx->fillRect(BTN_X + 4 + b * 9, 216 - bh, 7, bh, col);
}
gfx->setTextSize(1);
gfx->setCursor(BTN_X + 44, 196);
if (up) {
gfx->setTextColor(CYAN);
gfx->printf("%ld", rssi);
} else {
gfx->setTextColor(RED);
gfx->print("DOWN");
}
gfx->setCursor(BTN_X + 44, 208);
gfx->setTextColor(gfx->color565(120, 120, 120));
gfx->print("dBm");
gfx->setCursor(BTN_X + 4, 228);
gfx->setTextColor(gfx->color565(120, 120, 120));
gfx->print("WiFi signal");
}
/* normal side column: the two ask buttons */
void drawButtons() {
gfx->fillRect(BTN_X, 0, BTN_W, 188, BLACK);
drawButton(BTN_OBJ_Y, "WHAT DO", "YOU SEE?", gfx->color565(0, 90, 160));
drawButton(BTN_PERSON_Y, "DESCRIBE", "PERSON", gfx->color565(120, 60, 140));
gfx->setTextColor(CYAN);
gfx->setCursor(BTN_X + 2, 128);
gfx->print("OpenAI eyes");
gfx->setCursor(BTN_X + 2, 140);
gfx->print("Azure voice");
gfx->setCursor(BTN_X + 2, 152);
gfx->print("Robojax.com");
drawWifi();
}
/* answer-mode side column: CLEAR (back to camera) + REPLAY (say it again).
* The answer stays on screen until CLEAR is tapped. */
void drawClearSide() {
gfx->fillRect(BTN_X, 0, BTN_W, 188, BLACK);
gfx->fillRoundRect(BTN_X, BTN_OBJ_Y, BTN_W, BTN_H, 6, gfx->color565(110, 35, 35));
gfx->drawRoundRect(BTN_X, BTN_OBJ_Y, BTN_W, BTN_H, 6, WHITE);
gfx->setTextSize(2);
gfx->setTextColor(WHITE);
gfx->setCursor(BTN_X + 10, BTN_OBJ_Y + 14);
gfx->print("CLEAR");
#if SPEAK_REPLIES
if (last_audio_len > 0) {
gfx->fillRoundRect(BTN_X, BTN_PERSON_Y, BTN_W, BTN_H, 6, gfx->color565(0, 110, 60));
gfx->drawRoundRect(BTN_X, BTN_PERSON_Y, BTN_W, BTN_H, 6, WHITE);
gfx->setTextSize(1);
gfx->setTextColor(WHITE);
gfx->setCursor(BTN_X + 16, BTN_PERSON_Y + 20);
gfx->print("REPLAY");
}
#endif
gfx->setTextSize(1);
gfx->setTextColor(YELLOW);
gfx->setCursor(BTN_X + 2, 124);
gfx->print("CLEAR = camera");
gfx->setCursor(BTN_X + 2, 136);
gfx->print("REPLAY = again");
drawWifi();
}
/* Word-wrapped answer overlay across the bottom of the viewfinder. */
void showAnswer(const String &text) {
const int max_chars = 38;
int lines = (text.length() + max_chars - 1) / max_chars;
if (lines > 6) lines = 6;
int h = lines * 10 + 8;
int y = 240 - h;
gfx->fillRect(0, y, 240, h, gfx->color565(0, 0, 0));
gfx->drawRect(0, y, 240, h, CYAN);
gfx->setTextSize(1);
gfx->setTextColor(WHITE);
for (int i = 0; i < lines; i++) {
gfx->setCursor(4, y + 5 + i * 10);
gfx->print(text.substring(i * max_chars, min((int)text.length(), (i + 1) * max_chars)));
}
}
/* ===========================================================================
* One full "look and tell" cycle
* =========================================================================== */
void lookAndTell(const char *prompt, const char *label) {
led(255, 120, 0); // amber: working
preview_on = false; // camera goes OFF here
gfx->fillRect(0, 0, 240, 240, BLACK);
gfx->setTextColor(YELLOW);
gfx->setTextSize(1);
gfx->setCursor(30, 110);
gfx->printf("capturing photo (%s)...", label);
size_t jpg_len = 0;
uint32_t t_cap = millis();
uint8_t *jpg = captureJpeg(&jpg_len);
t_cap = millis() - t_cap;
if (!jpg || jpg_len == 0) {
if (jpg) free(jpg);
showAnswer("Capture failed - tap CLEAR to retry.");
led(255, 0, 0);
drawClearSide();
return;
}
Serial.printf("Captured %u KB in %lu ms\n", (unsigned)(jpg_len / 1024), (unsigned long)t_cap);
gfx->setCursor(30, 124);
gfx->printf("asking OpenAI (%uKB)...", (unsigned)(jpg_len / 1024));
String answer;
uint32_t t_ai = millis();
bool ok = askVision(jpg, jpg_len, prompt, answer);
t_ai = millis() - t_ai;
free(jpg);
if (!ok) {
showAnswer("No answer - see serial monitor for the reason.");
led(255, 0, 0);
drawClearSide();
return;
}
Serial.printf("Vision (%lu ms): %s\n", (unsigned long)t_ai, answer.c_str());
showAnswer(answer);
drawClearSide(); // CLEAR replaces the ask buttons
#if SPEAK_REPLIES
led(0, 255, 40); // green: speaking
speak(answer); // answer stays on screen
#endif
led(0, 0, 0);
/* the answer now stays until the user taps CLEAR */
}
/* ===========================================================================
* SETUP
* =========================================================================== */
void setup() {
Serial.begin(115200);
delay(400);
Serial.println("\n=== 05 Vision AI | Robojax.com ===");
pinMode(TFT_BLK, OUTPUT);
digitalWrite(TFT_BLK, LOW);
pinMode(SD_CS, OUTPUT);
digitalWrite(SD_CS, HIGH);
gfx->begin();
gfx->fillScreen(BLACK);
digitalWrite(TFT_BLK, HIGH);
bbct.init(TOUCH_SDA, TOUCH_SCL, TOUCH_RST, TOUCH_INT);
delay(50);
// The camera's SCCB shares this bus, so Wire must be up before the camera
Wire.begin(I2C_SDA, I2C_SCL, 100000);
delay(20);
rgb.begin();
rgb.setBrightness(LED_BRIGHTNESS);
led(0, 0, 0);
#if SPEAK_REPLIES
spkInit();
#endif
gfx->setTextSize(1);
gfx->setTextColor(YELLOW);
gfx->setCursor(4, 4);
gfx->printf("Connecting to %s ...", WIFI_SSID);
WiFi.mode(WIFI_STA);
WiFi.begin(WIFI_SSID, WIFI_PASS);
uint32_t t0 = millis();
while (WiFi.status() != WL_CONNECTED && millis() - t0 < 20000) delay(300);
gfx->setCursor(4, 16);
if (WiFi.status() == WL_CONNECTED) {
gfx->setTextColor(GREEN);
gfx->print("WiFi ok");
} else {
gfx->setTextColor(RED);
gfx->print("WiFi FAILED (2.4GHz only! check secrets.h)");
}
gfx->setCursor(4, 28);
gfx->setTextColor(YELLOW);
gfx->print("starting camera...");
if (!camStartPreview()) {
gfx->fillScreen(RED);
gfx->setTextColor(WHITE);
gfx->setTextSize(2);
gfx->setCursor(20, 100);
gfx->print("CAMERA FAILED");
gfx->setTextSize(1);
gfx->setCursor(20, 130);
gfx->print("Press RESET (camera reset = board reset)");
while (1) delay(1000);
}
delay(400);
gfx->fillScreen(BLACK);
drawButtons();
preview_on = true;
Serial.println("Running. Touch a button to have the AI look through the camera.");
}
/* ===========================================================================
* LOOP
* =========================================================================== */
void loop() {
static uint32_t last_touch = 0;
if (preview_on) {
camera_fb_t *fb = esp_camera_fb_get();
if (fb) {
gfx->draw16bitBeRGBBitmap(0, 0, (uint16_t *)fb->buf, fb->width, fb->height);
esp_camera_fb_return(fb);
}
} else {
delay(20); // answer on screen, waiting for CLEAR
}
/* live WiFi signal, refreshed every 2 s in both modes */
static uint32_t last_wifi = 0;
if (millis() - last_wifi > 2000) {
last_wifi = millis();
drawWifi();
}
/* Edge-detected touch: an action fires only on a NEW finger-down, and the
* finger must fully lift (4 consecutive empty reads) before anything can
* fire again. This is what stops one tap on CLEAR from also triggering the
* capture button that appears in the same spot a moment later. */
static bool touch_down = false;
static uint8_t release_count = 0;
uint16_t x, y;
if (getTouch(&x, &y)) {
release_count = 0;
if (!touch_down) {
touch_down = true; // new tap - act exactly once
if (!preview_on) {
/* answer mode: CLEAR returns to the camera, REPLAY says it again */
if (x >= BTN_X && y >= BTN_OBJ_Y && y < BTN_OBJ_Y + BTN_H) {
if (camStartPreview()) {
preview_on = true;
drawButtons();
} else {
showAnswer("Camera restart failed - press RESET.");
}
}
#if SPEAK_REPLIES
else if (x >= BTN_X && y >= BTN_PERSON_Y && y < BTN_PERSON_Y + BTN_H) {
led(0, 255, 40); // green while speaking
playLastAnswer();
led(0, 0, 0);
}
#endif
} else if (x >= BTN_X && y >= BTN_OBJ_Y && y < BTN_OBJ_Y + BTN_H) {
lookAndTell(PROMPT_OBJECTS, "objects");
} else if (x >= BTN_X && y >= BTN_PERSON_Y && y < BTN_PERSON_Y + BTN_H) {
lookAndTell(PROMPT_PERSON, "person");
}
}
} else if (touch_down) {
if (++release_count >= 4) { touch_down = false; release_count = 0; }
}
(void)last_touch;
}
Ce dont vous pourriez avoir besoin
-
AutreProduct page for MaTouch AI ESP32S3 2.8" TFT ST7789Vmakerfabs.com
Ressources et références
-
DocumentationMakerfabs MaTouch ESP32-S3 2.8" Camera and Touchscreen: user's manualwiki.makerfabs.com
-
Documentation
-
DocumentationProduct page for MaTouch AI ESP32S3 2.8" TFT ST7789Vmakerfabs.com
-
TéléchargerArduino GFX Library on Githubgithub.com