This tutorial is part of: ESP32-S3 RGB LED 매트릭스
ESP32-S3 RGB 매트릭스 모듈을 활용한 재미있고 실용적인 프로젝트를 만들어 보세요. 다른 영상 링크는 이 글 아래에 있습니다.
ESP32-S3 RGB LED 매트릭스 Wi-Fi + NTP 시간 시계 프로젝트 -1 기본 시계
ESP32-S3 8×8 NeoMatrix 인터넷 시계 (Wi-Fi + NTP 시간)
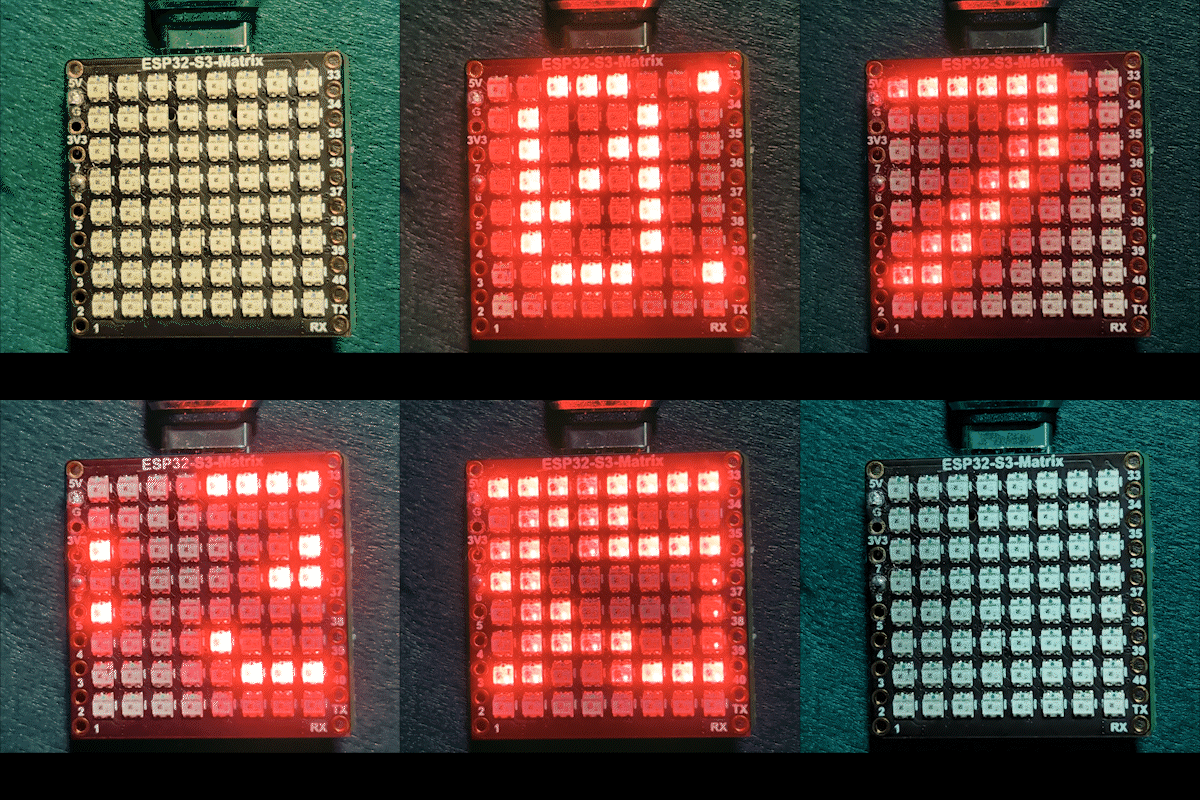
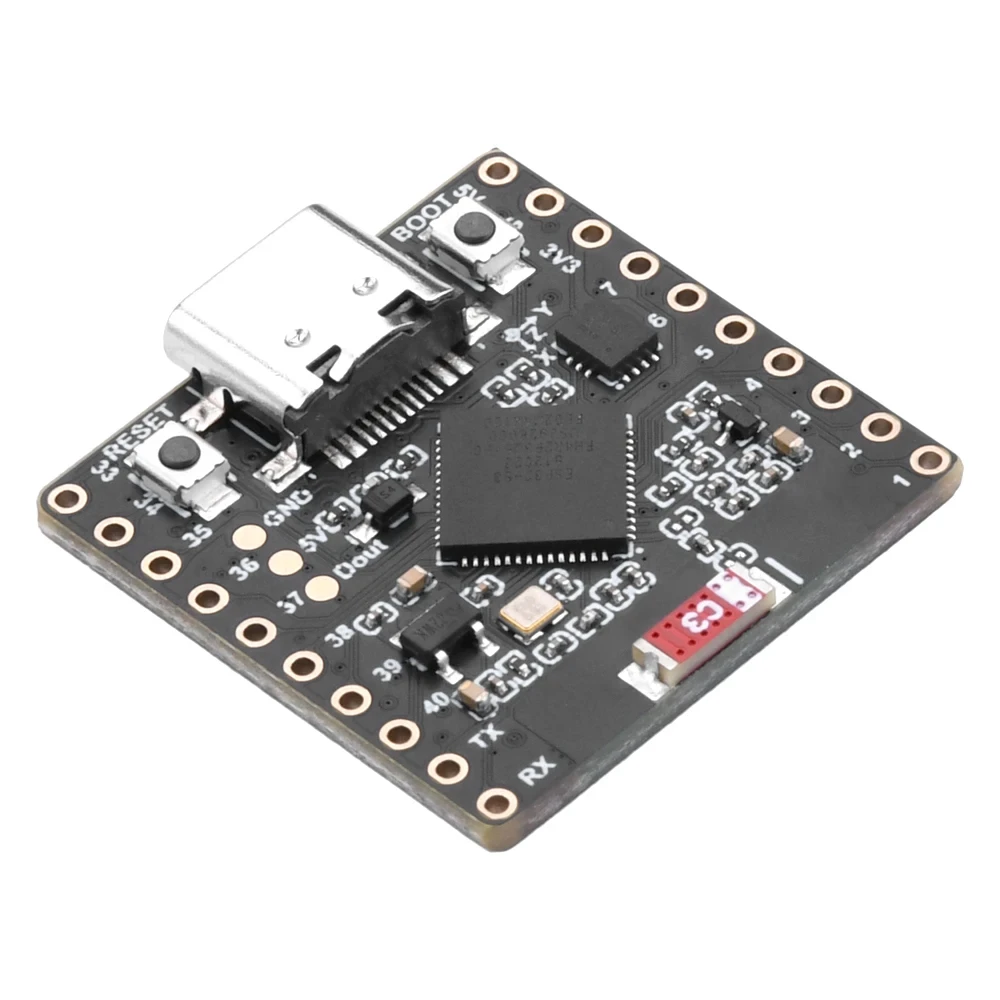
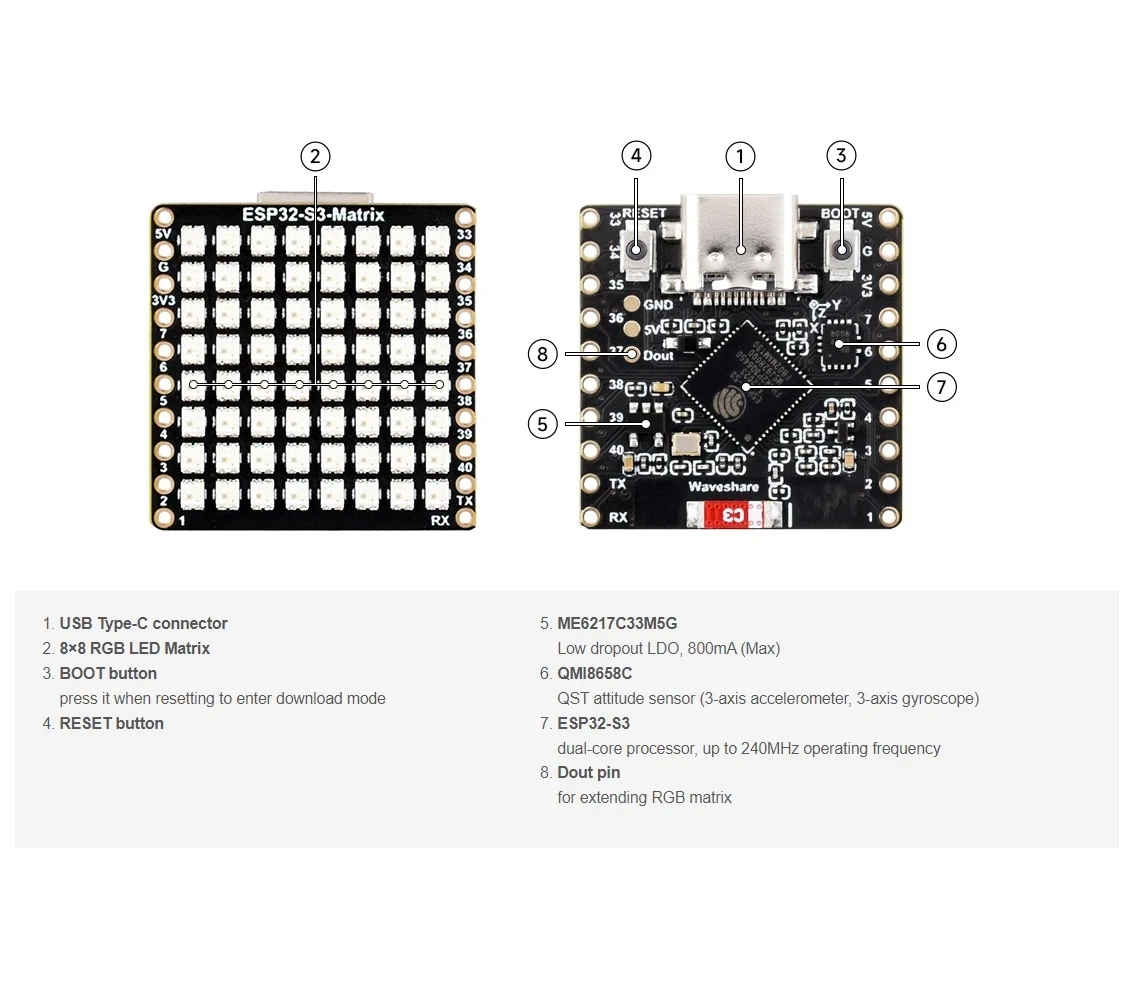
이 프로젝트는 ESP32-S3와 8×8 RGB NeoMatrix(NeoPixel/WS2812)를 작은 인터넷 시계로 만듭니다. ESP32는 Wi-Fi에 연결되고, NTP 서버에서 로컬 시간을 동기화한 다음, 시간을 HH:MM 형식으로 8×8 디스플레이에 스크롤하여 표시합니다.

작동 방식 (개요)
1) ESP32-S3가 <WiFi.h>를 사용하여 라우터에 연결됩니다.
2) "time.h"와 configTime()을 사용하여 NTP 서버에서 시간을 동기화합니다.
3) 시간은 HH:MM 형식으로 포맷되어 작은 텍스트 버퍼에 저장됩니다.
4) NeoMatrix가 텍스트를 렌더링하고 8×8 패널에 스크롤합니다.
RGB 색상
시계 텍스트 색상은 RGB(빨강, 초록, 파랑) 값을 사용하여 제어되며, 각 색상 채널은 0에서 255까지의 범위를 가지며 다양한 조합이 NeoMatrix에 서로 다른 색상을 만듭니다. color_RED, color_GREEN, color_BLUE 변수를 조정하여 시계의 외관을 원하는 색상으로 쉽게 사용자 지정할 수 있습니다. 특정 색상의 정확한 RGB 값을 빠르게 찾으려면 온라인 RGB 색상 선택기 색상 선택기 를 사용할 수 있습니다.
사용된 라이브러리
다음 include 문은 스케치가 의존하는 항목을 정확히 보여줍니다:

#include <WiFi.h>
#include "time.h"
#include <Adafruit_GFX.h>
#include <Adafruit_NeoMatrix.h>
#include <Adafruit_NeoPixel.h>
Arduino 라이브러리 관리자를 사용하여 Adafruit NeoMatrix를 설치하세요. 그러면 Adafruit GFX Library 및 Adafruit NeoPixel과 같은 필수 종속성도 함께 설치됩니다.
반드시 편집해야 하는 중요한 사용자 설정
1) 텍스트 색상 (RGB)
0~255 값을 사용하여 시계 텍스트 색상을 설정하세요:
//빨강, 초록, 파랑으로 구성된 디스플레이 색상 설정
unsigned int color_RED = 17;
unsigned int color_GREEN = 43;
unsigned int color_BLUE = 171;
이 값들은 여기에서 사용됩니다:
matrix.setTextColor(matrix.Color(color_RED, color_GREEN, color_BLUE));참고: 모든 색상을 0(검정)으로 설정하면 텍스트가 보이지 않게 됩니다. 스케치에는 안전 검사가 포함되어 있습니다:
// 사용자가 모든 색상을 0으로 설정하면 디스플레이가 꺼지므로 초록색으로 설정
if (color_RED == 0 && color_GREEN == 0 && color_BLUE == 0) {
  color_GREEN = 200;
}
이렇게 하면 보이지 않는 색상 설정으로 인해 매트릭스가 "죽은" 것처럼 보이지 않습니다.
2) Wi-Fi SSID 및 비밀번호
이것들을 실제 Wi-Fi 이름과 비밀번호로 교체하세요:
const char* WIFI_SSID     = "WiFi";
const char* WIFI_PASSWORD = "passW0rd";
시작하는 동안 ESP32는 시리얼 모니터에 연결 진행 상황을 출력하고 약 15초(30회 재시도 × 500ms) 후에 시간 초과됩니다.
3) NTP 서버
기본 NTP 서버는 다음과 같습니다:
const char* ntpServer = "pool.ntp.org";그대로 유지해도 됩니다. 로컬 서버를 사용하려면 호스트 이름을 원하는 NTP 서버로 교체하세요.
4) 시간대 오프셋 및 일광 절약 시간 오프셋
이 두 설정이 로컬 시간을 제어합니다:
// 토론토 근처: UTC-5, DST +1시간
const long  gmtOffset_sec      = -5 * 3600;  // -5시간
const int   daylightOffset_sec = 3600;       // DST +1시간
설정 방법:
gmtOffset_sec= (UTC 오프셋 시간) × 3600. 예: UTC-5 →-5*3600, UTC+2 →2*3600.daylightOffset_sec= DST 조정이 필요 없으면0, 해당 지역이 현재 DST(+1시간)를 적용 중이면3600.
이 값들은 여기에서 적용됩니다:
configTime(gmtOffset_sec, daylightOffset_sec, ntpServer);디스플레이 구성
매트릭스 데이터 핀
데이터 핀은 여기에서 정의됩니다:
#define MATRIX_PIN 14배선이 다른 GPIO를 사용하는 경우 이 숫자를 일치하도록 변경하세요.
NeoMatrix 레이아웃 + 색상 순서
매트릭스는 다음과 같이 초기화됩니다:
Adafruit_NeoMatrix matrix(8, 8, MATRIX_PIN,
  NEO_MATRIX_TOP    + NEO_MATRIX_LEFT +
  NEO_MATRIX_ROWS   + NEO_MATRIX_PROGRESSIVE,
  NEO_RGB           + NEO_KHZ800);
디스플레이가 "잘못" 보이는 두 가지 일반적인 이유:
- 회전 / 배선 방향: 텍스트가 거꾸로 또는 미러링되어 보이면
NEO_MATRIX_*플래그(TOP/BOTTOM, LEFT/RIGHT, ROWS/COLUMNS, PROGRESSIVE/ZIGZAG)를 조정하세요. - 색상 순서: 이 코드는
NEO_RGB를 사용합니다. 일부 패널은NEO_GRB입니다. 빨강/초록/파랑이 일치하지 않으면NEO_RGB를 올바른 순서로 변경하세요.
밝기
밝기는 initMatrix()에서 설정됩니다:
matrix.setBrightness(40);더 밝은 디스플레이를 위해 높이고, 열과 전력 소모를 줄이려면 낮추세요.
HH:MM 형식으로 시간이 생성되는 방식
시계는 포맷된 시간을 6자 버퍼에 저장합니다:
char timeText[6] = "00:00";그런 다음 updateTimeText()는 NTP와 동기화된 로컬 시간을 읽고 텍스트를 작성합니다:
// HH:MM 형식
snprintf(timeText, sizeof(timeText), "%02d:%02d",
         timeinfo.tm_hour,
         timeinfo.tm_min);
이것은 메인 루프에서 초당 한 번 업데이트됩니다.
8×8 디스플레이에서 스크롤이 작동하는 방식
8×8 매트릭스는 HH:MM을 한 번에 표시하기에는 너무 좁아서, 스케치가 텍스트를 스크롤합니다. 변경되는 X 위치(scrollX)에 시간을 그린 다음, 각 업데이트마다 왼쪽으로 한 픽셀씩 이동합니다.
int16_t scrollX = 8;
const uint16_t scrollIntervalMs = 120;
각 스크롤 단계:
matrix.fillScreen(0);
matrix.setCursor(scrollX, 0);
matrix.print(timeText);
matrix.show();
scrollX--;
텍스트가 왼쪽으로 완전히 나가면, 코드는 오른쪽 가장자리에서 다시 시작하도록 재설정합니다:
int16_t textWidth = 30;
if (scrollX < -textWidth) {
  scrollX = matrix.width();
}
시리얼 모니터 출력 (디버깅)
이 스케치는 유용한 메시지를 출력합니다:
- Wi-Fi 연결 진행 상황 및 IP 주소
- 시간 동기화 성공 여부
- 형식화된 시간 문자열 (예:
Time text: 14:32)
디스플레이가 비어 있으면, 시리얼 모니터가 Wi-Fi와 NTP가 작동하는지 확인할 첫 번째 장소입니다.
프로젝트 시연
업로드 및 재설정 후:
- ESP32가 Wi-Fi에 연결됩니다
pool.ntp.org에서 시간을 동기화합니다- 매트릭스에
OK를 잠시 표시합니다 - 현재 시간을
HH:MM으로 계속 스크롤합니다
다운로드 및 링크
전체 코드는 이 문서 아래에 제공됩니다. 부품, 도구 및 데이터시트도 이 문서 아래에 링크되어 있습니다.
이미지
This tutorial is part of: ESP32-S3 RGB LED 매트릭스
- ESP32-S3 RGB LED 매트릭스 프로젝트 1- 기본 점
- ESP32-S3 RGB LED 매트릭스 프로젝트 2 - 스크롤 텍스트
- ESP32-S3 RGB LED 매트릭스 프로젝트 3 - 휴대폰에서 텍스트 보내기
- ESP32-S3 RGB LED 매트릭스 프로젝트 4 - 기울기 점
- ESP32-S3 RGB LED 매트릭스 프로젝트 5 - 화살표는 항상 위로
- ESP32-S3 RGB LED 매트릭스 프로젝트 6 - 사격 게임
- ESP32-S3 RGB LED 매트릭스 인터넷 시계 프로젝트 - 2개의 시계 멀티 컬러 시간 및 날짜 표시
- ESP32-S3 RGB LED 매트릭스 인터넷 시계 프로젝트 - 날짜 포함 3가지 야간 색상
- ESP32-S3 RGB LED 매트릭스 인터넷 시계 프로젝트 - 5 무지개 색상
- ESP32-S3 RGB LED 매트릭스 인터넷 시계 프로젝트 - 4가지 랜덤 색상
- ESP32-S3 RGB LED Matrix test for RGB, GRB setting
/*
This is ESP32 sketch that connects to the internet, gets the time and displays it on the RGB matrix
you must set your WiFi correctly to make sure it gets connected.
 watch video https://youtube.com/shorts/4iWjLiD7fS8
 📚⬇️ Download and resource page https://robojax.com/RJT838
 * Author:  Ahmad Shamshiri (Robojax.com)
 * Date: 07 Jan 2026
www.Robojax.com
https://youTube.com/@robojax


*/
#include <WiFi.h>
#include "time.h"
#include <Adafruit_GFX.h>
#include <Adafruit_NeoMatrix.h>
#include <Adafruit_NeoPixel.h>

//set the color of diplay make of Red, Green and Blue
unsigned int color_RED = 17;
unsigned int color_GREEN = 43;
unsigned int color_BLUE = 171;

// 👇 REPLACE these with your real home WiFi name & password
const char* WIFI_SSID     = "WiFi";
const char* WIFI_PASSWORD = "passW0rd";


#define MATRIX_PIN 14

Adafruit_NeoMatrix matrix(8, 8, MATRIX_PIN,
  NEO_MATRIX_TOP    + NEO_MATRIX_LEFT +
  NEO_MATRIX_ROWS   + NEO_MATRIX_PROGRESSIVE,
  NEO_RGB           + NEO_KHZ800);

char timeText[6] = "00:00";
int16_t scrollX = 8;
unsigned long lastScrollMs = 0;
const uint16_t scrollIntervalMs = 120;

unsigned long lastTimeUpdateMs = 0;
const uint16_t timeUpdateIntervalMs = 1000;

//prototypes
bool updateTimeText();  // forward declaration
void scrollTime();      // forward declaration


// NTP (time) server
const char* ntpServer = "pool.ntp.org";

// Toronto-ish: UTC-5, plus 1 hour DST
const long  gmtOffset_sec     = -5 * 3600;  // -5 hours
const int   daylightOffset_sec = 3600;      // +1 hour for DST


bool updateTimeText() {
  struct tm timeinfo;
  if (!getLocalTime(&timeinfo)) {
    Serial.println("Failed to obtain time for display");
    return false;
  }

  // Format HH:MM
  snprintf(timeText, sizeof(timeText), "%02d:%02d",
           timeinfo.tm_hour,
           timeinfo.tm_min);

  Serial.print("Time text: ");
  Serial.println(timeText);
  return true;
}

void scrollTime() {
  matrix.fillScreen(0);
  matrix.setCursor(scrollX, 0);
  matrix.print(timeText);
  matrix.show();

  scrollX--;

  // Rough width: 5 characters ("HH:MM") × 6 pixels each ≈ 30 px
  int16_t textWidth = 30;
  if (scrollX < -textWidth) {
    scrollX = matrix.width();  // reset to right edge (8)
  }
}


void initMatrix() {
  matrix.begin();
  matrix.setBrightness(40);        // be careful with heat
  matrix.setTextWrap(false);
  matrix.setTextColor(matrix.Color(color_RED, color_GREEN, color_BLUE)); // color of text
}

void showMessage(const char* msg) {
  matrix.fillScreen(0);
  matrix.setCursor(0, 0);  // top-left
  matrix.print(msg);
  matrix.show();
}


void printLocalTime() {
  struct tm timeinfo;
  if (!getLocalTime(&timeinfo)) {
    Serial.println("Failed to obtain time");
    return;
  }
  // Format: 2025-11-18 14:35:12
  Serial.printf("%04d-%02d-%02d %02d:%02d:%02d\n",
                timeinfo.tm_year + 1900,
                timeinfo.tm_mon + 1,
                timeinfo.tm_mday,
                timeinfo.tm_hour,
                timeinfo.tm_min,
                timeinfo.tm_sec);
}

void setup() {
  Serial.begin(115200);
  delay(1000);
  Serial.println();
  Serial.println("ESP32-S3 Internet Clock - WiFi + NTP test");

  // Connect to WiFi
  Serial.print("Connecting to WiFi: ");
  Serial.println(WIFI_SSID);
  WiFi.mode(WIFI_STA);
  WiFi.begin(WIFI_SSID, WIFI_PASSWORD);

  int retries = 0;
  while (WiFi.status() != WL_CONNECTED && retries < 30) { // ~15s timeout
    delay(500);
    Serial.print(".");
    retries++;
  }
  Serial.println();

  if (WiFi.status() != WL_CONNECTED) {
    Serial.println("WiFi connection FAILED");
  } else {
    Serial.print("WiFi connected. IP: ");
    Serial.println(WiFi.localIP());
  }

// if user set all colors to 0, the dispaly will be turned off so set it green
  if(color_RED ==0 & color_GREEN ==0 && color_BLUE ==0)
  {
    color_GREEN = 200;
  }

  // Configure time via NTP
  configTime(gmtOffset_sec, daylightOffset_sec, ntpServer);
  Serial.println("Waiting for time...");
  delay(2000); // small wait for initial sync

  printLocalTime(); // print once at startup

    // NEW: init the LED matrix and show a test message
  initMatrix();
  showMessage("OK");
}

void loop() {
  unsigned long now = millis();

  // Update the time string "HH:MM" once per second
  if (now - lastTimeUpdateMs >= timeUpdateIntervalMs) {
    lastTimeUpdateMs = now;
    updateTimeText();  // fills timeText[], e.g. "14:32"
  }

  // Scroll the time across the 8×8 every scrollIntervalMs
  if (now - lastScrollMs >= scrollIntervalMs) {
    lastScrollMs = now;
    scrollTime();      // uses timeText and scrollX
  }
}
필요할 수 있는 것들
-
아마존
-
이베이
-
알리익스프레스Purchase ESP32-S3 RGB Matrix from AliExpresss.click.aliexpress.com
-
알리익스프레스Purchase ESP32-S3 RGB Matrix from AliExpress (2)s.click.aliexpress.com
자원 및 참고자료
-
비디오
파일📁
프리징 파일
-
esp32-S3-supermini-tht fritzing part
esp32-S3-supermini-tht.fzpz0.02 MB