This tutorial is part of: ESP32-S3 RGB LED Matrix
Cool project to create for fun and practical applications using ESP32-S3 RGB Matrix module. Links to other videos are below this article.

ESP32-S3 RGB LED Matrix Wi-Fi + NTP Time Clock Project -1 Basic Clock
ESP32-S3 Internet Clock with 8×8 NeoMatrix (Wi-Fi + NTP Time)
This project turns an ESP32-S3 and an 8×8 RGB NeoMatrix (NeoPixel/WS2812) into a tiny Internet clock. The ESP32 connects to Wi-Fi, synchronizes the local time from an NTP server, then scrolls the time as HH:MM across the 8×8 display.

How it works (high level)
1) ESP32-S3 connects to your router using <WiFi.h>.
2) It syncs time from an NTP server using "time.h" and configTime().
3) The time is formatted as HH:MM and saved into a small text buffer.
4) The NeoMatrix renders the text and scrolls it across the 8×8 panel.

RGB Color
The clock text color is controlled using RGB (Red, Green, Blue) values, where each color channel ranges from 0 to 255 and different combinations create different colors on the NeoMatrix. By adjusting the color_RED, color_GREEN, and color_BLUE variables, you can easily customize the appearance of the clock to any color you like. To quickly find the exact RGB values for a specific color, you can use the online RGB Color Picker Color Picker .

Libraries used
These includes tell you exactly what the sketch depends on:

#include <WiFi.h>
#include "time.h"
#include <Adafruit_GFX.h>
#include <Adafruit_NeoMatrix.h>
#include <Adafruit_NeoPixel.h>
Install Adafruit NeoMatrix using Arduino Library Manager. It will also pull required dependencies such as Adafruit GFX Library and Adafruit NeoPixel.
Important user settings you MUST edit
1) Text color (RGB)
Set your clock text color using 0–255 values:
//set the color of display made of Red, Green and Blue
unsigned int color_RED = 17;
unsigned int color_GREEN = 43;
unsigned int color_BLUE = 171;
These values are used here:
matrix.setTextColor(matrix.Color(color_RED, color_GREEN, color_BLUE));Note: If you set all colors to 0 (black), the text becomes invisible. The sketch includes a safety check:
// if user set all colors to 0, the display will be turned off so set it green
if (color_RED == 0 && color_GREEN == 0 && color_BLUE == 0) {
  color_GREEN = 200;
}
This ensures the matrix never looks “dead” due to an invisible color setting.
2) Wi-Fi SSID and password
Replace these with your real Wi-Fi name and password:
const char* WIFI_SSID     = "WiFi";
const char* WIFI_PASSWORD = "passW0rd";
During startup, the ESP32 prints connection progress in Serial Monitor and times out after about 15 seconds (30 retries × 500ms).
3) NTP server
The default NTP server is:
const char* ntpServer = "pool.ntp.org";You can keep it as-is. If you ever want to use a local server, replace the hostname with your preferred NTP server.
4) Time zone offset and daylight saving offset
These two settings control local time:
// Toronto-ish: UTC-5, plus 1 hour DST
const long  gmtOffset_sec      = -5 * 3600;  // -5 hours
const int   daylightOffset_sec = 3600;       // +1 hour for DST
How to set them:
gmtOffset_sec= (UTC offset hours) × 3600. Example: UTC-5 →-5*3600, UTC+2 →2*3600.daylightOffset_sec=0if you do not want DST adjustment, or3600if your region is currently observing DST (+1 hour).
These are applied here:
configTime(gmtOffset_sec, daylightOffset_sec, ntpServer);Display configuration
Matrix data pin
The data pin is defined here:
#define MATRIX_PIN 14If your wiring uses a different GPIO, change this number to match.
NeoMatrix layout + color order
Your matrix is initialized like this:
Adafruit_NeoMatrix matrix(8, 8, MATRIX_PIN,
  NEO_MATRIX_TOP    + NEO_MATRIX_LEFT +
  NEO_MATRIX_ROWS   + NEO_MATRIX_PROGRESSIVE,
  NEO_RGB           + NEO_KHZ800);
Two common reasons the display looks “wrong”:
- Rotation / wiring direction: If text appears upside down or mirrored, adjust the
NEO_MATRIX_*flags (TOP/BOTTOM, LEFT/RIGHT, ROWS/COLUMNS, PROGRESSIVE/ZIGZAG). - Color order: This code uses
NEO_RGB. Some panels areNEO_GRB. If red/green/blue don’t match, changeNEO_RGBto the correct order.
Brightness
Brightness is set in initMatrix():
matrix.setBrightness(40);Increase for a brighter display, reduce to lower heat and power draw.
How the time is generated as HH:MM
The clock stores the formatted time in a 6-character buffer:
char timeText[6] = "00:00";Then updateTimeText() reads NTP-synced local time and writes the text:
// Format HH:MM
snprintf(timeText, sizeof(timeText), "%02d:%02d",
         timeinfo.tm_hour,
         timeinfo.tm_min);
This is updated once per second in the main loop.
How scrolling works on an 8×8 display
An 8×8 matrix is too narrow to show HH:MM at once, so the sketch scrolls the text. It draws the time at a changing X position (scrollX), then moves it left by one pixel on each update.
int16_t scrollX = 8;
const uint16_t scrollIntervalMs = 120;
Each scroll step:
matrix.fillScreen(0);
matrix.setCursor(scrollX, 0);
matrix.print(timeText);
matrix.show();
scrollX--;
When the text fully exits the left side, the code resets it to start again from the right edge:
int16_t textWidth = 30;
if (scrollX < -textWidth) {
  scrollX = matrix.width();
}
Serial Monitor output (debugging)
This sketch prints useful messages:
- Wi-Fi connection progress and IP address
- Whether time sync succeeded
- The formatted time string (e.g.,
Time text: 14:32)
If the display is blank, the Serial Monitor is the first place to check to confirm Wi-Fi and NTP are working.
Project demonstration
After upload and reset:
- ESP32 connects to Wi-Fi
- Syncs time from
pool.ntp.org - Shows
OKbriefly on the matrix - Continuously scrolls the current time as
HH:MM
Downloads and links
The full code is provided below this article. Parts, tools, and datasheets are also linked below this article.
Images
This tutorial is part of: ESP32-S3 RGB LED Matrix
- ESP32-S3 RGB LED Matrix Project 1- Basic Dot
- ESP32-S3 RGB LED Matrix Project 2 - Scrolling Text
- ESP32-S3 RGB LED Matrix Project 3 - Text from mobile phone
- ESP32-S3 RGB LED Matrix Project 4 - Tilt dot
- ESP32-S3 RGB LED Matrix Project 5 - Arrow always up
- ESP32-S3 RGB LED Matrix Project 6 - Cible game
- ESP32-S3 RGB LED Matrix Internet Clock Project - 2 Clock multi color Time & Date Display
- ESP32-S3 RGB LED Matrix Internet Clock Project - 3 Night Color with Date
- ESP32-S3 RGB LED Matrix Internet Clock Project - 5 Rainbow color
- ESP32-S3 RGB LED Matrix Internet Clock Project - 4 Random color
- ESP32-S3 RGB LED Matrix test for RGB, GRB setting
/*
This is ESP32 sketch that connects to the internet, gets the time and displays it on the RGB matrix
you must set your WiFi correctly to make sure it gets connected.
 watch video https://youtube.com/shorts/4iWjLiD7fS8
 📚⬇️ Download and resource page https://robojax.com/RJT838
 * Author:  Ahmad Shamshiri (Robojax.com)
 * Date: 07 Jan 2026
www.Robojax.com
https://youTube.com/@robojax


*/
#include <WiFi.h>
#include "time.h"
#include <Adafruit_GFX.h>
#include <Adafruit_NeoMatrix.h>
#include <Adafruit_NeoPixel.h>

//set the color of diplay make of Red, Green and Blue
unsigned int color_RED = 17;
unsigned int color_GREEN = 43;
unsigned int color_BLUE = 171;

// 👇 REPLACE these with your real home WiFi name & password
const char* WIFI_SSID     = "WiFi";
const char* WIFI_PASSWORD = "passW0rd";


#define MATRIX_PIN 14

Adafruit_NeoMatrix matrix(8, 8, MATRIX_PIN,
  NEO_MATRIX_TOP    + NEO_MATRIX_LEFT +
  NEO_MATRIX_ROWS   + NEO_MATRIX_PROGRESSIVE,
  NEO_RGB           + NEO_KHZ800);

char timeText[6] = "00:00";
int16_t scrollX = 8;
unsigned long lastScrollMs = 0;
const uint16_t scrollIntervalMs = 120;

unsigned long lastTimeUpdateMs = 0;
const uint16_t timeUpdateIntervalMs = 1000;

//prototypes
bool updateTimeText();  // forward declaration
void scrollTime();      // forward declaration


// NTP (time) server
const char* ntpServer = "pool.ntp.org";

// Toronto-ish: UTC-5, plus 1 hour DST
const long  gmtOffset_sec     = -5 * 3600;  // -5 hours
const int   daylightOffset_sec = 3600;      // +1 hour for DST


bool updateTimeText() {
  struct tm timeinfo;
  if (!getLocalTime(&timeinfo)) {
    Serial.println("Failed to obtain time for display");
    return false;
  }

  // Format HH:MM
  snprintf(timeText, sizeof(timeText), "%02d:%02d",
           timeinfo.tm_hour,
           timeinfo.tm_min);

  Serial.print("Time text: ");
  Serial.println(timeText);
  return true;
}

void scrollTime() {
  matrix.fillScreen(0);
  matrix.setCursor(scrollX, 0);
  matrix.print(timeText);
  matrix.show();

  scrollX--;

  // Rough width: 5 characters ("HH:MM") × 6 pixels each ≈ 30 px
  int16_t textWidth = 30;
  if (scrollX < -textWidth) {
    scrollX = matrix.width();  // reset to right edge (8)
  }
}


void initMatrix() {
  matrix.begin();
  matrix.setBrightness(40);        // be careful with heat
  matrix.setTextWrap(false);
  matrix.setTextColor(matrix.Color(color_RED, color_GREEN, color_BLUE)); // color of text
}

void showMessage(const char* msg) {
  matrix.fillScreen(0);
  matrix.setCursor(0, 0);  // top-left
  matrix.print(msg);
  matrix.show();
}


void printLocalTime() {
  struct tm timeinfo;
  if (!getLocalTime(&timeinfo)) {
    Serial.println("Failed to obtain time");
    return;
  }
  // Format: 2025-11-18 14:35:12
  Serial.printf("%04d-%02d-%02d %02d:%02d:%02d\n",
                timeinfo.tm_year + 1900,
                timeinfo.tm_mon + 1,
                timeinfo.tm_mday,
                timeinfo.tm_hour,
                timeinfo.tm_min,
                timeinfo.tm_sec);
}

void setup() {
  Serial.begin(115200);
  delay(1000);
  Serial.println();
  Serial.println("ESP32-S3 Internet Clock - WiFi + NTP test");

  // Connect to WiFi
  Serial.print("Connecting to WiFi: ");
  Serial.println(WIFI_SSID);
  WiFi.mode(WIFI_STA);
  WiFi.begin(WIFI_SSID, WIFI_PASSWORD);

  int retries = 0;
  while (WiFi.status() != WL_CONNECTED && retries < 30) { // ~15s timeout
    delay(500);
    Serial.print(".");
    retries++;
  }
  Serial.println();

  if (WiFi.status() != WL_CONNECTED) {
    Serial.println("WiFi connection FAILED");
  } else {
    Serial.print("WiFi connected. IP: ");
    Serial.println(WiFi.localIP());
  }

// if user set all colors to 0, the dispaly will be turned off so set it green
  if(color_RED ==0 & color_GREEN ==0 && color_BLUE ==0)
  {
    color_GREEN = 200;
  }

  // Configure time via NTP
  configTime(gmtOffset_sec, daylightOffset_sec, ntpServer);
  Serial.println("Waiting for time...");
  delay(2000); // small wait for initial sync

  printLocalTime(); // print once at startup

    // NEW: init the LED matrix and show a test message
  initMatrix();
  showMessage("OK");
}

void loop() {
  unsigned long now = millis();

  // Update the time string "HH:MM" once per second
  if (now - lastTimeUpdateMs >= timeUpdateIntervalMs) {
    lastTimeUpdateMs = now;
    updateTimeText();  // fills timeText[], e.g. "14:32"
  }

  // Scroll the time across the 8×8 every scrollIntervalMs
  if (now - lastScrollMs >= scrollIntervalMs) {
    lastScrollMs = now;
    scrollTime();      // uses timeText and scrollX
  }
}
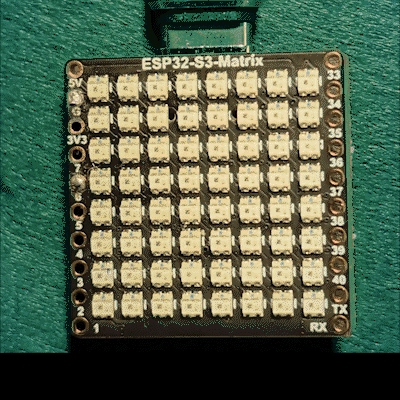
Things you might need
-
Amazon
-
eBay
-
AliExpressPurchase ESP32-S3 RGB Matrix from AliExpresss.click.aliexpress.com
-
AliExpressPurchase ESP32-S3 RGB Matrix from AliExpress (2)s.click.aliexpress.com
Resources & references
-
Video
Files📁
Fritzing File
-
esp32-S3-supermini-tht fritzing part
esp32-S3-supermini-tht.fzpz0.02 MB