呢個教學係以下嘅一部分: ESP32-S3 RGB LED 点阵
这是一个很棒的项目,可以使用 ESP32-S3 RGB 矩阵模块进行创作,兼具趣味性和实用性。本文下方有其他相关视频的链接。
ESP32-S3 RGB LED矩陣項目6 - Cible遊戲
項目 6 – 目標遊戲(傾斜板嚟撞圓圈)
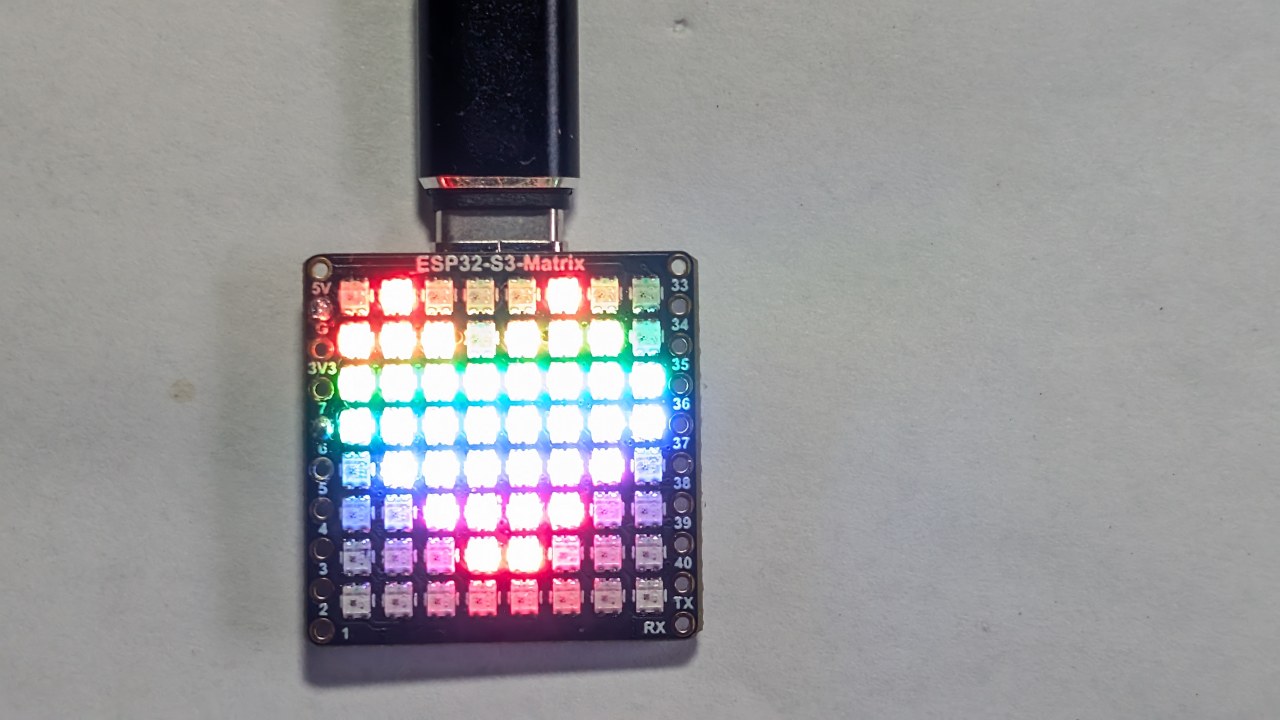
項目 6 係呢個 ESP32-S3 RGB LED 矩陣系列入面最後同最互動嘅項目。利用板上嘅 QMI8658C 運動感測器,你傾斜塊板就可以喺 8×8 矩陣上面移動一點。一個圓形嘅“目標區域”會喺顯示器中間。當你嘅點碰到圓圈,顏色就會改變,而且(可選)蜂鳴器會響。咁就整咗一個簡單但出乎意料咁好玩嘅平衡/協調遊戲。
全部六個項目都會喺一條 YouTube 影片入面示範(嵌入喺呢頁)。完整嘅遊戲代碼會自動載入喺呢篇文章下面,而模組嘅聯盟購買連結會出現喺代碼部分下面。

ESP32-S3 RGB LED 矩陣模組概覽
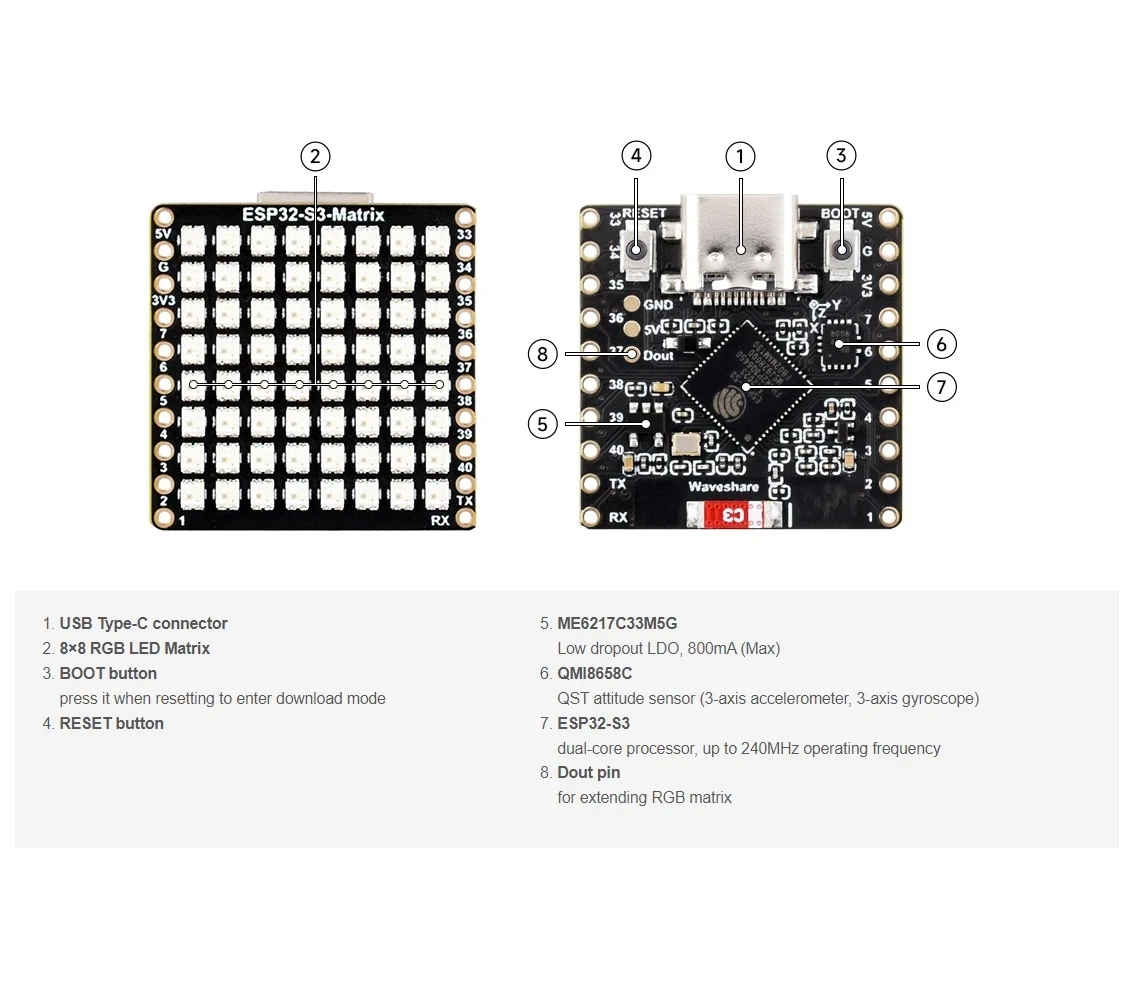
呢個模組包括:
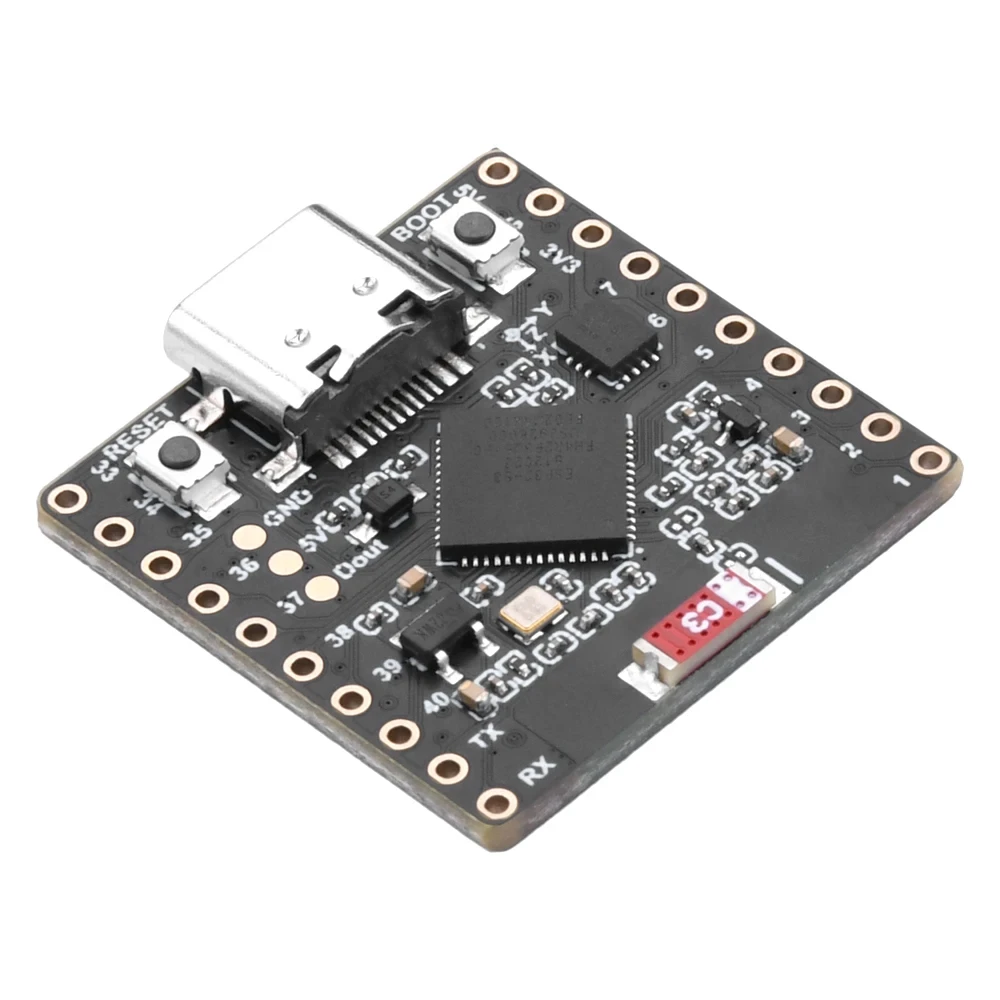
- ESP32-S3 微控制器(Wi-Fi + BLE)
- 8×8 RGB LED 矩陣(64 粒可定址 LED)
- QMI8658C 加速度計用嚟感應傾斜同方向
- USB-C 接口用嚟供電同編程
- Boot / Reset 按鈕
- 可用嘅 GPIO 引腳用嚟加裝蜂鳴器或感測器等配件
對於呢個遊戲嚟講,加速度計係必不可少嘅—佢會持續報告 X/Y 傾斜值,令到點可以根據板嘅角度平滑移動。呢個項目嘅影片部分清楚顯示咗當你向左/右/前/後傾斜模組時,點係點樣滑動同反應嘅。
影片入面涵蓋嘅項目(時間戳)
- 00:00 – 介紹
- 02:01 – 安裝 ESP32 開發板
- 03:32 – 安裝程式庫
- 05:32 – 項目 1:移動點
- 11:11 – 項目 2:文字捲動
- 12:59 – 項目 3:HTTP 文字
- 16:41 – 項目 4:傾斜點
- 18:55 – 項目 5:向上箭嘴
- 20:02 – 項目 6:目標遊戲(呢個項目)
影片嘅呢部分會同時展示點嘅移動同圓圈偵測邏輯嘅實際運作,令到更容易理解座標係點樣運作。

喺 Arduino IDE 安裝 ESP32 開發板
如果你已經完成之前嘅項目,開發板安裝已經搞掂。否則跟住做:
File > Preferences→ 加入 ESP32 開發板 URL。Tools > Board > Boards Manager…→ 安裝 “ESP32”。- 喺
Tools > Board下面選擇 ESP32-S3 開發板。 - 喺
Tools > Port下面選擇正確嘅 COM 埠。
安裝所需程式庫
呢個遊戲用到:
Adafruit NeoMatrixAdafruit NeoPixelAdafruit GFXQMI8658(運動感測器)
透過以下方式安裝:
Sketch > Include Library > Manage Libraries…- 搜尋:NeoMatrix → 安裝
- 安裝依賴項目(GFX + NeoPixel)
- 搜尋並安裝 QMI8658
目標遊戲點樣運作
QMI8658C 加速度計會提供 X 同 Y 嘅傾斜值。呢啲值會被映射到 LED 座標(兩個方向都係 0–7)。你嘅點會根據板嘅角度喺矩陣上面移動。
一個圓形(或圓環)會畫喺顯示器上面作為“目標區域”。每當點同圓圈重疊,你就會得到一次“命中”。喺嗰一刻:
- 目標顏色會改變(隨機或預設)
- 一個可選嘅蜂鳴器會響(如果有連接)
由於矩陣好細,圓圈係用簡單嘅半徑檢查嚟畫出嚟。遊戲會持續運行,所以你可以來回傾斜去重複命中圓圈。
項目 6 – 代碼設定(目標遊戲)
以下係 sketch 頂部主要俾用家調整嘅設定。完整代碼會自動包含喺呢篇文章下面。
矩陣配置
// Matrix configuration
const int MATRIX_PIN    = 14;
const int MATRIX_WIDTH  = 8;
const int MATRIX_HEIGHT = 8;
RGB 矩陣係硬件接線到 GPIO 14—唔好改呢個。
亮度
uint8_t matrixBrightness = 40; // 0–255
室內使用嘅話,30–60 係最理想。
點顏色
// Dot color (R, G, B)
uint8_t dotRed   = 255;
uint8_t dotGreen = 255;
uint8_t dotBlue  = 255;
呢個就係你透過傾斜板嚟移動嘅點。
圓圈顏色(隨機或固定)
// Circle (target) color
uint8_t circleRed   = 0;
uint8_t circleGreen = 0;
uint8_t circleBlue  = 255;

// If true, choose a new random color each time the dot hits
bool randomCircleColor = true;
如果你想用固定顏色,就設定 randomCircleColor = false;。
圓圈半徑
// Target size (radius)
int targetRadius = 3;   // 3 fits well on 8×8 matrix
半徑越大遊戲越易;越細就越難。
傾斜靈敏度
// Sensitivity of tilt mapping
float tiltScale = 4.0f;   // increase = faster movement across screen
如果點郁得太快或者跳動,就調低呢個數字。
蜂鳴器設定(可選)
// 蜂鳴器腳位(可選)
int buzzerPin = 6;      // 將蜂鳴器正極連接到腳位 6,負極連接到 GND
bool useBuzzer = true;  // 設為 false 可停用聲音
如果你冇連接蜂鳴器,只需設定 useBuzzer = false;
總結
項目 6 結合咗之前項目學到嘅所有嘢:矩陣繪圖、加速度計輸入、顏色控制、移動平滑處理,以及可選嘅聲音。傾斜開發板會移動點,撞到圓圈會改變佢嘅顏色,並且(可選)觸發一聲嗶響。呢個係一個有趣嘅示範,展示咗喺一個小巧嘅 RGB 顯示屏上進行動作感應。
完整嘅「目標遊戲」代碼會自動顯示喺呢篇文章下面。你亦都可以睇影片中嘅項目 6 部分,了解點樣移動點以及點樣偵測碰撞。如果你想自己整一個遊戲,購買 ESP32-S3 RGB LED 矩陣模組嘅聯盟連結會顯示喺代碼部分下面。
圖片
呢個教學係以下嘅一部分: ESP32-S3 RGB LED 点阵
- ESP32-S3 RGB LED矩陣項目1-基本點
- ESP32-S3 RGB LED矩陣項目2 - 滾動文字
- ESP32-S3 RGB LED矩陣項目3 - 手機文字
- ESP32-S3 RGB LED矩陣項目 4 - 傾斜點
- ESP32-S3 RGB LED矩陣項目5 - 箭嘴永遠向上
- ESP32-S3 RGB LED矩陣 Wi-Fi + NTP時鐘項目 -1 基本時鐘
- ESP32-S3 RGB LED矩陣網絡時鐘項目 - 2個時鐘多色時間及日期顯示
- ESP32-S3 RGB LED矩陣互聯網時鐘項目 - 3種夜間顏色連日期
- ESP32-S3 RGB LED矩陣網絡時鐘項目 - 5 彩虹色
- ESP32-S3 RGB LED矩陣網絡時鐘項目 - 4種隨機顏色
- ESP32-S3 RGB LED Matrix test for RGB, GRB setting
/*
  Project 6: Tilt Circle Game – ESP32-S3 RGB LED Matrix (Waveshare)

  This sketch reads tilt from the QMI8658C IMU and smoothly moves a dot
  on the 8×8 RGB LED matrix based on board orientation.

  ▶️ Video Tutorial:
  https://youtu.be/JKLuYrRcLMI

  📚⬇️ Resources & Code Page:
  https://robojax.com/RJT829

  QMI8658_RGB_2
*/

#include <Arduino.h>
#include <math.h>

#include <Adafruit_GFX.h>
#include <Adafruit_NeoMatrix.h>
#include <Adafruit_NeoPixel.h>

#include <QMI8658.h>   // by Lahav Gahali

// -------- LED MATRIX SETUP --------
#define MATRIX_PIN    14
#define MATRIX_WIDTH  8
#define MATRIX_HEIGHT 8

// Buzzer pin – change this to your actual buzzer GPIO.
const int BUZZER_PIN = 6;   // TODO: set to your buzzer pin

// Matrix brightness (0–255)
const uint8_t MATRIX_BRIGHTNESS = 10;

Adafruit_NeoMatrix matrix = Adafruit_NeoMatrix(
  MATRIX_WIDTH, MATRIX_HEIGHT, MATRIX_PIN,
  NEO_MATRIX_TOP + NEO_MATRIX_LEFT +
  NEO_MATRIX_ROWS + NEO_MATRIX_PROGRESSIVE,
  NEO_GRB + NEO_KHZ800
);

// -------- IMU SETUP --------
QMI8658 imu;

// -------- GAME CONFIG --------

// How often the dot is allowed to move (ms).
// Bigger = slower movement.
const uint16_t MOVE_INTERVAL_MS = 150;   // try 120–250

// How much tilt (m/s^2) before the dot moves.
// Increase if it feels too sensitive.
const float ACC_TILT_THRESHOLD = 2.0f;   // about ~0.2 g

// Dot base color (RGB)
const uint8_t DOT_R = 255;
const uint8_t DOT_G = 255;
const uint8_t DOT_B = 255;


// Circle geometry (centered on 8x8)
const float CIRCLE_CENTER_X = (MATRIX_WIDTH - 1) / 2.0f;   // 3.5
const float CIRCLE_CENTER_Y = (MATRIX_HEIGHT - 1) / 2.0f;  // 3.5
const float CIRCLE_RADIUS   = 3.0f;
const float CIRCLE_THICKNESS = 0.8f; // +- thickness around radius

// -------- GAME STATE --------

// Dot position on the 8x8 grid (0..7)
int dotX = 3;
int dotY = 3;

// Colors (16-bit NeoMatrix colors)
uint16_t dotColor;
uint16_t circleColor;

// To detect “just touched circle” vs “still on circle”
bool wasOnCircle = false;

// Timer for rate-limiting movement
unsigned long lastMoveTime = 0;

// -------- HELPER FUNCTIONS --------

// Classic NeoPixel color wheel (0-255 -> rainbow)
uint16_t wheel(byte pos) {
  if (pos < 85) {
    return matrix.Color(pos * 3, 255 - pos * 3, 0);
  } else if (pos < 170) {
    pos -= 85;
    return matrix.Color(255 - pos * 3, 0, pos * 3);
  } else {
    pos -= 170;
    return matrix.Color(0, pos * 3, 255 - pos * 3);
  }
}

// Is a given pixel approximately on the circle?
bool isOnCircle(int x, int y) {
  float dx = x - CIRCLE_CENTER_X;
  float dy = y - CIRCLE_CENTER_Y;
  float d2 = dx * dx + dy * dy;

  float rMin = CIRCLE_RADIUS - CIRCLE_THICKNESS;
  float rMax = CIRCLE_RADIUS + CIRCLE_THICKNESS;

  return (d2 >= rMin * rMin) && (d2 <= rMax * rMax);
}

// Draw circle + dot
void drawScene() {
  matrix.fillScreen(0);

  // Draw circle
  for (int y = 0; y < MATRIX_HEIGHT; y++) {
    for (int x = 0; x < MATRIX_WIDTH; x++) {
      if (isOnCircle(x, y)) {
        matrix.drawPixel(x, y, circleColor);
      }
    }
  }

  // Draw dot (on top)
  matrix.drawPixel(dotX, dotY, dotColor);

  matrix.show();
}

// Simple blocking beep (short)
void buzzOnce() {
  digitalWrite(BUZZER_PIN, HIGH);
  delay(40);
  digitalWrite(BUZZER_PIN, LOW);
}

// Use accelerometer to decide dot movement
void updateDotFromTilt(float ax, float ay) {
  unsigned long now = millis();
  if (now - lastMoveTime < MOVE_INTERVAL_MS) {
    return; // too soon, wait
  }

  int dx = 0;
  int dy = 0;

  // On this board, Y tilt feels like "left/right" on the matrix,
  // and X tilt feels like "up/down" → so we swap.

  // --- Horizontal movement from AY (tilt left/right) ---
  if (ay > ACC_TILT_THRESHOLD) {
    dx = 1;   // tilt to the right → move dot to the right
  } else if (ay < -ACC_TILT_THRESHOLD) {
    dx = -1;  // tilt to the left → move dot to the left
  }

  // --- Vertical movement from AX (tilt forward/back) ---
  // This was inverted. We flip the signs:
  // ax >  threshold  = tilt "forward" (away)  → move dot UP  (dy = -1)
  // ax < -threshold  = tilt "back"    (toward)→ move dot DOWN(dy =  1)
  if (ax > ACC_TILT_THRESHOLD) {
    dy = -1;  // was +1 before
  } else if (ax < -ACC_TILT_THRESHOLD) {
    dy = 1;   // was -1 before
  }

  if (dx != 0 || dy != 0) {
    dotX = constrain(dotX + dx, 0, MATRIX_WIDTH  - 1);
    dotY = constrain(dotY + dy, 0, MATRIX_HEIGHT - 1);
    lastMoveTime = now;
  }
}


// -------- SETUP & LOOP --------

void setup() {
  Serial.begin(115200);
  delay(100);

  // Matrix init
  matrix.begin();
  matrix.setBrightness(MATRIX_BRIGHTNESS);
  matrix.fillScreen(0);
  matrix.show();

  // Buzzer init
  pinMode(BUZZER_PIN, OUTPUT);
  digitalWrite(BUZZER_PIN, LOW);

  // IMU init
if (!imu.begin(11, 12)) {
    Serial.println("Failed to initialize QMI8658!");
    while (1) {
      delay(100);
    }
  }

  // Use m/s^2 and dps (optional, but nice)
  imu.setAccelUnit_mps2(true);
  imu.setGyroUnit_dps(true);
  imu.setDisplayPrecision(3);

  Serial.println("QMI8658 initialized.");

  // Game initial state
  randomSeed((uint32_t)micros());

  dotX = MATRIX_WIDTH  / 2;
  dotY = MATRIX_HEIGHT / 2;

  dotColor    = matrix.Color(DOT_R, DOT_G, DOT_B);
  circleColor = wheel(random(256));

  drawScene();
}

void loop() {
  // Read accelerometer
  float ax, ay, az;
  if (imu.readAccelMPS2(ax, ay, az)) {
    // Debug if needed:
    // Serial.print("AX: "); Serial.print(ax);
    // Serial.print("  AY: "); Serial.print(ay);
    // Serial.print("  AZ: "); Serial.println(az);

    updateDotFromTilt(ax, ay);
  }

  // Check collision with circle
  bool onCircle = isOnCircle(dotX, dotY);
  if (onCircle && !wasOnCircle) {
    // Just touched circle: change color + beep
    circleColor = wheel(random(256));
    buzzOnce();
  }
  wasOnCircle = onCircle;

  // Redraw
  drawScene();

  // Small delay so we don’t hammer I2C too hard
  delay(10);
}
你可能需要嘅嘢
-
亞馬遜
-
易贝
-
阿里巴巴速卖通Purchase ESP32-S3 RGB matrix from AliExpresss.click.aliexpress.com
-
阿里巴巴速卖通Purchase ESP32-S3 RGB matrix from AliExpress (2)s.click.aliexpress.com
資源與參考資料
-
內部🎨 Color picker Toolrobojax.com
文件📁
Fritzing 文件
-
esp32-S3-supermini-tht fritzing part
esp32-S3-supermini-tht.fzpz0.02 MB