このチュートリアルはの一部です: ESP32-S3 RGB LEDマトリックス
ESP32-S3 RGBマトリックスモジュールを使って、楽しく実用的なアプリケーションを作成するためのクールなプロジェクトです。他のビデオへのリンクはこの記事の下にあります。

ESP32-S3 RGB LEDマトリックスプロジェクト6 - Cibleゲーム
プロジェクト6 - ターゲットゲーム (ボードを傾けて円を打つ)
プロジェクト6は、このESP32-S3 RGB LEDマトリックスシリーズの最後で最もインタラクティブなプロジェクトです。オンボードのQMI8658Cモーションセンサーを使用して、ボードを傾けることで8×8マトリックス内を移動する点を操作します。ディスプレイの中央には円形の「ターゲットゾーン」があります。点が円に触れると、色が変わり(オプションで)ブザーが鳴ります。これにより、シンプルですが驚くほど楽しいバランス/コーディネーションゲームが作成されます。
すべての6つのプロジェクトは、1つのYouTube動画で紹介されています(このページに埋め込まれています)。完全なゲームコードはこの記事の下に自動的に読み込まれ、モジュールのアフィリエイト購入リンクはコードセクションの下に表示されます。

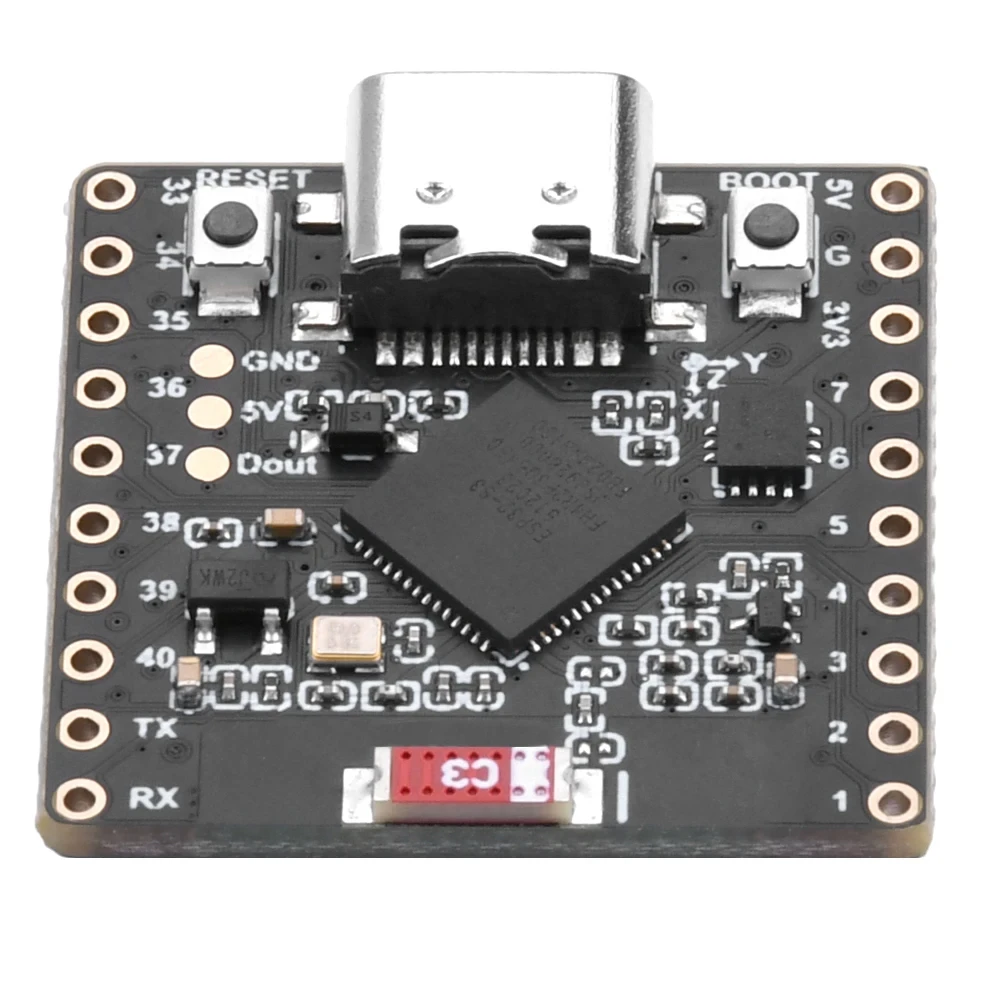
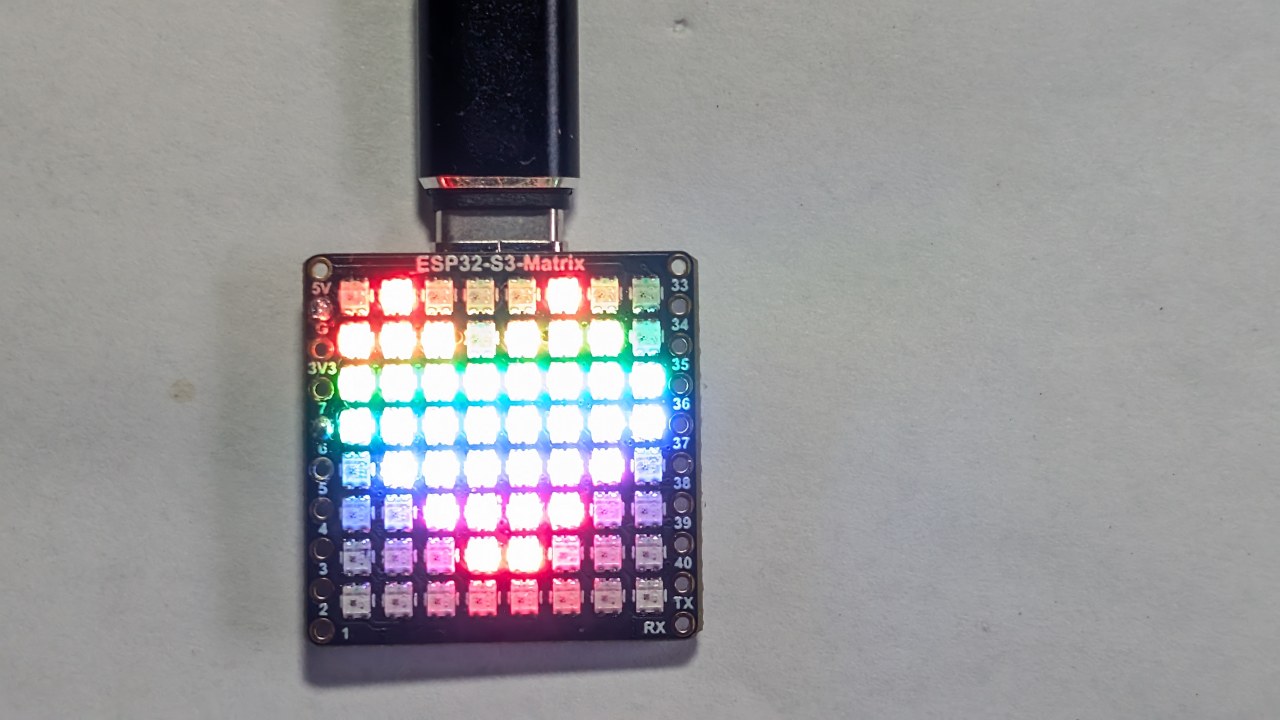
ESP32-S3 RGB LEDマトリックスモジュールの概要
このモジュールには次のものが含まれています:

- ESP32-S3マイクロコントローラ(Wi-Fi + BLE)
- 8×8 RGB LEDマトリックス(64個のアドレス指定可能なLED)
- QMI8658C 加速度センサー傾きおよび向きセンサリング用
- USB-C電源およびプログラミング用ポート
- ブート / リセットボタン
- 利用可能GPIOピンブザーやセンサーのようなアドオン用に
このゲームでは、加速度計が不可欠です。加速度計はX/Yの傾きを継続的に報告し、ドットがボードの角度に基づいてスムーズに動くことを可能にします。このプロジェクトのビデオセクションでは、モジュールを左/右/前/後に傾けると、ドットがどのように滑り、反応するかが明確に示されています。:contentReference[oaicite:0]{index=0}

動画で紹介されたプロジェクト(タイムスタンプ)
- 00:00- はじめに
- 02:01ESP32ボードのインストール
- 03:32- ライブラリのインストール
- 05:32- プロジェクト 1: 移動する点
- 11:11- プロジェクト2: テキストスクロール
- 12:59- プロジェクト3:HTTPテキスト
- 16:41- プロジェクト4:ティルトドット
- 18:55- プロジェクト5:矢印上
- 20:02-プロジェクト6:ターゲットゲーム(このプロジェクト)
この動画のこの部分では、ドットの動きと円の検出ロジックが実際に動作している様子が示されており、座標がどのように振る舞うかを理解しやすくなっています。:contentReference[oaicite:1]{index=1}

Arduino IDEでESP32ボードをインストールする
以前のプロジェクトがすでに完了している場合、ボードのインストールは完了しています。そうでない場合は、次に従ってください:
File > PreferencesESP32 ボードの URL を追加します。Tools > Board > Boards Manager…「ESP32」をインストールします。- ESP32-S3ボードを選択してください。
Tools > Board. - 正しいCOMポートを選択してください。
Tools > Port.
必要なライブラリのインストール
このゲームは使用しています:
Adafruit NeoMatrixAdafruit NeoPixelAdafruit GFXQMI8658(モーションセンサー)
それらを次のようにインストールします:
Sketch > Include Library > Manage Libraries…- 検索:ネオマトリックス→ インストール
- 依存関係をインストールする (GFX+ネオピクセル)
- 検索してインストールQMI8658
ターゲットゲームの仕組み
QMI8658C加速度計はXおよびYの傾斜値を提供します。これらはLED座標(両方向で0-7)にマッピングされます。ドットは基板の角度に基づいてマトリックスを移動します。
ディスプレイに円(またはリング)が「ターゲットエリア」として描かれます。点が円と重なったときに「ヒット」として勝利します。その瞬間:
- ターゲットカラーが変更されます(ランダムまたは事前定義された)
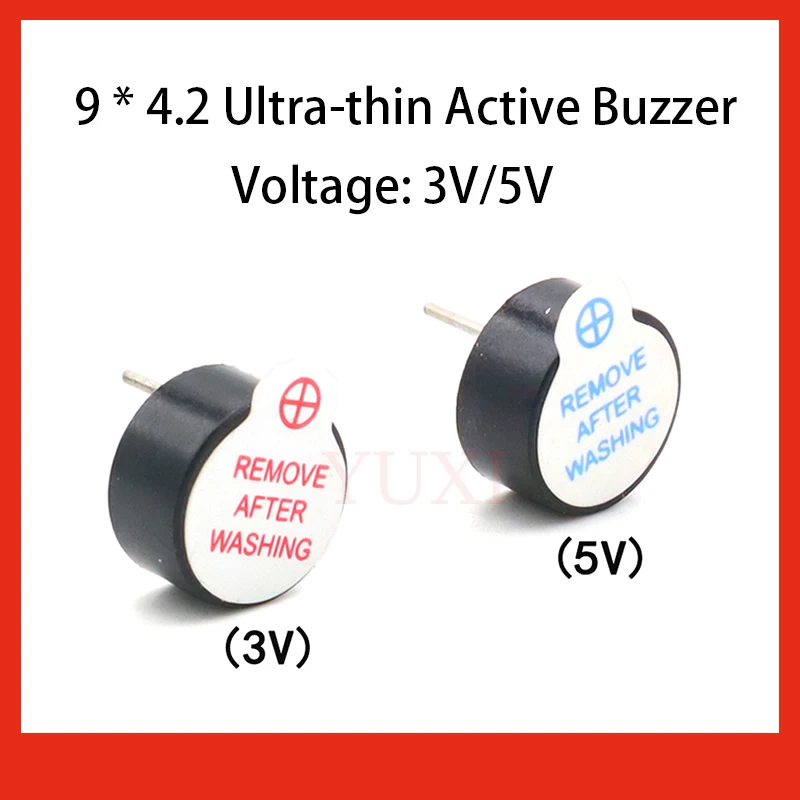
- 接続されている場合、オプションのブザーが鳴ります。
行列が小さいため、円は単純な半径チェックを使用して描画されます。ゲームは継続的に実行されるため、円に繰り返し当たるために前後に傾けることができます。
プロジェクト6 - コード設定(ターゲットゲーム)
以下は、スケッチの上部にある主なユーザー調整設定です。完全なコードはこの記事の下に自動的に含まれます。
マトリックス設定
// Matrix configuration
const int MATRIX_PIN    = 14;
const int MATRIX_WIDTH  = 8;
const int MATRIX_HEIGHT = 8;
RGBマトリックスはGPIO 14にハードワイヤリングされているため、これを変更しないでください。
明るさ
uint8_t matrixBrightness = 40; // 0–255
屋内使用には、30-60が理想的です。
ドットの色
// Dot color (R, G, B)
uint8_t dotRed   = 255;
uint8_t dotGreen = 255;
uint8_t dotBlue  = 255;
これはボードを傾けることで移動する点です。
円の色(ランダムまたは固定)
// Circle (target) color
uint8_t circleRed   = 0;
uint8_t circleGreen = 0;
uint8_t circleBlue  = 255;

// If true, choose a new random color each time the dot hits
bool randomCircleColor = true;
セットrandomCircleColor = false;固定された色が欲しい場合。
円の半径
// Target size (radius)
int targetRadius = 3;   // 3 fits well on 8×8 matrix
大きい半径はゲームを簡単にし、小さい半径は難しくします。
傾き感度
// Sensitivity of tilt mapping
float tiltScale = 4.0f;   // increase = faster movement across screen
点が速く動いたり飛んだりする場合は、この数値を減らしてください。
ブザー設定(オプション)
// Buzzer pin (optional)
int buzzerPin = 6;      // connect buzzer + to pin 6, – to GND
bool useBuzzer = true;  // set false to disable sound
ブザーを接続しない場合は、単に設定してください。useBuzzer = false;
要約
プロジェクト6は、以前のプロジェクトから学んだすべてを組み合わせています:マトリックス描画、加速度計入力、色の制御、動きの滑らかさ、そしてオプションの音です。ボードを傾けるとドットが移動し、円をヒットするとその色が変わり(オプションで)ビープ音が鳴ります。これは、コンパクトなRGBディスプレイでの動作検知の楽しいデモンストレーションです。
この記事の下に完全な「ターゲットゲーム」コードが自動的に表示されます。また、ビデオのプロジェクト6部分を視聴することで、点がどのように動き、ヒットがどのように検出されるかを見ることができます。自分のゲームを作成したい場合、コードセクションの下にはESP32-S3 RGB LEDマトリックスモジュールを購入するためのアフィリエイトリンクが表示されます。
画像
このチュートリアルはの一部です: ESP32-S3 RGB LEDマトリックス
- ESP32-S3 RGB LEDマトリックスプロジェクト(傾斜ゲーム、テキスト表示、矢印表示、WiFiデモ)
- ESP32-S3 RGB LEDマトリックスプロジェクト 2 - スクロールテキスト
- ESP32-S3 RGB LEDマトリックスプロジェクト3 - 携帯電話からのテキスト
- ESP32-S3 RGB LEDマトリックスプロジェクト4 - 傾斜ドット
- ESP32-S3 RGB LEDマトリックスプロジェクト5 - 矢印は常に上向き
- ESP32-S3 RGB LEDマトリックス Wi-Fi + NTP時計プロジェクト -1 基本時計
- ESP32-S3 RGB LEDマトリックスインターネット時計プロジェクト - 2つの時計の多色時間と日付の表示
- ESP32-S3 RGB LEDマトリックスインターネット時計プロジェクト - 3つの夜間カラーと日付
- ESP32-S3 RGB LEDマトリックスインターネット時計プロジェクト - 5つの虹色
- ESP32-S3 RGB LEDマトリックスインターネット時計プロジェクト - 4つのランダムカラー
- ESP32-S3 RGB LEDマトリックステスト RGB、GRB設定用
/*
  Project 6: Tilt Circle Game – ESP32-S3 RGB LED Matrix (Waveshare)

  This sketch reads tilt from the QMI8658C IMU and smoothly moves a dot
  on the 8×8 RGB LED matrix based on board orientation.

  ▶️ Video Tutorial:
  https://youtu.be/JKLuYrRcLMI

  📚⬇️ Resources & Code Page:
  https://robojax.com/RJT829

  QMI8658_RGB_2
*/

#include <Arduino.h>
#include <math.h>

#include <Adafruit_GFX.h>
#include <Adafruit_NeoMatrix.h>
#include <Adafruit_NeoPixel.h>

#include <QMI8658.h>   // by Lahav Gahali

// -------- LED MATRIX SETUP --------
#define MATRIX_PIN    14
#define MATRIX_WIDTH  8
#define MATRIX_HEIGHT 8

// Buzzer pin – change this to your actual buzzer GPIO.
const int BUZZER_PIN = 6;   // TODO: set to your buzzer pin

// Matrix brightness (0–255)
const uint8_t MATRIX_BRIGHTNESS = 10;

Adafruit_NeoMatrix matrix = Adafruit_NeoMatrix(
  MATRIX_WIDTH, MATRIX_HEIGHT, MATRIX_PIN,
  NEO_MATRIX_TOP + NEO_MATRIX_LEFT +
  NEO_MATRIX_ROWS + NEO_MATRIX_PROGRESSIVE,
  NEO_GRB + NEO_KHZ800
);

// -------- IMU SETUP --------
QMI8658 imu;

// -------- GAME CONFIG --------

// How often the dot is allowed to move (ms).
// Bigger = slower movement.
const uint16_t MOVE_INTERVAL_MS = 150;   // try 120–250

// How much tilt (m/s^2) before the dot moves.
// Increase if it feels too sensitive.
const float ACC_TILT_THRESHOLD = 2.0f;   // about ~0.2 g

// Dot base color (RGB)
const uint8_t DOT_R = 255;
const uint8_t DOT_G = 255;
const uint8_t DOT_B = 255;


// Circle geometry (centered on 8x8)
const float CIRCLE_CENTER_X = (MATRIX_WIDTH - 1) / 2.0f;   // 3.5
const float CIRCLE_CENTER_Y = (MATRIX_HEIGHT - 1) / 2.0f;  // 3.5
const float CIRCLE_RADIUS   = 3.0f;
const float CIRCLE_THICKNESS = 0.8f; // +- thickness around radius

// -------- GAME STATE --------

// Dot position on the 8x8 grid (0..7)
int dotX = 3;
int dotY = 3;

// Colors (16-bit NeoMatrix colors)
uint16_t dotColor;
uint16_t circleColor;

// To detect “just touched circle” vs “still on circle”
bool wasOnCircle = false;

// Timer for rate-limiting movement
unsigned long lastMoveTime = 0;

// -------- HELPER FUNCTIONS --------

// Classic NeoPixel color wheel (0-255 -> rainbow)
uint16_t wheel(byte pos) {
  if (pos < 85) {
    return matrix.Color(pos * 3, 255 - pos * 3, 0);
  } else if (pos < 170) {
    pos -= 85;
    return matrix.Color(255 - pos * 3, 0, pos * 3);
  } else {
    pos -= 170;
    return matrix.Color(0, pos * 3, 255 - pos * 3);
  }
}

// Is a given pixel approximately on the circle?
bool isOnCircle(int x, int y) {
  float dx = x - CIRCLE_CENTER_X;
  float dy = y - CIRCLE_CENTER_Y;
  float d2 = dx * dx + dy * dy;

  float rMin = CIRCLE_RADIUS - CIRCLE_THICKNESS;
  float rMax = CIRCLE_RADIUS + CIRCLE_THICKNESS;

  return (d2 >= rMin * rMin) && (d2 <= rMax * rMax);
}

// Draw circle + dot
void drawScene() {
  matrix.fillScreen(0);

  // Draw circle
  for (int y = 0; y < MATRIX_HEIGHT; y++) {
    for (int x = 0; x < MATRIX_WIDTH; x++) {
      if (isOnCircle(x, y)) {
        matrix.drawPixel(x, y, circleColor);
      }
    }
  }

  // Draw dot (on top)
  matrix.drawPixel(dotX, dotY, dotColor);

  matrix.show();
}

// Simple blocking beep (short)
void buzzOnce() {
  digitalWrite(BUZZER_PIN, HIGH);
  delay(40);
  digitalWrite(BUZZER_PIN, LOW);
}

// Use accelerometer to decide dot movement
void updateDotFromTilt(float ax, float ay) {
  unsigned long now = millis();
  if (now - lastMoveTime < MOVE_INTERVAL_MS) {
    return; // too soon, wait
  }

  int dx = 0;
  int dy = 0;

  // On this board, Y tilt feels like "left/right" on the matrix,
  // and X tilt feels like "up/down" → so we swap.

  // --- Horizontal movement from AY (tilt left/right) ---
  if (ay > ACC_TILT_THRESHOLD) {
    dx = 1;   // tilt to the right → move dot to the right
  } else if (ay < -ACC_TILT_THRESHOLD) {
    dx = -1;  // tilt to the left → move dot to the left
  }

  // --- Vertical movement from AX (tilt forward/back) ---
  // This was inverted. We flip the signs:
  // ax >  threshold  = tilt "forward" (away)  → move dot UP  (dy = -1)
  // ax < -threshold  = tilt "back"    (toward)→ move dot DOWN(dy =  1)
  if (ax > ACC_TILT_THRESHOLD) {
    dy = -1;  // was +1 before
  } else if (ax < -ACC_TILT_THRESHOLD) {
    dy = 1;   // was -1 before
  }

  if (dx != 0 || dy != 0) {
    dotX = constrain(dotX + dx, 0, MATRIX_WIDTH  - 1);
    dotY = constrain(dotY + dy, 0, MATRIX_HEIGHT - 1);
    lastMoveTime = now;
  }
}


// -------- SETUP & LOOP --------

void setup() {
  Serial.begin(115200);
  delay(100);

  // Matrix init
  matrix.begin();
  matrix.setBrightness(MATRIX_BRIGHTNESS);
  matrix.fillScreen(0);
  matrix.show();

  // Buzzer init
  pinMode(BUZZER_PIN, OUTPUT);
  digitalWrite(BUZZER_PIN, LOW);

  // IMU init
if (!imu.begin(11, 12)) {
    Serial.println("Failed to initialize QMI8658!");
    while (1) {
      delay(100);
    }
  }

  // Use m/s^2 and dps (optional, but nice)
  imu.setAccelUnit_mps2(true);
  imu.setGyroUnit_dps(true);
  imu.setDisplayPrecision(3);

  Serial.println("QMI8658 initialized.");

  // Game initial state
  randomSeed((uint32_t)micros());

  dotX = MATRIX_WIDTH  / 2;
  dotY = MATRIX_HEIGHT / 2;

  dotColor    = matrix.Color(DOT_R, DOT_G, DOT_B);
  circleColor = wheel(random(256));

  drawScene();
}

void loop() {
  // Read accelerometer
  float ax, ay, az;
  if (imu.readAccelMPS2(ax, ay, az)) {
    // Debug if needed:
    // Serial.print("AX: "); Serial.print(ax);
    // Serial.print("  AY: "); Serial.print(ay);
    // Serial.print("  AZ: "); Serial.println(az);

    updateDotFromTilt(ax, ay);
  }

  // Check collision with circle
  bool onCircle = isOnCircle(dotX, dotY);
  if (onCircle && !wasOnCircle) {
    // Just touched circle: change color + beep
    circleColor = wheel(random(256));
    buzzOnce();
  }
  wasOnCircle = onCircle;

  // Redraw
  drawScene();

  // Small delay so we don’t hammer I2C too hard
  delay(10);
}
必要かもしれないもの
-
アマゾンAmazonからESP32-S3 RGBマトリックスを購入するamzn.to
-
イーベイeBayからESP32-S3 RGBマトリックスを購入するebay.us
-
アリエクスプレスAliExpressからESP32-S3 RGBマトリックスを購入するs.click.aliexpress.com
-
アリエクスプレスAliExpressからESP32-S3 RGBマトリックスを購入する (2)s.click.aliexpress.com
リソースと参考文献
-
内部カラー選択ツールrobojax.com
ファイル📁
フリッツィングファイル
-
esp32-S3-supermini-tht フリッツィングパーツ
esp32-S3-supermini-tht.fzpz0.02 MB