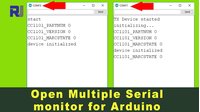
How to open multiple Serial Monitor for Arduino
Have you ever been working on a project that requires two Arduinos to communicate with each other, only to find yourself frustrated by the limitation of having just one Serial Monitor open at a time? This is a common hurdle, especially when debugging wireless modules like nRF24L01 or HC-05 Bluetooth, where you need to see what each device is transmitting and receiving simultaneously. This tutorial presents a simple, clever trick to open two separate Arduino IDE windows, each connected to its own COM port, allowing you to monitor both devices in real-time. This guide is perfect for anyone testing bidirectional communication, building a remote control system, or simply wanting to debug two separate microcontrollers without constantly switching ports.
Here are a few practical scenarios where this technique is invaluable:
Debugging a Transmitter/Receiver Pair: When using RF modules, you can watch the exact data being sent from the TX unit and confirm the exact data received by the RX unit simultaneously.
Testing a Master/Slave I2C or SPI Setup: Monitor the commands sent by the master and the responses from the slave in real-time to ensure proper handshaking.
Creating a Two-Way Chat System: Build a simple wired or wireless chat interface where you can type a message on one computer's Serial Monitor and see it appear on the other, and vice versa.
Comparing Sensor Readings: If you have two independent sensor nodes, you can compare their outputs side-by-side to verify calibration or environmental differences.
Hardware/Components
For this specific tutorial, the primary "hardware" is actually the software environment, but you will need the following to follow along:
Two Arduino boards (e.g., Uno, Nano, Mega) – these will be your TX and RX units.
Two USB cables to connect both Arduinos to your computer.
Your computer with the Arduino IDE installed.
The video demonstrates this with two separate Arduinos, but the core principle is about managing the IDE instances, not the specific hardware. Ensure both boards are properly connected and recognized by your computer before proceeding.
Code Explanation
Since the video focuses on the IDE setup, no specific code is provided or required for this trick. The technique works with any sketch you have loaded on your Arduinos. The critical part is not the code itself, but the process of launching the IDE.
To get started, ensure you have a simple sketch loaded on each Arduino. For example, a basic "Hello World" or a simple serial echo program will work perfectly to test the setup. The goal is to see data flowing in both Serial Monitors independently.
Live Project/Demonstration
Let's walk through the step-by-step process to achieve this dual-monitor setup, as demonstrated in the video (in video at 01:06).
Step 1: Connect and Identify Ports. First, plug in both Arduinos to your computer. Open your first Arduino IDE instance and load the sketch for your TX (transmitter) unit. Go to Tools > Port and note the COM port it is assigned to (e.g., COM8). In the video, this is the TX program on COM8.
Step 2: Open the First Serial Monitor. Click the Serial Monitor icon to open the monitor for this first Arduino. You will see it is connected to COM8. This is your first monitoring window.
Step 3: The Crucial Trick - Open a Second IDE Instance. The key is to not open a new file from within the current IDE window. Instead, go to your desktop or Start Menu and launch a completely new instance of the Arduino IDE application (in video at 01:33). This creates a separate, independent program window.
Step 4: Load the Second Sketch. In this newly opened IDE window, go to File > Open and load the sketch for your RX (receiver) unit. This is the RX file on COM11.
Step 5: Configure the Second Port and Monitor. In this second IDE window, go to Tools > Port and select the COM port for the second Arduino (e.g., COM11). Now, click the Serial Monitor icon in this second window. You will now have two separate Serial Monitor windows open, one on COM8 and one on COM11, each operating independently (in video at 02:17).
You can now send data from one monitor and see it appear on the other, and vice versa, allowing you to fully debug your bidirectional communication system.
Chapters
[00:00] Introduction and Project Overview
[00:19] Demonstrating the Problem with a Single Serial Monitor
[01:06] The Trick: Opening a Second Arduino IDE Instance
[01:56] Configuring the Second IDE for a Different COM Port
[02:17] Successful Two-Way Serial Monitoring
Resources & references
-
DownloadDownlaod Arduino IDE for freearduino.cc
Files📁
No files available.