Measure Temperature and Humidity using M5Stack Core 2 with DHT11 and DHT22 - Robojax
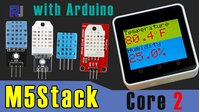
This guide demonstrates how to connect a DHT11 or DHT22 temperature and humidity sensor to the M5Stack Core2 and display the readings on its built-in touchscreen. The M5Stack Core2 is a powerful ESP32-based development board with a 2-inch LCD, making it an ideal platform for creating a standalone environmental monitoring station. This project is perfect for a variety of applications, such as:
- Building a desktop weather station to monitor your home or office environment.
- Creating a temperature and humidity logger for a greenhouse, terrarium, or reptile enclosure.
- Developing a simple environmental monitoring node for a larger IoT project.
- Learning how to interface with the popular DHT series of sensors using a modern display module.
Hardware Components
- M5Stack Core2 (ESP32 development board with display)
- DHT11 sensor (either the bare sensor with a 10kΩ resistor or a PCB module)
- DHT22 (AM2302) sensor (either the white module or the red/black module)
- Breadboard and jumper wires
Wiring Guide
The wiring is straightforward, as the M5Stack Core2 provides a convenient Grove-compatible port. The video demonstrates the connection on the M5Stack Core2's expansion port. (in video at 03:52)
Here is the connection summary for all sensor types:
- Data Pin: Connect the sensor's data/out pin to GPIO 27 on the M5Stack Core2. (in video at 03:58)
- Power Pin (VCC/+): Connect the sensor's power pin to the 3.3V pin on the M5Stack Core2. (in video at 04:11)
- Ground Pin (GND/-): Connect the sensor's ground pin to a GND pin on the M5Stack Core2. (in video at 04:17)
If you are using a bare DHT11 or DHT22 sensor, you must add a pull-up resistor (typically 5.6kΩ to 10kΩ) between the data pin and the 3.3V pin. (in video at 04:50)
Code Explanation
The code is designed to be highly configurable, allowing you to easily change the sensor type, display mode, colors, and refresh rate. Here’s a breakdown of the main user-configurable sections:
Sensor and Display Settings
At the top of the code, you can define the sensor type and the display mode. To select your sensor, you must comment or uncomment the correct #define line. (in video at 13:43)
#define DHTPIN 27
#define DHTTYPE DHT22   // DHT 22  (AM2302), AM2321
//#define DHTTYPE DHT11   // DHT 11
//#define DHTTYPE DHT21   // DHT 21 (AM2301)
For example, to use a DHT11, you would comment out #define DHTTYPE DHT22 and uncomment #define DHTTYPE DHT11.
The unit variable controls what data is shown on the screen. (in video at 09:33)
unsigned int unit=3;//
//              0=C celsius
//              1=F fahrenheit
//              2=Humidity
//              3=C and Humidity
//              4=F and Humidity
//              5=C and F
You can set this to any value from 0 to 5 to display Celsius, Fahrenheit, Humidity, or a combination of them.
The refresh variable sets how often the sensor is read and the screen is updated, in milliseconds. (in video at 09:15)
const int refresh=3000;//read every 3 secondsCustomization Options
The code also allows you to customize the on-screen text and colors. The title and unitText arrays store the labels and units displayed on the screen. (in video at 10:01)
char *title[]={"Temperature","Temperature","Humidity"};
char *unitText[]={"C","F","%"};
You can change these strings to display text in your own language. The color variables such as backgroundColor, temperatureTitleColor, and humidityValueColor can be set to any of the predefined TFT color values or your own custom hex values. (in video at 10:21)
Live Project Demonstration
The video provides a comprehensive demonstration of the project. It shows the display working with a DHT22 sensor in various modes, including Fahrenheit, humidity only, Celsius with humidity, and finally Celsius and Fahrenheit. (in video at 21:03) The demonstration also includes a test with a DHT11 sensor, both with a PCB module and as a bare sensor with a pull-up resistor. (in video at 22:22) Finally, the video shows what happens when a wire is disconnected, which results in a "None" reading on the screen. (in video at 22:38)
Video Chapters
- [00:00] Introduction and Project Overview
- [00:55] M5Stack Core2 Features
- [02:22] DHT11 vs DHT22 Sensor Specifications
- [03:52] Wiring Guide
- [07:40] Installing Board Drivers and Libraries
- [09:01] Code Explanation
- [21:03] Live Demonstration
- [22:53] Conclusion and Wrap-up
Images


/*
 * file: M5Stack_DHT11_DHT22
  Measure Temperature and Humidity using DHT11, DHT22, DHT21 Sensor and display on M5Stack Core 2 ESP32 IoT board
 * Written by Ahmad Shamshiri on April 22, 2021 in Ontario, Canada
 * Watch video instruction https://youtu.be/ZDZm_QOlCJo
 www.Robojax.com YouTube http://www.youtube.com/robojaxTV

 *
  *
 * This code is "AS IS" without warranty or liability. Free to be used as long as you keep this note intact. *
 * This code has been downloaded from Robojax.com
    This program is free software: you can redistribute it and/or modify
    it under the terms of the GNU General Public License as published by
    the Free Software Foundation, either version 3 of the License, or
    (at your option) any later version.

    This program is distributed in the hope that it will be useful,
    but WITHOUT ANY WARRANTY; without even the implied warranty of
    MERCHANTABILITY or FITNESS FOR A PARTICULAR PURPOSE.  See the
    GNU General Public License for more details.

    You should have received a copy of the GNU General Public License
    along with this program.  If not, see <https://www.gnu.org/licenses/>.


*/
#include <M5Core2.h>


const int refresh=3000;//read every 3 seconds

unsigned int unit=3;//
//              0=C celsius
//              1=F fahrenheit
//              2=Humidity
//              3=C and Humidity
//              4=F and Humidity
//              5=C and F

char *title[]={"Temperature","Temperature","Humidity"};
char *unitText[]={"C","F","%"};

//set more color. see https://docs.m5stack.com/#/en/api/lcd

unsigned int backgroundColor= YELLOW;
unsigned int temperatureTitleColor= BLACK;
unsigned int temperatureValueColor= RED;

unsigned int humidityTitleColor= BLACK;
unsigned int humidityValueColor= RED;

unsigned int background2Color= TFT_CYAN;

uint8_t titleV,unitV,degree;

uint8_t line1TitleY=3;
uint8_t line1ValueY=40;

uint8_t line2TitleY=110;
uint8_t line2ValueY=150;

#include "DHT.h"
#define DHTPIN 27
//#define DHTTYPE DHT11   // DHT 11
#define DHTTYPE DHT22   // DHT 22  (AM2302), AM2321
//#define DHTTYPE DHT21   // DHT 21 (AM2301)
DHT dht(DHTPIN, DHTTYPE);
float temperatureCValue,temperatureFValue, humidityValue,myValue1,myValue2;//
// ****** DHT settings end (Robojax.com )

void readTemperature();
void displayTemperature(uint8_t line );
void setup() {

  M5.begin();
  M5.Lcd.setTextSize(4);

  Serial.begin(9600);//default is 115200
  Serial.println("M5Stack DHT Test ");

 // Robojax.com code for ESP32 DHT11 DHT22
   dht.begin();
delay(1000);
}

void loop() {
  readTemperature();//reads the temperature and humidity
  displayMyValue();//displays temperature or humidity

  //printOnSerial();
   delay(refresh);
}


/*
 * www.robojax.com
 * see video https://youtu.be/ZDZm_QOlCJo
 * for details
 */
void readTemperature()
{
  temperatureCValue = dht.readTemperature();// Read temperature as Celsius (the default)
  humidityValue = dht.readHumidity();// Reading humidity
  temperatureFValue = dht.readTemperature(true);// Read temperature as Fahrenheit (isFahrenheit = true)

}//readTemperature() end

void displayMyValue()
{

  switch (unit) {
    case 1:
      titleV = 1;
      unitV =1;
      myValue1= temperatureFValue;
      displayTemperature( 1 , true);
    break;

    case 2:
      titleV = 2;
      unitV =2;
      myValue1= humidityValue;
     displayTemperature( 1, false );
    break;

    case 3:
      titleV = 0;
      unitV =0;
      myValue1= temperatureCValue;
      displayTemperature( 1 , true);

      titleV = 2;
      unitV =2;
      myValue2= humidityValue;
      displayTemperature( 2, false );
    break;

    case 4:
      titleV = 1;
      unitV =1;
      myValue1= temperatureFValue;
      displayTemperature( 1 , true);

      titleV = 2;
      unitV =2;
      myValue2= humidityValue;
      displayTemperature( 2 , false);
    break;

    case 5:
      titleV = 0;
      unitV =0;
      myValue1= temperatureCValue;
      displayTemperature( 1, true);

      titleV = 1;
      unitV =1;
      myValue2= temperatureFValue;
      displayTemperature( 2 , true);
    break;

    default:
      titleV = 0;
      unitV =0;
      myValue1= temperatureCValue;
      displayTemperature(1, true);
    break;

  }


}//displayMyValue() end

/*
 * displayTemperature(uint8_t line, bool degree)
 * Displays temperature on Core2 screen
 * See video for details
 * https://youtu.be/ZDZm_QOlCJo
 */
void displayTemperature(uint8_t line, bool degree)
{
  uint8_t Y_lineTitle,Y_lineValue;
  float valueToDisplay;
  //M5.Lcd.fillScreen(backgroundColor);
  M5.Lcd.setTextColor(temperatureTitleColor);

  M5.Lcd.setTextSize(4);
  if(line ==1){
    Y_lineTitle =line1TitleY;
    Y_lineValue =line1ValueY;
    valueToDisplay=myValue1;
    //M5.Lcd.fillRect(0, 0, 340, line2TitleY, backgroundColor);
   M5.Lcd.fillScreen(backgroundColor);
  }else{
    //M5.Lcd.drawRect(0, line2TitleY, 340, 240-line2TitleY, background2Color);
    M5.Lcd.fillRect(0, line2TitleY, 340, 240-line2TitleY, background2Color);
    Y_lineTitle =line2TitleY;
    Y_lineValue =line2ValueY;
    valueToDisplay=myValue2;
  }

  M5.Lcd.setCursor(3,Y_lineTitle);

  M5.Lcd.print(title[titleV]);
  M5.Lcd.setTextColor(temperatureValueColor);
  M5.Lcd.setTextSize(7);
  M5.Lcd.setCursor(3,Y_lineValue);
  M5.Lcd.printf("%.1f", valueToDisplay);
  if(degree){
   printDegree();//print degree symbol if needed
  }
  M5.Lcd.print(unitText[unitV]);
}
/*
 * displayHumidity()
 * displays humidity from DHT11 or DHT22 on Core 2
 * written by Ahmad Shamshiri
 * on April 21, 2021 in Ajax, Ontario, Canada
 * www.robojax.com
 */
void displayHumidity()
{

  M5.Lcd.setTextColor(humidityTitleColor);
  M5.Lcd.setTextSize(4);
  M5.Lcd.setCursor(3,110);
  M5.Lcd.print(title[2]); //humidity title
  M5.Lcd.setTextColor(humidityValueColor);
  M5.Lcd.setTextSize(7);
  M5.Lcd.setCursor(3,150);
  M5.Lcd.printf("%.1f", humidityValue);
  M5.Lcd.print(unitText[2]);

}//displayHumidity() end


/*
 * printDegree()
 * prints degree symbol
 * Written by Ahmad Shamshiri
 * on April 2, 2021 at 23:53
 * www.robojax.com
 */
void printDegree()
{

  M5.Lcd.setTextSize(3);

  M5.Lcd.print("o");
  M5.Lcd.setTextSize(7);
  M5.Lcd.setCursor(M5.Lcd.getCursorX()+15,M5.Lcd.getCursorY());
}//printDegree() end

/*
written by Ahmad Shamshiri for Robojax, Robojax.com
on April 21, 2021 in Ajax, Ontario, Canada
*/
void printOnSerial()
{
      Serial.print(title[unit]);
      Serial.print(" ");
      Serial.print(myValue1);

      Serial.print(unitText[unit]);
      Serial.println();
}//printOnSerial() end
Resources & references
-
ExternalM5Stack Core2 Documentation pagedocs.m5stack.com
-
ExternalM5Stack Core2 product pagem5stack-store.myshopify.com
Files📁
No files available.