Lesson 78: Lakisa mosika na VL53L0X na LCD | Eteyelo ya Arduino na Mokolo na Mokolo
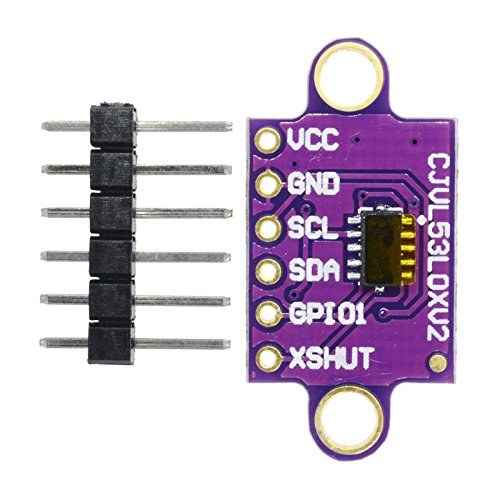
Esaleli ya Hardware
- Table ya Arduino (lokola Uno)
- Senseur ya mosika ya laser VL53L0X
- Ekrani ya LCD 1602 na module ya I2C
- Banzela ya jumper
Mokambi ya bobongisi ya ba connexions
Bobongisi ya ba connexions mpo na projet oyo ezali pete, mpo na protocole ya I2C, oyo epesaka LCD mpe senseur nzela ya kosolola na ba fils mibale ya ndenge moko. Senseur ya VL53L0X esengaka na puissance ya 5V, oyo ezwami mbala moko na pin ya 5V ya Arduino. Mpo na kopesa senseur source ya puissance ya sembo, pin mosusu ebakisami lokola VCC ya mibale. (na vidéo na 00:27)
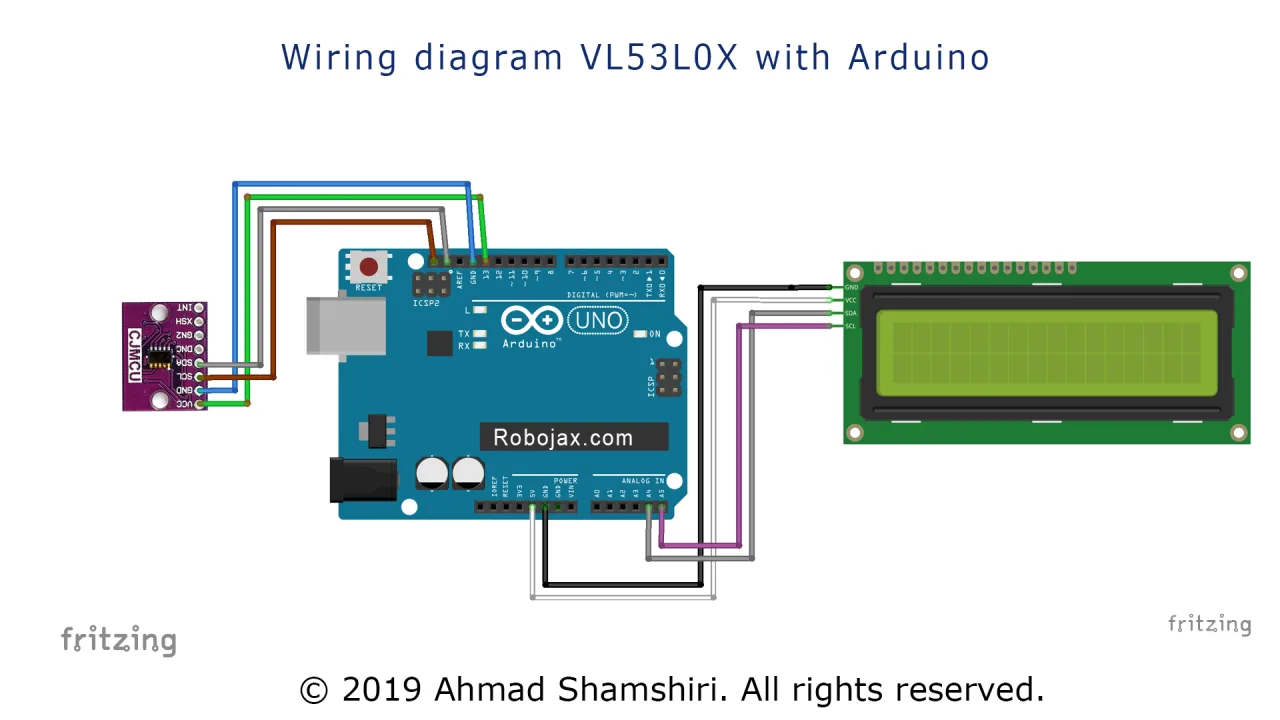
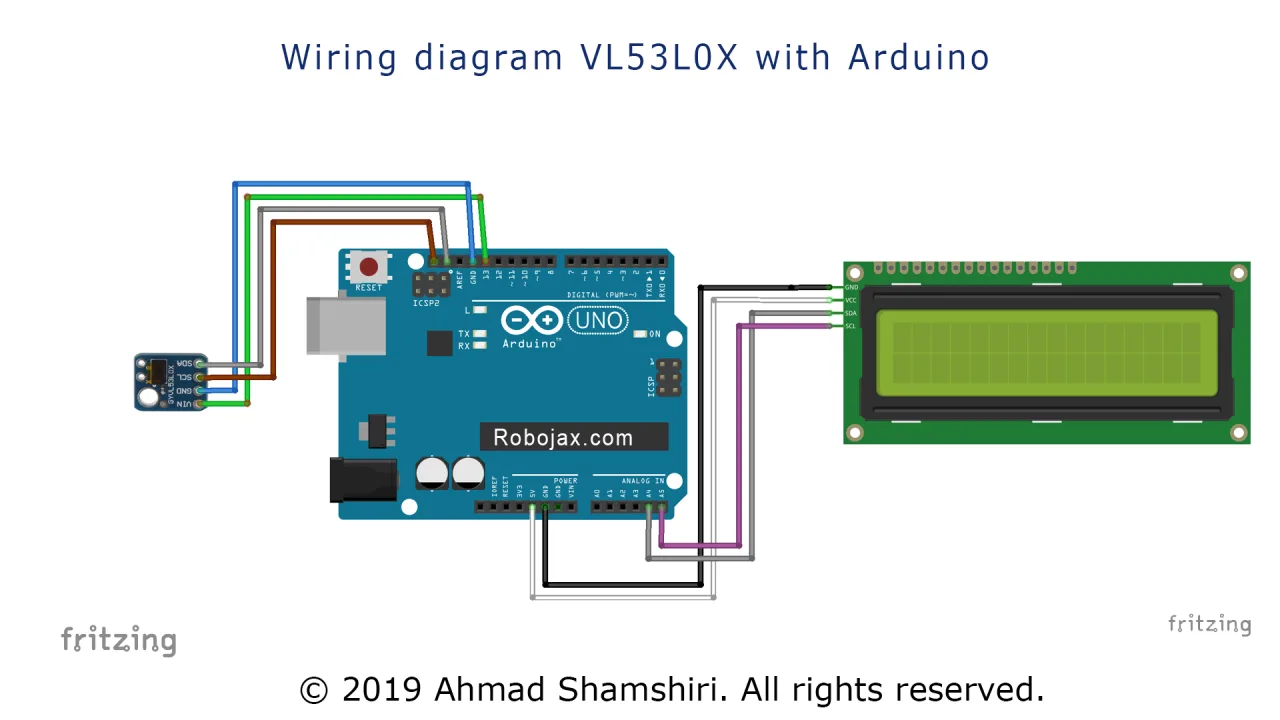
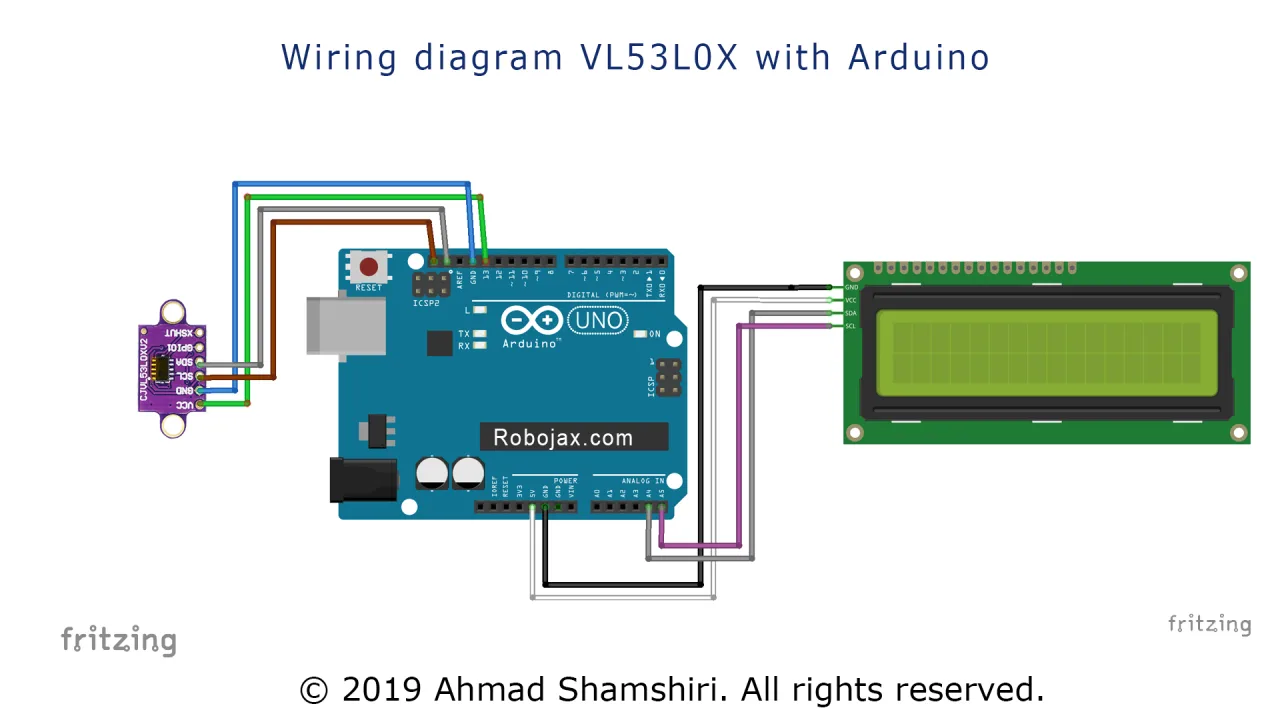
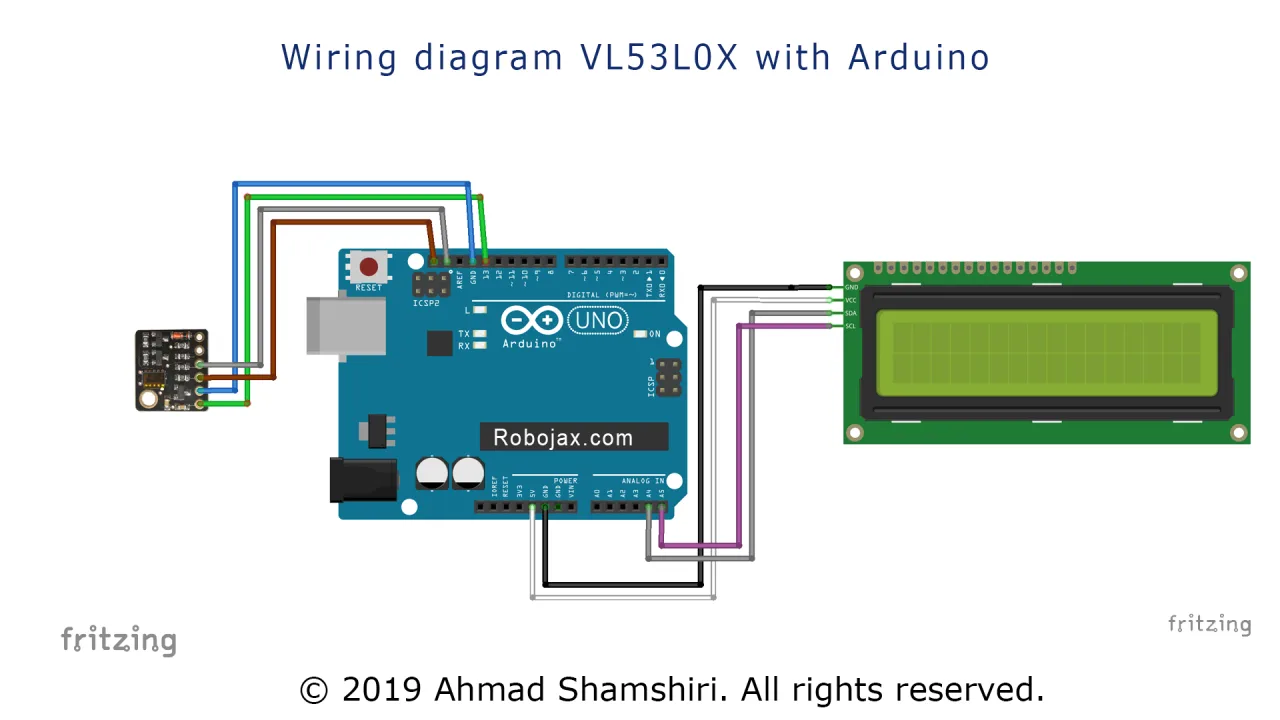
Tala mokambi ya connexions oyo:

Ba connexions ezali boye:
- VL53L0X VCC -> Arduino 5V mpe Pin 13 (Pin 13 esalemi lokola sortie ya numérique mpo na kopesa lisungi ya puissance ya sembo).
- VL53L0X GND -> Arduino GND.
- VL53L0X SCL -> Arduino SCL (A5).
- VL53L0X SDA -> Arduino SDA (A4).
- LCD I2C VCC -> Arduino 5V.
- LCD I2C GND -> Arduino GND.
- LCD I2C SCL -> Arduino SCL (A5).
- LCD I2C SDA -> Arduino SDA (A4).
Soki ozali kosalela modeli mosusu ya Arduino, ba pins ya I2C ekoki kozala na esika mosusu. Ba pins ya SDA mpe SCL ekomami mbala mingi moko na table. (na vidéo na 02:42)
Limonisi ya Code
Code esalemi mpo na kozala pete na konfiguere. Ba eteni ya moto oyo akoki kobongola ezali na likolo ya sketch. (na vidéo na 04:18)
Liboso, tosali définition ya constante mpo na pin ya puissance ya liboso. Oyo esalelami mpo na kopesa 5V ya pete na senseur.
const int vcc2 = 13; // Pin ya VCC ya liboso mpo na senseur ya VL53L0XNa sima, tosali création ya instance ya bibliothèque ya LCD mpe tosali définition ya adresse na yango ya I2C. Okoki kozwa adresse oyo na kosala scanner ya I2C, ndenge emonami na vidéo. (na vidéo na 03:26)
LiquidCrystal_I2C lcd(0x3F, 16, 2); // Bongola adresse ya LCD na 0x3F mpo na ekrani ya ba caractères 16 mpe ba lignes 2Na suka, ezali na variable oyo ekolaka unité ya mesure. Okoki kobongola valeur oyo mpo na kolakisa mosika na millimètres to centimètres.
const int type = 1; // Bongola na 1 mpo na millimètre, 2 mpo na centimètreNa fonction setup(), pin ya VCC ya liboso esalemi lokola sortie mpe esili kozwa valeur HIGH mpo na kopesa puissance na senseur. Na sima, LCD ebandisami.
Logique ya liboso na fonction loop() etangaka mosika na senseur, ekolongolaka LCD, mpe ekomaka valeur na unité. Tango type ezali na valeur 2, mosika ebongolami longwa na millimètres na valeur ya float na centimètres mpo na kotanga ya sembo koleka. (na vidéo na 06:47)
Lakisi ya Projet na Bomoi
Na lakisi, senseur etekami na règlette mpo na koyeba soki ezali ya sembo. Vidéo emonisi ete senseur epesaka ba mesures ya sembo mingi, na déviation ya ba millimètres moke. (na vidéo na 08:32)
Ezali malamu koyeba ete senseur ezali na mosika ya maximum ya pene na 1,2 mètres na mode ya mesure ya libela. Tango objet ezali na libánda ya mosika, ekrani ekolakisa valeur 8190. (na vidéo na 09:53)
Lisusu mosusu ya motuya ezali ete sensor ekoki kopesa ba lectures ya mabe na ba surfaces oyo ezali kongenga mingi. Kotia yango na eloko oyo ezali kongenga ekoki kosala ba erreurs minene, kasi kotia yango na surface ya matte epesa ba résultats ya malamu. (na vidéo na 10:42)
Code yango ezali mpe compatible na ba variantes ya module VL53L0X mpe ba LCD minene, lokola modèle 2004, sans mbongwana na ba connexions. (na vidéo na 11:30)
Ba Chapitres ya Vidéo
- [00:05] Introduction na projet VL53L0X mpe LCD
- [00:27] Diagramme ya ba connexions mpo na VL53L0X mpe LCD
- [02:51] Ba connexions détaillées na board Arduino ya solo
- [03:26] Koluka ba adresses I2C
- [04:18] Explication ya code mpe configuration
- [08:32] Démonstration ya komekama ya mosika na temps réel
- [09:53] Komeka étendue ya sensor mpe ba limites na yango
- [10:42] Précision na ba surfaces ndenge na ndenge
- [11:30] Komeka na module sensor mosusu mpe LCD monene
Images
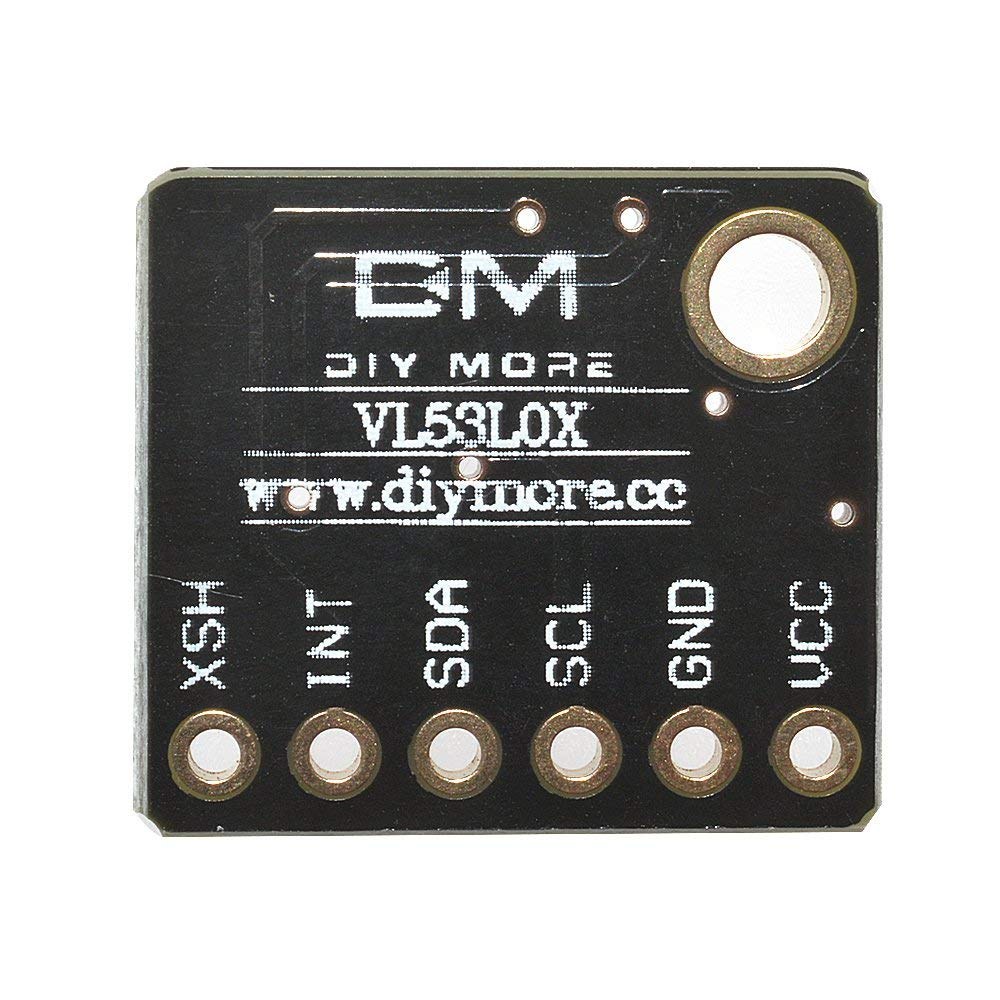


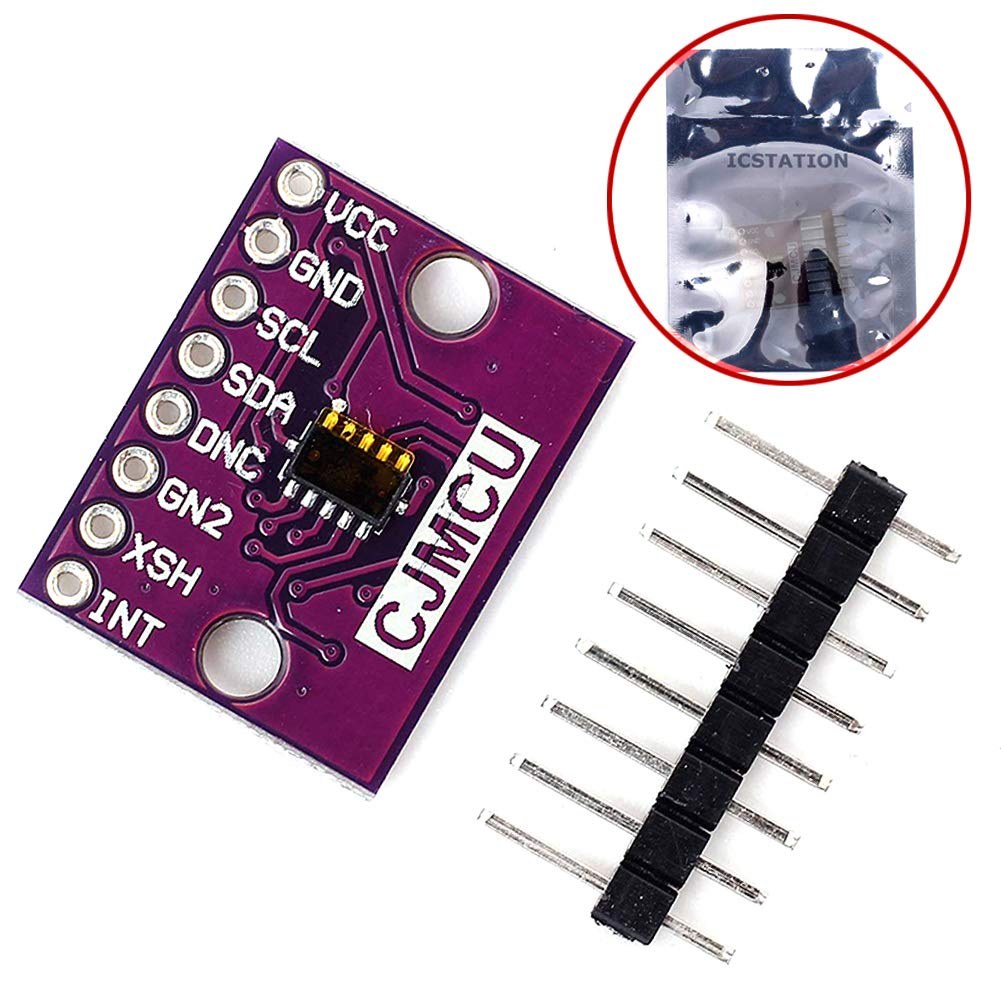
/*
* Lesson 76-1: Using One single VL6180 Laser Distance Sensor with Arduino
 * Adafruit code modified for this tutorial
 * by Ahmad Shamshiri at 22:22 on
 * March 10-11, 2021 in Ajax, ON, Canada
 Please watch video instruction of this code: https://youtu.be/_H9D0czQpSI

View code for using two or more VL6180X sensors: https://robojax.com/course1/lecture76

  This video is part of Arduino Step by Step Course which starts here: https://youtu.be/-6qSrDUA5a8


If you found this tutorial helpful, please support me so I can continue creating
content like this.

or make a donation using PayPal http://robojax.com/L/?id=64

 * This code is "AS IS" without warranty or liability. Free to be used as long as you keep this note intact. *
 * This code has been downloaded from Robojax.com
    This program is free software: you can redistribute it and/or modify
    it under the terms of the GNU General Public License as published by
    the Free Software Foundation, either version 3 of the License, or
    (at your option) any later version.

    This program is distributed in the hope that it will be useful,
    but WITHOUT ANY WARRANTY; without even the implied warranty of
    MERCHANTABILITY or FITNESS FOR A PARTICULAR PURPOSE.  See the
    GNU General Public License for more details.

    You should have received a copy of the GNU General Public License
    along with this program.  If not, see <https://www.gnu.org/licenses/>.
 */
#include <Wire.h>
#include "Adafruit_VL6180X.h"

Adafruit_VL6180X vl = Adafruit_VL6180X();

void setup() {
  Serial.begin(115200);

  // wait for serial port to open on native usb devices
  while (!Serial) {
    delay(1);
  }

  Serial.println("Adafruit VL6180x test!");
  if (! vl.begin()) {
    Serial.println("Failed to find sensor");
    while (1);
  }
  Serial.println("Sensor found!");
}

void loop() {

  uint8_t range = vl.readRange();
  uint8_t status = vl.readRangeStatus();

  if (status == VL6180X_ERROR_NONE) {
    Serial.print("Range: "); Serial.print(range);
    Serial.println("mm");
  }
//  if(range <=76)
//  {
//    //do something
//  }

  // Some error occurred, print it out!

  if  ((status >= VL6180X_ERROR_SYSERR_1) && (status <= VL6180X_ERROR_SYSERR_5)) {
    Serial.println("System error");
  }
  else if (status == VL6180X_ERROR_ECEFAIL) {
    Serial.println("ECE failure");
  }
  else if (status == VL6180X_ERROR_NOCONVERGE) {
    Serial.println("No convergence");
  }
  else if (status == VL6180X_ERROR_RANGEIGNORE) {
    Serial.println("Ignoring range");
  }
  else if (status == VL6180X_ERROR_SNR) {
    Serial.println("Signal/Noise error");
  }
  else if (status == VL6180X_ERROR_RAWUFLOW) {
    Serial.println("Raw reading underflow");
  }
  else if (status == VL6180X_ERROR_RAWOFLOW) {
    Serial.println("Raw reading overflow");
  }
  else if (status == VL6180X_ERROR_RANGEUFLOW) {
    Serial.println("Range reading underflow");
  }
  else if (status == VL6180X_ERROR_RANGEOFLOW) {
    Serial.println("Range reading overflow");
  }
  delay(50);
}
Nko o na nki.
-
AmazonPurchase VL53L0X from Amazonamzn.to
-
eBayPurchase VL53l0x from eBayebay.us
Mokili na bisika
-
L'extérieurArduino Library (GitHub)github.com
-
L'extérieurPurchase VL53l0x from eBayebay.us
-
L'extérieurVL53L0X datasheet (PDF)st.com
Fichiers📁
Fritzing File
-
Adafruit VL6180X Time of Flight Distance SensorFritzing part for the Adafruit VL6180X Time of Flight distance sensor. This sensor measures absolute distance up to 100mm and ambient light, communicating via I2C. Includes the sensor breakout board and pin connections for use in Fritzing projects.
Adafruit VL6180X Time of Flight Distance Sensor-1.fzpz0.02 MB