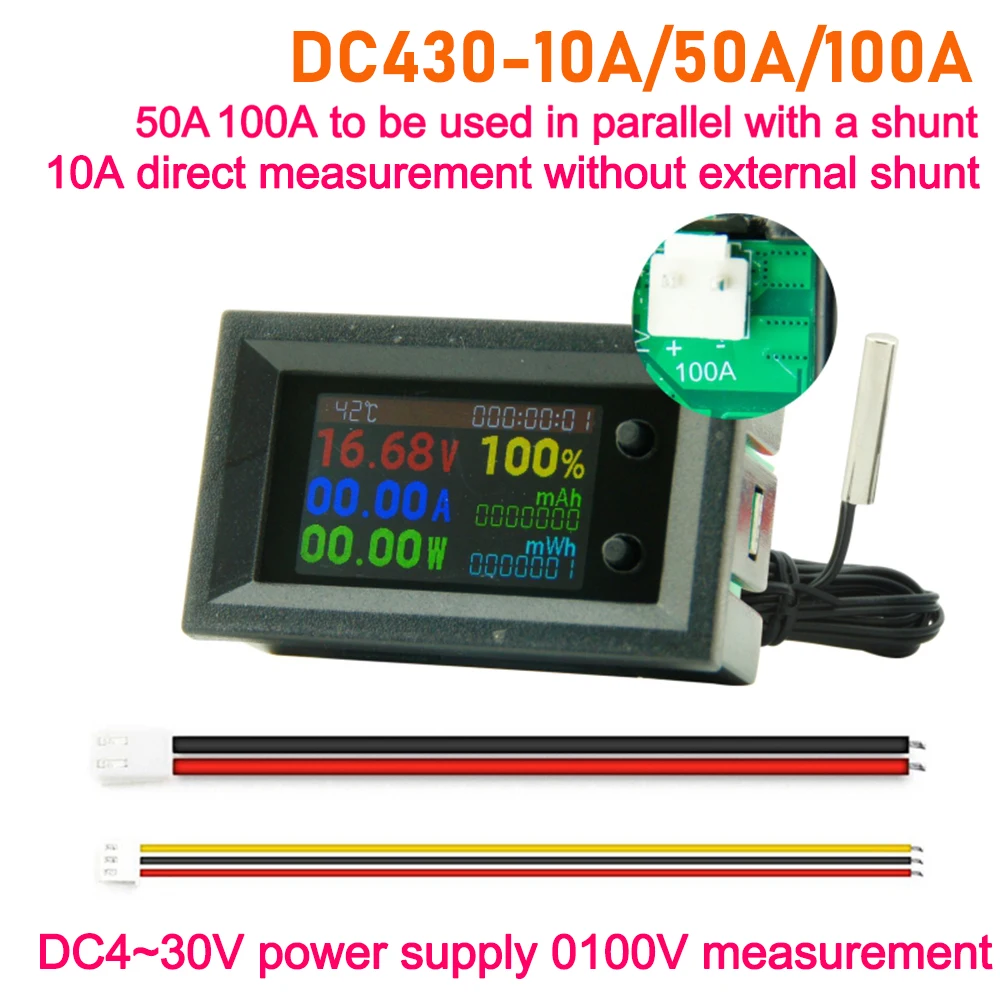
How to use Mosfet Optocoupled HW-532 to control up to 30V DC Motor Speed or load using Arduino
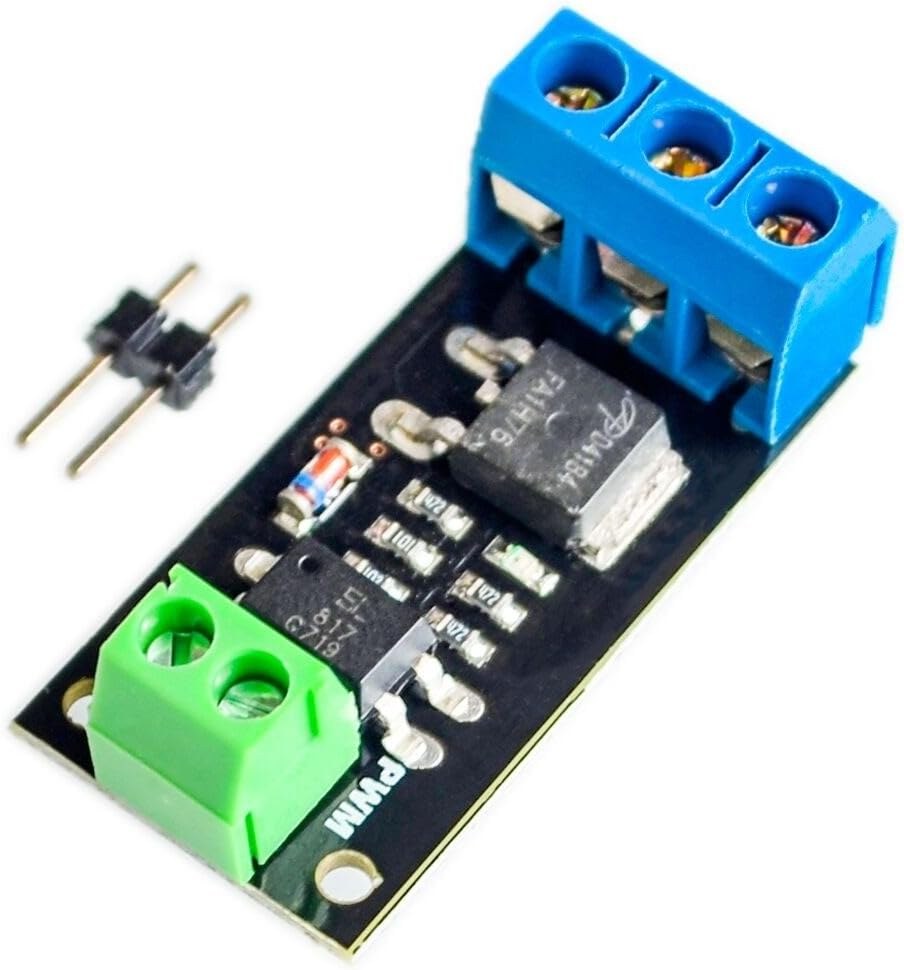
This project guide demonstrates how to build a versatile DC motor speed controller using an Arduino and the HW-532 optocoupled MOSFET module. The mosfet may be FR120N , LR7843 or D4184. This allows you to control the speed and on/off state of a DC motor with voltages up to 30V. The HW-532 module offers protection and isolation, making it safer and more reliable than directly connecting the motor to the Arduino.
This project is valuable for various applications. Here are a few examples:
- Precisely controlling the speed of a robotic arm
- Building a variable-speed fan for cooling systems
- Creating automated machinery with adjustable movement
- Developing a motorized valve control for fluid systems
Hardware/Components
The core components are the Arduino, the HW-532 optocoupled MOSFET module (with MOSFET options like D4184, LR7843, or FR120N), a DC motor (voltage rating ≤ 30V), connecting wires, and optionally, a potentiometer and push-button switch for advanced control (in video at 19:34).
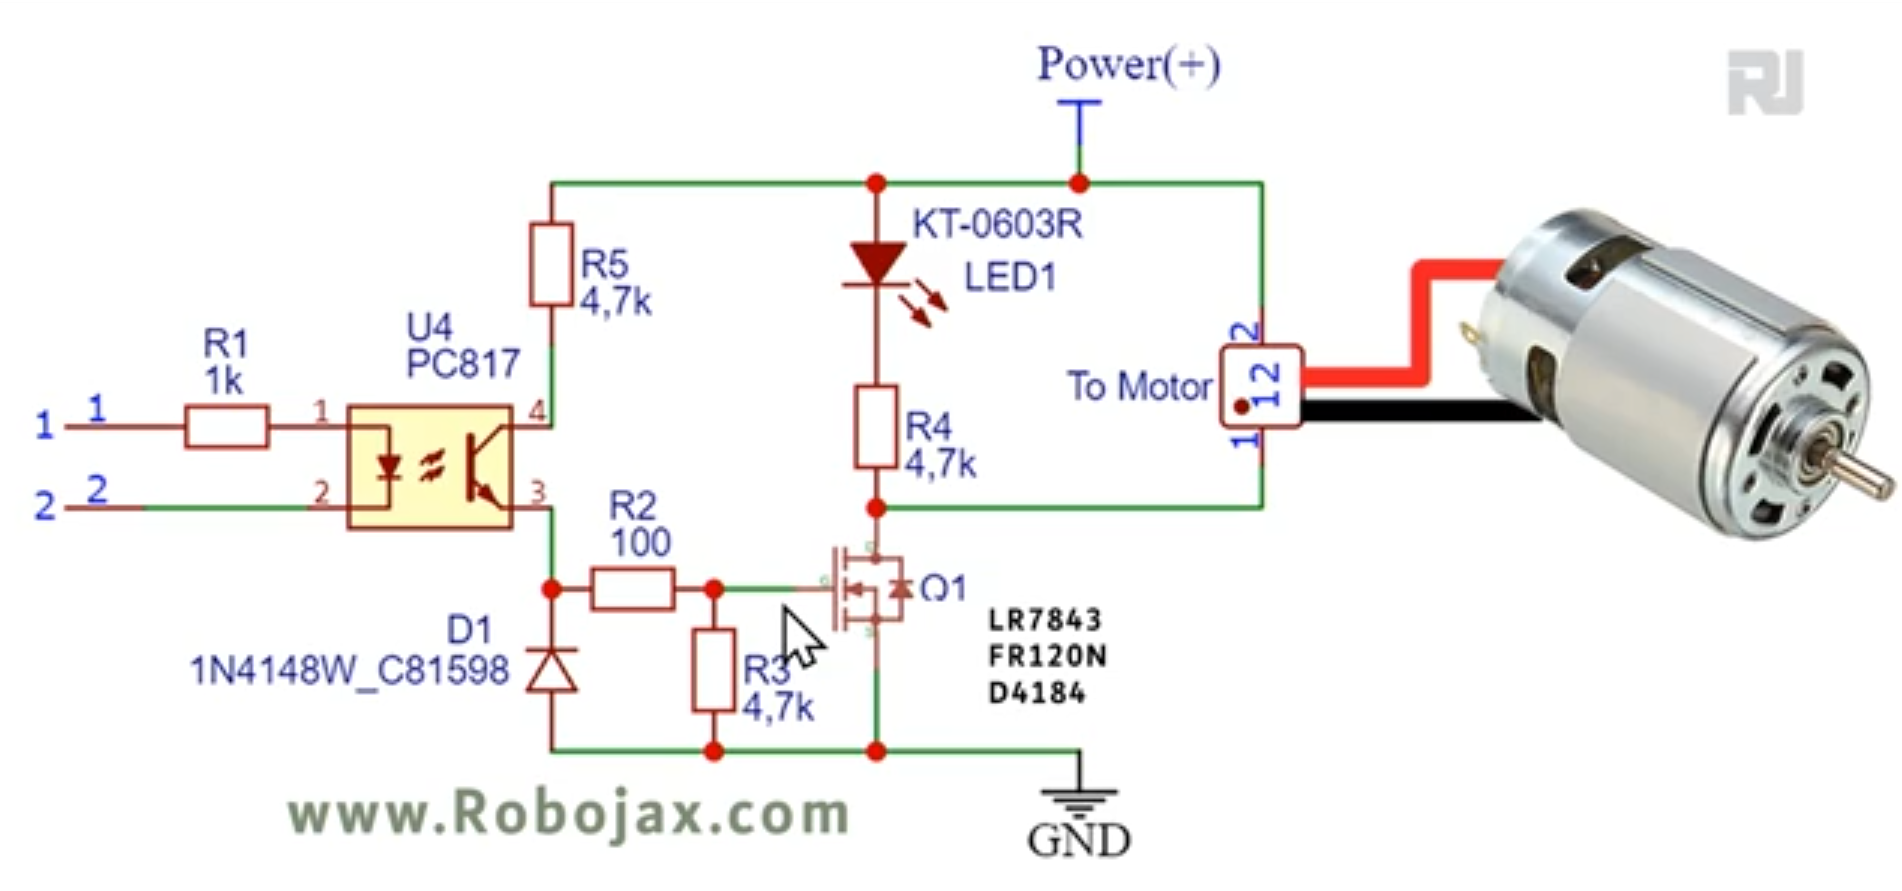
The choice of MOSFET within the HW-532 module depends on your current requirements (in video at 01:24). The video provides a detailed comparison of the different MOSFETs (in video at 06:50) and their suitability for various applications (in video at 09:45). Remember to include a diode for inductive loads like DC motors to protect the module (in video at 06:00 and 22:02).
Wiring Guide
The basic wiring connects the motor's positive terminal to the HW-532's output, the motor's negative terminal to the HW-532's ground, and the HW-532's control pin to an Arduino digital pin (in video at 11:16).

Code Explanation
The provided code offers three levels of control:
- On/Off Control: This simple code (in video at 15:05) uses a digital pin to switch the motor on and off. The user-configurable part is the
MOTOR_OUT_PINconstant, which defines which Arduino pin controls the HW-532 module. - PWM Speed Control: This code (in video at 15:39) uses Pulse Width Modulation (PWM) to control the motor's speed. The user can adjust
SPEED_MAXandSPEED_MINto set the upper and lower limits of the speed control, and themotorControl()andstopMotor()functions are used to control the motor and stop it, respectively. - Potentiometer and Push-Button Control: This code (in video at 22:12) allows controlling the motor speed with a potentiometer and starting/stopping it with a push button. User-configurable parts include
POT_PIN(potentiometer pin),MOTOR_OUT_PIN(PWM control pin),START_STOP_PIN(push button pin),SPEED_MAX, andSPEED_MIN.
Live Project/Demonstration
The video demonstrates the operation of all three code examples. The on/off control is shown (in video at 11:41), followed by PWM speed control (in video at 16:53), and finally, the potentiometer and push-button control (in video at 23:02).
Chapters
- [00:00] Introduction and Project Overview
- [01:24] HW-532 Module and MOSFET Options
- [03:23] Circuit Schematic and Explanation
- [05:11] Component Details
- [06:50] MOSFET Datasheet Analysis
- [11:16] Basic Wiring and On/Off Demonstration
- [15:05] Arduino Code for On/Off Control
- [15:39] Arduino Code for PWM Speed Control
- [19:34] Wiring with Potentiometer and Push Button
- [22:12] Arduino Code with Potentiometer and Push Button
Görseller


/*
 * Ders 108-1: Bu derste, modülü FR120N, LR7843 ve D4184 MOSFET ile kullanarak 10A'e kadar DC yükü nasıl açıp kapatacağımızı öğreniyoruz. HW-532, modüle bağlı olarak 5V'tan 30V'a kadar 10A'e kadar yüke kadar optik olarak izole edilmiştir. Şema gösterilmiştir, bağlantı şeması açıklanmıştır ve ayrıca buton ve potansiyometre ile farklı bağlantı yöntemleri de gösterilmiştir.
 * Video https://youtu.be/eqXaqRFAWrA
 *
 * RoboJax.com için Ahmad Shamshiri tarafından yazılmıştır.
 * // 25 Ağustos 2022 tarihinde Aajx, Ontario, Kanada'da yayınlanmıştır.
 *
 * Proje 1: Bir motoru veya yükü açma/kapatma (bu proje)
 * Proje 2: Arduino kodu kullanarak hızı kontrol etme
 * Proje 3: Potansiyometre ve buton kullanarak hızı kontrol etme
 *
 * Bu kod için video talimatlarını izleyin: https://youtu.be/eqXaqRFAWrA
 *
 * Bu kod, şu adreste başlayan Arduino Adım Adım Kursu'nun bir parçasıdır: https://youtu.be/-6qSrDUA5a8
 *
 * Bu kodun kütüphanesi için http://robojax.com/ adresini ziyaret edin.
 *
 * Bu eğitimi faydalı bulduysanız, lütfen bu tür içerikler oluşturmaya devam edebilmem için beni destekleyin. Kredi kartınızla PayPal kullanarak bağış yapın https://bit.ly/donate-robojax
 *
 * Bu kod, garanti veya yükümlülük olmaksızın "OLDUĞU GİBİ"dir. Bu notu olduğu gibi muhafaza ettiğiniz sürece kullanımı ücretsizdir.*
 * Bu kod Robojax.com adresinden indirilmiştir.
 * Bu program özgür bir yazılımdır: Özgür Yazılım Vakfı tarafından yayınlanan GNU Genel Kamu Lisansı'nın 3. sürümü veya (tercihinize bağlı olarak) daha sonraki herhangi bir sürümü kapsamında yeniden dağıtabilir ve/veya değiştirebilirsiniz.
 *
 * Bu program, faydalı olacağı umuduyla dağıtılmaktadır,
 * ancak HERHANGİ BİR GARANTİ OLMADAN; hatta SATILABİLİRLİK veya BELİRLİ BİR AMACA UYGUNLUK konusunda zımni bir garanti bile verilmeden.
 * Daha fazla bilgi için GNU Genel Kamu Lisansı'na bakın.
 *
 * Bu programla birlikte GNU Genel Kamu Lisansı'nın bir kopyasını almış olmalısınız. Almamışsanız, <https://www.gnu.org/licenses/> adresine bakın.
 */
const int MOTOR_OUT_PIN=2;


void setup() {
 // Robojax  MOSFET Motor driver code
  Serial.begin(9600);
  Serial.println("Robojax LR7834 ,  Arduino");

  pinMode(MOTOR_OUT_PIN, OUTPUT);
  digitalWrite(MOTOR_OUT_PIN, HIGH);


}

 // the loop routine runs over and over again forever:
void loop() {


 // Robojax XY-GMOS MOSFET Motor driver code
} // loop end
# include <Arduino_LSM6DS3.h>

/*
 * Lesson 108-2: In this lesson we learn how to use  the module with FR120N , LR7843 and D4184 MOSFET to turn ON/OFF DC load up to up to 10A. HW-532 optically isolated from 5V to 30V load up to 10A depending on the module. Schematic shown, wiring diagram explained, different
 * method of wiring with push button and potentiometer also shown.
 * Video https://youtu.be/eqXaqRFAWrA
 * Get code for this project from https://robojax.com/RJT797
 *
 * Written by Ahmad Shamshiri for RoboJax.com
 * // Published on Aug 25, 2022 in Aajx, ON, Canada.
 *
 *
 *   Project 1: Turning ON/OFF a motor or load (this project)
 *   Project 2: Controlling Speed using Arduino code
 *   Project 3: Controlling Speed using potentiometer and a push button
 * Watch Video instruction for this code:https://youtu.be/eqXaqRFAWrA
 *
 * This code is part of Arduino Step by Step Course which starts here:  https://youtu.be/-6qSrDUA5a8
 *
 * for library of this code visit http://robojax.com/
 *
 *  If you found this tutorial helpful, please support me so I can continue creating
 *  content like this. Make a donation using PayPal by credit card https://bit.ly/donate-robojax
 *  * This code is "AS IS" without warranty or liability. Free to be used as long as you keep this note intact.*
 * This code has been download from Robojax.com
 *      This program is free software: you can redistribute it and/or modify
 *      it under the terms of the GNU General Public License as published by
 *      the Free Software Foundation, either version 3 of the License, or
 *      (at your option) any later version.
 *
 *      This program is distributed in the hope that it will be useful,
 *      but WITHOUT ANY WARRANTY; without even the implied warranty of
 *      MERCHANTABILITY or FITNESS FOR A PARTICULAR PURPOSE.  See the
 *      GNU General Public License for more details.
 *
 *      You should have received a copy of the GNU General Public License
 *      along with this program.  If not, see <https://www.gnu.org/licenses/>.
 */


const int MOTOR_OUT_PIN = 3;

const int SPEED_MAX = 100; // in %
const int SPEED_MIN = 0; // in %

const int STOP=0;
const int RUN=1;
int motorState=RUN;
int motorSpeed = 0; // between 0 to 100%.
 // video instruction https://youtu.be/eqXaqRFAWrA


void setup() {
 // Robojax XY-GMOS MOSFET Motor driver code
  Serial.begin(9600);
  Serial.println("Robojax XY-GMOS Motor,  Arduino");

  pinMode(MOTOR_OUT_PIN, OUTPUT);


} // setup ends

 // the loop routine runs over and over again forever:
void loop() {


 // video https://youtu.be/eqXaqRFAWrA
  motorControl(50); // run motor at 50%
  delay(5000); // keep it running for 5000ms or 5 seconds
   stopMotor(); // stop the motor
  delay(3000); // keep it stopped for 5000ms or 5 seconds

  for(int i=0; i<100; i++)
  {
    motorControl(i);
    delay(200);
  }
  stopMotor(); // stop motor
  delay(3000); // keep it stopped for 5000ms or 5 seconds

   for(int i=100; i >0; i--)
  {
    motorControl(i);
    delay(200);
  }

 // Robojax LR7843 MOSFET Motor driver code
} // loop end


/*
 * motorControl(int s)
 * @brief controls the motor with the value s
 * @param return nothing
 * @param "type" is character
 * on May 08, 2020 at 02:36 in Ajax, Ontario, Canada
 */
void motorControl(int s)
{
 // Robojax LR7843 MOSFET Motor driver code
 // video https://youtu.be/eqXaqRFAWrA
  int k = map(s, SPEED_MIN, SPEED_MAX, 0, 255);
  Serial.print("Speed: "); Serial.print(s);Serial.println("%");
  analogWrite(MOTOR_OUT_PIN, k);
} // motorControl


/*
 * stopMotor()
 * @brief stops the motor
 * @param return nothing
 * @param
 * on May 08, 2020 at 02:36 in Ajax, Ontario, Canada
 */
void stopMotor(){
 // Robojax XY-GMOS MOSFET Motor driver code
  analogWrite( MOTOR_OUT_PIN, 0);
  Serial.println("STOPPED");
} // stopMotor()
/*
 * Ders 108-3: Değişken Direnç (potansiyometre) ve Arduino ile Başlat/Durdur butonu kullanarak motor hızının kontrolü.
 *
 * Bu derste, modülü FR120N, LR7843 ve D4184 MOSFET ile kullanarak 10A'e kadar DC yükü nasıl açıp kapatacağımızı öğreniyoruz. HW-532, modüle bağlı olarak 5V ile 30V arasında 10A'e kadar yüke kadar optik olarak izole edilmiştir. Şema gösterilmiştir, bağlantı şeması açıklanmıştır ve ayrıca buton ve potansiyometre ile farklı bağlantı yöntemleri de gösterilmiştir.
 * Video https://youtu.be/eqXaqRFAWrA
 * Bu proje için kodları https://robojax.com/RJT797 adresinden edinin.
 * RoboJax.com için Ahmad Shamshiri tarafından yazılmıştır.
 * // 25 Ağustos 2022 tarihinde Aajx, ON, Kanada'da yayınlanmıştır.
 *
 * Proje 1: Bir motoru veya yükü açma/kapatma
 * Proje 2: Arduino kodu kullanarak hız kontrolü
 * Proje 3: Potansiyometre ve buton kullanarak hız kontrolü (bu proje)
 *
 * Bu kod için video talimatını izleyin: https://youtu.be/eqXaqRFAWrA
 *
 * Bu kod, burada başlayan Arduino Adım Adım Kursu'nun bir parçasıdır: https://youtu.be/-6qSrDUA5a8
 *
 * Bu kodun kütüphanesi için http://robojax.com/ adresini ziyaret edin.
 *
 * Bu eğitimi faydalı bulduysanız, lütfen bu tür içerikler oluşturmaya devam edebilmem için beni destekleyin. Kredi kartınızla PayPal kullanarak bağış yapın https://bit.ly/donate-robojax
 *
 * Bu kod, garanti veya yükümlülük olmaksızın "OLDUĞU GİBİ"dir. Bu notu olduğu gibi muhafaza ettiğiniz sürece kullanımı ücretsizdir.*
 * Bu kod Robojax.com adresinden indirilmiştir.
 * Bu program özgür bir yazılımdır: Özgür Yazılım Vakfı tarafından yayınlanan GNU Genel Kamu Lisansı'nın 3. sürümü veya (tercihinize bağlı olarak) daha sonraki herhangi bir sürümü kapsamında yeniden dağıtabilir ve/veya değiştirebilirsiniz.
 *
 * Bu program, faydalı olacağı umuduyla dağıtılmaktadır,
 * ancak HERHANGİ BİR GARANTİ OLMADAN; hatta SATILABİLİRLİK veya BELİRLİ BİR AMACA UYGUNLUK konusunda zımni bir garanti bile verilmeden.
 * Daha fazla bilgi için GNU Genel Kamu Lisansı'na bakın.
 *
 * Bu programla birlikte GNU Genel Kamu Lisansı'nın bir kopyasını almış olmalısınız. Almamışsanız, <https://www.gnu.org/licenses/> adresine bakın.
 */
const int POT_PIN =A0; // can change
const int MOTOR_OUT_PIN = 3; // ~
const int START_STOP_PIN=2; // for push button switch

const int SPEED_MAX = 100; // in %
const int SPEED_MIN = 0; // in %
 // video instruction https://youtu.be/eqXaqRFAWrA

const int STOP=0;
const int RUN=1;
int motorState=RUN;
int motorSpeed = 0; // between 0 to 100%.

void pushButton();
void setup() {
 // Robojax XY-GMOS MOSFET Motor driver code
  Serial.begin(9600);
  Serial.println("Robojax XY-GMOS Motor,  Arduino");
  pinMode(START_STOP_PIN, INPUT_PULLUP);
  pinMode(MOTOR_OUT_PIN, OUTPUT);
 // video instruction https://youtu.be/eqXaqRFAWrA


}

 // the loop routine runs over and over again forever:
void loop() {

 pushButton();
 int potValue =analogRead(POT_PIN);
 int speedPercent = map(potValue, 0, 1023, 0, 100);

 if(motorState ==RUN)
 {
  motorControl(speedPercent);
 }else{
  stopMotor();
 }


  delay(500);
 // Robojax XY-GMOS MOSFET Motor driver code
 // video instruction https://youtu.be/eqXaqRFAWrA
} // loop end


/*
 * motorControl(int s)
 * @brief controls the motor with the value s
 * @param return nothing
 * @param "type" is character
 * on May 08, 2020 at 02:36 in Ajax, Ontario, Canada
 */
void motorControl(int s)
{
 // Robojax LR7843 MOSFET Motor driver code
 // video instruction https://youtu.be/eqXaqRFAWrA
  int k = map(s, SPEED_MIN, SPEED_MAX, 0, 255);
  Serial.print("Speed: "); Serial.print(s);Serial.println("%");
  analogWrite(MOTOR_OUT_PIN, k);
} // motorControl


/*
 * stopMotor()
 * @brief stops the motor
 * @param return nothing
 * @param
 * on May 08, 2020 at 02:36 in Ajax, Ontario, Canada
 */
void stopMotor(){
 // Robojax XY-GMOS MOSFET Motor driver code
 // video instruction https://youtu.be/eqXaqRFAWrA
  analogWrite( MOTOR_OUT_PIN, 0);
  Serial.println("STOPPED");
} // stopMotor()


/*
 * pushButton()
 * @brief reads the push button
 * @param return nothing
 * @param
 * on May 08, 2020 at 02:36 in Ajax, Ontario, Canada
 */
void pushButton()
{
 // Robojax XY-GMOS MOSFET Motor driver code
 // video instruction https://youtu.be/eqXaqRFAWrA
  if(digitalRead(START_STOP_PIN) ==LOW)
  {
    motorState =!motorState;
    delay(100);
  }

} // pushButton()
İhtiyacın olabileceğini düşünüyor
-
AmazonPurchase HW-532 from Amazonamzn.to
-
eBay
-
AliExpressPurchase FR120N Motor Driver from AliExpresss.click.aliexpress.com
Kaynaklar ve referanslar
Henüz kaynak yok.
Dosyalar📁
Veri Sayfası (pdf)
-
infineon-IRLR7843 LR7843 MOSFET datasheet
infineon-irlr7843-datasheet-en.pdf0.37 MB
Fritzing Dosyası
-
HW-532B Mosfot Module
HW-532B.fzpz0.01 MB
Diğer dosyalar
-
infineon-irfr120n-datasheet-en
infineon-irfr120n-datasheet-en.pdf0.39 MB -
alpha-and-Omega-AOD4184A_datasheet
alpha-and-Omega-AOD4184A_datasheet.pdf0.43 MB