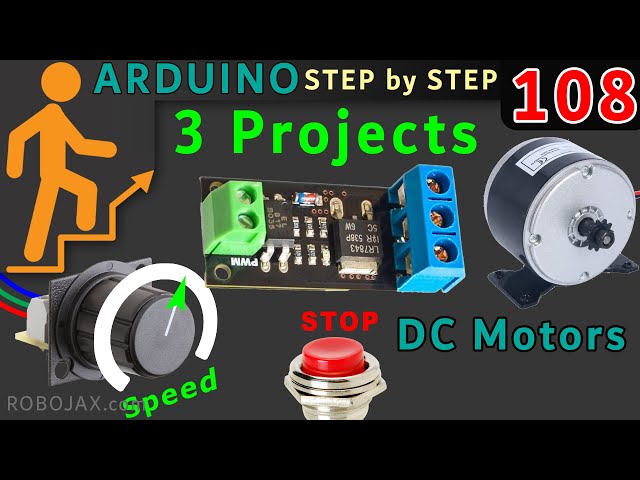
How to use Mosfet Optocoupled HW-532 to control up to 30V DC Motor Speed or load using Arduino
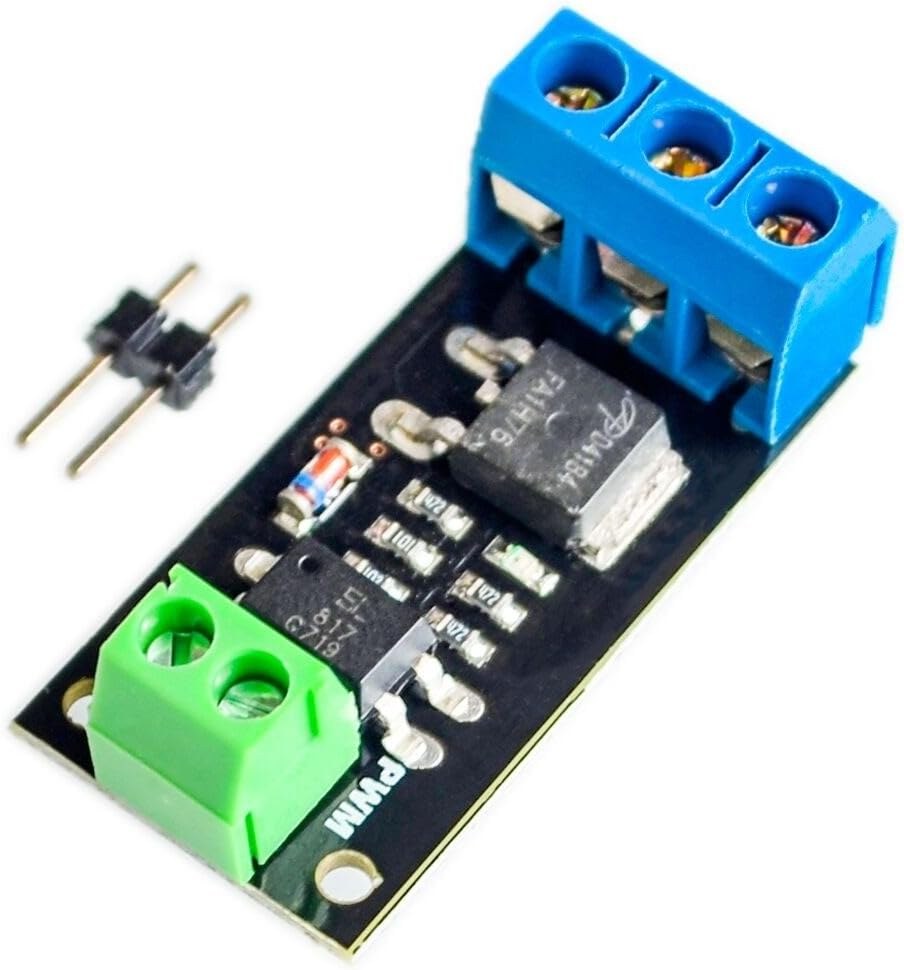
This project guide demonstrates how to build a versatile DC motor speed controller using an Arduino and the HW-532 optocoupled MOSFET module. The mosfet may be FR120N , LR7843 or D4184. This allows you to control the speed and on/off state of a DC motor with voltages up to 30V. The HW-532 module offers protection and isolation, making it safer and more reliable than directly connecting the motor to the Arduino.
This project is valuable for various applications. Here are a few examples:
- Precisely controlling the speed of a robotic arm
- Building a variable-speed fan for cooling systems
- Creating automated machinery with adjustable movement
- Developing a motorized valve control for fluid systems
Hardware/Components
The core components are the Arduino, the HW-532 optocoupled MOSFET module (with MOSFET options like D4184, LR7843, or FR120N), a DC motor (voltage rating ≤ 30V), connecting wires, and optionally, a potentiometer and push-button switch for advanced control (in video at 19:34).
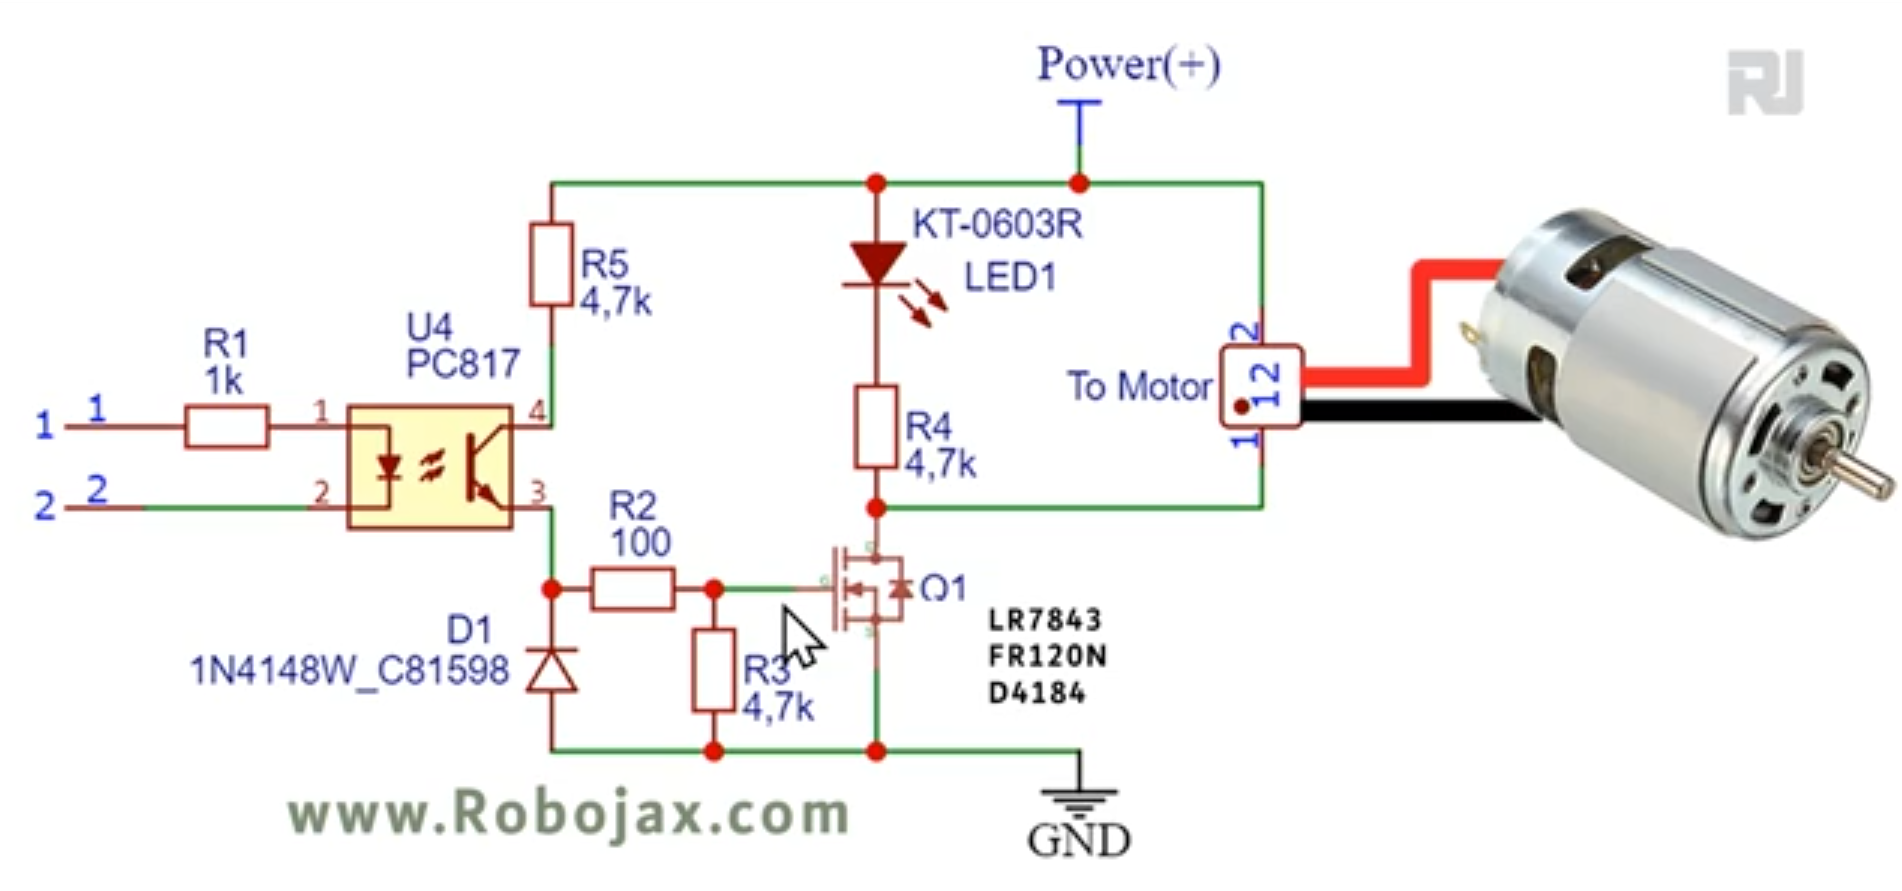
The choice of MOSFET within the HW-532 module depends on your current requirements (in video at 01:24). The video provides a detailed comparison of the different MOSFETs (in video at 06:50) and their suitability for various applications (in video at 09:45). Remember to include a diode for inductive loads like DC motors to protect the module (in video at 06:00 and 22:02).
Wiring Guide
The basic wiring connects the motor's positive terminal to the HW-532's output, the motor's negative terminal to the HW-532's ground, and the HW-532's control pin to an Arduino digital pin (in video at 11:16).

Code Explanation
The provided code offers three levels of control:
- On/Off Control: This simple code (in video at 15:05) uses a digital pin to switch the motor on and off. The user-configurable part is the
MOTOR_OUT_PINconstant, which defines which Arduino pin controls the HW-532 module. - PWM Speed Control: This code (in video at 15:39) uses Pulse Width Modulation (PWM) to control the motor's speed. The user can adjust
SPEED_MAXandSPEED_MINto set the upper and lower limits of the speed control, and themotorControl()andstopMotor()functions are used to control the motor and stop it, respectively. - Potentiometer and Push-Button Control: This code (in video at 22:12) allows controlling the motor speed with a potentiometer and starting/stopping it with a push button. User-configurable parts include
POT_PIN(potentiometer pin),MOTOR_OUT_PIN(PWM control pin),START_STOP_PIN(push button pin),SPEED_MAX, andSPEED_MIN.
Live Project/Demonstration
The video demonstrates the operation of all three code examples. The on/off control is shown (in video at 11:41), followed by PWM speed control (in video at 16:53), and finally, the potentiometer and push-button control (in video at 23:02).
Chapters
- [00:00] Introduction and Project Overview
- [01:24] HW-532 Module and MOSFET Options
- [03:23] Circuit Schematic and Explanation
- [05:11] Component Details
- [06:50] MOSFET Datasheet Analysis
- [11:16] Basic Wiring and On/Off Demonstration
- [15:05] Arduino Code for On/Off Control
- [15:39] Arduino Code for PWM Speed Control
- [19:34] Wiring with Potentiometer and Push Button
- [22:12] Arduino Code with Potentiometer and Push Button
Изображения


/*
 * Урок 108-1: В этом уроке мы изучим, как использовать модуль с MOSFET FR120N, LR7843 и D4184 для включения/выключения постоянной нагрузки до 10А. HW-532 оптически изолирован от 5V до 30V, нагрузка до 10А в зависимости от модуля. Схема показана, объяснена схема подключения, также показаны различные методы подключения с помощью кнопки и потенциометра. Видео https://youtu.be/eqXaqRFAWrA
 *
 * Автор: Ахмад Шамшир для RoboJax.com
 * // Опубликовано 25 августа 2022 года в Айдже, Онтарио, Канада.
 *
 * Проект 1: Включение/выключение мотора или нагрузки (этот проект)
 * Проект 2: Управление скоростью с помощью кода Arduino
 * Проект 3: Управление скоростью с помощью потенциометра и кнопки
 *
 * Смотрите видеоинструкцию для этого кода: https://youtu.be/eqXaqRFAWrA
 *
 * Этот код является частью курса Arduino "Шаг за шагом", который начинается здесь: https://youtu.be/-6qSrDUA5a8
 *
 * Для библиотеки этого кода посетите http://robojax.com/
 *
 * Если вы нашли этот учебник полезным, пожалуйста, поддержите меня, чтобы я мог продолжать создавать такой контент. Сделать пожертвование с помощью PayPal по кредитной карте https://bit.ly/donate-robojax
 *
 * Этот код предоставляется "КАК ЕСТЬ" без гарантий или обязательств. Свободно использовать при условии, что вы сохраните эту заметку нетронутой.*
 * Этот код был загружен с Robojax.com
 * Эта программа является бесплатным программным обеспечением: вы можете перераспределять и/или изменять ее на условиях Общей публичной лицензии GNU, опубликованной Фондом свободного программного обеспечения, либо версии 3 этой лицензии, либо (по вашему выбору) любой более поздней версии.
 *
 * Эта программа распространяется в надежде, что она будет полезной, но БЕЗ ЛЮБЫХ ГАРАНТИЙ; даже без подразумеваемой гарантии ПРОДОВОЛЬСТВЕННОГО ИСПОЛЬЗОВАНИЯ или ПРИГОДНОСТИ ДЛЯ КОНКРЕТНОЙ ЦЕЛИ. Смотрите Общую публичную лицензию GNU для получения дополнительных сведений.
 *
 * Вы должны были получить копию Общей публичной лицензии GNU вместе с этой программой. Если нет, смотрите <https://www.gnu.org/licenses/>.
 */
const int MOTOR_OUT_PIN=2;


void setup() {
 // Robojax  MOSFET Motor driver code
  Serial.begin(9600);
  Serial.println("Robojax LR7834 ,  Arduino");

  pinMode(MOTOR_OUT_PIN, OUTPUT);
  digitalWrite(MOTOR_OUT_PIN, HIGH);


}

 // the loop routine runs over and over again forever:
void loop() {


 // Robojax XY-GMOS MOSFET Motor driver code
} // loop end
# include <Arduino_LSM6DS3.h>

/*
 * Lesson 108-2: In this lesson we learn how to use  the module with FR120N , LR7843 and D4184 MOSFET to turn ON/OFF DC load up to up to 10A. HW-532 optically isolated from 5V to 30V load up to 10A depending on the module. Schematic shown, wiring diagram explained, different
 * method of wiring with push button and potentiometer also shown.
 * Video https://youtu.be/eqXaqRFAWrA
 * Get code for this project from https://robojax.com/RJT797
 *
 * Written by Ahmad Shamshiri for RoboJax.com
 * // Published on Aug 25, 2022 in Aajx, ON, Canada.
 *
 *
 *   Project 1: Turning ON/OFF a motor or load (this project)
 *   Project 2: Controlling Speed using Arduino code
 *   Project 3: Controlling Speed using potentiometer and a push button
 * Watch Video instruction for this code:https://youtu.be/eqXaqRFAWrA
 *
 * This code is part of Arduino Step by Step Course which starts here:  https://youtu.be/-6qSrDUA5a8
 *
 * for library of this code visit http://robojax.com/
 *
 *  If you found this tutorial helpful, please support me so I can continue creating
 *  content like this. Make a donation using PayPal by credit card https://bit.ly/donate-robojax
 *  * This code is "AS IS" without warranty or liability. Free to be used as long as you keep this note intact.*
 * This code has been download from Robojax.com
 *      This program is free software: you can redistribute it and/or modify
 *      it under the terms of the GNU General Public License as published by
 *      the Free Software Foundation, either version 3 of the License, or
 *      (at your option) any later version.
 *
 *      This program is distributed in the hope that it will be useful,
 *      but WITHOUT ANY WARRANTY; without even the implied warranty of
 *      MERCHANTABILITY or FITNESS FOR A PARTICULAR PURPOSE.  See the
 *      GNU General Public License for more details.
 *
 *      You should have received a copy of the GNU General Public License
 *      along with this program.  If not, see <https://www.gnu.org/licenses/>.
 */


const int MOTOR_OUT_PIN = 3;

const int SPEED_MAX = 100; // in %
const int SPEED_MIN = 0; // in %

const int STOP=0;
const int RUN=1;
int motorState=RUN;
int motorSpeed = 0; // between 0 to 100%.
 // video instruction https://youtu.be/eqXaqRFAWrA


void setup() {
 // Robojax XY-GMOS MOSFET Motor driver code
  Serial.begin(9600);
  Serial.println("Robojax XY-GMOS Motor,  Arduino");

  pinMode(MOTOR_OUT_PIN, OUTPUT);


} // setup ends

 // the loop routine runs over and over again forever:
void loop() {


 // video https://youtu.be/eqXaqRFAWrA
  motorControl(50); // run motor at 50%
  delay(5000); // keep it running for 5000ms or 5 seconds
   stopMotor(); // stop the motor
  delay(3000); // keep it stopped for 5000ms or 5 seconds

  for(int i=0; i<100; i++)
  {
    motorControl(i);
    delay(200);
  }
  stopMotor(); // stop motor
  delay(3000); // keep it stopped for 5000ms or 5 seconds

   for(int i=100; i >0; i--)
  {
    motorControl(i);
    delay(200);
  }

 // Robojax LR7843 MOSFET Motor driver code
} // loop end


/*
 * motorControl(int s)
 * @brief controls the motor with the value s
 * @param return nothing
 * @param "type" is character
 * on May 08, 2020 at 02:36 in Ajax, Ontario, Canada
 */
void motorControl(int s)
{
 // Robojax LR7843 MOSFET Motor driver code
 // video https://youtu.be/eqXaqRFAWrA
  int k = map(s, SPEED_MIN, SPEED_MAX, 0, 255);
  Serial.print("Speed: "); Serial.print(s);Serial.println("%");
  analogWrite(MOTOR_OUT_PIN, k);
} // motorControl


/*
 * stopMotor()
 * @brief stops the motor
 * @param return nothing
 * @param
 * on May 08, 2020 at 02:36 in Ajax, Ontario, Canada
 */
void stopMotor(){
 // Robojax XY-GMOS MOSFET Motor driver code
  analogWrite( MOTOR_OUT_PIN, 0);
  Serial.println("STOPPED");
} // stopMotor()
/*
 * Урок 108-3: Управление скоростью мотора с помощью переменного сопротивления (потенциометра) и с использованием кнопки запуска/остановки с Arduino.
 *
 * В этом уроке мы научимся использовать модуль с FR120N, LR7843 и D4184 MOSFET для включения/выключения нагрузки постоянного тока до 10A. HW-532 оптически изолирован для нагрузок от 5V до 30V до 10A в зависимости от модуля. Схема показана, схема подключения объяснена, также показаны различные методы подключения с кнопкой и потенциометром.
 * Видео https://youtu.be/eqXaqRFAWrA
 * Получите коды для этого проекта с https://robojax.com/RJT797
 * Написано Ахмадом Шамшири для RoboJax.com
 * // Опубликовано 25 августа 2022 года в Aajx, Онтарио, Канада.
 *
 * Проект 1: Включение/выключение мотора или нагрузки
 * Проект 2: Управление скоростью с помощью кода Arduino
 * Проект 3: Управление скоростью с помощью потенциометра и кнопки (этот проект)
 *
 * Смотрите видеоинструкцию для этого кода: https://youtu.be/eqXaqRFAWrA
 *
 * Этот код является частью курса Arduino Шаг за Шагом, который начинается здесь: https://youtu.be/-6qSrDUA5a8
 *
 * для библиотеки этого кода посетите http://robojax.com/
 *
 * Если вы нашли этот учебник полезным, пожалуйста, поддержите меня, чтобы я мог продолжать создавать
 * контент вроде этого. Сделайте пожертвование с помощью PayPal кредитной картой https://bit.ly/donate-robojax
 *
 * Этот код предоставляется "КАК ЕСТЬ" без каких-либо гарантий или обязательств. Бесплатно для использования, пока вы сохраняете это уведомление нетронутым.*
 * Этот код был скачан с Robojax.com
 * Эта программа является бесплатным программным обеспечением: вы можете перераспределять ее и/или изменять
 * ее в соответствии с условиями Общей публичной лицензии GNU, опубликованной
 * Фондом свободного программного обеспечения, версии 3 Лицензии или
 * (по вашему выбору) любой последующей версии.
 *
 * Эта программа распространяется с надеждой, что она будет полезной,
 * но БЕЗ ЛЮБЫХ ГАРАНТИЙ; даже без предполагаемой гарантии
 * ТОРГОВОЙ СЛАБОСТИ или ПРИГОДНОСТИ ДЛЯ КОНКРЕТНОЙ ЦЕЛИ. См.
 * Общую публичную лицензию GNU для получения подробной информации.
 *
 * Вы должны были получить копию Общей публичной лицензии GNU
 * вместе с этой программой. Если нет, см. <https://www.gnu.org/licenses/>.
 */
const int POT_PIN =A0; // can change
const int MOTOR_OUT_PIN = 3; // ~
const int START_STOP_PIN=2; // for push button switch

const int SPEED_MAX = 100; // in %
const int SPEED_MIN = 0; // in %
 // video instruction https://youtu.be/eqXaqRFAWrA

const int STOP=0;
const int RUN=1;
int motorState=RUN;
int motorSpeed = 0; // between 0 to 100%.

void pushButton();
void setup() {
 // Robojax XY-GMOS MOSFET Motor driver code
  Serial.begin(9600);
  Serial.println("Robojax XY-GMOS Motor,  Arduino");
  pinMode(START_STOP_PIN, INPUT_PULLUP);
  pinMode(MOTOR_OUT_PIN, OUTPUT);
 // video instruction https://youtu.be/eqXaqRFAWrA


}

 // the loop routine runs over and over again forever:
void loop() {

 pushButton();
 int potValue =analogRead(POT_PIN);
 int speedPercent = map(potValue, 0, 1023, 0, 100);

 if(motorState ==RUN)
 {
  motorControl(speedPercent);
 }else{
  stopMotor();
 }


  delay(500);
 // Robojax XY-GMOS MOSFET Motor driver code
 // video instruction https://youtu.be/eqXaqRFAWrA
} // loop end


/*
 * motorControl(int s)
 * @brief controls the motor with the value s
 * @param return nothing
 * @param "type" is character
 * on May 08, 2020 at 02:36 in Ajax, Ontario, Canada
 */
void motorControl(int s)
{
 // Robojax LR7843 MOSFET Motor driver code
 // video instruction https://youtu.be/eqXaqRFAWrA
  int k = map(s, SPEED_MIN, SPEED_MAX, 0, 255);
  Serial.print("Speed: "); Serial.print(s);Serial.println("%");
  analogWrite(MOTOR_OUT_PIN, k);
} // motorControl


/*
 * stopMotor()
 * @brief stops the motor
 * @param return nothing
 * @param
 * on May 08, 2020 at 02:36 in Ajax, Ontario, Canada
 */
void stopMotor(){
 // Robojax XY-GMOS MOSFET Motor driver code
 // video instruction https://youtu.be/eqXaqRFAWrA
  analogWrite( MOTOR_OUT_PIN, 0);
  Serial.println("STOPPED");
} // stopMotor()


/*
 * pushButton()
 * @brief reads the push button
 * @param return nothing
 * @param
 * on May 08, 2020 at 02:36 in Ajax, Ontario, Canada
 */
void pushButton()
{
 // Robojax XY-GMOS MOSFET Motor driver code
 // video instruction https://youtu.be/eqXaqRFAWrA
  if(digitalRead(START_STOP_PIN) ==LOW)
  {
    motorState =!motorState;
    delay(100);
  }

} // pushButton()
Вещи, которые могут вам понадобиться
-
АмазонкаКупите HW-532 на Amazonamzn.to
-
eBay
-
АлиЭкспрессКупите моторный драйвер FR120N на AliExpresss.click.aliexpress.com
Ресурсы и ссылки
Ресурсов пока нет.
Файлы📁
Технический паспорт (pdf)
-
инфинион-IRLR7843 LR7843 MOSFET технический паспорт
infineon-irlr7843-datasheet-en.pdf0.37 MB
Файл Fritzing
-
HW-532B Mosfot Модуль
HW-532B.fzpz0.01 MB
Другие файлы
-
infineon-irfr120n-datasheet-en
infineon-irfr120n-datasheet-en.pdf0.39 MB -
alpha-and-Omega-AOD4184A_datasheet
alpha-and-Omega-AOD4184A_datasheet.pdf0.43 MB