Arduino Code and Video for PowerShell Command-Line Control of a Relay via USB
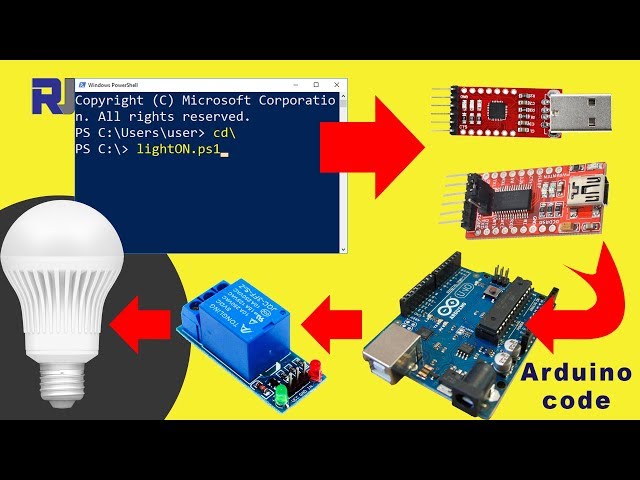
In this tutorial, we will explore how to control a relay using an Arduino and a USB to UART module, all through Windows PowerShell commands. This setup allows you to turn a light on and off remotely by sending specific commands via the command line. By the end of this guide, you'll have a working system that can control AC devices safely and effectively.

We will be utilizing the Arduino's serial communication capabilities to listen for commands sent from PowerShell. The specific commands used will be integers that correspond to turning the relay on and off. This project requires careful handling of AC voltage, so safety precautions must be observed throughout the process. For additional clarification, be sure to watch the full video (in video at 00:00).
Hardware Explained
The main components involved in this project include the Arduino board, the USB to UART module, and the relay. The Arduino acts as the brain of the operation, processing serial commands and controlling the relay accordingly. The USB to UART module facilitates communication between the Arduino and your computer, enabling command input through PowerShell.
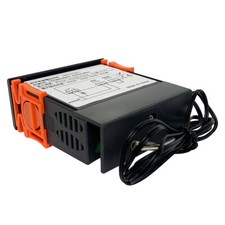
The relay serves as a switch that controls the flow of electricity to the light. When the relay is activated, it closes the circuit, allowing current to flow and the light to turn on. When deactivated, it opens the circuit, cutting off the power and turning the light off. This allows for safe control of high-voltage devices from a low-voltage system.
Datasheet Details
| Manufacturer | FTDI |
|---|---|
| Part number | FT232R |
| Logic/IO voltage | 3.3 V / 5 V |
| Supply voltage | 4.5 V to 5.5 V |
| Output current (per channel) | 50 mA |
| Peak current (per channel) | 100 mA |
| PWM frequency guidance | N/A |
| Input logic thresholds | 0.3 V (low), 0.7 V (high) |
| Voltage drop / RDS(on) / saturation | 0.5 V max |
| Thermal limits | 125 °C |
| Package | 32 LQFP |
| Notes / variants | USB to UART converter |
- Ensure proper voltage levels for the relay and UART module.
- Use a heat sink if the relay is expected to handle high loads.
- Double-check all connections before powering the system.
- Keep the module away from moisture and conductive materials.
- Utilize common grounding for all components to avoid voltage spikes.
Wiring Instructions


Begin by connecting the VCC pin of the relay module to the 5V pin on the Arduino. Next, connect the GND pin of the relay to one of the ground pins on the Arduino. The control pin (labeled as IN or similar) from the relay should be connected to digital pin 8 on the Arduino.
For the USB to UART module, connect the TX pin to the RX pin of the Arduino and the RX pin of the module to the TX pin of the Arduino. Be sure to connect the ground pin of the USB module to the same ground as the Arduino to ensure a common reference. This setup allows for seamless communication between the Arduino and your computer through PowerShell.
Code Examples & Walkthrough
byte RX_Value = 0;        // stores received byte
#define relay 8 // pin 8 for relay
int comON = 6; // code to turn ON the light
int comOFF = 2; // code to turn OFF the light
In this excerpt, we define the variable RX_Value to hold the received command from the serial monitor. The relay is set to pin 8, and we define two commands: comON for turning the light on and comOFF for turning it off.

void setup() {
  Serial.begin(9600); // Start serial communication at 9600 baud
  pinMode(relay, OUTPUT); // Set relay pin as output
  digitalWrite(relay, HIGH); // Turn the relay OFF initially
}
In the setup() function, we initialize serial communication at 9600 baud, which must match the settings in PowerShell. The relay pin is configured as an output, and we set it to HIGH to ensure the relay is off when the program starts.

if (Serial.available()) {
    RX_Value = Serial.read(); // Read the incoming byte
    if (RX_Value == comON) {
        digitalWrite(relay, LOW); // Turn the relay ON
    } else if (RX_Value == comOFF) {
        digitalWrite(relay, HIGH); // Turn the relay OFF
    }
}
This code snippet demonstrates how the program listens for incoming serial data. If a command is received that matches comON, the relay is activated, turning the light on. Conversely, if comOFF is received, the relay is deactivated, turning the light off. This loop continues, allowing for responsive control from PowerShell.
Demonstration / What to Expect
When the setup is complete and the code is uploaded, you should be able to open PowerShell and send the commands to control the light. Typing the corresponding command should immediately trigger the relay, turning the light on or off as desired. Be cautious when handling AC devices, ensuring no live wires are exposed during testing.
Video Timestamps
- 00:00 - Introduction and overview of the project
- 02:30 - Wiring explanation
- 05:00 - Code walkthrough
- 08:15 - PowerShell command demonstration
- 10:45 - Conclusion and safety tips
图像


This code has not been parsed yet. Please return to the admin panel to parse it.|||您可能需要的东西
-
亚马逊从亚马逊购买 CP2102 USB 转 UARTamzn.to
-
亚马逊在亚马逊购买FT232RL迷你USB转TTLamzn.to
-
易趣从eBay购买1个通道5V KY-019继电器ebay.us
-
全球速卖通从AliExpress购买1个通道5V KY-019继电器s.click.aliexpress.com
资源与参考
尚无可用资源。
文件📁
Fritzing 文件
-
4通道 5伏继电器模块
4-Channel 5v Relay Shield.fzpz0.02 MB -
FT232-AZ-USB到TTL串行适配器
FT232-AZ-USB-to_TTL-serial-adapter.fzpz0.01 MB
其他文件
-
Power Script to control relay over USB
robojax-usb-relay-powershell_scripts.zip