Aosong AM2320 デジタル温度・湿度センサーを LCD1602 と I2C モジュールで使うための Arduino コードとビデオ
このチュートリアルでは、Aosong AM2320 デジタル温湿度センサーを I2C モジュールを搭載した LCD1602 ディスプレイと組み合わせて使う方法を紹介します。目的は温度を華氏(Fahrenheit)と摂氏(Celsius)の両方で表示し、さらに相対湿度を表示することです。この構成はさまざまなプロジェクトで環境条件を監視するのに最適で、Arduino ツールキットに汎用性の高い追加となります。

AM2320センサーを使って温度と湿度のデータを取得し、それをLCD1602に表示します。I2Cモジュールにより配線が簡素化され、必要なのはVCC、GND、SDA、SCLの4つの接続だけです。配線とプログラミングを明確に理解するには、関連するビデオ(00:00)を見ることをおすすめします。
ハードウェアの解説
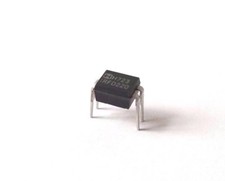
このプロジェクトの主要な構成要素はAM2320センサー、LCD1602ディスプレイ、およびI2Cモジュールです。AM2320はデジタルセンサーで、I2Cインターフェースを通じて温度と湿度の正確な測定値を提供します。動作電圧は3.3V〜5.5Vで、温度の測定範囲は-40°C〜+80°C、湿度の測定範囲は0%〜100%です。
LCD1602ディスプレイはセンサーの読み取り値を可視化できます。これは16x2文字表示のディスプレイで、I2Cプロトコルで通信し、必要な接続数をわずか4本に減らします。I2CモジュールはLCDからの並列データをシリアル形式に変換し、Arduinoへの接続を容易にします。
データシートの詳細
| 製造元 | アオソング |
|---|---|
| 部品番号 | AM2320 |
| ロジック/入出力電圧 | 3.3V〜5.5V |
| 供給電圧 | 3.3V〜5.5V |
| 出力電流 | 1.5 mA以下 |
| 測定範囲(温度) | -40°C〜+80°C |
| 測定範囲(湿度) | 0%から100% |
| 応答時間 | 2秒以下 |
| パッケージ | DIP-4 |
| 備考/バリエーション | I2C接続にはプルアップ抵抗が推奨されます。 |
- 指定された電圧範囲内で適切な電源を確保してください。
- SDAおよびSCLラインにはプルアップ抵抗(推奨:4.7kΩ)を使用してください。
- I2Cアドレスが正しいか確認してください(ほとんどのLCDのデフォルトは0x27です)。
- センサーのエラーコードを確認して、発生し得るエラーに対処してください。
- 表示が重ならないように、新しい測定値を表示する前にLCDをクリアしてください。
配線手順

AM2320センサーの配線は、左端のピン(VCC)をArduinoの5Vに接続します。2番目のピン(SDA)はArduino UnoのA4ピン(Megaではピン20)に接続します。3番目のピン(GND)はグラウンドに接続し、4番目のピン(SCL)はArduino UnoのA5ピン(Megaではピン21)に接続します。さらに、SDAピンと5Vの間に4.7kΩの抵抗を、SCLピンと5Vの間にももう一つ4.7kΩの抵抗を接続して、適切な信号レベルを確保してください。
I2CのLCD1602ディスプレイは、VCCピンを5Vに、GNDピンをグランドに接続します。LCDのSDAピンをセンサーで使用している同じSDAピン(A4)に接続し、同様にLCDのSCLピンをセンサーで使用している同じSCLピン(A5)に接続します。この共通配線により、両方のデバイスは同じI2Cバス上で通信できます。
コード例とウォークスルー
次のコードはAM2320センサーとLCD1602ディスプレイを初期化します。必要なライブラリを読み込み、センサーのインスタンスを作成することから始まります。
#include
AM2320 sensor;
#include
LiquidCrystal_I2C lcd(0x27, 16, 2); ここで、sensorオブジェクトはAM2320ライブラリから作成され、lcdオブジェクトはディスプレイのI2Cアドレスで初期化されます。
〜の中でsetup()関数ではセンサーとLCDの両方を初期化します。これにはバックライトを点灯し、初期メッセージを表示することが含まれます。
void setup() {
  sensor.begin();
  lcd.begin();
  lcd.backlight();
  lcd.print("Robojax AM2320 ");
  lcd.setCursor (0,1);
  lcd.print("LCD1602 I2C Demo");
  delay(3000);
}
このコードはディスプレイにウェルカムメッセージを3秒間表示し、ユーザーがシステムの初期化を確認する時間を確保します。
そのloop()この関数はセンサーの測定値を継続的にチェックし、それに応じて表示を更新します。測定値が利用可能な場合は画面を消去し、華氏と摂氏の両方の温度および相対湿度を表示します。
void loop() {
  if (sensor.measure()) {
    lcd.clear();
    lcd.print("T:");
    lcd.print(temp('F'));
    lcd.print("F/");
    lcd.print(temp('C'));
    lcd.print("C");
    lcd.setCursor (0,1);
    lcd.print("R.H. :");
    lcd.print(sensor.getHumidity());
    lcd.print("%");
  }
  else {
    int errorCode = sensor.getErrorCode();
    switch (errorCode) {
      case 1: lcd.print("ERR: Sensor offline"); break;
      case 2: lcd.print("ERR: CRC failed."); break;
    }
  }
  delay(500);
}この抜粋は、プログラムがセンサーデータを取得して表示し、潜在的なエラーをチェックして処理する方法を示していますerrorCode。
デモンストレーション/当日の内容
セットアップが完了すると、LCDには華氏と摂氏の両方の温度と相対湿度(%)が表示されます。センサーがオフラインの場合やCRCエラーがある場合は、表示に対応するエラーメッセージが表示されます。問題を避けるため、すべての接続が確実に固定されていることを確認することが重要です(ビデオの02:45で)。
動画のタイムスタンプ
- 00:00- プロジェクトの紹介
- 01:30- 配線手順
- 03:15- コードの説明
- 04:45- 機能のデモ
画像


++
/**
 * This is Arduino code for AM2320 Temperature and Humidity Sensor with LCD1602 and I2C Module
 * which displays the temperature and RH (relative humidity)
 * on an LCD1602 with an I2C module.  The code was combined by Robojax.
 *
    Original Code For AM2320 :https://github.com/hibikiledo/AM2320
    Copyright 2016 Ratthanan Nalintasnai

    Modified for Robojax.com video by
    Ahmad S. on March 22, 2018 at 23:55 in Ajax, Ontario, Canada
    This code, with library and other codes, is available at
    https://robojax.com
    Watch the video instruction for this code: https://youtu.be/ym567hneDpE
**/

// Include library for AM2320
#include <AM2320.h>
// Create an instance of the sensor
AM2320 sensor;


#include <Wire.h>
// Include the LiquidCrystal library for display
#include <LiquidCrystal_I2C.h>

// Set the LCD address to 0x27 for a 16 chars and 2 line display
LiquidCrystal_I2C lcd(0x27, 16, 2);


void setup() {
  // Call sensor.begin() to initialize the library
  sensor.begin();

  // Robojax code for LCD with I2C
  // Initialize the LCD,
  lcd.begin();
   // Turn on the backlight and print a message.
  lcd.backlight();
  lcd.print("Robojax AM2320 ");
  lcd.setCursor (0,1);
  lcd.print("LCD1602 I2C Demo");
  delay(3000);
}

void loop() {
  if (sensor.measure()) {
    lcd.clear();
    lcd.print("T:");
    lcd.print(temp('F'));
    lcd.print("F/");
    lcd.print(temp('C'));
    lcd.print("C");
    lcd.setCursor (0,1); // go to start of 2nd line
    lcd.print("R.H. :");
    lcd.print(sensor.getHumidity());
    lcd.print("%");


  }
  else {  // An error has occurred
    int errorCode = sensor.getErrorCode();
    switch (errorCode) {
      case 1: lcd.print("ERR: Sensor offline"); break;
      case 2: lcd.print("ERR: CRC failed."); break;
    }
  }

  delay(500);
}

/*
 * temp()
 * Returns the temperature based on the input character T.
 * If T == 'F', converts Celsius to Fahrenheit.
 * Otherwise, returns Celsius.
 * How to use:
 *  To get Fahrenheit, use temp('F').
 *  To get Celsius, use temp('C') or temp('').
 *  temp('') uses an empty single quote.
 *
 */
float temp(char T)
{
  if (sensor.measure()) {
    if(T =='F')
    {
      // Convert to FAHRENHEIT and return
      // Robojax video tutorial
      return sensor.getTemperature()* 1.8 + 32;
    }else{
      return sensor.getTemperature();// Return CELSIUS
    }

  }// if sensor.measure
}/*********************************************************************
Original source: http://playground.arduino.cc/Main/I2cScanner
This program will find the I2C address on the I2C device. Just upload the code into your Arduino
and open the serial monitor and wait. It will display the I2C address as 0x3C or similar.
* Please view other RoboJax codes and videos at http://robojax.com/learn/arduino
* If you are sharing this code, you must keep this copyright note.
*
*********************************************************************/
#include <Wire.h>
void setup()
{
Wire.begin();
Serial.begin(9600);
while (!Serial); // Leonardo: wait for serial monitor
Serial.println("\nI2C Scanner");
}
void loop()
{
byte error, address;
int nDevices;
Serial.println("Scanning...");
nDevices = 0;
for(address = 1; address < 127; address++ )
{
// The I2C scanner uses the return value of
// the Wire.endTransmission to see if
// a device did acknowledge the address.
Wire.beginTransmission(address);
error = Wire.endTransmission();
if (error == 0)
{
Serial.print("I2C device found at address 0x");
if (address<16)
Serial.print("0");
Serial.print(address,HEX);
Serial.println(" !");
nDevices++;
}
else if (error==4)
{
Serial.print("Unknown error at address 0x");
if (address<16)
Serial.print("0");
Serial.println(address,HEX);
}
}
if (nDevices == 0)
Serial.println("No I2C devices found\n");
else
Serial.println("done\n");
delay(5000); // wait 5 seconds for next scan
}必要かもしれないもの
-
アマゾンAmazonでAM2302センサーを購入するamzn.to
-
アリエクスプレスAliExpressからAM2302、DHT11、またはDHT22センサーを購入してください。s.click.aliexpress.com
リソースと参考文献
-
外部AM2320ライブラリ(GitHubから)github.com
-
外部Arduino Wire ドキュメントページarduino.cc
ファイル📁
データシート(pdf)
-
Adafruit AM2320 温湿度 I2C センサー ユーザーマニュアル
adafruit-am2320-temperature-humidity-i2c-sensor.pdf1.27 MB
フリッツィングファイル
-
AM2320湿度および温度センサー
AM2320 Humidity and Temperature Sensor.fzpz0.01 MB