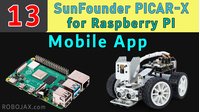
Lesson 12: Control PiCAR-X Robot Car using mobile app | Raspberry Pi Smart Robot car by SunFounder
In this lesson, we explore how to control the SunFounder PiCar-X Raspberry Pi robot car using a dedicated mobile application. This tutorial demonstrates how to install the necessary software, connect the robot to your phone, and use the app's interface to control movement, view the camera feed, and monitor sensor data. The value of this project lies in its practical application of IoT concepts, allowing you to create a remotely operated vehicle. You can use this setup for a variety of projects, such as:
- Building a home surveillance robot that you can drive around and monitor from your phone.
- Creating a remote-controlled exploration vehicle for indoor or outdoor use.
- Developing a platform for testing autonomous navigation algorithms with manual override.
- Learning about wireless communication protocols and mobile app integration with hardware.
Hardware and Components
This project is based on the SunFounder PiCar-X kit, which includes all the necessary mechanical and electronic components. The key parts used in this lesson are:
- Raspberry Pi (the "brain" of the robot).
- The PiCar-X robot chassis, including motors, wheels, and servos for the camera.
- An ultrasonic sensor for distance measurement.
- A camera module for video streaming.
- A battery pack to power the robot.
Wiring Guide
This project does not require a separate wiring diagram as it uses the pre-assembled PiCar-X kit. All components, including the motors, sensors, and camera, are connected to the Raspberry Pi via the SunFounder control board that comes with the kit. If you are using a different robot or building your own, you would need to consult the specific wiring diagram for your components.
Software Setup
Before you can control the PiCar-X with your phone, you need to set up the software on the Raspberry Pi. This process involves installing the necessary modules and running the controller program.
First, you need to install the SunFounder controller module. This is a one-time setup step. On your Raspberry Pi, open a terminal and run the following commands:
cd ~
sudo python3 setup.py
This will install the required libraries and drivers for the controller. Once this is complete, you can run the main application that enables mobile app control. Navigate to the example directory and run the script:
cd ~/pi-car-x/example
sudo python3 13.1.1_controller_app.py
Once this code is running, the PiCar-X will start its own Wi-Fi hotspot or connect to your network, and it will begin streaming video and listening for commands from the mobile app. The terminal will also display the IP address where the video stream is available, which is useful for troubleshooting.
Mobile App Installation and Connection
To control the robot, you need to install the "SunFounder Controller" app on your Android or iOS device. You can find it by searching for "SunFounder" in your app store. After installing, open the app. You will need to add your robot to the app's list. The app supports multiple types of SunFounder robots, so you will need to select the PiCar-X model. If the automatic discovery does not work, you can manually enter the robot's IP address to connect. Ensure your phone and the Raspberry Pi are on the same network.
Using the Application
Once connected, the app provides a rich interface to control the PiCar-X. The main screen includes a live video feed from the robot's camera. You can control the camera's pan and tilt by dragging your finger on the video area or using the directional pad. The app also displays real-time data from the ultrasonic sensor, showing the distance to objects in front of the robot. The interface includes a joystick or directional buttons for moving the robot forward, backward, and turning left or right.
You can customize the app's layout by adding different widgets, such as buttons, sliders, and displays, to suit your needs. This allows you to create a control interface tailored to your specific project.
Live Project Demonstration
The video demonstrates the complete process, from setting up the software to driving the robot. The presenter shows how to connect to the robot's camera feed and use the app's controls to move the robot in different directions. The ultrasonic sensor reading is also shown live, updating as objects move closer or farther away. This confirms that the robot is fully functional and responsive to the mobile app commands.
Code Explanation
As no code snippets were provided, we cannot detail specific user-configurable variables. However, in the context of this project, the main code file typically contains configuration sections at the top where you can adjust settings. For example, you might find variables to set the camera resolution, the servo angles for the camera, or the maximum speed of the motors. If you were to modify the code, you would look for these constants to change the robot's behavior.
Video Chapters
- [00:00] Introduction and project overview
- [02:01] Finding the lesson documentation
- [03:21] Installing the SunFounder controller module
- [05:23] Running the controller application code
- [06:51] Installing and connecting the mobile app
- [08:09] Controlling the camera and viewing the video feed
- [09:14] Driving the robot with the app controls
- [10:02] Demonstrating the live video stream and robot movement
- [13:05] Conclusion and final thoughts
자원 및 참고자료
아직 자원이 없습니다.
파일📁
파일이 없습니다.