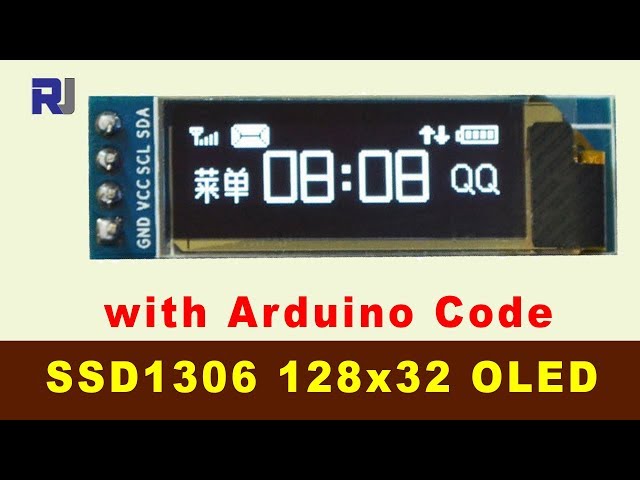
Arduino Code and Video for SSD1306 OLED 128 x 32 Display with I2C
In this tutorial, we will explore how to use the SSD1306 OLED 128 x 32 display with I2C communication on an Arduino. The goal is to display various elements such as text, rectangles, and dynamic values like voltage and temperature on the screen. This setup is ideal for projects requiring a compact and efficient display solution.

We will walk through the necessary hardware components, wiring instructions, and the Arduino code to get everything up and running. For a visual guide, make sure to check out the video accompanying this tutorial (in video at 00:00).
Hardware Explained
The key components for this project include the SSD1306 OLED display, which is a low-power display that uses I2C communication for easy interfacing. The display features a resolution of 128 x 32 pixels, making it suitable for displaying text and simple graphics.
To control the display, we will use the Arduino board, which will send commands and data via I2C. The Arduino handles the logic of displaying the information by using libraries such as Adafruit_GFX and Adafruit_SSD1306. These libraries simplify the communication process and allow for easy drawing of shapes and text.
Datasheet Details
| Manufacturer | Adafruit |
|---|---|
| Part number | SSD1306 |
| Logic/IO voltage | 3.3 - 5 V |
| Supply voltage | 3.3 - 5 V |
| Current consumption | ~20 mA (typ.) |
| Display resolution | 128 x 32 pixels |
| Interface | I2C |
| Dimensions | 128 x 32 mm |
| Notes / variants | Available in various sizes and interfaces |
- Check I2C address, typically 0x3C for OLEDs.
- Ensure proper power supply to avoid damage.
- Use pull-up resistors for SDA and SCL lines if required.
- Keep wiring short to reduce noise in the I2C signal.
- Consider heat dissipation if powering multiple modules.
Wiring Instructions

To wire the SSD1306 OLED display, first connect the VCC pin of the display to the 5V output on the Arduino. Next, connect the GND pin to one of the Arduino's ground pins. For the I2C communication, connect the SDA pin of the display to the SDA pin on the Arduino, which is A4 for the UNO. Then, connect the SCL pin of the display to the SCL pin on the Arduino, which is A5 for the UNO. If you are using a different Arduino model, refer to the specific pin mapping for SDA and SCL.
For additional components, if you have an LED that you want to control, connect it to pin 9 through a 330-ohm resistor. Make sure to connect the other end of the resistor to the anode of the LED, while the cathode should go to ground. This setup will allow the LED to light up when pin 9 is activated.
Code Examples & Walkthrough
In the Arduino code, we start by including the necessary libraries for the OLED display. A key identifier is display, which is an instance of the Adafruit_SSD1306 class. The display is initialized in the setup() function, where we also clear the display to prepare for drawing.

void setup() {
  Serial.begin(9600);
  display.begin(SSD1306_SWITCHCAPVCC, 0x3C);
  display.display();
  delay(2000);
  display.clearDisplay();
}
In the loop() function, we define a string variable vString to hold the voltage value, which is updated dynamically. The robojaxText() function is used to display text on the screen at specified coordinates.
void loop() {
  String vString = String(count, 3);
  display.clearDisplay();
  robojaxText("Voltage:          ", 4, 3, 1, false);
  robojaxText(vString, 72, 3, 1, false);
  display.display();
  count += 0.173;
  delay(2000);
}
The robojaxText() function is crucial for positioning and displaying text. It takes parameters for the text string, x and y coordinates, text size, and a boolean to determine if the display should be updated immediately.
void robojaxText(String text, int x, int y, int size, boolean d) {
  display.setTextSize(size);
  display.setTextColor(WHITE);
  display.setCursor(x, y);
  display.println(text);
  if(d) {
    display.display();
  }
}
This function sets the text size, color, and cursor position before printing the text. Remember to watch the video for a complete walkthrough of the code (in video at 10:00).
Demonstration / What to Expect
When the code is uploaded to the Arduino, the OLED display should show the voltage, temperature, and capacity values dynamically updating every two seconds. You should also see a rectangle drawn around the text elements. If the display does not show anything, ensure that the connections are correct and that the I2C address matches the one specified in the code.
Video Timestamps
- 00:00 - Introduction to the project
- 02:00 - Wiring instructions
- 05:00 - Code walkthrough
- 10:00 - Demonstration of the output
图像


This code has not been parsed yet. Please return to the admin panel to parse it.|||您可能需要的东西
-
亚马逊在亚马逊上购买 OLED 128x32amzn.to
-
全球速卖通从AliExpress购买SSD1306 OLED 128x32s.click.aliexpress.com
资源与参考
-
外部Adafruit-GFX 库(来自 GitHub)github.com
-
外部SSD1306库(来自GitHub)github.com
文件📁
没有可用的文件。