รหัส Arduino และวิดีโอสำหรับจอแสดงผล SSD1306 OLED 128 x 32 พร้อม I2C
ในบทช่วยสอนนี้ เราจะสำรวจวิธีการใช้จอแสดงผล SSD1306 OLED 128 x 32 พร้อมการสื่อสารแบบ I2C บน Arduino เป้าหมายคือการแสดงองค์ประกอบต่างๆ เช่น ข้อความ สี่เหลี่ยมผืนผ้า และค่าที่เปลี่ยนแปลงแบบไดนามิก เช่น แรงดันไฟฟ้าและอุณหภูมิบนหน้าจอ การตั้งค่านี้เหมาะสำหรับโปรเจกต์ที่ต้องการโซลูชันการแสดงผลที่กะทัดรัดและมีประสิทธิภาพ

เราจะอธิบายส่วนประกอบฮาร์ดแวร์ที่จำเป็น คำแนะนำการเดินสายไฟ และโค้ด Arduino เพื่อให้ทุกอย่างทำงานได้ สำหรับคำแนะนำแบบภาพ อย่าลืมดูวิดีโอที่มาพร้อมกับบทช่วยสอนนี้ (ในวิดีโอที่ 00:00)
อธิบายฮาร์ดแวร์
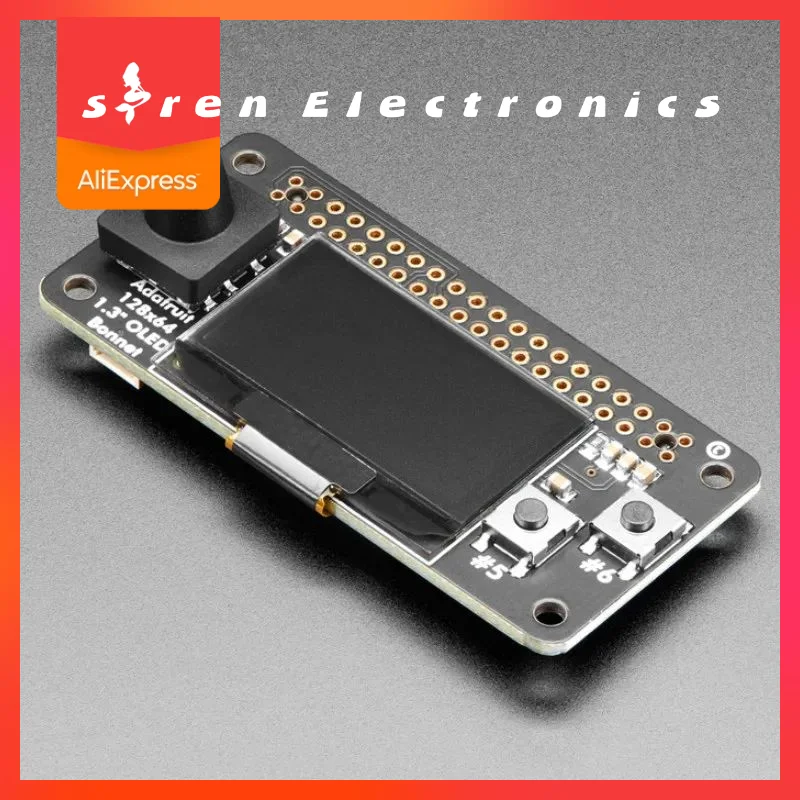
ส่วนประกอบสำคัญสำหรับโปรเจกต์นี้ ได้แก่ จอแสดงผล SSD1306 OLED ซึ่งเป็นจอแสดงผลที่ใช้พลังงานต่ำและใช้การสื่อสารแบบ I2C เพื่อการเชื่อมต่อที่ง่ายดาย จอแสดงผลมีความละเอียด 128 x 32 พิกเซล ทำให้เหมาะสำหรับการแสดงข้อความและกราฟิกอย่างง่าย
ในการควบคุมจอแสดงผล เราจะใช้บอร์ด Arduino ซึ่งจะส่งคำสั่งและข้อมูลผ่าน I2C Arduino จัดการตรรกะของการแสดงข้อมูลโดยใช้ไลบรารี เช่น Adafruit_GFX และ Adafruit_SSD1306 ไลบรารีเหล่านี้ช่วยให้กระบวนการสื่อสารง่ายขึ้นและช่วยให้วาดรูปทรงและข้อความได้อย่างง่ายดาย
รายละเอียดจาก Datasheet
| ผู้ผลิต | Adafruit |
|---|---|
| หมายเลขชิ้นส่วน | SSD1306 |
| แรงดันไฟฟ้าลอจิก/IO | 3.3 - 5 V |
| แรงดันไฟฟ้าจ่าย | 3.3 - 5 V |
| กระแสไฟฟ้าที่ใช้ | ~20 mA (โดยทั่วไป) |
| ความละเอียดจอแสดงผล | 128 x 32 พิกเซล |
| อินเทอร์เฟซ | I2C |
| ขนาด | 128 x 32 มม. |
| หมายเหตุ/รูปแบบต่างๆ | มีให้เลือกหลายขนาดและอินเทอร์เฟซ |
- ตรวจสอบที่อยู่ I2C โดยทั่วไปคือ 0x3C สำหรับจอ OLED
- ตรวจสอบให้แน่ใจว่าแหล่งจ่ายไฟเหมาะสมเพื่อหลีกเลี่ยงความเสียหาย
- ใช้ตัวต้านทาน pull-up สำหรับสาย SDA และ SCL หากจำเป็น
- เดินสายไฟให้สั้นเพื่อลดสัญญาณรบกวนในสัญญาณ I2C
- พิจารณาการระบายความร้อนหากจ่ายไฟให้หลายโมดูล
คำแนะนำการเดินสายไฟ

ในการเดินสายไฟจอแสดงผล SSD1306 OLED ก่อนอื่นให้เชื่อมต่อพิน VCC ของจอแสดงผลเข้ากับเอาต์พุต 5V บน Arduino จากนั้นเชื่อมต่อพิน GND เข้ากับพินกราวด์ตัวใดตัวหนึ่งของ Arduino สำหรับการสื่อสารแบบ I2C ให้เชื่อมต่อพิน SDA ของจอแสดงผลเข้ากับพิน SDA บน Arduino ซึ่งคือ A4 สำหรับรุ่น UNO จากนั้นเชื่อมต่อพิน SCL ของจอแสดงผลเข้ากับพิน SCL บน Arduino ซึ่งคือ A5 สำหรับรุ่น UNO หากคุณใช้บอร์ด Arduino รุ่นอื่น โปรดอ้างอิงแผนผังพินเฉพาะสำหรับ SDA และ SCL
สำหรับส่วนประกอบเพิ่มเติม หากคุณมี LED ที่ต้องการควบคุม ให้เชื่อมต่อเข้ากับพิน 9 ผ่านตัวต้านทาน 330 โอห์ม ตรวจสอบให้แน่ใจว่าเชื่อมต่อปลายอีกด้านของตัวต้านทานเข้ากับขั้วบวก (anode) ของ LED ในขณะที่ขั้วลบ (cathode) ควรต่อลงกราวด์ การตั้งค่านี้จะทำให้ LED สว่างขึ้นเมื่อพิน 9 ถูกเปิดใช้งาน
ตัวอย่างโค้ดและคำอธิบาย
ในโค้ด Arduino เราเริ่มต้นด้วยการรวมไลบรารีที่จำเป็นสำหรับจอแสดงผล OLED ตัวระบุสำคัญคือ display ซึ่งเป็นอินสแตนซ์ของคลาส Adafruit_SSD1306 จอแสดงผลถูกเริ่มต้นในฟังก์ชัน setup() ซึ่งเรายังล้างหน้าจอเพื่อเตรียมพร้อมสำหรับการวาด

void setup() {
  Serial.begin(9600);
  display.begin(SSD1306_SWITCHCAPVCC, 0x3C);
  display.display();
  delay(2000);
  display.clearDisplay();
}
ในฟังก์ชัน loop() เรากำหนดตัวแปรสตริง vString เพื่อเก็บค่าแรงดันไฟฟ้า ซึ่งจะถูกอัปเดตแบบไดนามิก ฟังก์ชัน robojaxText() ใช้เพื่อแสดงข้อความบนหน้าจอที่พิกัดที่ระบุ
void loop() {
  String vString = String(count, 3);
  display.clearDisplay();
  robojaxText("Voltage:          ", 4, 3, 1, false);
  robojaxText(vString, 72, 3, 1, false);
  display.display();
  count += 0.173;
  delay(2000);
}
ฟังก์ชัน robojaxText() มีความสำคัญสำหรับการวางตำแหน่งและการแสดงข้อความ โดยรับพารามิเตอร์สำหรับสตริงข้อความ พิกัด x และ y ขนาดตัวอักษร และค่าบูลีนเพื่อกำหนดว่าควรอัปเดตจอแสดงผลทันทีหรือไม่
void robojaxText(String text, int x, int y, int size, boolean d) {
  display.setTextSize(size);
  display.setTextColor(WHITE);
  display.setCursor(x, y);
  display.println(text);
  if(d) {
    display.display();
  }
}
ฟังก์ชันนี้จะตั้งค่าขนาดตัวอักษร สี และตำแหน่งเคอร์เซอร์ก่อนที่จะพิมพ์ข้อความ อย่าลืมดูวิดีโอสำหรับคำอธิบายโค้ดแบบเต็ม (ในวิดีโอที่ 10:00)
การสาธิต / สิ่งที่คาดหวัง
เมื่ออัปโหลดโค้ดไปยัง Arduino แล้ว จอแสดงผล OLED ควรแสดงค่าแรงดันไฟฟ้า อุณหภูมิ และความจุที่อัปเดตแบบไดนามิกทุกสองวินาที คุณควรเห็นสี่เหลี่ยมผืนผ้าที่วาดรอบองค์ประกอบข้อความด้วย หากจอแสดงผลไม่แสดงอะไรเลย ตรวจสอบให้แน่ใจว่าการเชื่อมต่อถูกต้อง และที่อยู่ I2C ตรงกับที่ระบุในโค้ด
เวลาต่างๆ ในวิดีโอ
- 00:00 - แนะนำโปรเจกต์
- 02:00 - คำแนะนำการเดินสายไฟ
- 05:00 - คำอธิบายโค้ด
- 10:00 - การสาธิตผลลัพธ์
ภาพ


/*********************************************************************
This is an example for our monochrome OLEDs based on SSD1306 drivers.

This example is for a 128x32 size display using I2C.

If you get the error: Adafruit_GFX.h not found, download the Adafruit-GFX Library
https://github.com/adafruit/Adafruit-GFX-Library


Purchase this OLED module from Amazon: https://amzn.to/36zFvTb

Written by Limor Fried/Ladyada for Adafruit Industries.
BSD license, check license.txt for more information.
All text above, and the splash screen must be included in any redistribution.

 * Watch the video for this code to learn it fully.
  * Watch the video here: https://youtu.be/RjyulqVsz2o
 * This code is offered "as is" without any warranty.
 * Updated by Ahmad Shamshiri for Robojax.com video tutorial
 * on March 18, 2018 at 10:21 in Ajax, Ontario, Canada.
 * Please view other Robojax codes and videos at http://robojax.com/learn/arduino
 * If you are sharing this code, you must keep this copyright note.
 *
*********************************************************************/

#include <SPI.h>
#include <Wire.h>
#include <Adafruit_GFX.h>
#include <Adafruit_SSD1306.h>

#define OLED_RESET 4
Adafruit_SSD1306 display(OLED_RESET);

#define NUMFLAKES 10
#define XPOS 0
#define YPOS 1
#define DELTAY 2
double count=0;

/*
 * PIN connection:
 * Pin connection see: https://www.arduino.cc/en/Reference/Wire
 * for UNO: SDA to A4, SCL to A5
 * for Mega2560: SDA to 20, SCL to 21
 * for Leonardo: SDA to 2, SCL to 3
 * for Due: SDA to 20, SCL to 21
 * VCC to 5V
 * GND to GND :-)
 */


// this is the Width and Height of Display which is 128 x 32
#define LOGO16_GLCD_HEIGHT 32
#define LOGO16_GLCD_WIDTH  128


#if (SSD1306_LCDHEIGHT != 32)
#error("Height incorrect, please fix Adafruit_SSD1306.h!");
#endif

void setup()   {
  Serial.begin(9600);

  // by default, we'll generate the high voltage from the 3.3v line internally! (neat!)
  display.begin(SSD1306_SWITCHCAPVCC, 0x3C);  // initialize with the I2C addr 0x3C (for the 128x32)
  display.display();
  delay(2000);
   // Clear the buffer.
  display.clearDisplay();
}


void loop() {
  String vString =  String(count, 3);// using a float and the
  display.clearDisplay();
  robojaxText("Voltage:          ", 4, 3, 1, false);
  robojaxText(vString, 72, 3, 1, false);
  robojaxText("V", 110, 3, 1, false);
  robojaxText("Temperature: 32C", 4, 11, 1, false);
  robojaxText("Capacity:   92.86L", 4, 21, 1, false);
  //display.drawLine(1, 37, 100, 37, WHITE);
 display.drawRect(1, 1, 126,31, WHITE);
  //display.drawCircle(63,31, 31, WHITE);
   //display.startscrollright(0x00, 0x0F);
  display.display();
  count +=0.173;
   delay(2000);
}


/*
 * robojaxText(String text, int x, int y,int size, boolean d)
 * text is the text string to be printed
 * x is the integer x position of text
 * y is the integer y position of text
 * size is the text size, 1, 2, 3 etc
 * d is either true or false.  If true, the display is updated.
 */
void robojaxText(String text, int x, int y,int size, boolean d) {

  display.setTextSize(size);
  display.setTextColor(WHITE);
  display.setCursor(x,y);
  display.println(text);
  if(d){
    display.display();
  }

  //delay(100);
}
สิ่งที่คุณอาจต้องการ
-
อเมซอนPurchase OLED 128x32 from Amazonamzn.to
-
อาลีเอ็กซ์เพรสPurchase SSD1306 OLED 128x32 from AliExpresss.click.aliexpress.com
แหล่งข้อมูลและเอกสารอ้างอิง
-
ภายนอกAdafruit-GFX library (from GitHub)github.com
-
ภายนอกSSD1306 library (from GitHub)github.com
ไฟล์📁
แผ่นข้อมูล (pdf)
-
SSD1306 display datasheetSSD1306 is a single-chip CMOS OLED/PLED driver with controller for organic / polymer light emitting diode dot-matrix graphic display system. It consists of 128 segments and 64commons. This IC is designed for Common Cathode type OLED panel. The SSD1306 embeds with contrast control, display RAM and oscillator, which reduces the number of external components and power consumption. It has 256-step brightness control. Data/Commands are sent from general MCU through the hardware selectable 6800/8000 series compatible Parallel Interface, I2C interface or Serial Peripheral Interface. It is suitable for many compact portable applications, such as mobile phone sub-display, MP3 player and calculator, etc.
SSD1306_display_datasheet.pdf1.79 MB
ไฟล์ Fritzing
-
SSD1306 128x32 OLED WiringFritzing wiring diagram for an SSD1306 128x32 OLED display, showing connections to a microcontroller (likely Arduino). Useful for breadboard prototyping and verifying I2C or SPI wiring.
SSD1306_128x32_wiring.fzz
Wiring diagram
-
SSD1306 128x32 OLED WiringFritzing wiring diagram for an SSD1306 128x32 OLED display, showing connections to a microcontroller (likely Arduino). Useful for breadboard prototyping and verifying I2C or SPI wiring.
SSD1306_128x32_wiring.fzz