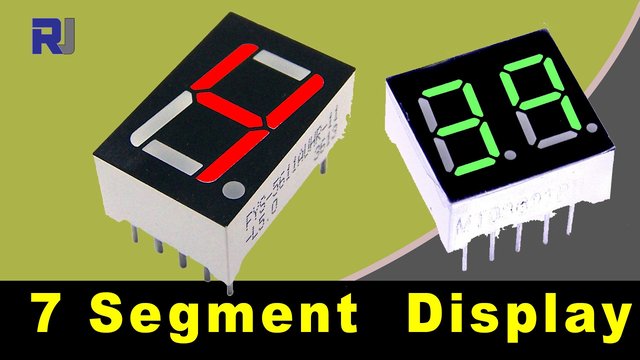
How to use a 7-segment display
In this tutorial, we will explore how to effectively use a 7-segment display, focusing on the differences between common cathode and common anode configurations. This guide will help you understand how to wire the display, calculate the necessary resistors, and control the segments to display digits accurately.

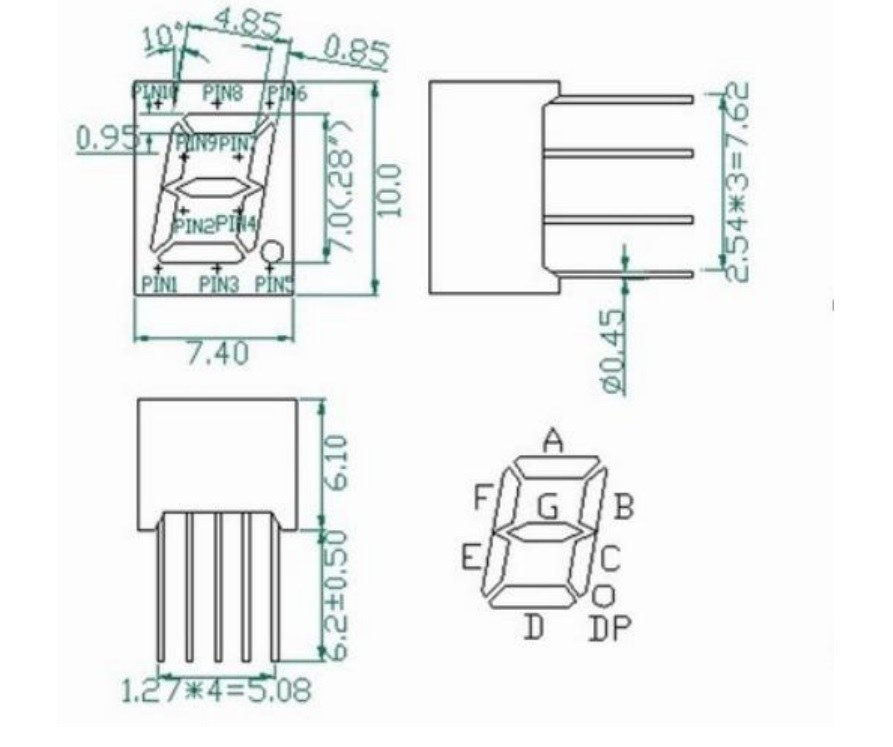
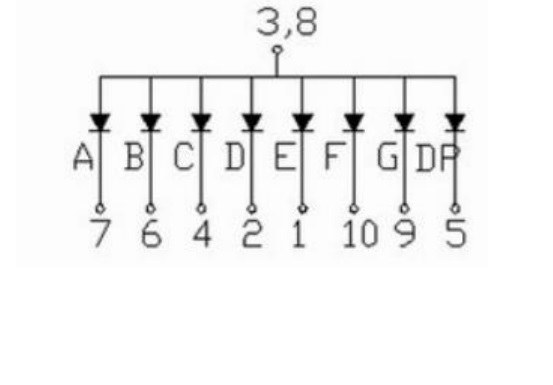
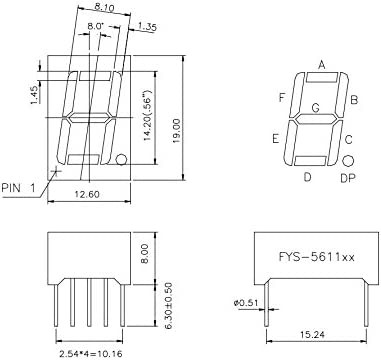
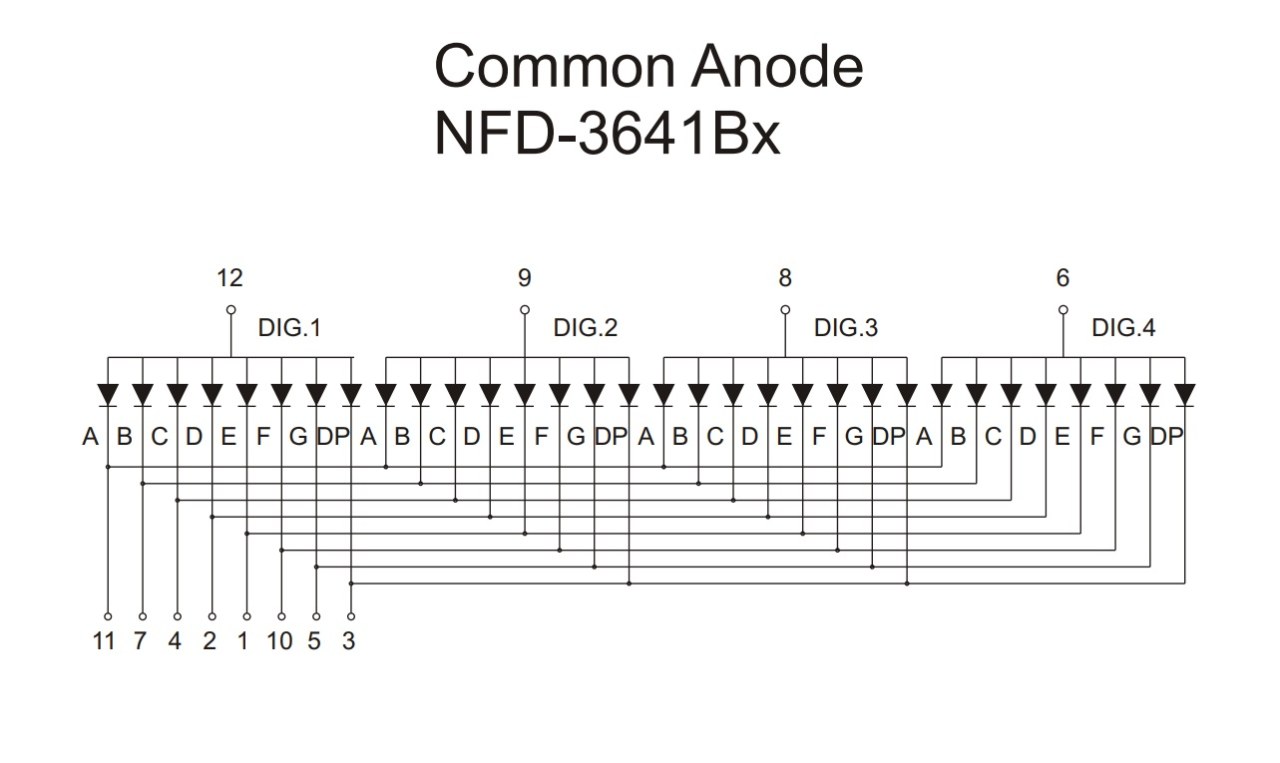
7-segment displays consist of eight LEDs, arranged to form numbers and symbols by illuminating specific segments. The segments are labeled A through G, with an additional segment for the decimal point (DP). Depending on whether you are using a common cathode or common anode display, the wiring and control logic will differ significantly.
For a deeper understanding of this project, be sure to check out the accompanying video for visual explanations (in video at 0:00).
Hardware Explained
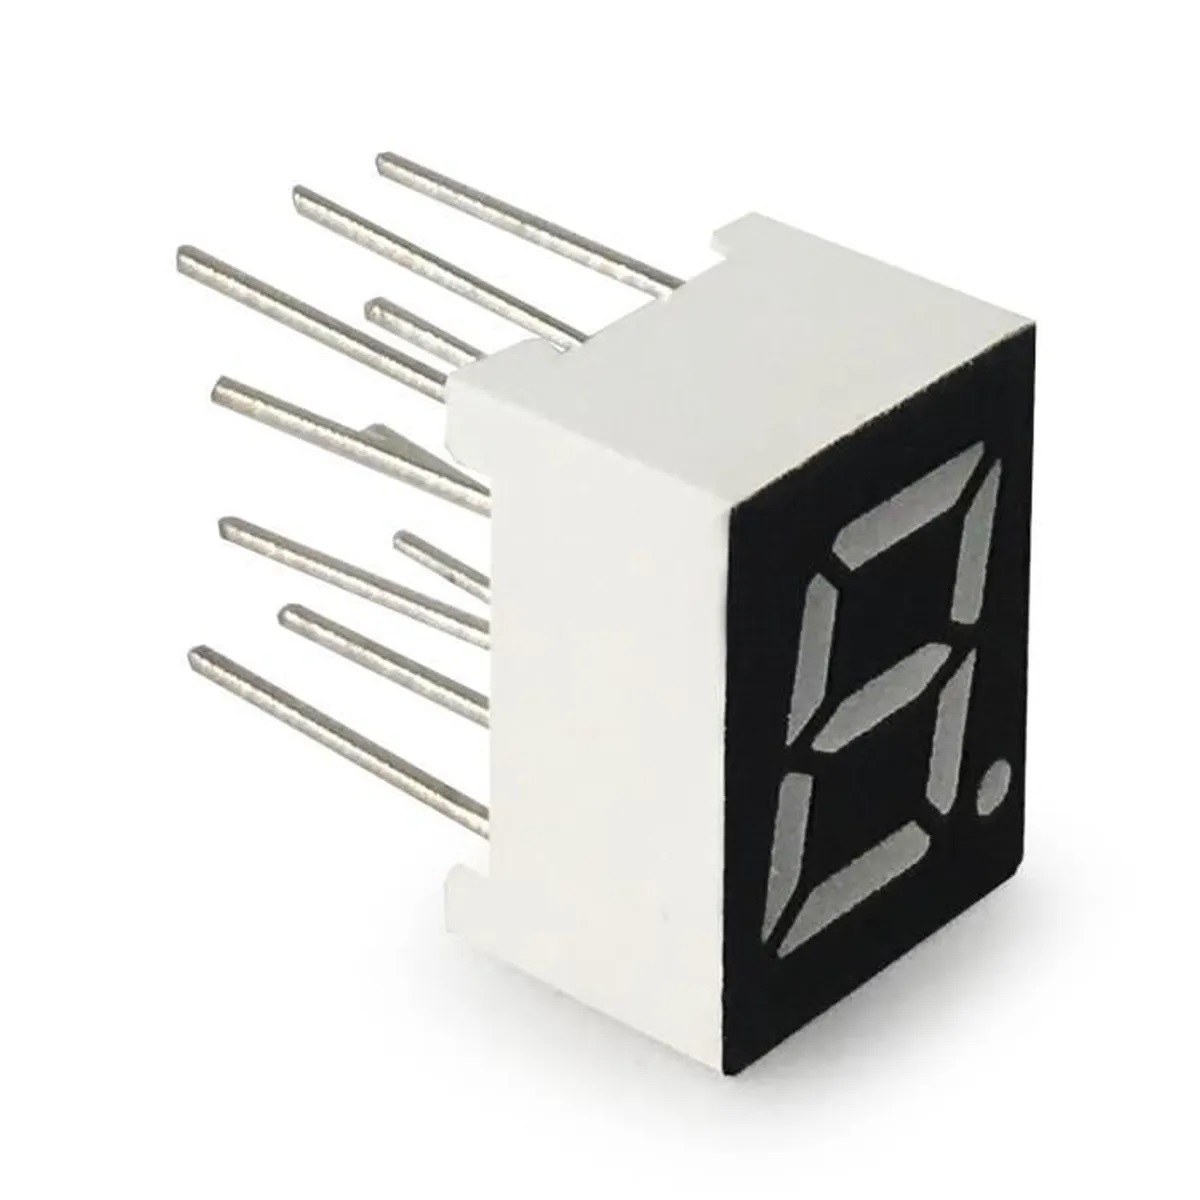
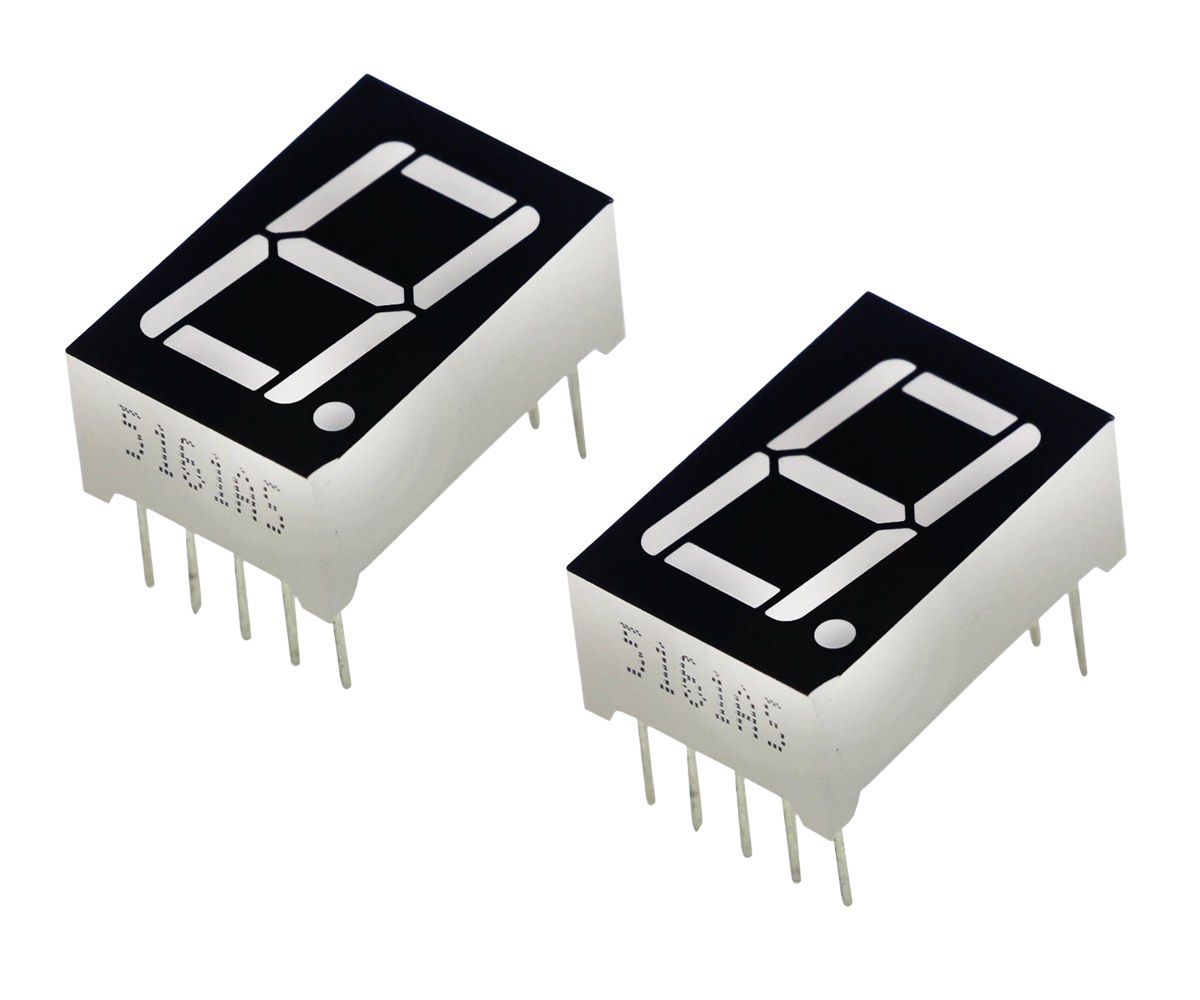
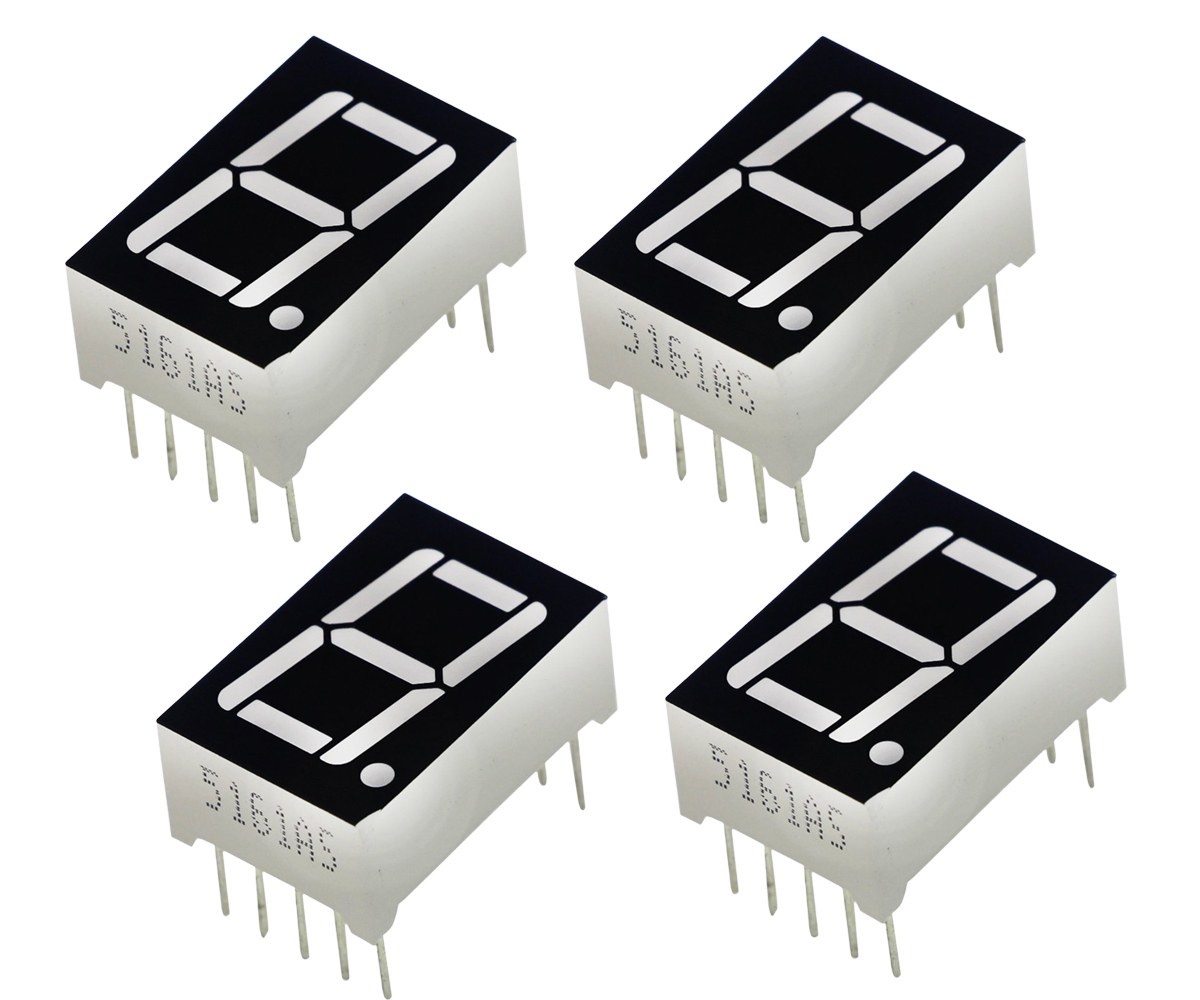
The main components of this project include the 7-segment display, resistors, and a microcontroller such as an Arduino. The 7-segment display is the primary output device that shows the numbers by lighting up the appropriate segments.
Resistors are essential for limiting the current through each LED segment to prevent damage. The microcontroller sends signals to the display's pins to control which segments are lit, allowing it to represent different numbers. Understanding the configuration of your specific display type (common cathode vs. common anode) is crucial for correct wiring.
Datasheet Details
| Manufacturer | Generic |
|---|---|
| Part number | 7-segment display |
| Forward voltage (VF) | 2.2 V (typ.) |
| Forward current (IF) | 20 mA (typ.) |
| Common types | Common cathode, Common anode |
| Operating temperature | -20 to 75 °C |
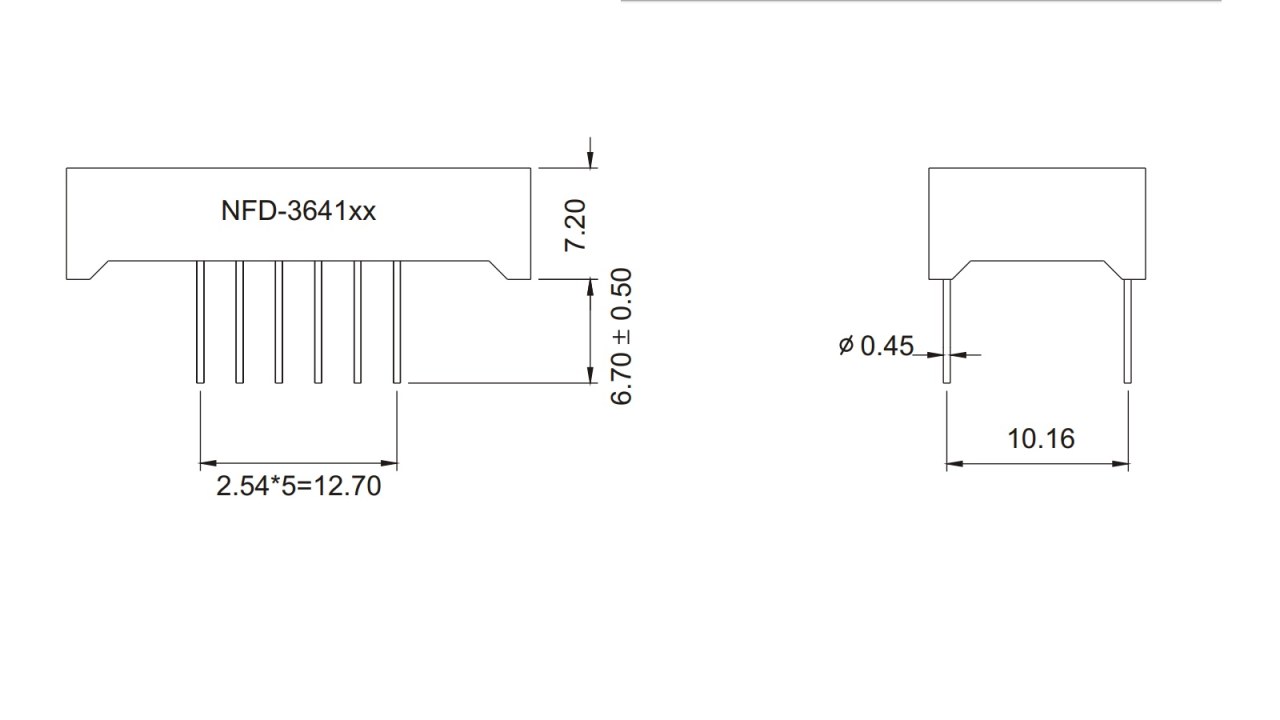
| Package | DIP-10 |
- Use a resistor for each segment to control current.
- Typical resistor value: 140 ohms for 5 V supply.
- Ensure correct wiring according to the display type.
- Test each segment individually for functionality.
- Check forward voltage ratings to avoid damage.
Wiring Instructions
To wire the 7-segment display, start by connecting the common pin (either common anode or common cathode) to the appropriate power supply. For a common cathode display, connect the common pin to ground. For a common anode display, connect it to the positive voltage supply.
Demonstration / What to Expect
When properly wired and programmed, your 7-segment display should light up the correct segments to represent the desired numbers. For instance, to display the number 1, only segments B and C should be lit. Make sure to check the polarity of your connections, as reversing the common connection can lead to incorrect behavior or damage to the display.
Video Timestamps
- 00:00 Start
- 3:39 common anode and cathode
- 05:30 testing each segments
- 6:24 identifying pins of two digit display
- 09:18 calculating resistor
Immagini
Cose di cui potresti avere bisogno
-
Amazon
-
Amazon
-
AliExpressPurchase seven segment display from AlixExpresss.click.aliexpress.com
Risorse e riferimenti
Nessuna risorsa ancora.
File📁
Nessun file disponibile.