Arduino-Code zur Verwendung eines zweiachsigen XY-Joysticks mit einem Nokia 5110 LCD-Bildschirm
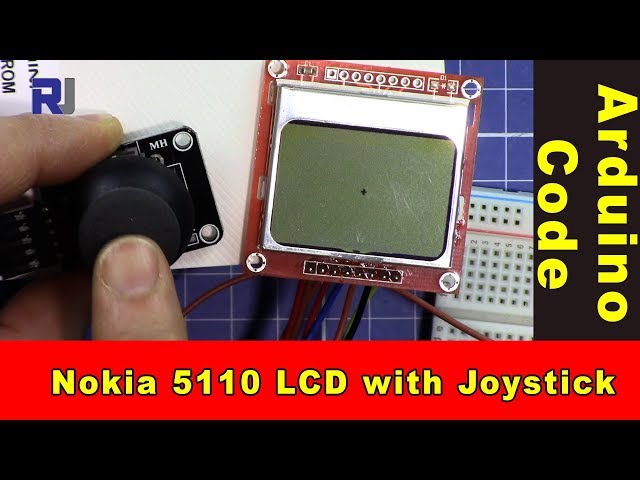
Dieses Tutorial führt Sie durch den Prozess, einen zweiachsigen XY-Joystick zu verwenden, um einen Punkt auf einem Nokia 5110 LCD-Bildschirm zu steuern. Das Projekt umfasst das Auslesen der Joystick-Position und die entsprechende Aktualisierung der Anzeige. Am Ende dieser Anleitung haben Sie eine funktionierende Einrichtung, bei der das Bewegen des Joysticks die Position eines Punktes auf dem Bildschirm verändert (im Video bei 00:00).

In diesem Projekt werden Sie die analogen Ausgänge des Joysticks nutzen, um seine Position auf den X- und Y-Achsen zu bestimmen. Die Messwerte des Joysticks werden auf die Abmessungen des LCD-Bildschirms abgebildet, wodurch sich der Punkt flüssig bewegen lässt. Außerdem lernen Sie, wie man den Schaltereingang des Joysticks ausliest, der für weitere Interaktionen verwendet werden kann.
Hardware erklärt
Die Hauptkomponenten dieses Projekts sind das Arduino, der zweiachsige XY-Joystick und der Nokia-5110-LCD-Bildschirm. Das Arduino dient als Mikrocontroller, verarbeitet Eingaben vom Joystick und steuert das LCD-Display.
Der Joystick hat typischerweise zwei Potentiometer – eines für die X-Achse und eines für die Y-Achse. Wenn Sie den Joystick bewegen, ändern diese Potentiometer ihren Widerstand und liefern unterschiedliche Spannungspegel an die analogen Eingangspins des Arduino. Das Nokia-5110-LCD wird über SPI-Kommunikation gesteuert, was einen effizienten Datentransfer und Anzeigeaktualisierungen ermöglicht.
Details zum Datenblatt
| Hersteller | Texas Instruments |
|---|---|
| Teilenummer | L293D |
| Logik-/I/O-Spannung | 5 V |
| Versorgungsspannung | 4,5–36 V |
| Ausgangsstrom (pro Kanal) | 600 mA |
| Spitzenstrom (pro Kanal) | 1,2 A |
| Hinweise zur PWM-Frequenz | 20 kHz |
| Eingangslogik-Schwellenwerte | TTL-kompatibel |
| Spannungsabfall / RDS(on)/ Sättigung | 1,5 V max |
| Thermische Grenzwerte | 150 °C |
| Paket | DIP-16 |
| Notizen / Varianten | Weit verbreitet in Anwendungen mit Motortreibern. |
- Sorgen Sie für eine ausreichende Wärmeableitung für den Dauerbetrieb.
- Verwenden Sie Entkopplungskondensatoren für eine stabile Stromversorgung.
- Überprüfen Sie die Nennspannungen, um Beschädigungen der Bauteile zu vermeiden.
- Gehen Sie vorsichtig mit PWM-Signalen um; stellen Sie sicher, dass sie innerhalb der angegebenen Grenzen liegen.
- Überprüfen Sie die Kabelverbindungen, um Kurzschlüsse zu vermeiden.
Verdrahtungsanleitung

Um den Joystick und das LCD-Display mit dem Arduino zu verkabeln, beginnen Sie damit, den VCC-Pin des Joysticks mit dem 5V-Pin des Arduino und den GND-Pin mit dem GND des Arduino zu verbinden. Verbinden Sie den X-Achsen-Ausgang des Joysticks mit dem analogen PinA0und den Ausgang der Y-Achse an den AnalogpinA1. Der Schaltausgang des Joysticks sollte an den digitalen Pin angeschlossen werden2.
Beim Nokia-5110-LCD schließen Sie die folgenden Pins an: VCC an 5V, GND an GND, SCE an Pin7, RST an Pin6, D/C an Pin5, DN(MOSI) an Pin11, und SCLK an Pin13. Zuletzt verbinden Sie den LED-Pin über einen 330-Ohm-Widerstand mit Pin9zur Steuerung der Hintergrundbeleuchtung.
Codebeispiele und Schritt-für-Schritt-Anleitung
In der Setup-Funktion initialisieren wir die serielle Kommunikation und das LCD. Der BefehllcdBegin()Richtet die Pins ein und initialisiert das Display. Der Kontrast wird für optimale Sichtbarkeit eingestellt.
void setup() {
  Serial.begin(9600);
  lcdBegin();
  setContrast(40);
  delay(1000);
  clearDisplay(BLACK);
  updateDisplay();
}
Dies initialisiert die notwendigen Komponenten für das Projekt und stellt sicher, dass das LCD bereit ist, Informationen anzuzeigen.

In der Loop-Funktion lesen wir die Position des Joysticks aus und bilden sie auf die Bildschirmabmessungen ab. Die Position des Punkts wird anhand der X- und Y-Werte des Joysticks aktualisiert.
void loop() {
  int x = analogRead(A0); // read the x position of joystick
  int y = analogRead(A1); // read the y position of joystick
  int xPos = map(x, 0, 1023, 0, screenWidth); // map x to screen
  int yPos = map(y, 0, 1023, 0, screenHeight); // map y to screen
  setCircle(xPos, yPos, thickness, BLACK, 2); // display the dot
  updateDisplay();
  delay(10);
}
Dieser Code aktualisiert kontinuierlich die Position des Punktes auf dem LCD entsprechend der Bewegung des Joysticks.
Demonstration / Was Sie erwartet
Wenn Sie die Schaltung einschalten, zeigt das LCD einen Punkt an. Durch Bewegen des Joysticks wird der Punkt in Echtzeit entsprechend den X- und Y-Bewegungen des Joysticks neu positioniert. Wird der Joystick-Schalter gedrückt, kann dies zusätzliche Funktionen auslösen, die Sie implementieren können. Achten Sie auf mögliche schwebende Eingänge, wenn der Joystick nicht zentriert ist, da dies zu unerwarteten Punktbewegungen führen kann (im Video bei 01:30).
Video-Zeitstempel
- 00:00- Einführung in das Projekt
- 01:30- Erläuterung zur Verdrahtung
- 02:45- Code‑Durchgang
- 04:10- Demonstration der Funktionalität
Bilder
/*
 * This is Arduino code to use a dual-axis XY joystick with a Nokia 5110 screen to move a dot on the screen.
 * It also reads the switch.
 * Other Arduino libraries and videos: https://robojax.com

 * Watch the video for this code to learn it fully.
  * Watch the video here: https://youtu.be/zqDZybR5JSE
 * This code is offered "as is" without any warranty.
 * If you are sharing this code, you must keep this copyright note.
 */
 /*
/* Nokia 5100 LCD Example Code with Added Joystick by Robojax
   Graphics driver and PCD8544 interface code for SparkFun's
   84x48 Graphic LCD.
   https://www.sparkfun.com/products/10168
   Original source code:
https://github.com/sparkfun/GraphicLCD_Nokia_5110

  This stuff could all be put into a library, but we wanted to
  leave it all in one sketch to keep it as transparent as possible.

  Hardware: (Note most of these pins can be swapped)
    Graphic LCD Pin ---------- Arduino Pin
       1-VCC       ----------------  5V
       2-GND       ----------------  GND
       3-SCE       ----------------  7
       4-RST       ----------------  6
       5-D/C       ----------------  5
       6-DN(MOSI)  ----------------  11
       7-SCLK      ----------------  13
       8-LED       - 330 Ohm res --  9
   The SCLK, DN(MOSI), must remain where they are, but the other
   pins can be swapped. The LED pin should remain a PWM-capable
   pin. Don't forget to stick a current-limiting resistor in line
   between the LCD's LED pin and Arduino pin 9!
   Modified by Ahmad S. for Robojax.com
   on Mar 11, 2018 at 20:49 at Ajax, Ontario, Canada
*/
#include <SPI.h>
#include "LCD_Functions.h"

#define sw 2 // pint 2 is used for joystick switch input
#define screenWidth 83 // NOkia screen width
#define screenHeight 47 // Nokia screen height
int thickness =1;// the thickness of the dot


void setup()
{
  // Robojax Dual Axis joystick  with Nokia 5110 LCD screen project
  Serial.begin(9600);

  lcdBegin(); // This will setup our pins, and initialize the LCD
  //updateDisplay(); // with displayMap untouched, SFE logo
  setContrast(40); // Good values range from 40-60
  delay(1000);

  clearDisplay(BLACK);
  updateDisplay();
}


void loop()
{
  clearDisplay(WHITE);
   // Robojax Dual Axis joystick  with Nokia 5110 LCD screen project
  int x = analogRead(A0);// read the x position of joystick
  int y = analogRead(A1); // read the y position of joystick
  int xPos = map(x, 0, 1023,0,screenWidth);// map or translate the x of joystick to x of screen
  int yPos = map(y, 0, 1023,0,screenHeight); // map or translate the y of joystick to y of screen
  int sStat = digitalRead(sw);//read the switch from pin 2
  Serial.print("X: ");
  Serial.print(xPos);
  Serial.print(" Y: ");
  Serial.println(yPos);// Robojax prints y

  // Robojax Dual Axis joystick  with Nokia 5110 LCD screen project
   //setCircle(xPos, yPos, thicness, BLACK, 2);
   // xPos is the position of x
   // yPos is the position of y
   // thickness
  setCircle(xPos, yPos, thickness, BLACK, 2);// display the dot on the screen
    updateDisplay();
  delay(10);


}
Dinge, die Sie vielleicht brauchen
-
Amazon
-
Amazon
Ressourcen & Referenzen
Noch keine Ressourcen vorhanden.
Dateien📁
Erforderliche Datei (.h)
-
robojax-nokia5110.h header file for Arduino
robojax-nokia5110.zip0.01 MB -
LCD_Functions. file for Nokia
LCD_Functions.h0.02 MB
Fritzing-Datei
-
Nokia 5110 LCD
Nokia_5110_LCD.fzpz0.03 MB -
Schwarzer Joystick KY-023
Black Joystick KY-023.fzpz0.02 MB