Arduino Code and Video for the E18-D80NK Infrared Obstacle Avoidance Sensor
In this tutorial, we will learn how to use the E18-D80NK infrared obstacle avoidance sensor with Arduino to detect obstacles and trigger actions, such as turning on an LED or activating a relay. The project will demonstrate how to read the sensor's output and respond accordingly. By the end of this tutorial, you will have a working setup that can detect obstacles and activate outputs based on that detection.

Be sure to watch the associated video for a clearer understanding of the wiring and code implementation (in video at 00:00).
Hardware Explained
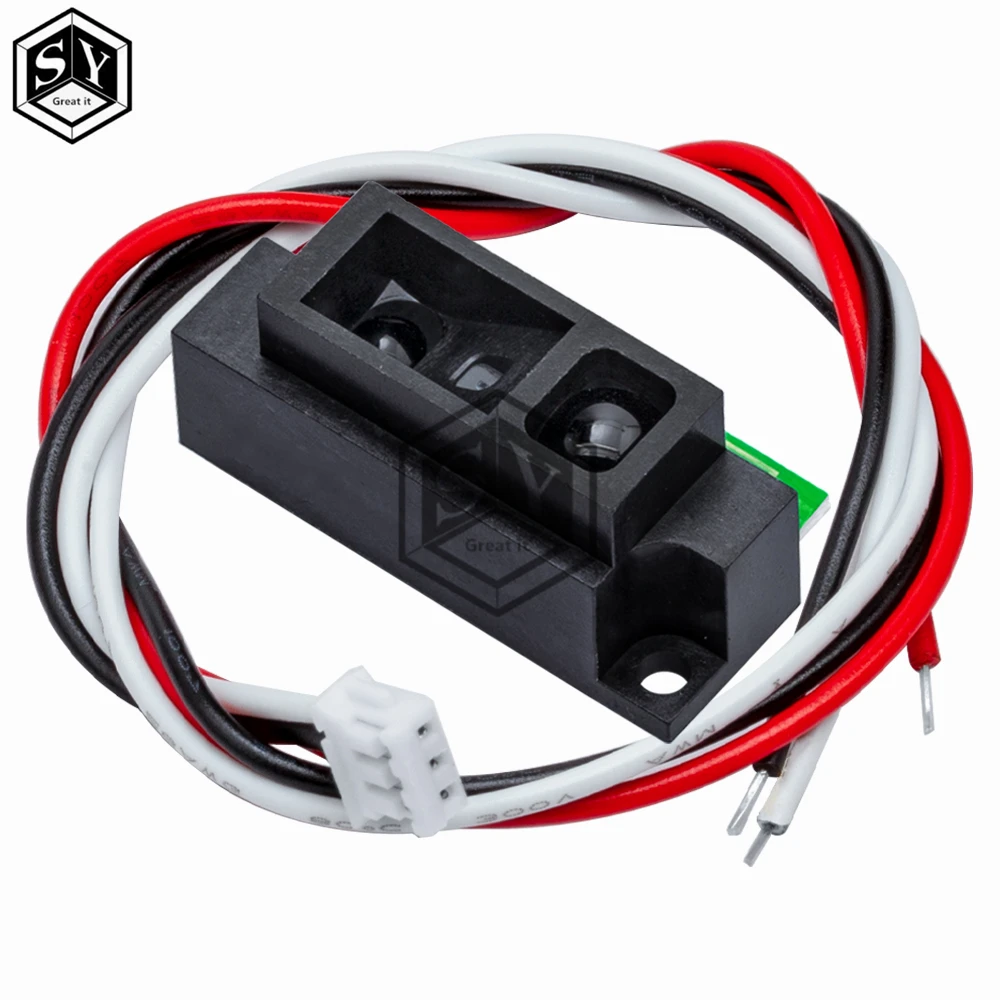
The E18-D80NK infrared obstacle avoidance sensor is designed to detect nearby objects using infrared light. It emits infrared rays and detects the reflection from obstacles. When an object is detected within a certain range, the sensor outputs a low signal, which can be read by an Arduino.
This sensor has three main pins: a power pin (usually brown), ground (blue), and a signal pin (black). The signal pin is connected to a digital input on the Arduino to read the obstacle detection status. The output can then control various devices like motors or relays based on the sensor's readings.
Datasheet Details
| Manufacturer | Shenzhen Eighteen Electronics |
|---|---|
| Part number | E18-D80NK |
| Logic/IO voltage | 3.3 V to 5 V |
| Supply voltage | 5 V |
| Output current (per channel) | 20 mA |
| Peak current (per channel) | 200 mA |
| Detection range | 2 cm to 30 cm |
| Output type | Digital |
| Package | Module |
- Ensure correct wiring to prevent damage to the module.
- Use a pull-up resistor on the signal line for stable readings.
- Keep the sensor clean and free from obstructions for accurate detection.
- Test the sensor range in your specific environment.
- Be cautious of the power ratings when connecting to relays or motors.
Wiring Instructions

To wire the E18-D80NK sensor to the Arduino, start by connecting the brown wire to the 5V pin on the Arduino for power. Next, connect the blue wire to the GND pin to complete the power circuit. Then, take the black wire and connect it to digital pin 2 on the Arduino for signal input.

If you are using a relay, connect the relay's control pin (usually to pin 9) to the Arduino to control the output based on the sensor's readings. Make sure the relay is properly powered and connected to the AC device you want to control. It is crucial to follow safety precautions when working with AC power.
Code Examples & Walkthrough
The following code demonstrates how to read the sensor's output and control an action based on the detection of an obstacle. The sensor output is read using the SENSOR identifier defined as pin 2, and the action pin is defined as pin 9.
#define SENSOR 2 // define pin 2 for sensor
#define ACTION 9 // define pin 9 as for ACTION

void setup() {
  Serial.begin(9600); // setup Serial Monitor to display information
  pinMode(SENSOR, INPUT_PULLUP); // define pin as Input sensor
  pinMode(ACTION, OUTPUT); // define pin as OUTPUT for ACTION
}
In this excerpt, we set up the serial communication and configure the sensor pin as an input with a pull-up resistor, while the action pin is set as an output. This configuration is essential for reading the sensor and controlling the relay or other devices.
void loop() {
  int L = digitalRead(SENSOR); // read the sensor
  if (L == 0) {
    Serial.println("Obstacle detected");
    digitalWrite(ACTION, HIGH); // send signal
  } else {
    Serial.println("=== All clear");
    digitalWrite(ACTION, LOW); // turn the relay OFF
  }
  delay(500);
}
This part of the code continuously checks the sensor's output. If an obstacle is detected (when L is 0), it sends a HIGH signal to the action pin, which can activate a relay or other components. If no obstacle is detected, it sends a LOW signal, turning off the device.
Demonstration / What to Expect
When you set up the circuit and upload the code, the sensor will continuously monitor for obstacles. If an object comes within the detection range, you should see a message on the serial monitor indicating that an obstacle has been detected, and the connected device will activate. If the path is clear, it will print a message saying "All clear". Make sure to adjust the delay in the loop if you notice any missed detections or unwanted triggers (in video at 00:00).
Video Timestamps
- 00:00 - Introduction to the project
- 01:30 - Hardware overview
- 03:15 - Wiring instructions
- 05:00 - Code walkthrough
- 06:45 - Demonstration of the setup
图像


This code has not been parsed yet. Please return to the admin panel to parse it.|||您可能需要的东西
-
亚马逊从亚马逊购买e18-d80nkamzn.to
-
全球速卖通从AliExpress购买e18-d80nk红外光电设备s.click.aliexpress.com
资源与参考
-
外部从美国亚马逊购买 E18-D80NKamzn.to
-
外部购买 E18-D80NK 亚马逊欧洲 (所有)amzn.to
文件📁
没有可用的文件。