Lesson 18, RoboJax Arduino Step-by-Step Course: Using Tilt Angle Sensor SCA60C1
Welcome to this hands-on tutorial from Robojax. In this lesson, we introduce the SCA60C1 angle sensor from VTI Technologies and demonstrate how it can be used with Arduino to detect and measure angle positions in various robotics or automation projects.
What Is the SCA60C1?
The SCA60C1 is a precision angle sensor capable of detecting angular displacement in a range of approximately -180° to +90°. It provides real-time data that can be used to determine the tilt or rotation of mechanical components, arms, or platforms. This makes it especially useful for:
Robotic joints
Rotating platforms
Arm articulation and position feedback
Why Angle Sensing Matters
Accurately measuring angles is critical in robotics and mechatronics. Whether you're building a robotic arm or a gimbal system, knowing the real-time angle ensures proper control, safety, and automation. This tutorial walks you through using the SCA60C1 with an Arduino board to create a reliable angle measurement system.
Demonstration Overview
In the video:
The sensor is wired to the Arduino.
The angle is printed to the Serial Monitor in degrees.
The instructor shows how the angle reading changes as the sensor is rotated.
You will see the output going from +90°, to 0°, to -90°, and further down to -180°, depending on the orientation. This helps visualize how the sensor responds to real-world movement.
Wiring and Setup
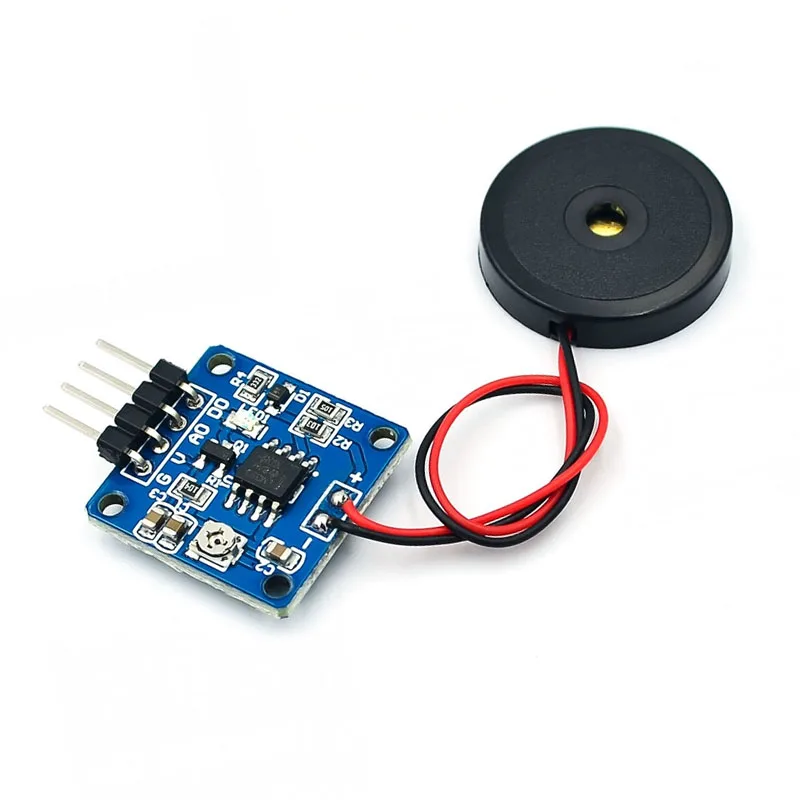
The sensor is mounted securely and connected to the Arduino for reading analog or digital outputs (depending on model variant). The video clearly demonstrates this wiring step.
📷 Image Caption: Wiring diagram showing the SCA60C1 angle sensor connected to Arduino with appropriate power, ground, and signal pins.
This sensor is ideal for learning how to measure tilt and rotation. Watch the video to see how it performs in real time, and follow along to integrate angle sensing into your own robotics projects.
/*
 *  Robojax Arduino Step By Step Course
 * Tilt Angle Sensor SCA60C1 N1000060
 * It displays the angle from 0 to 180 degrees.
 *
  Please watch video instruction here https://youtu.be/hkhepVzWyWE
 This code is available at http://robojax.com/course1/?vid=lecture11

With over 100 lectures free on YouTube. Watch it here http://robojax.com/L/?id=338
Get the code for the course: http://robojax.com/L/?id=339
 *
Written by Ahmad Shamshiri on Mar 17, 2020 at 20:20

 * in Ajax, Ontario, Canada. www.robojax.com
 *
  Need wiring diagram for this code:
  Purchase My Arduino course on Udemy.com http://robojax.com/L/?id=62
 *

 * Get this code and other Arduino codes from Robojax.com
Learn Arduino step by step in a structured course with all material, wiring diagrams, and libraries
all in one place. Purchase My course on Udemy.com http://robojax.com/L/?id=62

If you found this tutorial helpful, please support me so I can continue creating
content like this.

or make a donation using PayPal http://robojax.com/L/?id=64

 *  * This code is "AS IS" without warranty or liability. Free to be used as long as you keep this note intact.*
 * This code has been downloaded from Robojax.com
    This program is free software: you can redistribute it and/or modify
    it under the terms of the GNU General Public License as published by
    the Free Software Foundation, either version 3 of the License, or
    (at your option) any later version.

    This program is distributed in the hope that it will be useful,
    but WITHOUT ANY WARRANTY; without even the implied warranty of
    MERCHANTABILITY or FITNESS FOR A PARTICULAR PURPOSE.  See the
    GNU General Public License for more details.

    You should have received a copy of the GNU General Public License
    along with this program.  If not, see <https://www.gnu.org/licenses/>.
 */

const int anglePin =A0;
int angle =0;
const int angleCompensate =0;

const int d1Pin =A1;
int d1State =LOW;
int d1Delay =0;//watch

const int d2Pin =A2;
int d2State =LOW;
int d2Delay =0;

char *lables[]={"Angle","Alarm D1","Alarm D2"};

void setup()

{

  Serial.begin(9600);          //  setup serial
  Serial.println("Robojax SCA60C Angle Sensor");

}


void loop(){
  //Robojax Tilt Angle Sensor
  	//Robojax Arduino Step By Step Course http://robojax.com/L/?id=338
  getAngle();
  d1Alarm();
  d2Alarm();


  // print out the value you read:
  Serial.print(lables[0]);//
  Serial.print(":");
  Serial.print(angle);
  Serial.println("\xC2\xB0");//degree symbol
//  Serial.print("\t");
//  Serial.print(lables[1]);
//  Serial.print(":");
//  Serial.print(d1State);
//  Serial.print("\t");
//  Serial.print(lables[2]);
//  Serial.print(":");
//  Serial.println(d2State);
//  Serial.println("======");
  delay(100);
//Robojax Tilt Angle Sensor
}

void getAngle()
{

   angle =map(analogRead(A0), 96, 927, -90, 90) + angleCompensate;

}

/**************************************/
/*!
    @brief  Get the state of the D1 alarm. HIGH if triggered.
    @param  no parameter
    @returns returns nothing
    Written by Ahmad Shamshiri on Mar 17, 2020 at 20:20 in Ajax, Ontario, Canada.
*/
/**************************************/
void d1Alarm()
{
  	//Robojax Arduino Step By Step Course http://robojax.com/L/?id=338
  //
  float vo = analogRead(d1Pin) * (5.0 / 1023.0);
  if(vo < 3.5)
  {
    d1State =HIGH;
    delay(d1Delay);
  }else{
    d1State =LOW;
  }

}//d1Alarm() end


/**************************************/
/*!
    @brief  Get the state of the D1 alarm. HIGH if triggered.
    @param  no parameter
    @returns returns nothing
    Written by Ahmad Shamshiri on Mar 17, 2020 at 20:20 in Ajax, Ontario, Canada.
*/
/**************************************/
void d2Alarm()
{
  	//Robojax Arduino Step By Step Course http://robojax.com/L/?id=338
  //
  float vo = analogRead(d2Pin) * (5.0 / 1023.0);

  if(vo < 3.5)
  {
    d2State =HIGH;
    delay(d2Delay);
  }else{
    d2State =LOW;
  }

}//d1Alarm() end
Ресурсы и ссылки
Ресурсов пока нет.
Файлы📁
Нет доступных файлов.