Lesson 27: Using a DHT11 Temperature Sensor with an LCD Screen | Arduino Step-by-Step Course
This guide walks you through building a temperature and humidity monitoring system using a DHT11 sensor and an I2C LCD screen, based on Lesson 27 of the Robojax Arduino Step-by-Step Course. While the video transcript references an HTU21DF sensor, the code and principles presented here apply directly to the more common and budget-friendly DHT11 module, which is a staple for environmental sensing projects. This project is perfect for beginners looking to move beyond blinking LEDs and start reading real-world data.

The real-world value of this project is immense. You can use this setup for a wide variety of practical applications, including:
- Building a simple digital thermometer and hygrometer for your home or office.
- Creating a climate monitor for a reptile terrarium or a plant greenhouse.
- Developing a basic weather station that logs data to your computer via the serial monitor.
- Adding temperature-based automation, such as turning on a fan or heater when a certain threshold is crossed.
This tutorial will guide you through the wiring, the necessary libraries, and the code, empowering you to build your own environmental monitoring system.
Hardware and Components
To build this project, you will need the following components:
- An Arduino board (e.g., Uno, Nano).
- A DHT11 temperature and humidity sensor module.
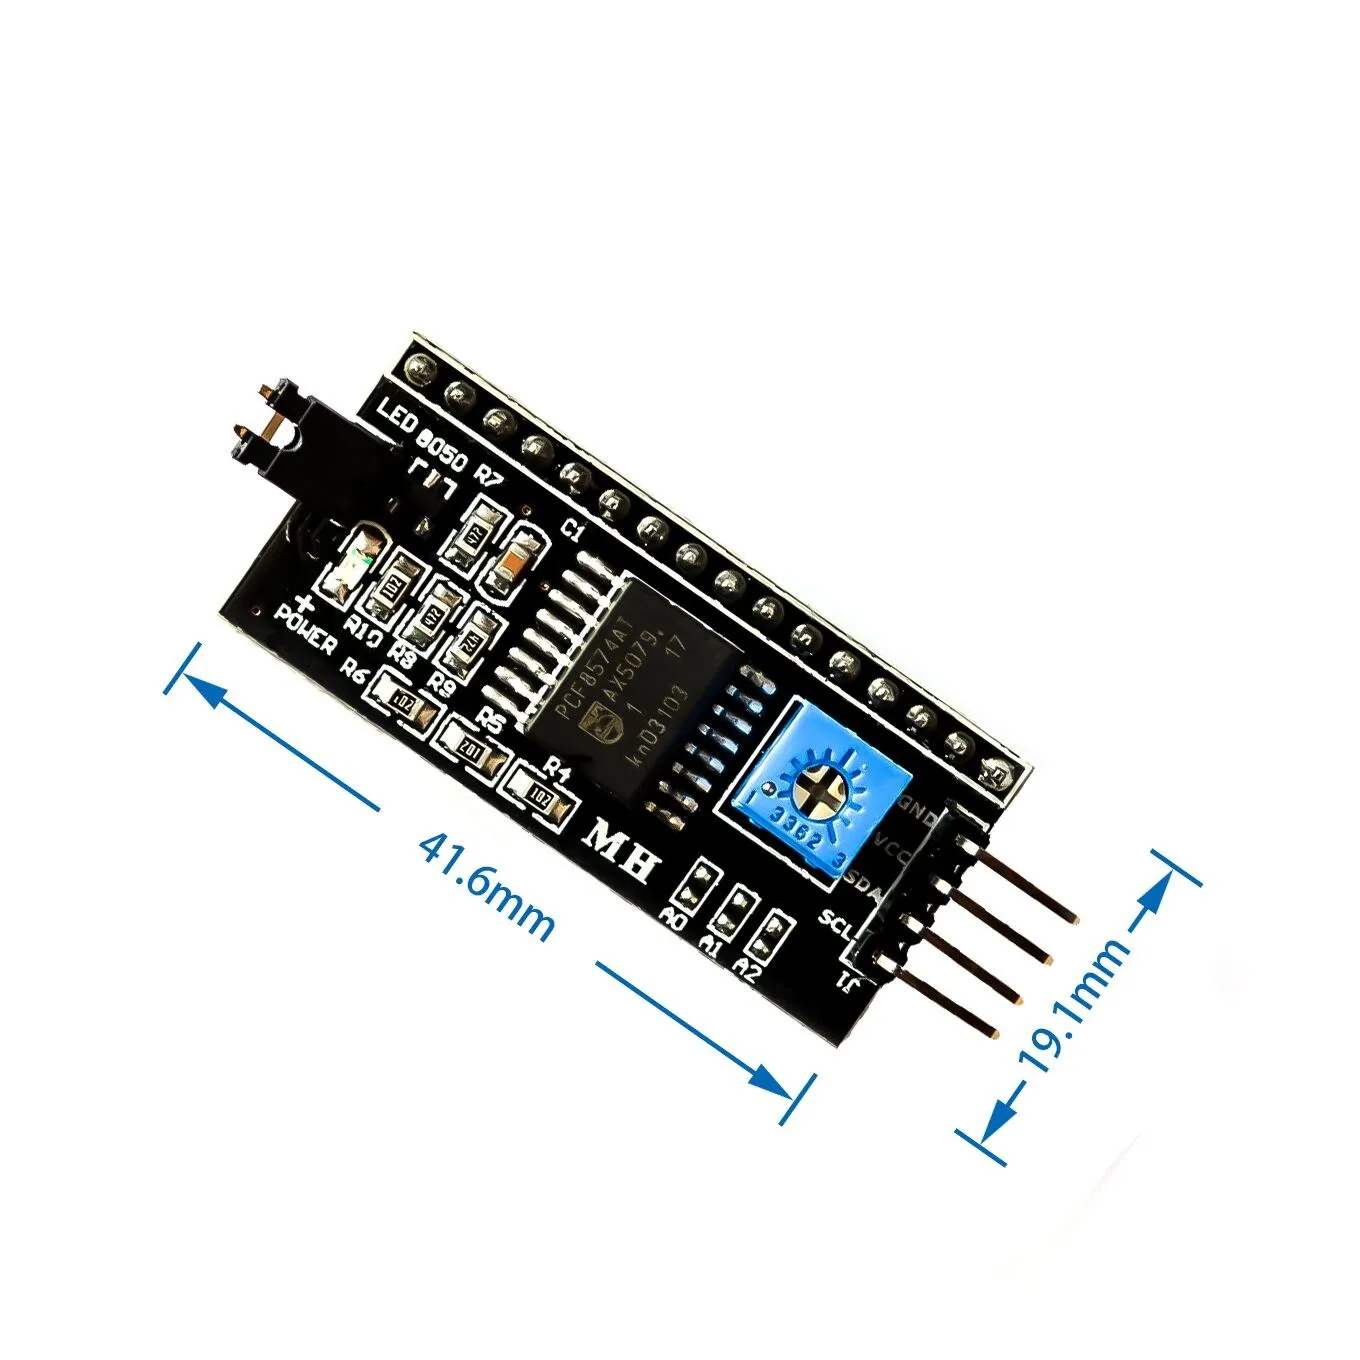
- An LCD1602 display with an I2C interface module.
- Jumper wires.
- A breadboard (optional, but recommended for easy connections).
Wiring Guide
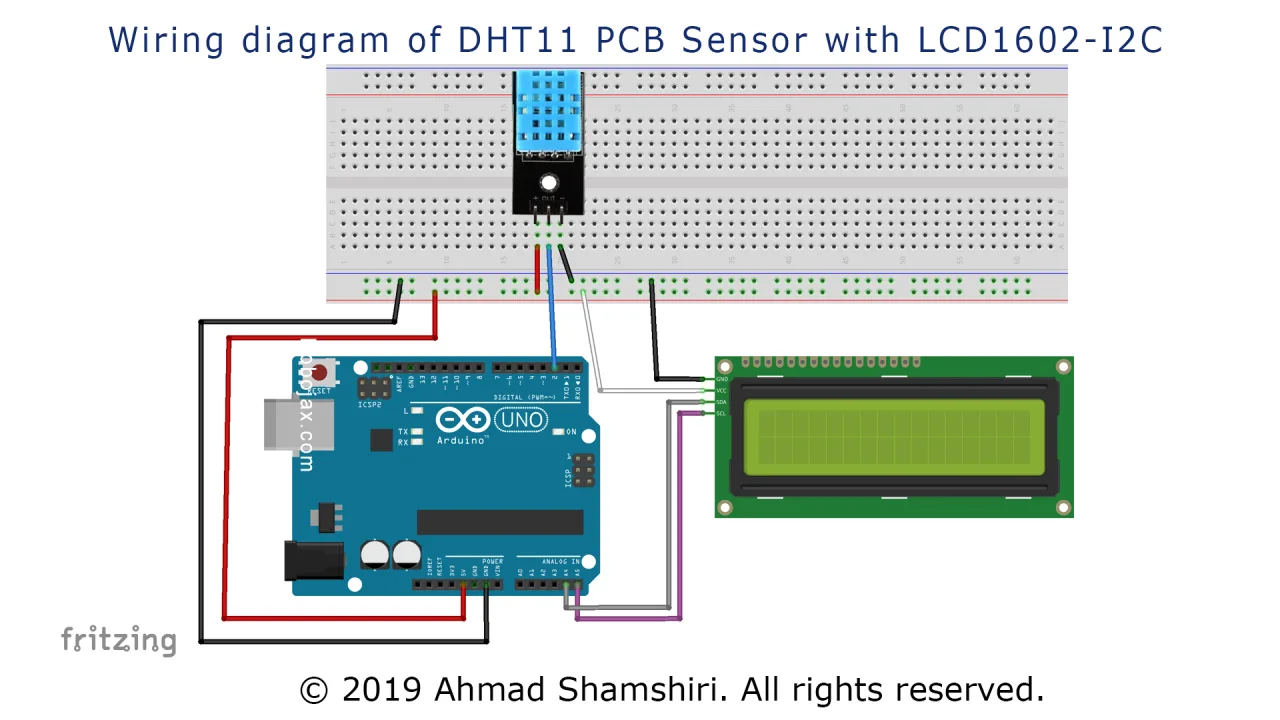
The wiring for this project is straightforward, thanks to the I2C interface on the LCD and the simple digital output of the DHT11. The I2C LCD only requires two data wires (SDA and SCL) and two power wires, which simplifies connections significantly. The DHT11 sensor also has a simple three-pin interface.
Here is the connection diagram for the project:
Connect the components as follows:
- DHT11 Sensor: Connect the VCC (or +) pin to the Arduino's 5V pin, the GND (-) pin to the Arduino's GND, and the DATA (or OUT) pin to digital pin 2 on the Arduino.
- I2C LCD (LCD1602): Connect the VCC pin to the Arduino's 5V pin, the GND pin to the Arduino's GND, the SDA pin to the Arduino's analog pin A4, and the SCL pin to the Arduino's analog pin A5.
These connections are all you need to power the sensor and display and to enable communication between the components.
Code Explanation
The code is designed to read temperature and humidity from the DHT11 sensor and display the values on the I2C LCD screen. It also prints the data to the Serial Monitor for easy viewing on your computer.
Let's break down the user-configurable parts of the code that you may want to adjust for your own projects.
// header file from GitHub: https://github.com/adidax/dht11
#include <dht11.h>

dht11 DHT11; // create object of DHT11
#define dhtpin 2 // set the pin to connect to DHT11

// start of settings for LCD1602-I2C
#include <Wire.h>
#include <LiquidCrystal_I2C.h>
// Set the LCD address to 0x3F for a 16 chars and 2 line display
LiquidCrystal_I2C lcd(0x3F, 16, 2);
// end of settings for LCD1602-I2C
- #define dhtpin 2: This defines the Arduino digital pin that is connected to the DATA pin of the DHT11 sensor. If you connect it to a different pin, you must change this number.
- LiquidCrystal_I2C lcd(0x3F, 16, 2): This line initializes the LCD. The first parameter,
0x3F, is the I2C address of your specific LCD module. This address can sometimes be0x27depending on the manufacturer. The other two parameters,16and2, define the number of columns and rows on your LCD screen.
In the loop(), the code uses a custom function called getTemp() to read and convert the temperature. This function is a great example of how to make your code cleaner and more reusable.
float getTemp(char type) {
    float temp = (float)DHT11.temperature;//get temp
  if(type =='F')
  {
    return temp * 1.8 + 32;// convert to fahrenheit
  }else if(type =='K')
  {
    return temp + 274.15;// convert to Kelvin
  }else{
   return temp;
  }

}
To use this function, you simply call it and pass a single character to specify the desired unit. For example, getTemp('C') will return the temperature in Celsius, getTemp('F') in Fahrenheit, and getTemp('K') in Kelvin. This makes it very easy to display the temperature in multiple scales, as shown in the video's demonstration.
Live Project Demonstration
Once you have assembled the circuit and uploaded the code, you will see the LCD screen display "DHT11 Sensor" for two seconds, followed by the live temperature and humidity readings. The screen will show the temperature in both Celsius and Fahrenheit. You can also open the Serial Monitor (set to 9600 baud) to view the data, which will include the temperature in Kelvin and the relative humidity percentage.
In the video, the presenter demonstrates the sensor's response by applying heat from a heat gun. You will see the temperature reading on the LCD increase rapidly while the humidity reading drops, showcasing the sensor's real-time capabilities. This is a great way to test your setup and confirm that everything is working correctly.
Chapters
- [00:00] Introduction to the DHT11 and HTU21DF Temperature Sensors
- [01:38] Sensor Specifications and Datasheet Overview
- [02:28] Detailed Wiring Guide for the Sensor
- [03:03] Installing the Required Arduino Libraries
- [04:05] Explaining the Original Example Code
- [07:34] Demonstrating the Sensor in Action
- [08:33] Introducing the Modified Code with a Custom Function
- [10:22] How the getTemp() Function Works
- [12:19] Live Demonstration: Displaying Temperature in Celsius, Fahrenheit, and Kelvin
- [13:01] Testing the Sensor's Maximum Temperature Limit
ምስሎች
/*
 * Robojax Arduino Step-by-Step Course
 * Lesson 26 DHT11 with LCD1602-I2C display


 * This is the Arduino code for the DHT11 module to read temperature and humidity.
 * This code can display temperature in:
 * C is used to get Celsius.
 * F is used to get Fahrenheit.
 * K is used for Kelvin.

 *  *
 * Written by Ahmad Shamshiri for Robojax
 * on January 4, 2018
 * Robojax.com

   Please watch video instructions here: https://youtu.be/0XMLnCYkvbE
 This code is available at: http://robojax.com/course1/?vid=lecture11

with over 100 lectures free on YouTube. Watch it here: http://robojax.com/L/?id=338
Get the code for the course: http://robojax.com/L/?id=339


 * This code is "AS IS" without warranty or liability. Free to be used as long as you keep this note intact.
 * This code has been downloaded from Robojax.com
    This program is free software: you can redistribute it and/or modify
    it under the terms of the GNU General Public License as published by
    the Free Software Foundation, either version 3 of the License, or
    (at your option) any later version.

    This program is distributed in the hope that it will be useful,
    but WITHOUT ANY WARRANTY; without even the implied warranty of
    MERCHANTABILITY or FITNESS FOR A PARTICULAR PURPOSE.  See the
    GNU General Public License for more details.

    You should have received a copy of the GNU General Public License
    along with this program.  If not, see <https://www.gnu.org/licenses/>.
 */

// header file from GitHub: https://github.com/adidax/dht11
#include <dht11.h>

dht11 DHT11; // create object of DHT11
#define dhtpin 2 // set the pin to connect to DHT11

// start of settings for LCD1602-I2C
#include <Wire.h>
#include <LiquidCrystal_I2C.h>
// Set the LCD address to 0x3F for a 16 chars and 2 line display
LiquidCrystal_I2C lcd(0x3F, 16, 2);
// end of settings for LCD1602-I2C


void setup() {
    Serial.begin(9600);// setting up serial monitor

  // initialize the LCD,
  lcd.begin();
  // Turn on the backlight and print a message.
  lcd.backlight();
  lcd.clear();
  lcd.setCursor (0,0); //
  lcd.print("DHT11 Sensor");
  delay(2000);
}

void loop() {
	//Robojax Step-by-Step Arduino Course YouTube Watch it here: http://robojax.com/L/?id=338
  DHT11.read(dhtpin);// initialize the reading
  int humidity = DHT11.humidity;// get humidity

  lcd.clear();// clear previous values from screen
  lcd.setCursor (0,0); //character zero, line 1
  lcd.print("LCD1602 DHT11"); // print text

  // print distance in degrees C
  lcd.setCursor (0,1); //character 0, line 2
  lcd.print(getTemp('C'));// print Temperature Celsius
  lcd.setCursor (4,1); //character 5, line 2
  lcd.print((char)223);// print degree
  lcd.setCursor (5,1); //character 6, line 2
  lcd.print("C");// print C

   // print distance degrees F
  lcd.setCursor (7,1); //character 8, line 2
  lcd.print(getTemp('F'));// print distance in cm
  lcd.setCursor (13,1); //character 14, line 2
  lcd.print((char)223);// print degree
  lcd.setCursor (14,1); //character 16, line 2
  lcd.print("F");// print F


  //code for Robojax.com video
   Serial.print(getTemp('C'));
   Serial.print("C ");
   Serial.print(getTemp('F'));
   Serial.print("F ");
   Serial.print(getTemp('K'));
   Serial.print("K ");
   Serial.print(" humidity:");
   Serial.print (humidity);
   Serial.print("% ");
   Serial.println();
 delay(500);
}


/*
 * getTemp(char type)
 * type: character of upper case
 * C is used to get Celsius.
 * F is used to get Fahrenheit.
 * K is used for Kelvin.
 */
float getTemp(char type) {
	//Robojax Step-by-Step Arduino Course YouTube Watch it here: http://robojax.com/L/?id=338
    float temp = (float)DHT11.temperature;//get temp
  if(type =='F')
  {
    return temp * 1.8 + 32;// convert to fahrenheit
  }else if(type =='K')
  {
    return temp + 274.15;// convert to Kelvin
  }else{
   return temp;
  }

}
እንደሚያስፈልግዎት ይችላል
-
አማዞንPurchase DHT11 from Amazonamzn.to
-
አማዞንPurchase LCD1602-I2C from Amazonamzn.to
-
ኢቤይPurchase LCD1602-I2C from eBayebay.us
-
አሊኤክስፕሬስDHT11 and DHT22 from AliExpressamzn.to
-
አሊኤክስፕሬስPurchase 10pcs LCD1602-I2C from AliExpresss.click.aliexpress.com
-
አሊኤክስፕሬስPurchase LCD1602-I2C from AliExpresss.click.aliexpress.com
-
ባንጉድPurchase DHT11 module from Banggoodbanggood.com
ምንጮች እና ምንጮች
-
ውስጥDHT11 library on GitHubgithub.com
-
ውስጥDHT11 Manual (PDF)robojax.com
-
ውስጥLCD library from Robojax.com (ZIP)robojax.com
ፋይሎች📁
ፍሪትዚንግ ፋይል
-
Temperature Sensor DHT11
Temperature Sensor DHT11.fzpz0.01 MB -
DHT11 Humitidy and Temperature Sensor (3 pins)
DHT11 Humitidy and Temperature Sensor (3 pins).fzpz0.20 MB
ተጠቃሚ መመሪያ
-
DHT11 ተጠቃሚ መመሪያ
robojax-DHT11_manual.pdf0.82 MB
ሌላ ፋይሎች
-
DHT11 간단한 아두이노 라이브러리
robojax-DHT11-simple_library.zip