This tutorial is part of: Digital Relative Humidity & Temperature Sensor HTU21D
Videos related to Digital Relative Humidity & Temperature Sensor HTU21D. Links to other videos are below this article.

Lesson 35-1: Using the HTU21D Temperature Sensor
In this tutorial, we will explore how to use the HTU21D temperature and humidity sensor with an Arduino. The HTU21D is a compact sensor that communicates over I2C, making it easy to interface with microcontrollers. By the end of this lesson, you will be able to read temperature and humidity values and display them through the Arduino serial monitor.

For this project, we will utilize the Adafruit library specifically designed for the HTU21D sensor. The library simplifies the process of reading sensor data, allowing us to focus on integrating the sensor into our projects. You can expect to see the sensor's temperature readings in Celsius, Fahrenheit, and Kelvin, as well as the relative humidity percentage (in video at 03:15).
Hardware Explained
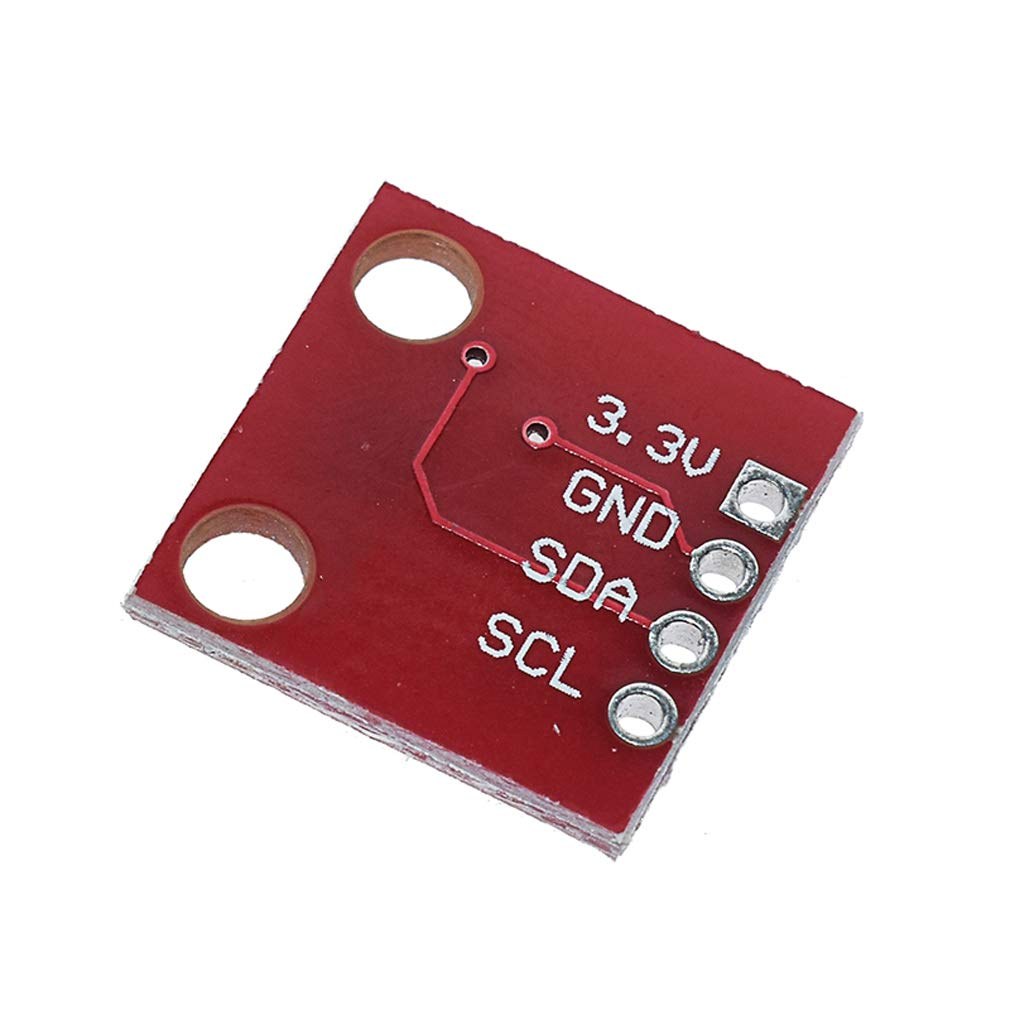
The main component for this project is the HTU21D temperature and humidity sensor. This sensor operates on a supply voltage of 1.5 to 3.6 volts and consumes very little power, making it ideal for battery-operated devices. It communicates with the Arduino using I2C protocol, requiring only two data lines: SDA for data and SCL for the clock.
To power the sensor, we will connect it to either a 3.3V or 5V source, depending on the specific module you are using. The Adafruit version includes a voltage regulator, allowing it to work seamlessly with both voltage levels. This flexibility makes it a great choice for various applications.
Datasheet Details
| Manufacturer | TE Connectivity |
|---|---|
| Part number | HTU21D-F |
| Logic/IO voltage | 1.5 - 3.6 V |
| Supply voltage | 3.3 V (typ.) |
| Current consumption (idle) | 0.02 µA |
| Current consumption (measurement) | 450 µA (typ.) |
| Temperature range | -40 to +125 °C |
| Humidity resolution | 0.04 % |
| Package | 6-pin DFN |
- Ensure proper voltage levels to avoid damaging the sensor.
- Use pull-up resistors on the I2C lines if not included in the module.
- Keep wires short to minimize interference with I2C communication.
- Consider heat-sinking if using in high-temperature environments.
- Check the sensor's orientation to ensure correct pin connections.
Wiring Instructions

To wire the HTU21D sensor to your Arduino, start by connecting the sensor's VCC pin to the 3.3V power pin on the Arduino. Next, connect the GND pin on the sensor to the ground (GND) pin on the Arduino. Then, connect the SDA pin on the sensor to the Arduino's analog pin A4, which serves as the I2C data line. Finally, connect the SCL pin on the sensor to analog pin A5, which acts as the I2C clock line. Make sure your connections are secure to avoid intermittent readings.
For clarity, if you are using a different board, ensure you identify the correct pins for SDA and SCL as they may vary. This wiring setup will allow the Arduino to communicate with the HTU21D sensor effectively (in video at 05:00).
Code Examples & Walkthrough
Below is an excerpt from the setup function that initializes the serial communication and checks if the sensor is found:
void setup() {
  Serial.begin(9600);
  if (!htu.begin()) {
    Serial.println("Couldn't find sensor!");
    while (1);
  }
}
This code begins serial communication at a baud rate of 9600 and attempts to initialize the HTU21D sensor. If the sensor is not detected, it will print an error message and halt further execution.
The main loop of the program continuously reads the temperature and humidity values:
void loop() {
    Serial.print(getHTU('C'));
    Serial.println("C");
    Serial.print("Humidity:");
    Serial.print(getHTU('H'));
    Serial.println("%");
    delay(1000);
}
In this loop, we call the function getHTU with 'C' to get the temperature in Celsius and 'H' to get the humidity. The results are printed to the serial monitor every second. This allows for real-time observation of the sensor readings.
Additionally, we have a function getHTU that returns the temperature or humidity based on a character input:
float getHTU(char type) {
    float temp = htu.readTemperature();
    float rel_hum = htu.readHumidity();
    return (type == 'H') ? rel_hum : temp;
}
This function reads the temperature and humidity from the sensor and returns the appropriate value based on the type specified. This modular approach keeps the code clean and easy to maintain.
Demonstration / What to Expect
Upon successful setup and execution of the code, you should see the temperature and humidity values printed to the serial monitor. If you apply heat to the sensor, the temperature readings should increase accordingly, while humidity may decrease. If the temperature exceeds the sensor's maximum range, it may display unexpected results, such as zero (in video at 12:00).
Video Timestamps
- 00:00 - Introduction
- 03:15 - Sensor overview
- 05:00 - Wiring instructions
- 10:00 - Code walkthrough
- 12:00 - Demonstration
Images
This tutorial is part of: Digital Relative Humidity & Temperature Sensor HTU21D
- Lesson 35-2: Using the HTU21D Temperature Sensor Custom Code
- Lesson 35: Using HTU21D Temperature Sensor with Arduino
- Lesson 36: Using the HTU21D Temperature Sensor with an LCD Arduino Step-by-Step Course
- Using Two More HTU21DF Humidity and Temperature Sensors with Arduino
- Displaying Temperature from an HTU21D on an LCD
- Displaying Temperature from an HTU21D as a Bar Graph on an LCD
- How to Use the HTU21DF Humidity and Temperature Sensor with Arduino (Basic Code)
- How to Use the HTU21DF Humidity and Temperature Sensor with Arduino (Custom Code)
/*
 * Robojax Arduino Step-by-Step Course
 * Part 4: Temperature Sensors
 * Lesson 35: HTU21D Temperature Sensor


 * Updated by Ahmad Shamshiri on July 13, 2019
 * in Ajax, Ontario, Canada

  Please watch video instructions here https://youtu.be/LyA0yAKlf9E
 This code is available at http://robojax.com/course1/?vid=lecture35

with over 100 lectures free on YouTube. Watch it here http://robojax.com/L/?id=338
Get the code for the course: http://robojax.com/L/?id=339
If you found this tutorial helpful, please support me so I can continue creating.
Make a donation using PayPal http://robojax.com/L/?id=64

 * Code is available at http://robojax.com/learn/arduino

 * This code is "AS IS" without warranty or liability. Free to be used as long as you keep this note intact.
 * This code has been downloaded from Robojax.com
    This program is free software: you can redistribute it and/or modify
    it under the terms of the GNU General Public License as published by
    the Free Software Foundation, either version 3 of the License, or
    (at your option) any later version.

    This program is distributed in the hope that it will be useful,
    but WITHOUT ANY WARRANTY; without even the implied warranty of
    MERCHANTABILITY or FITNESS FOR A PARTICULAR PURPOSE.  See the
    GNU General Public License for more details.

    You should have received a copy of the GNU General Public License
    along with this program.  If not, see <https://www.gnu.org/licenses/>.


 */
/*

**************************************************
*
  This is an example for the HTU21D-F Humidity & Temp Sensor

  Designed specifically to work with the HTU21D-F sensor from Adafruit
  ----> https://www.adafruit.com/products/1899

  These displays use I2C to communicate; 2 pins are required to
  interface
 ****************************************************/

#include <Wire.h>
#include "Adafruit_HTU21DF.h"

// Connect Vin to 3-5VDC
// Connect GND to ground
// Connect SCL to I2C clock pin (A5 on UNO)
// Connect SDA to I2C data pin (A4 on UNO)

Adafruit_HTU21DF htu = Adafruit_HTU21DF();

void setup() {
  Serial.begin(9600);
  Serial.println("Robojax.com");
  Serial.println("HTU21D-F test");

  if (!htu.begin()) {
    Serial.println("Couldn't find sensor!");
    while (1);
  }
}

void loop() {
//Get the code for the course: http://robojax.com/L/?id=339
    Serial.print(getHTU('C'));
    printDegree();
    Serial.println("C");

    Serial.print(getHTU('F'));
    printDegree();
    Serial.println("F");

    Serial.print(getHTU('K'));
    Serial.println("K");
    Serial.println(" ");

    Serial.print("Humidity:");
    Serial.print(getHTU('H'));
    Serial.println("%");

    if(getHTU('C') <81)
    {
      //digitalWrite(5, LOW);

    }
    delay(1000);
}

/*
 * @brief returns temperature or relative humidity
 * @param "type" is character
 *     C = Celsius
 *     K = Kelvin
 *     F = Fahrenheit
 *     H = Humidity
 * @return returns one of the values above
 * Usage: to get Fahrenheit type: getHTU('F')
 * to print it on serial monitor Serial.println(getHTU('F'));
 * Written by Ahmad Shamshiri on July 13, 2019
 * in Ajax, Ontario, Canada
 * www.Robojax.com
 */
float getHTU(char type)
{
	//Get the code for the course: http://robojax.com/L/?id=339
  float value;
    float temp = htu.readTemperature();
    float rel_hum = htu.readHumidity();
   if(type =='F')
   {
    value = temp *9/5 + 32;//convert to Fahrenheit
   }else if(type =='K')
   {
    value = temp + 273.15;//convert to Kelvin
   }else if(type =='H')
   {
    value = rel_hum;//return relative humidity
   }else{
    value = temp;// return Celsius
   }
   return value;
}//

/*
 * @brief prints degree symbol on serial monitor
 * @param none
 * @return returns nothing
 * Written by Ahmad Shamshiri on July 13, 2019
 * for Robojax Tutorial Robojax.com
 */
void printDegree()
{
    Serial.print("\\xC2");
    Serial.print("\\xB0");
}
Things you might need
-
Amazon
-
eBayPurchase HTU21D from eBayebay.us
-
AliExpressPurchase HTU21D or SHT21 from AliExpresss.click.aliexpress.com
Resources & references
-
ExternalDifference between HTU21DF and HTU21D (image)robojax.com
-
External
Files📁
Datasheet (pdf)
-
HTU21D_temerature_humidity_datasheet
HTU21D_temerature_humidity_datasheet.pdf0.96 MB -
HTU31D HTU31V Temperature and Himidity Sensors Datasheet
HTU31_Sensors_Datasheet.pdf0.67 MB