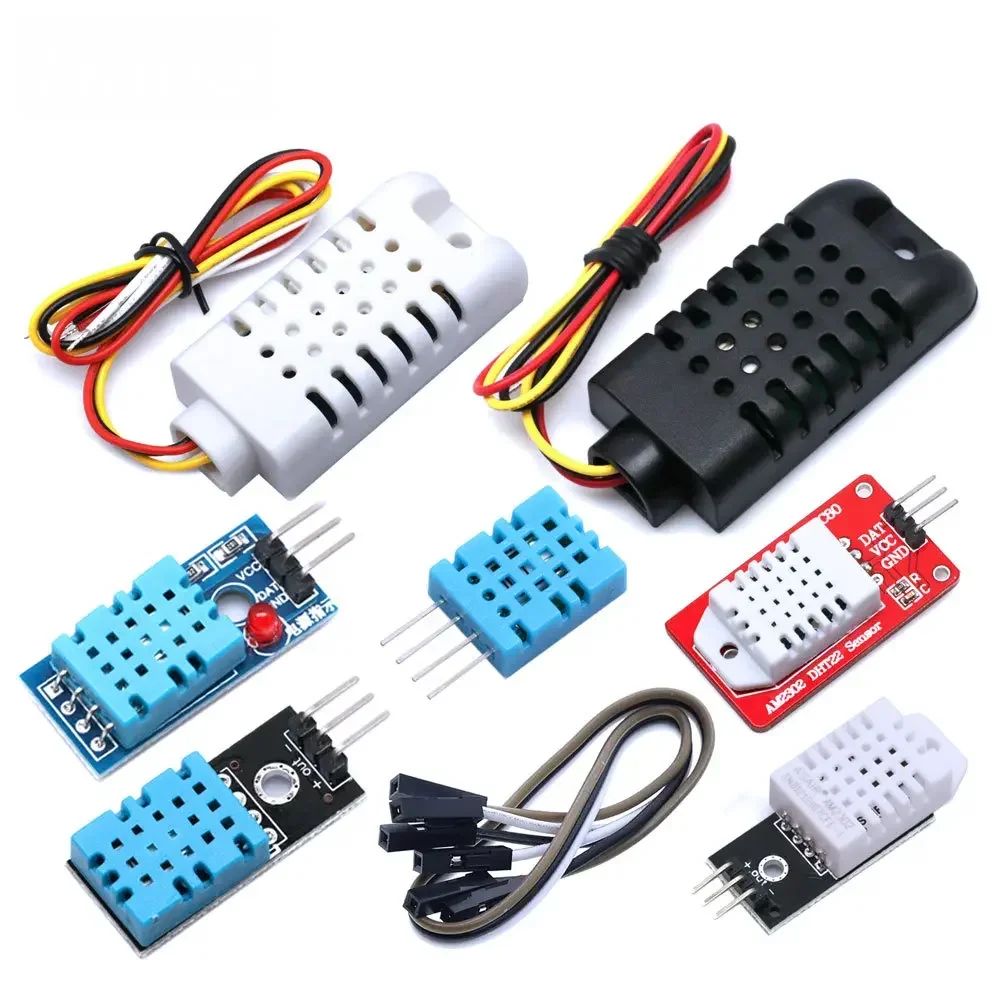
Mafunzo haya ni sehemu ya: Kitambuzi cha Unyevu na Halijoto cha Dijitali HTU21D
Video zinazohusiana na Kipima Unyevu na Halijoto cha Dijitali HTU21D. Viungo vya video zingine viko chini ya makala haya.
Somo la 36: Kutumia Kihisi cha Joto cha HTU21D na LCD Kozi ya Hatua kwa Hatua ya Arduino

Kihisi cha joto na unyevu cha HTU21D ni chaguo maarufu kwa miradi mingi ya Arduino kutokana na urahisi wa matumizi na usahihi wake. Katika somo hili, tutaunda mradi rahisi unaosoma data ya joto na unyevu kutoka kwa kihisi na kuiweka kwenye skrini ya LCD. Kufikia mwisho wa mafunzo haya, utakuwa na mfumo unaofanya kazi unaoonyesha joto kwa Selsiasi, Fahrenheit, na Kelvin, pamoja na asilimia ya unyevu wa jamaa. Kwa ufafanuzi zaidi, unaweza kurejea video (katika video kwenye mm:ss).

Vifaa Vimeelezwa
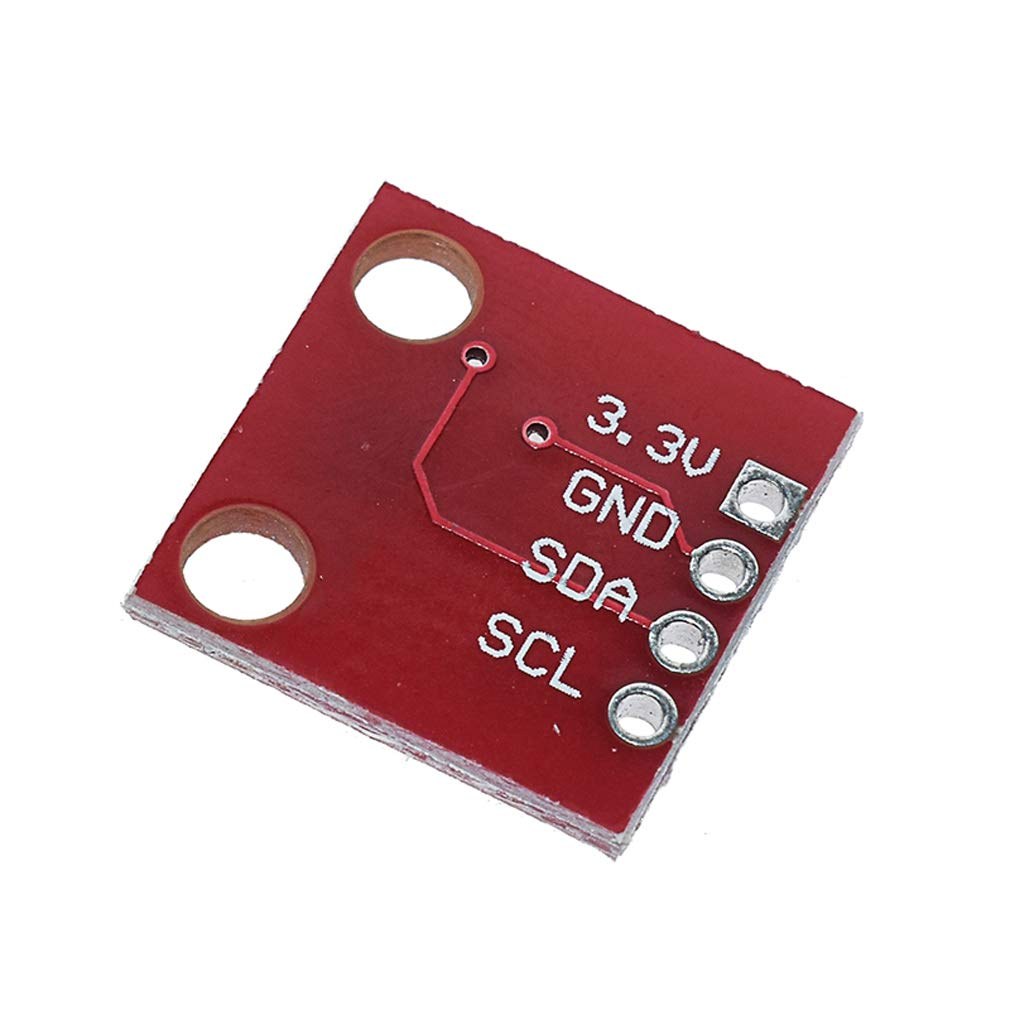
Sehemu kuu ya mradi huu ni kihisi cha joto na unyevu cha HTU21D, ambacho huwasiliana kupitia I2C. Kihisi hiki hufanya kazi ndani ya kiwango cha voltage cha 1.5 hadi 3.6 volti, na kufanya kiwe kinachofaa kwa mifumo ya 3.3V na 5V. Kinatumia nishati kidogo sana, kwa kawaida tu 0.02 microamperes wakati wa kupumzika na 450 microamperes wakati wa kupima. Mbali na HTU21D, tutatumia pia skrini ya LCD, hasa LCD1602 yenye I2C. Skrini hii inaruhusu uonyeshaji rahisi wa data ya maandishi na inahitaji pini mbili tu za mawasiliano: SDA (mstari wa data) na SCL (mstari wa saa). Mchanganyiko wa vifaa hivi utatuwezesha kuunda onyesho la taarifa kwa ajili ya kufuatilia viwango vya joto na unyevu.
Maelezo ya Datasheet
| Mtengenezaji | TE Connectivity |
|---|---|
| Nambari ya sehemu | HTU21D-F |
| Voltage ya Logic/IO | 1.5 - 3.6 V |
| Voltage ya usambazaji | 3.3 V (typ.) |
| Pato la sasa (typ.) | 0.02 µA (kupumzika), 450 µA (kupima) |
| Kiwango cha joto | -40 hadi +125 °C |
| Kiwango cha unyevu | 0 hadi 100 %RH |
| Azimio (Joto) | 0.01 °C |
| Azimio (Unyevu) | 0.04 %RH |
| Kifurushi | DFN-6 |
- Tumia kipinga cha kuvuta-juu kwa mistari ya SDA na SCL ikiwa haijajumuishwa.
- Hakikisha voltage sahihi ya usambazaji wa nishati ili kuepuka kuharibu kihisi.
- Dumisha wiring sahihi ili kuzuia makosa ya mawasiliano.
- Angalia anwani ya I2C ikiwa kihisi hakijibu.
- Tumia muda kati ya usomaji ili kuzuia kupakia kihisi kupita kiasi.
- Hakikisha LCD inaoana na mawasiliano ya I2C.
Maagizo ya Wiring
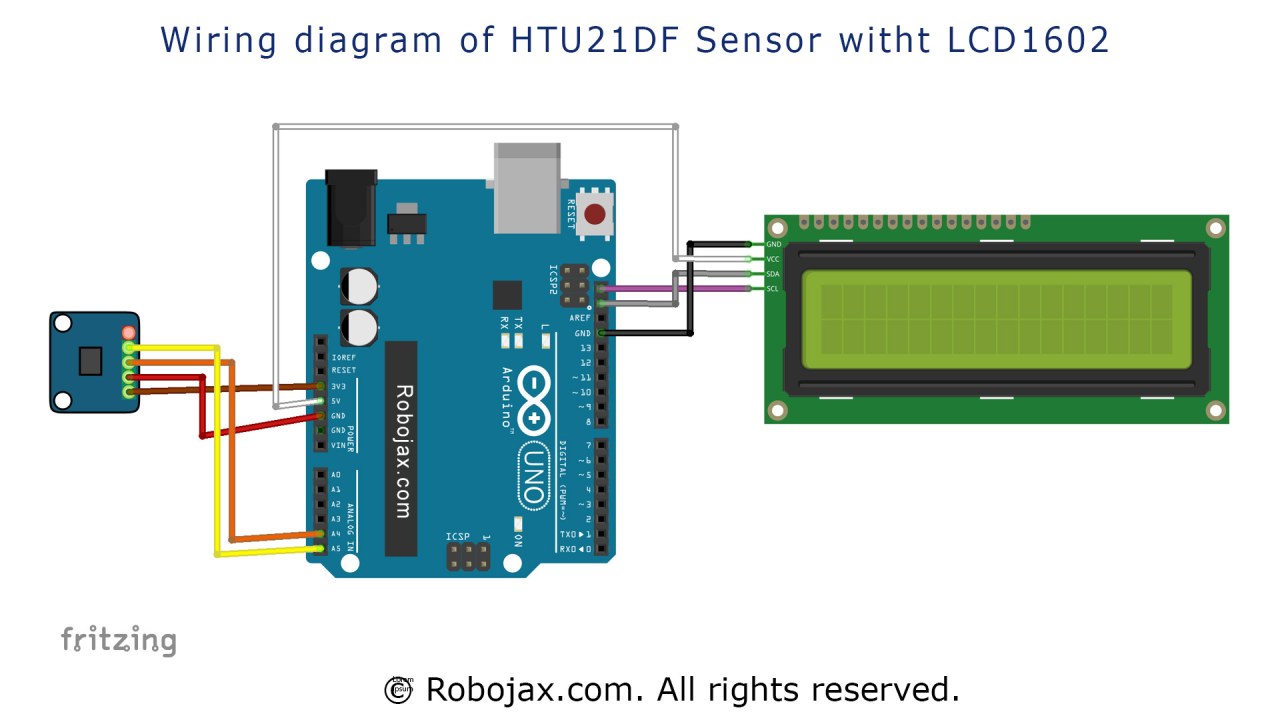
Ili kuunganisha kihisi cha HTU21D na skrini ya LCD, anza na miunganisho ya nishati. Unganisha pini ya kushoto ya HTU21D kwenye chanzo cha nishati cha 3.3V, na pini ya pili (mara nyingi nyekundu) kwenye ardhi. Ifuatayo, unganisha pini ya SDA ya HTU21D kwenye pini ya analogi A4 ya Arduino, na pini ya SCL kwenye pini ya analogi A5. Kwa skrini ya LCD1602, unganisha pini ya VCC kwenye chanzo hicho cha nishati cha 3.3V, na unganisha pini ya GND kwenye ardhi. Pini ya SDA kwenye LCD inapaswa pia kuunganishwa kwenye A4, na pini ya SCL inapaswa kuunganishwa kwenye A5, ikiruhusu vifaa vyote viwili kushiriki basi ya I2C. Hakikisha miunganisho yote ni salama ili kuwezesha mawasiliano sahihi kati ya Arduino, kihisi, na skrini.
Mifano ya Msimbo na Maelekezo
Msimbo ufuatao huanzisha kihisi cha HTU21D na skrini ya LCD. Katika kazi ya setup, LCD inatayarishwa kwa matumizi na kihisi kinaangaliwa kwa muunganisho:
void setup() {
  lcd.begin();
  lcd.backlight();
  if (!htu.begin()) {
      lcd.print("Robojax HTUD1DF");
      lcd.setCursor(0,1);
      lcd.print("sensor missing");
      while (1);
  } else {
      lcd.print("Robojax HTUD1DF");
      lcd.setCursor(0,1);
      lcd.print("Demo");
  }
  delay(2000);
}
Sehemu hii inaangalia ikiwa kihisi kimeunganishwa vizuri. Ikiwa sivyo, inaonyesha ujumbe wa hitilafu kwenye LCD na kusimamisha programu. Ikiwa kihisi kinafanya kazi, inaonyesha ujumbe wa onyesho kwa sekunde mbili. Kazi ya loop ndipo usomaji mkuu na uonyeshaji hufanyika. Hapa, tunaita kazi ya `lcdDisplay` kuonyesha joto katika vitengo tofauti:
void loop() {
   lcd.clear(); // clear previous values from screen
   lcdDisplay(0, 0, "Celsius: ", 10, 0, getHTU('C'), 'd');
   lcdDisplay(0, 1, "Fahrenheit: ", 10, 1, getHTU('F'), 'd');
   delay(5000);
}
Katika kitanzi hiki, LCD inafutwa, na usomaji wa joto kwa Selsiasi na Fahrenheit unaonyeshwa. Kazi ya `getHTU` inaitwa na herufi 'C' kwa Selsiasi na 'F' kwa Fahrenheit, mtawalia. Hatimaye, kazi ya `getHTU` inafafanuliwa kusoma joto au unyevu kulingana na herufi ya pembejeo:
float getHTU(char type) {
   float temp = htu.readTemperature();
   float rel_hum = htu.readHumidity();
   if(type =='F') {
       return temp * 9/5 + 32; // convert to Fahrenheit
   } else if(type =='K') {
       return temp + 273.15; // convert to Kelvin
   } else if(type =='H') {
       return rel_hum; // return relative humidity
   } else {
       return temp; // return Celsius
   }
}
Chaguo hili linasoma halijoto na unyevu kutoka kwenye sensa na kubadilisha halijoto kuwa kitengo kinachohitajika. Hakikisha umeangalia msimbo kamili uliopakiwa chini ya makala kwa maelezo zaidi.
Maonyesho / Nini cha Kutarajia
Baada ya kukamilisha uunganishaji wa nyaya na kupakia msimbo, unapaswa kuona thamani za halijoto na unyevu zikionyeshwa kwenye LCD. Usomaji utasasishwa kila baada ya sekunde chache, kuakisi hali ya sasa. Ikiwa utaweka joto kwenye sensa, unapaswa kuona halijoto ikipanda ipasavyo, wakati unyevu unapaswa kupungua kidogo. Kuwa makini na kikomo cha juu cha halijoto cha sensa; kuzidi hii kunaweza kusababisha usomaji usio sahihi au kushindwa kwa sensa (katika video kwenye mm:ss).
Vidokezo vya Muda wa Video
- 00:00 - Utangulizi wa mradi
- 01:15 - Maelekezo ya uunganishaji wa nyaya
- 03:30 - Maelezo ya msimbo
- 10:00 - Maonyesho ya usanidi
Bilder
Mafunzo haya ni sehemu ya: Kitambuzi cha Unyevu na Halijoto cha Dijitali HTU21D
- Somo la 35-1: Kutumia Kihisi cha Joto cha HTU21D
- Somo la 35-2: Kutumia Kihisi cha Joto cha HTU21D Msimbo Maalum
- Somo la 35: Kutumia Kihisi cha Joto cha HTU21D na Arduino
- Using Two More HTU21DF Humidity and Temperature Sensors with Arduino
- Displaying Temperature from an HTU21D on an LCD
- Displaying Temperature from an HTU21D as a Bar Graph on an LCD
- How to Use the HTU21DF Humidity and Temperature Sensor with Arduino (Basic Code)
- How to Use the HTU21DF Humidity and Temperature Sensor with Arduino (Custom Code)
/*
 * Robojax Arduino Step-by-Step Course
 * Part 4: Temperature Sensors
 * Lesson 36: HTU21D Temperature Sensor with LCD1602 and LCD2004 Display


 * Display Temperature from HTU21DF on LCD1602-I2C or LCD2004
 * Updated by Ahmad Shamshiri on July 13, 2019


  Please watch video instructions here https://youtu.be/SrFJKbmiaPM
 This code is available at http://robojax.com/course1/?vid=lecture36

with over 100 lectures free on YouTube. Watch it here http://robojax.com/L/?id=338
Get the code for the course: http://robojax.com/L/?id=339

If you found this tutorial helpful, please support me so I can continue creating
and make a donation using PayPal http://robojax.com/L/?id=64


*
  This is an example for the HTU21D-F Humidity & Temp Sensor

  Designed specifically to work with the HTU21D-F sensor from Adafruit
  ----> https://www.adafruit.com/products/1899

  These displays use I2C to communicate; 2 pins are required to
  interface

 Watch Introduction to a 360 Servo video with code: https://youtu.be/b_xvu6wWafA
You can get the wiring diagram from my Arduino Course at Udemy.com
Learn Arduino step by step with all libraries, codes, and wiring diagrams all in one place.
Visit my course now http://robojax.com/L/?id=62

If you found this tutorial helpful, please support me so I can continue creating
content like this.
or make a donation using PayPal http://robojax.com/L/?id=64

 * Code is available at http://robojax.com/learn/arduino

 * This code is "AS IS" without warranty or liability. Free to be used as long as you keep this note intact.
 * This code has been downloaded from Robojax.com
    This program is free software: you can redistribute it and/or modify
    it under the terms of the GNU General Public License as published by
    the Free Software Foundation, either version 3 of the License, or
    (at your option) any later version.

    This program is distributed in the hope that it will be useful,
    but WITHOUT ANY WARRANTY; without even the implied warranty of
    MERCHANTABILITY or FITNESS FOR A PARTICULAR PURPOSE.  See the
    GNU General Public License for more details.

    You should have received a copy of the GNU General Public License
    along with this program.  If not, see <https://www.gnu.org/licenses/>.

*/

#include <Wire.h>
#include "Adafruit_HTU21DF.h"

// Connect Vin to 3-5VDC
// Connect GND to ground
// Connect SCL to I2C clock pin (A5 on UNO)
// Connect SDA to I2C data pin (A4 on UNO)

Adafruit_HTU21DF htu = Adafruit_HTU21DF();

// start of settings for LCD1602 with I2C
#include <LiquidCrystal_I2C.h>
// Set the LCD address to 0x27 for a 16 chars and 2 line display
LiquidCrystal_I2C lcd(0x3F, 16, 2);
// end of settings for LCD1602 with I2C

void setup() {
	//Get the code for the course: http://robojax.com/L/?id=339
  lcd.begin();
  lcd.backlight();
  if (!htu.begin()) {
      lcd.print("Robojax HTUD1DF");
      lcd.setCursor(0,1);
      lcd.print("sensor missing");
    while (1);
  }else{
  // initialize the LCD

  lcd.print("Robojax HTUD1DF");
  lcd.setCursor(0,1);
  lcd.print("Demo");
  }
  delay(2000);
}

void loop() {
//Get the code for the course: http://robojax.com/L/?id=339
   lcd.clear();// clear previous values from screen
lcdDisplay(
             // to print Celsius:
             0, // character 0
             0, // line 0
             "Celsius: ",

             // to print Celsius
             10, // character 10
             0, // line 0
             getHTU('C'),
             'd'
             );

  lcdDisplay(
             // to print fahrenheit:
             0, // character 0
             1, // line 1
             "Fahrenheit: ",

             // to print Fahrenheit
             10, // character 9
             1, // line 0
             getHTU('F'),
             'd'
             );
    delay(5000);
lcdDisplay(
             // to print Kelvin:
             0, // character 0
             0, // line 0
             "Kelvin: ",

             // to print Celsius
             9, // character 10
             0, // line 0
             getHTU('K'),
             'k'
             );
  lcdDisplay(
             // to print humidity text
             0, // character 0
             1, // line 1
             "Humidity: ",

             // to print humidity
             10, // character 9
             1, // line 1
             getHTU('H'),
             '%'
             );

        delay(5000);
}

/*
 * @brief returns temperature or relative humidity
 * @param "type" is character
 *     C = Celsius
 *     K = Kelvin
 *     F = Fahrenheit
 *     H = Humidity
 * @return returns one of the values above
 * Usage: to get Fahrenheit type: getHTU('F')
 * to print it on serial monitor Serial.println(getHTU('F'));
 * Written by Ahmad Shamshiri on July 13, 2019
 * in Ajax, Ontario, Canada
 * www.Robojax.com
 */
float getHTU(char type)
{
	//Get the code for the course: http://robojax.com/L/?id=339
  float value;
    float temp = htu.readTemperature();
    float rel_hum = htu.readHumidity();
   if(type =='F')
   {
    value = temp *9/5 + 32;//convert to Fahrenheit
   }else if(type =='K')
   {
    value = temp + 273.15;//convert to Kelvin
   }else if(type =='H')
   {
    value = rel_hum;//return relative humidity
   }else{
    value = temp;// return Celsius
   }
   return value;
}//


/*
 * lcdDisplay(int tc, int tr, String title, int vc, int vr, float value)
 * displays value and title on LCD1602
 * How to use:
 * If you want to display: "Voltage: 13.56mV" starting from the first character
 * on the second row.
 * use:
 * lcdDisplay(0, 1, "Voltage: ", 13.56,'d')
 *
 *   'd' is degree symbol
 * tc  is character number  (0)
 * tr is row in the lcd (1)
 * title is the text (Voltage:)
 * vc value for character
 * vr value for  row or line
 * value is the value (13.56)
 */
void lcdDisplay(int tc, int tr, String title, int vc, int vr, float value,char symbol)
{
   // Robojax.com LCD1602 for HTU21D Demo
   lcd.setCursor (tc,tr); //
   lcd.print(title);

   lcd.setCursor (vc,vr); //
   lcd.print(value);
   if(symbol == 'd')
   {
    lcd.print((char)223);
   }else if(symbol =='%')
   {
    lcd.print("%");
   }else if(symbol =='k')
   {
    lcd.print("K");
   }
 // Robojax.com LCD1602 for HTU21D Demo
}
Tänker att du kanske behöver
-
Amazon
-
eBayPurchase HTU21D from eBayebay.us
-
AliExpressPurchase HTU21D or SHT21 from AliExpresss.click.aliexpress.com
Resurser och referenser
-
Extern.Adafruit HTU21D Library (GitHub)github.com
-
Extern.Difference between HTU21DF and HTU21D (image)robojax.com
-
Extern.
Filer📁
Datablad (pdf)
-
HTU21D_temerature_humidity_datasheet
HTU21D_temerature_humidity_datasheet.pdf0.96 MB