Lesson 45: BME280 Humidity, Barometric Pressure, and Temperature Sensor with LCD
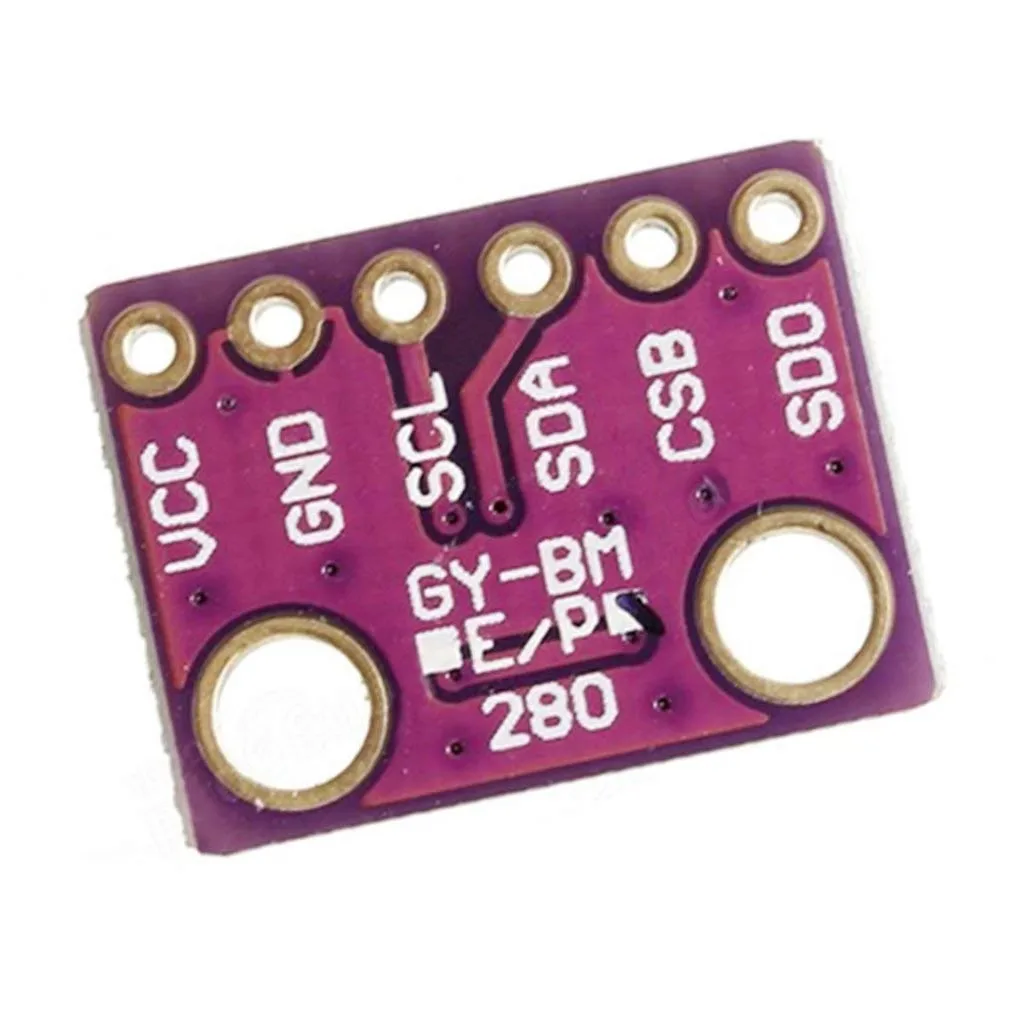
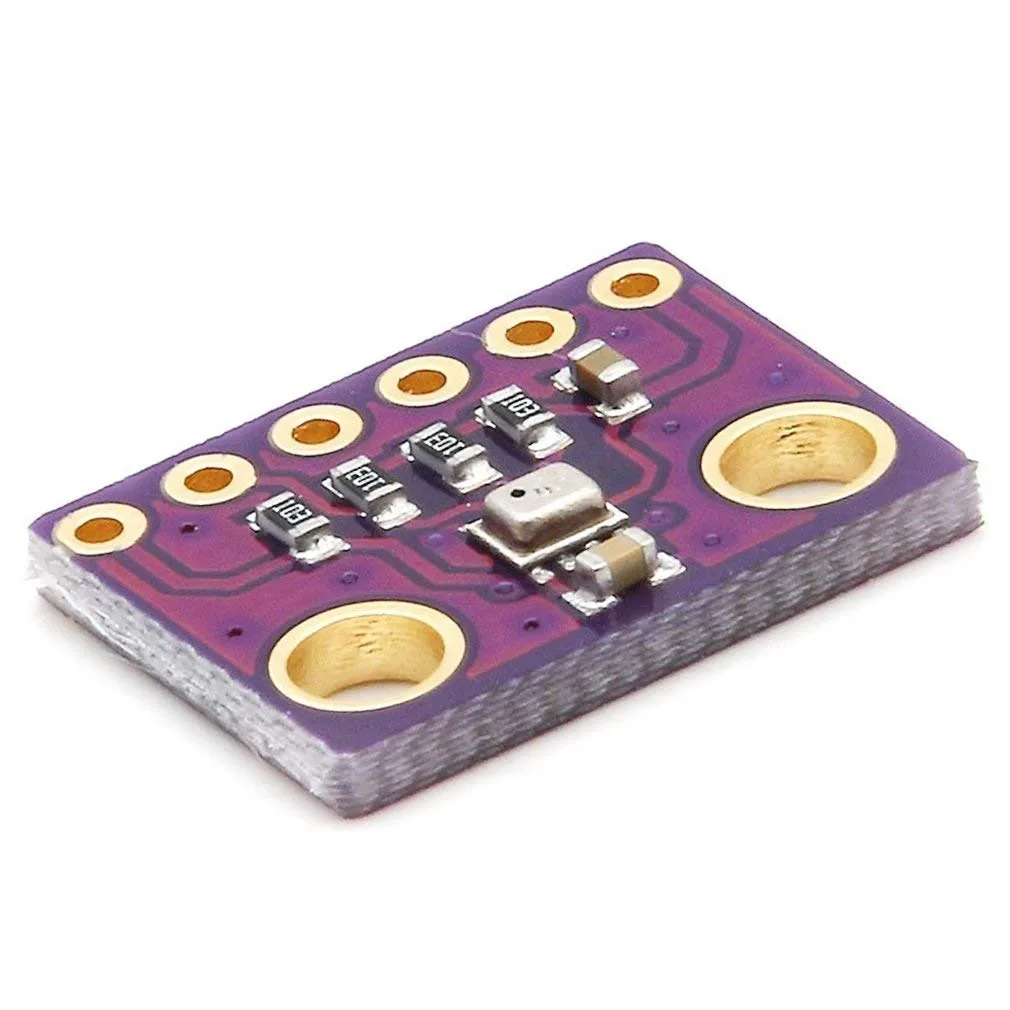
This guide walks you through building a comprehensive environmental monitoring station using the BME280 sensor and an I2C LCD display. The BME280 is a versatile and highly accurate sensor that measures barometric pressure, humidity, and temperature all in one compact package. By pairing it with a 16x2 or 20x4 character LCD, you can create a standalone, real-time display for a wide range of projects.
The value of this build lies in its simplicity and utility. Instead of needing a computer to read sensor data, the LCD provides an immediate, always-on visual readout. This makes it perfect for practical applications such as:

- Building a desktop weather station to monitor your local indoor climate.
- Creating a barometric pressure monitor for tracking weather trends and predicting short-term changes.
- Developing a small greenhouse controller display to show temperature and humidity for your plants.
- Making a home automation hub that displays the current comfort level in a room.
- Constructing an educational tool to learn about I2C communication, sensor reading, and data display with Arduino.
This project is a perfect next step for makers who have some experience with Arduino and want to move beyond basic blinking LEDs. The provided code is structured with special functions, making it easy to display data in multiple formats (Celsius, Fahrenheit, Kelvin) and with different units, giving you full control over your display output.
Hardware Required
To complete this project, you will need the following components. All of these are common and readily available from electronics suppliers.
- Arduino Uno (or any compatible board like the Mega or Nano)
- BME280 Sensor Module (I2C version)
- LCD1602 (16x2) or LCD2004 (20x4) with I2C interface module
- Jumper Wires (M-M)
- Breadboard (optional, for easier connections)
Before starting, it is highly recommended to watch the separate tutorials for the BME280 sensor and the I2C LCD module. This ensures you have the necessary libraries installed and can test each component individually, which simplifies troubleshooting if you run into issues. (in video at 00:44)
Wiring Guide
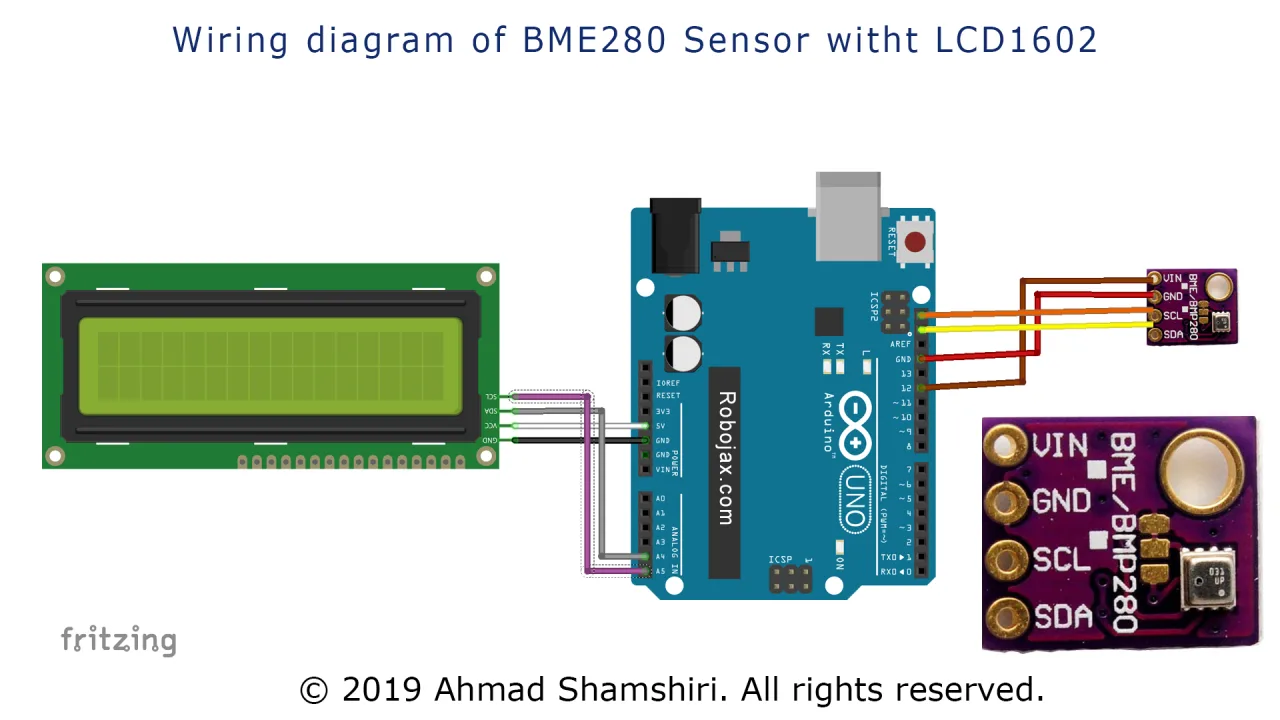
This project relies on two separate I2C devices. The I2C bus allows you to connect multiple devices using just two data lines (SDA and SCL) plus power and ground. This makes wiring very straightforward.
The BME280 sensor is connected to the Arduino's 5V and GND pins. The SDA and SCL pins are connected to the Arduino's A4 and A5 pins, respectively. The LCD module is connected in the same way. Since both devices are on the same I2C bus, they share the same A4 (SDA) and A5 (SCL) pins. This is a key advantage of I2C—you can connect up to 128 devices on the same two-wire bus. (in video at 03:41)
One important detail is that the BME280 sensor's VIN pin is not connected directly to the 5V rail. Instead, it is connected to a digital pin (pin 12 in the code). This is done so the Arduino can control power to the sensor, turning it on only when needed, which can be useful for low-power applications. The code sets this pin HIGH in the setup to provide power to the sensor. (in video at 05:48)
Here is a summary of the connections:
- BME280 VIN -> Arduino Pin 12
- BME280 GND -> Arduino GND
- BME280 SCL -> Arduino A5
- BME280 SDA -> Arduino A4
- LCD VCC -> Arduino 5V
- LCD GND -> Arduino GND
- LCD SCL -> Arduino A5
- LCD SDA -> Arduino A4
For different Arduino boards, the I2C pins may vary. For example, on the Arduino Mega, SDA is pin 20 and SCL is pin 21. (in video at 03:50)
Code Explanation
The code for this project is designed to be user-friendly, with two key functions that simplify the process of getting and displaying data. The full program is available below the article. Below we will focus on the user-configurable parts and the custom functions provided.
First, you will need to install two libraries. The first is the Adafruit_BME280 library, which handles all the low-level communication with the sensor. The second is the LiquidCrystal_I2C library, which allows you to easily control the LCD. Both can be installed via the Arduino IDE's Library Manager. (in video at 04:11)
At the top of the sketch, you will find the key configuration parameters you may need to adjust for your setup.
#include <Wire.h>
#include <Adafruit_Sensor.h>
#include <Adafruit_BME280.h>

#define SEALEVELPRESSURE_HPA (1013.25)

Adafruit_BME280 bme; // I2C
SEALEVELPRESSURE_HPA: This constant defines the standard atmospheric pressure at sea level in hectopascals (hPa). This value is crucial for calculating the approximate altitude. You may want to adjust this to a more precise local value for better altitude accuracy.Adafruit_BME280 bme;: This line creates an instance of the BME280 sensor object, which you will use to interact with the sensor throughout your code.
Next, you will define the pin for the sensor's power and the LCD's I2C address. The I2C address is critical. You can find the address of your LCD module by running an I2C scanner sketch. In the video, the scanner shows two addresses: one for the sensor (0x76) and one for the LCD (0x3F). (in video at 06:37)
#define BME_VIN_PIN 12 // Pin for BME280 VIN
LiquidCrystal_I2C lcd(0x3F, 16, 2); // set the LCD address to 0x3F for a 16 chars and 2 line display
BME_VIN_PIN: This defines the digital pin (pin 12) used to power the BME280 sensor. You can change this to any other available digital pin.LiquidCrystal_I2C lcd(0x3F, 16, 2);: This creates the LCD object. The first parameter is the I2C address you found with the scanner. The second and third parameters define the number of columns and rows on your LCD. If you are using a 20x4 LCD, you would change this tolcd(0x3F, 20, 4);. (in video at 08:22)
The code provides two custom functions to make your life easier. The first, getBME(char type), is a powerful function that returns a single sensor reading based on the character you pass to it. This eliminates the need to write separate code for each measurement.
float getBME(char type)
{
   // Robojax.com BME280 Code YouTube Watch it here http://robojax.com/L/?id=338
  float value;
    float temp = bme.readTemperature();// read temperature
    float pressure = bme.readPressure() / 100.0F; // read pressure
    float rel_hum = bme.readHumidity();// read humidity
    float alt =bme.readAltitude(SEALEVELPRESSURE_HPA);// read altitude
   if(type =='F')
   {
    value = temp *9/5 + 32;//convert to Fahrenheit
   }else if(type =='K')
   {
    value = temp + 273.15;//convert to Kelvin
   }else if(type =='H')
   {
    value = rel_hum;//return relative humidity
   }else if(type =='P')
   {
    value = pressure;//return pressure
   }else if(type =='A')
   {
    value = alt;//return approximate altitude
   }else{
    value = temp;// return Celsius
   }
   return value;
    // Robojax.com BME280 Code YouTube Watch it here http://robojax.com/L/?id=338
}//getBME
To use this function, you simply call it with the appropriate character. For example, to get the temperature in Fahrenheit, you would call getBME('F'). The available options are:
'C': Returns temperature in Celsius (default).'F': Returns temperature in Fahrenheit.'K': Returns temperature in Kelvin.'H': Returns relative humidity in percent.'P': Returns barometric pressure in hPa.'A': Returns approximate altitude in meters.
This function is incredibly useful for the loop() as it allows you to easily print all values to the Serial Monitor or use them in logic statements.
Live Project Demonstration
Once the code is uploaded, the LCD will first display a welcome message for two seconds before starting the main loop. The display will then cycle through several screens, each showing different sensor data. (in video at 09:57)
In the demonstration, you will see the temperature displayed in Celsius, Fahrenheit, and Kelvin, each with the proper unit and degree symbol where applicable. The display also shows the humidity as a percentage, the barometric pressure in hectopascals (hPa), and the approximate altitude in meters. The video shows a reading of 44 degrees Celsius, 165 degrees Fahrenheit, and a humidity of 20%, all updating correctly on the screen. (in video at 16:50)
One minor issue noted in the video is that the altitude reading can have an extra digit, which might cause it to overflow its designated area on the LCD. This is a minor cosmetic issue that can be addressed by adjusting the text size or spacing in the display function. (in video at 17:04)
The project works as intended, providing a clear and continuous readout of all key environmental data from the BME280 sensor. This makes it a great foundation for a variety of weather and environmental monitoring projects.
Video Chapters
- [00:00] Introduction and Project Overview
- [00:44] Prerequisites and Required Libraries
- [02:19] Wiring the BME280 and LCD to Arduino
- [04:11] Installing Required Libraries
- [05:06] Code Explanation: Includes and Pin Definitions
- [06:37] Finding the I2C Address for Your LCD
- [08:32] Code Explanation: Setup Function
- [10:22] Code Explanation: Main Loop and Display Logic
- [12:34] Code Explanation: Custom getBME() Function
- [14:52] Code Explanation: Custom LCD Display Function
- [16:50] Live Project Demonstration
- [18:18] Conclusion and Next Steps
Immagini
/***************************************************************************
 * Robojax Arduino Step By Step Course
 * Part 4: Temperature Sensors
 * Lesson 37: BME280 code with two extra functions to display temperature easily

* Written and updated by Ahmad Shamshiri on July 25, 2019 at 18:42
* in Ajax, Ontario, Canada for Robojax.com

  Please watch video instructions here https://youtu.be/zqJRNGECAvw
 This code is available at http://robojax.com/course1/?vid=lecture37

With over 100 lectures free on YouTube. Watch it here http://robojax.com/L/?id=338
Get the code for the course: http://robojax.com/L/?id=339

If you found this tutorial helpful, please support me so I can continue creating.
Make a donation using PayPal http://robojax.com/L/?id=64


  This is a library for the BME280 humidity, temperature & pressure sensor

  Designed specifically to work with the Adafruit BME280 Breakout
  ----> http://www.adafruit.com/products/2650

  These sensors use I2C or SPI to communicate, 2 or 4 pins are required
  to interface. The device's I2C address is either 0x76 or 0x77.

  Adafruit invests time and resources providing this open source code,
  please support Adafruit and open-source hardware by purchasing products
  from Adafruit!

  Written by Limor Fried & Kevin Townsend for Adafruit Industries.
  BSD license, all text above must be included in any redistribution
 ***************************************************************************/

#include <Wire.h>

#include <Adafruit_Sensor.h>
#include <Adafruit_BME280.h>

#define SEALEVELPRESSURE_HPA (1013.25)

Adafruit_BME280 bme; // I2C


void setup() {
    Serial.begin(9600);
    Serial.println(F("BME280 test"));

    bool status;

    // default settings
    // (you can also pass in a Wire library object like &Wire2)
    status = bme.begin();
    if (!status) {
        Serial.println("Could not find a valid BME280 sensor, check wiring!");
        while (1);
    }

    Serial.println("-- Robojax Test --");
    delay(2000);

    Serial.println();
}


void loop() {
    // Robojax.com BME280 Code YouTube Watch it here http://robojax.com/L/?id=338
    Serial.print("Temperature = ");
    Serial.print(getBME('C'));
    printDegree();
    Serial.print("C ");
    Serial.print(getBME('F'));
    printDegree();
    Serial.print("F ");
    Serial.print(getBME('K'));
    Serial.println("K ");


    Serial.print("Pressure = ");
    Serial.print(getBME('P'));
    Serial.println(" hPa ");

    Serial.print("Humidity = ");
    Serial.print(getBME('H'));
    Serial.println("% ");

    Serial.print("Approx. Altitude = ");
    Serial.print(getBME('A'));
    Serial.println(" m");


    Serial.println();

    // action
    if(getBME('C') <65.2)
    {
     //digitalWrite(5, HIGH);
    }
    delay(2000);
     // Robojax.com BME280 Code YouTube Watch it here http://robojax.com/L/?id=338
}// loop end


/*
 * @brief returns temperature or relative humidity
 * @param "type" is character
 *     C = Celsius
 *     K = Kelvin
 *     F = Fahrenheit
 *     H = Humidity
 *     P = Pressure
 *     A = Altitude
 * @return returns one of the values above
 * Usage: to get Fahrenheit type: getHTU('F')
 * to print it on serial monitor Serial.println(getBME('F'));
 * Written by Ahmad Shamshiri on July 13, 2019. Updated July 25, 2019
 * in Ajax, Ontario, Canada
 * www.Robojax.com
 */
float getBME(char type)
{
   // Robojax.com BME280 Code YouTube Watch it here http://robojax.com/L/?id=338
  float value;
    float temp = bme.readTemperature();// read temperature
    float pressure = bme.readPressure() / 100.0F; // read pressure
    float rel_hum = bme.readHumidity();// read humidity
    float alt =bme.readAltitude(SEALEVELPRESSURE_HPA);// read altitude
   if(type =='F')
   {
    value = temp *9/5 + 32;//convert to Fahrenheit
   }else if(type =='K')
   {
    value = temp + 273.15;//convert to Kelvin
   }else if(type =='H')
   {
    value = rel_hum;//return relative humidity
   }else if(type =='P')
   {
    value = pressure;//return pressure
   }else if(type =='A')
   {
    value = alt;//return approximate altitude
   }else{
    value = temp;// return Celsius
   }
   return value;
    // Robojax.com BME280 Code YouTube Watch it here http://robojax.com/L/?id=338
}//getBME


/*
 * @brief prints degree symbol on serial monitor
 * @param none
 * @return returns nothing
 * Written by Ahmad Shamshiri on July 13, 2019
 * for Robojax Tutorial Robojax.com
 */
 void printDegree()
{
   // Robojax.com Code
    Serial.print("\\xC2");
    Serial.print("\\xB0");
}
Cose di cui potresti avere bisogno
-
AmazonBME280 on Amazonamzn.to
-
eBayBME280 on eBayebay.us
Risorse e riferimenti
-
EsternoLibreria Adafruit BME280 (da GitHub)github.com
-
Esternolibreria BMP280 (da GitHub)github.com
-
EsternoSito web Bosch per BMP280bosch-sensortec.com
File📁
Scheda tecnica (pdf)
-
Scheda tecnica in inglese per sensore combinato di umidità e pressione BME280
bst-bme280-ds002[1].pdf1.59 MB