Lesson 95: Using a L293D 4 DC Motor Shield | Arduino Step-by-Step Course
In this tutorial, we will explore how to control four DC motors using the L293D motor shield with Arduino. This setup is particularly useful for robotics applications, such as building a robot car, where precise motor control is essential. By the end of this lesson, you will have a working model that can operate multiple motors simultaneously.

The L293D motor shield simplifies the wiring process and allows you to control the motors with just a few connections. You will learn how to wire the shield to the Arduino, set up the code, and execute motor control commands effectively. For a more visual explanation, you can refer to the video at specific timestamps for wiring and coding details (in video at mm:ss).
Hardware Explained
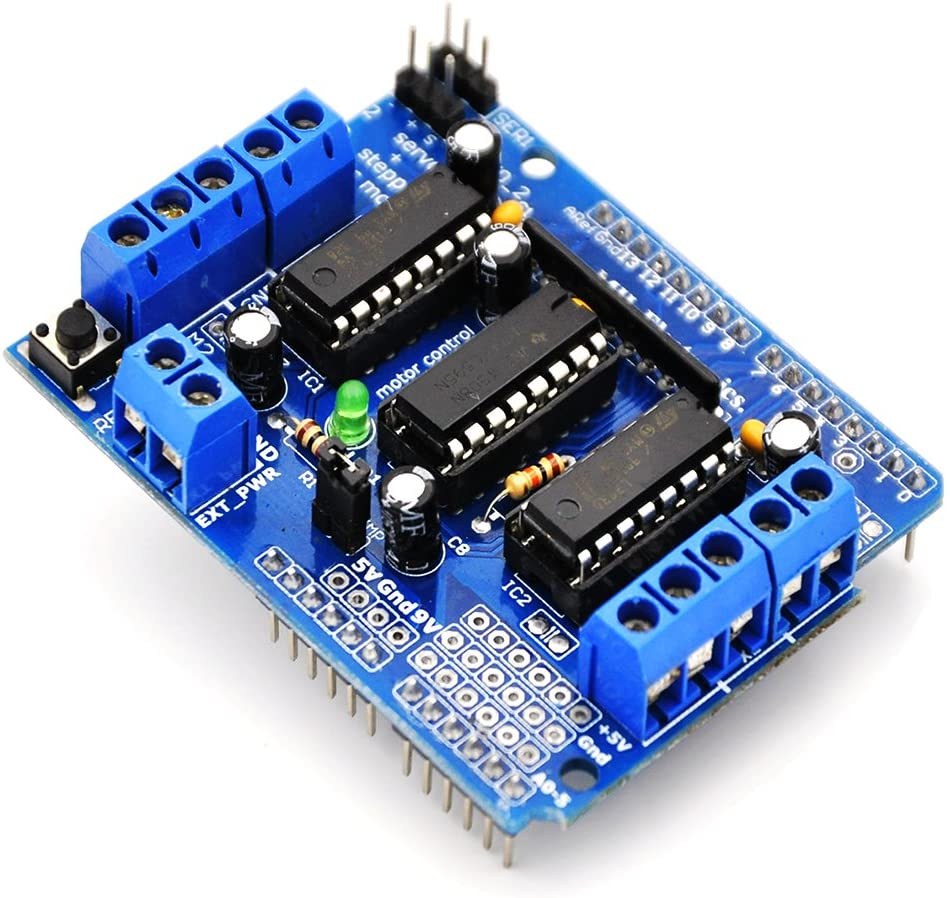
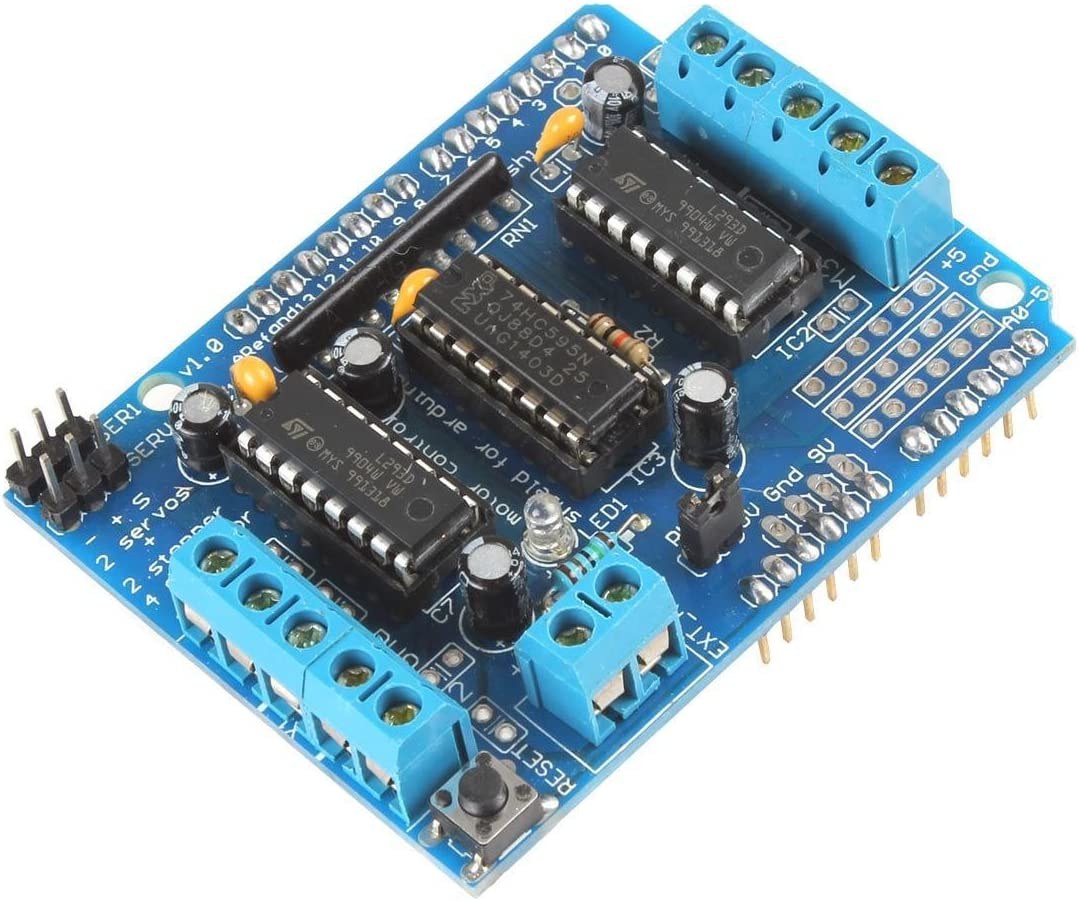
The primary component of this project is the L293D motor shield, which is a quadruple half H-bridge motor driver. This means that it can control two motors in both directions, allowing for full control over motor rotation. The shield connects directly to the Arduino, making it easy to manage power and control signals without messy wiring.
Each L293D chip can handle up to 600 mA of current per channel and operates at voltages ranging from 4.5V to 36V. This range makes it suitable for a variety of DC motors. Additionally, the shield features a jumper that allows you to power both the motors and the Arduino from a single external power source.
Datasheet Details
| Manufacturer | Texas Instruments |
|---|---|
| Part number | L293D |
| Logic/IO voltage | 5 V |
| Supply voltage | 4.5 – 36 V |
| Output current (per channel) | 600 mA |
| Peak current (per channel) | 1.2 A |
| PWM frequency guidance | 1 kHz – 20 kHz |
| Input logic thresholds | 2 V min (high), 0.8 V max (low) |
| Voltage drop / RDS(on) / saturation | 1.5 V max |
| Thermal limits | 150 °C |
| Package | 16-DIP |
| Notes / variants | Dual H-Bridge configuration |
- Ensure motors do not exceed 600 mA to prevent damage.
- Use adequate heat sinking for high current applications.
- Connect external power before powering the Arduino.
- Check jumper placement for powering the shield and Arduino.
- Test motor direction by swapping connections if necessary.
Wiring Instructions

Start by connecting the L293D motor shield to your Arduino Uno or Mega. Align the shield's pins with the Arduino's headers and press down firmly. Next, connect your DC motors to the terminals labeled M1, M2, M3, and M4 on the shield. Each motor will require two terminals, so make sure to connect them properly for correct rotation direction.
For power, connect an external battery or power supply to the shield's power input terminals, ensuring the voltage is within the 4.5V to 36V range. Don't forget to connect the jumper on the shield to allow the power to flow to the Arduino. Finally, connect the ground of the power supply to the ground pin of the Arduino to complete the circuit.
Install required library
click on Library icon and search for : Adafruit Motor Sheild Library and click on Install to install it.
Code Examples & Walkthrough
AF_DCMotor motor1(1);
AF_DCMotor motor2(2);
AF_DCMotor motor3(3);
AF_DCMotor motor4(4);
In the code, we initialize four motor objects: motor1, motor2, motor3, and motor4. Each motor is assigned a channel number corresponding to the motor shield's terminal connections. This allows us to control each motor individually.
void setup() {
  Serial.begin(9600); // set up Serial library at 9600 bps
  Serial.println("Robojax L293D Example");
}
The setup() function initializes the serial communication, allowing us to send and receive messages from the Arduino IDE. This is useful for debugging and monitoring the motor control process.
motor1.setSpeed(speed(50)); //set speed for motor 1 at 50%
motor1.run(FORWARD); //send motor 1 to Forward rotation
To control the motors, we set the speed using the setSpeed() method, which takes a value between 0 and 255. The run() method then starts the motor in the specified direction, such as FORWARD or BACKWARD. The speed can be adjusted dynamically as needed.
Demonstration / What to Expect
Once everything is wired and the code is uploaded, you should see the motors rotate according to the commands in the code. Initially, one motor will turn on, followed by the others in sequence, each running for a set duration. If the motors do not operate as expected, check your wiring, ensure the jumper is connected, and verify the power supply is adequate (in video at mm:ss).
Video Timestamps
- 00:00 Introduction
- 03:00 Datasheet for L293D
- 03:56 Wiring explained
- 07:21 Code and library
- 13:51 Demonstration controlling 4 motors
Images

/*
* Lesson 95: Control 4 DC Motors for a Smart Car using a Motor Shield
* This code works with Arduino UNO and Arduino Mega.
* Wiring diagram and how to wire and connect the power supply is shown in the video.

  Watch full video instruction:  https://youtu.be/0XihwdulmDQ
 * Download this code from: http://robojax.com
 *
* Written by Ahmad Shamshiri for Robojax.com on Jan 09, 2022
 * in Ajax, Ontario, Canada

This video is part of an Arduino Step by Step Course which starts here: https://youtu.be/-6qSrDUA5a8


If you found this tutorial helpful, please support me so I can continue creating content like this
and make a donation using PayPal http://robojax.com/L/?id=64

 * This code is "AS IS" without warranty or liability. Free to be used as long as you keep this note intact.*
 * This code has been downloaded from Robojax.com
    This program is free software: you can redistribute it and/or modify
    it under the terms of the GNU General Public License as published by
    the Free Software Foundation, either version 3 of the License, or
    (at your option) any later version.

    This program is distributed in the hope that it will be useful,
    but WITHOUT ANY WARRANTY; without even the implied warranty of
    MERCHANTABILITY or FITNESS FOR A PARTICULAR PURPOSE.  See the
    GNU General Public License for more details.

    You should have received a copy of the GNU General Public License
    along with this program.  If not, see <https://www.gnu.org/licenses/>.
 *  Library location: https://github.com/adafruit/Adafruit-Motor-Shield-library
 Adafruit Motor shield library
// copyright Adafruit Industries LLC, 2009
// this code is public domain, enjoy!
*/

#include <AFMotor.h>

AF_DCMotor motor1(1);
AF_DCMotor motor2(2);
AF_DCMotor motor3(3);
AF_DCMotor motor4(4);

void setup() {
  Serial.begin(9600); // set up Serial library at 9600 bps
  Serial.println("Robojax L293D Example");
}

void loop() {

  motor1.setSpeed( speed(50) ); //set speed for motor 1 at 50%
  motor1.run(FORWARD);//send motor 1 to Foarward rotation

  delay(2000);//wait for 2 seconds
  motor2.setSpeed( speed(100) );//set speed for motor 2 at 100%
  motor2.run(BACKWARD);//send motor 2 to Foarward rotation

  delay(2000);
  motor3.setSpeed( speed(70) );
  motor3.run(FORWARD);

  delay(2000);
  motor4.setSpeed( speed(90) );
  motor4.run(FORWARD);


  delay(2000);

  motor1.run(BRAKE);
  motor2.run(RELEASE);
  motor3.run(RELEASE);
  motor4.run(RELEASE);
  delay(2000);


  motor1.setSpeed(speed(100));
  motor1.run(BACKWARD);
  delay(2000);

  motor1.run(RELEASE);

  delay(1000);
}

/*
 * speed percent to speed converter
 * receives value between 0 to 100 and converts it to value between
 * 0 to 255 which are 8 bits Arduino PWM value
 * www.Robojax.com
 Watch full video instruction:  https://youtu.be/0XihwdulmDQ
 */
int  speed(int percent)
{
  return map(percent, 0, 100, 0, 255);
}
Things you might need
-
Amazon
-
Amazon
-
eBay
-
AliExpressPurchase L293D motor shield from AliExpresss.click.aliexpress.com
Resources & references
-
External
Files📁
No files available.