DHT22 Temperatuur en Humiditeit op 'n 7-Segment Vertoning met Arduino RJT43
Hierdie projek demonstreer hoe om 'n eenvoudige, maar effektiewe, stelsel te bou vir die vertoning van temperatuur- en humiditeitlesings op 'n 7-segment vertoning met behulp van 'n Arduino. Hierdie opstelling is nuttig vir verskeie toepassings waar die monitering van omgewingstoestande deurslaggewend is. Die projek kombineer die DHT22 temperatuur- en humiditeitsensor met 'n TM1637 7-segment vertoning, wat 'n duidelike en maklik leesbare uitset bied.


Projekidees:
- Monitering van 'n huisomgewing vir optimale gerief.
- Nasporing van toestande in 'n kweekhuis of terrarium.
- Bou van 'n basiese weerstasie.
- Vertoon van temperatuur en humiditeit in 'n data-aantekenprojek.
Hardeware/Komponente
Om hierdie projek te bou, sal jy die volgende komponente benodig:
- Arduino Uno (of versoenbare bord)
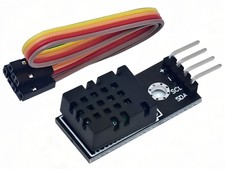
- DHT22 Temperatuur- en Humiditeitsensor
- TM1637 7-Segment Vertoning
- Verbindingsdrade
- Broodbord (opsioneel, maar aanbeveel)
Bedradingsgids


Die bedrading is eenvoudig. Verwys na die video (in video by 01:51) vir 'n visuele gids. Die sleutelverbindings is:
- TM1637 Vertoning: VCC na 5V, GND na GND, CLK na Arduino pen 2, DIO na Arduino pen 3 (in video by 02:00).
- DHT22 Sensor: VCC na 5V, GND na GND, DATA na Arduino pen 9 (in video by 02:20). Let daarop dat die video Arduino pen 8 gebruik om 5V aan die sensor te verskaf (in video by 02:41).
Kode Verduideliking
Die Arduino-kode gebruik twee biblioteke: TM1637Display vir die 7-segment vertoning en DHT vir die DHT22 sensor. Die kode se konfigureerbare parameters is hoofsaaklik aan die begin geleë:
// Module verbindingspenne (Digitale Penne)
#define CLK 2
#define DIO 3
#define DHTPIN 9     // DHT22 data pen
#define DHTTYPE DHT22   // DHT sensor tipe
Hierdie reëls definieer die Arduino-penne wat aan die vertoning en die DHT22 sensor gekoppel is. Jy mag dalk hierdie moet aanpas as jy verskillende penne gebruik. Die getTemp() funksie (in video by 07:03) is deurslaggewend. Dit laat jou toe om verskillende waardes van die DHT22 sensor te verkry deur 'n stringargument deur te gee:
float getTemp(String req) {
  // ... (Sensor leeskode) ...
  if(req =="c"){ return t; } // Celsius
  else if(req =="f"){ return f; } // Fahrenheit
  // ... (Ander opsies vir Kelvin, humiditeit, hitte-indeks) ...
}
Hierdie funksie vereenvoudig die lees van verskillende data van die sensor (Celsius, Fahrenheit, humiditeit, hitte-indeks). Die hoof lus gebruik hierdie funksie om die data te haal en dit op die 7-segment vertoning te vertoon, met afronding van drywende-punt waardes na heelgetalle vir vertoon doeleindes (in video by 07:14).
Lewende Projek/Demonstrasie
Die video (in video by 00:32) toon 'n lewendige demonstrasie van die projek. Die 7-segment vertoning toon duidelik die temperatuur in Fahrenheit. Die video demonstreer ook hoe die kode gewysig kan word om Celsius, Kelvin, humiditeit en hitte-indeks waardes te vertoon (in video by 08:21).
Hoofstukke
- [00:06] Inleiding en Projekoorsig
- [00:53] Aan die Gang en Komponentoorsig
- [01:51] Bedrading van die TM1637 Vertoning
- [02:20] Bedrading van die DHT22 Sensor
- [03:14] Kode Verduideliking: TM1637 Opstelling
- [04:00] Kode Verduideliking: DHT22 Opstelling
- [05:54] Kode Verduideliking: Hoof Lus en Vertoonfunksie
- [07:03] Kode Verduideliking: getTemp() Funksie
- [08:21] Demonstrasie en Verskillende Uitsetopsies
Beelde


/*
 * Original code from TM1637 https://github.com/avishorp/TM1637
 * Original code and library for DHT22 https://github.com/adafruit/DHT-sensor-library
 * Modified for Robojax video on January 7, 2018
 * by Ahmad Shamshiri, in Ajax, Ontario, Canada
 * Watch the video for this code https://youtu.be/z_FvRm6Te78
 * Other Arduino library and videos https://robojax.com
 * Get this code and other Arduino codes from Robojax.com
Learn Arduino step by step in a structured course with all material, wiring diagrams, and libraries
all in one place.

If you found this tutorial helpful, please support me so I can continue creating
content like this.

or make a donation using PayPal http://robojax.com/L/?id=64

 *  * This code is "AS IS" without warranty or liability. Free to be used as long as you keep this note intact.*
 * This code has been downloaded from Robojax.com
    This program is free software: you can redistribute it and/or modify
    it under the terms of the GNU General Public License as published by
    the Free Software Foundation, either version 3 of the License, or
    (at your option) any later version.

    This program is distributed in the hope that it will be useful,
    but WITHOUT ANY WARRANTY; without even the implied warranty of
    MERCHANTABILITY or FITNESS FOR A PARTICULAR PURPOSE.  See the
    GNU General Public License for more details.

    You should have received a copy of the GNU General Public License
    along with this program.  If not, see <https://www.gnu.org/licenses/>.
 */

// ****** Start of TM1637 Display code
#include <Arduino.h>
#include <TM1637Display.h>
// Module connection pins (Digital Pins)
#define CLK 2
#define DIO 3
// The amount of time (in milliseconds) between tests
#define TEST_DELAY   1000
TM1637Display display(CLK, DIO);
// ****** end of TM1637 Display code

// Example testing sketch for various DHT humidity/temperature sensors
// Written by ladyada, public domain


// ****** Start of DHT code
#include "DHT.h"
#define DHTPIN 9     // what digital pin we're connected to
// Uncomment whatever type you're using!
//#define DHTTYPE DHT11   // DHT 11
#define DHTTYPE DHT22   // DHT 22  (AM2302), AM2321
//#define DHTTYPE DHT21   // DHT 21 (AM2301)
DHT dht(DHTPIN, DHTTYPE);
// ********** end of DHT22 code

void setup()
{
  Serial.begin(9600);
  Serial.println("DHT22 Robojax Test with Display");
  pinMode(8,OUTPUT);
  digitalWrite(8,HIGH);// gives 5v for DHT22
  dht.begin();
}

void loop()
{
  delay(TEST_DELAY);// wait
  // **** TM1637 code start
  display.setBrightness(0x0f);// set brightness
  uint8_t data[] = { 0x0, 0x0, 0x0, 0x0 };// clear display values
  display.setSegments(data);//clear display
  // **** TM1637 code end


  // Robojax.com test video
  Serial.println(getTemp("h"));

  int temp = round(getTemp("h"));

  display.showNumberDec(temp, false, 3,1);


}// loop end


/*
 * getTemp(String req)
 * returns the temperature related parameters
 * req is string request
 * This code can display temperature in:
 * getTemp("c") is used to get Celsius
 * getTemp("f") is used to get Fahrenheit
 * getTemp("k") is used for Kelvin
 * getTemp("hif") is used to get Fahrenheit
 * getTemp("hic") is used to get Celsius
 * getTemp("h") is used to get humidity
 * written by Ahmad Shamshiri for Robojax.com on January 7, 2018
 * in Ajax, Ontario, Canada
 */
float getTemp(String req)
{

  // Reading temperature or humidity takes about 250 milliseconds!
  // Sensor readings may also be up to 2 seconds 'old' (it's a very slow sensor)
  float h = dht.readHumidity();
  // Read temperature as Celsius (the default)
  float t = dht.readTemperature();
  // Read temperature as Fahrenheit (isFahrenheit = true)
  float f = dht.readTemperature(true);

  // Compute heat index in Fahrenheit (the default)
  float hif = dht.computeHeatIndex(f, h);
  // Compute heat index in Celsius (isFahreheit = false)
  float hic = dht.computeHeatIndex(t, h, false);

  // Check if any reads failed and exit early (to try again).
  if (isnan(h) || isnan(t) || isnan(f)) {
    Serial.println("Failed to read from DHT sensor!");
    return 0.0; //return 0.0 instead of nothing.
  }
  // Compute heat index in Kelvin
  float k = t + 273.15;
  if(req =="c"){
    return t;//return Celsius
  }else if(req =="f"){
    return f;// return Fahrenheit
  }else if(req =="h"){
    return h;// return humidity
  }else if(req =="hif"){
    return hif;// return heat index in Fahrenheit
  }else if(req =="hic"){
    return hic;// return heat index in Celsius
  }else if(req =="k"){
    return k;// return temperature in Kelvin
  }else{
    return 0.000;// if no request found, return 0.000
  }

}
Hulpbronne en verwysings
Geen hulpbronne nog.
Lêers📁
Arduino Biblioteke (zip)
-
DHT22 PCB module rooi
DHT22-module-red.fzpz0.01 MB
Fritzing-lêer
-
DHT22 Humiditeit en Temperatuursensor
DHT22 Humidity and Temperature Sensor.fzpz0.01 MB -
DHT22 PCB module rooi
DHT22-module-red.fzpz0.01 MB -
DHT22 module wit
DHT22-module-white.fzpz0.01 MB -
TM1637 Sewe-segment module
TM1637.fzpz0.01 MB -
DHT11 Humiditeit en Temperatuursensor (3 penne)
DHT11 Humitidy and Temperature Sensor (3 pins).fzpz0.20 MB
Gebruikershandleiding
-
DHT22 Temperatuur en Humiditeit sensor gebruikershandleiding
robojax-DHT22_manual.pdf0.36 MB