In this tutorial, we will learn how to use the SunFounder ESP32 with a DHT11 or DHT22 sensor to measure temperature and humidity. This project will allow us to read the sensor data on our mobile devices or browsers via Wi-Fi, showcasing the ESP32's capabilities as a web server. We will set up the ESP32, wire the components correctly, and write the necessary code to get everything running smoothly (in video at 00:15).
esp32-51-dht-wifi
The ESP32 microcontroller is a powerful device with built-in Wi-Fi and Bluetooth. This allows us to connect to the internet and transmit sensor data wirelessly. The DHT sensor will measure the temperature and humidity, which will then be displayed on a web page accessible through the ESP32's IP address. This setup is ideal for monitoring environmental conditions remotely.
Hardware Explained
For this project, we will use the following main components:
ESP32 Microcontroller: This is the core of the project that handles Wi-Fi connectivity and serves as a web server to display the sensor data.
DHT11 or DHT22 Sensor: These sensors measure temperature and humidity. The DHT11 is suitable for basic applications, while the DHT22 offers better accuracy and a wider range.
The DHT sensor communicates with the ESP32 using a single data pin. It sends temperature and humidity readings in a digital format, which the ESP32 can easily interpret. The ESP32 will then host a web page that displays these readings in real-time.
Datasheet Details
Manufacturer
Adafruit
Part number
DHT11/DHT22
Logic/IO voltage
3.3 V - 5.5 V
Supply voltage
3.3 V - 5.5 V
Output current (per channel)
0.5 mA (typ.)
Peak current (per channel)
2.5 mA (max.)
Response time
1 s (typ.)
Humidity range
20% to 90% RH
Temperature range
-40°C to 80°C
Package
DIP-4
Ensure the DHT sensor is connected to the correct GPIO pin on the ESP32.
Use pull-up resistors to stabilize the data line.
Pay attention to the power supply voltage; both DHT11 and DHT22 operate well at 3.3V.
Keep the wiring short to avoid signal degradation.
Check for correct library installation for DHT sensors in the Arduino IDE.
Wiring Instructions
ESP32-28_dht_temperature-sensor-wiring
To wire the DHT sensor to the ESP32, connect the following pins:
DHT Sensor VCC: Connect to the 3.3V pin on the ESP32.
DHT Sensor GND: Connect to a GND pin on the ESP32.
DHT Sensor Data: Connect to GPIO 14 on the ESP32 (this is defined in the code as DHTPIN).
Ensure that you have the correct resistor (typically 4.7kΩ) connected between the VCC and the data pin for proper signal integrity. If using the DHT22, simply change the DHTTYPE in the code from DHT11 to DHT22 to accommodate the differences in sensor characteristics.
Code Examples & Walkthrough
In the code, we start by including the necessary libraries and defining some key identifiers. For instance, refresh is set to 3 seconds, which determines how often the temperature and humidity readings are updated.
const int refresh=3; // read every 3 seconds
boolean showSerial = true; // true or false
The showSerial variable allows us to control whether to print readings to the Serial Monitor. Next, we define the sensor pin and type:
#define DHTPIN 14  // Set the pin connected to the DHT11 data pin
#define DHTTYPE DHT11 // DHT 11
DHT dht(DHTPIN, DHTTYPE);
Here, the DHT object is created, linking it to the specified pin and type of sensor. The main function for sending temperature data over the web is defined as sendTemp():
This function generates an HTML page that displays the temperature and humidity readings. The page is refreshed based on the refresh interval defined earlier. For full code details, please refer to the complete code loaded below the article.
Demonstration / What to Expect
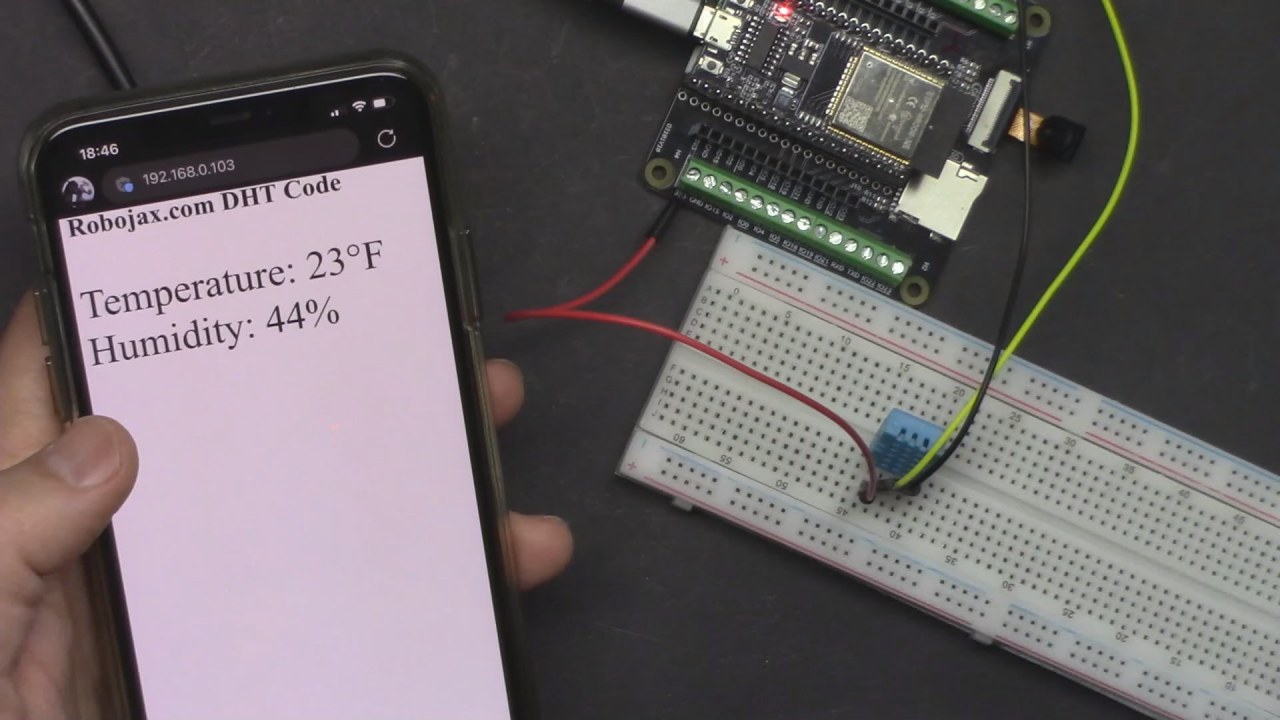
DHT_Wifi_browser
After uploading the code to the ESP32, you should see the IP address printed in the Serial Monitor. Open a web browser and enter the IP address to view the temperature and humidity readings. The values will refresh every 3 seconds, providing real-time data (in video at 12:30).
Be cautious of common pitfalls, such as ensuring the ESP32 and your device are connected to the same Wi-Fi network. If you encounter issues, check the wiring and ensure the DHT sensor is functioning properly.
Video Timestamps
00:00 Start
1:45 Introduction to DHT wifi project
3:59 Arduino Code for ESP32 DHT Wifi
13:31 Selecting ESP32 board and COM port in Arduino IDE