本教程是的一部分: 使用 PCA9685 控制 16 或 32 伺服电机
这套包含视频教程的合集将帮助您使用 Arduino UNO、Nano、Mini 或 ESP32 控制 32 个或更多伺服电机。所有代码均已提供。

通过桌面或手机使用ESP32和PCA9685通过Wi-Fi控制32个伺服电机 V5
在本教程中,我们将学习如何使用连接到ESP32的PCA9685 PWM控制器模块通过Wi-Fi控制32个舵机。此设置使您可以通过桌面或移动设备访问的网络界面单独控制每个舵机或同时控制所有舵机。在本指南结束时,您将拥有一个功能齐全的系统,能够轻松管理多个舵机。

PCA9685模块提供了一种简单的方法来使用PWM信号控制多个舵机,而ESP32则处理Wi-Fi通信和 웹服务器功能。您将能够通过一个用户友好的界面来调整每个舵机电机的角度,该界面为每个舵机显示按钮。为了获得视觉参考,请务必查看视频(在视频的00:00处)。
硬件解析
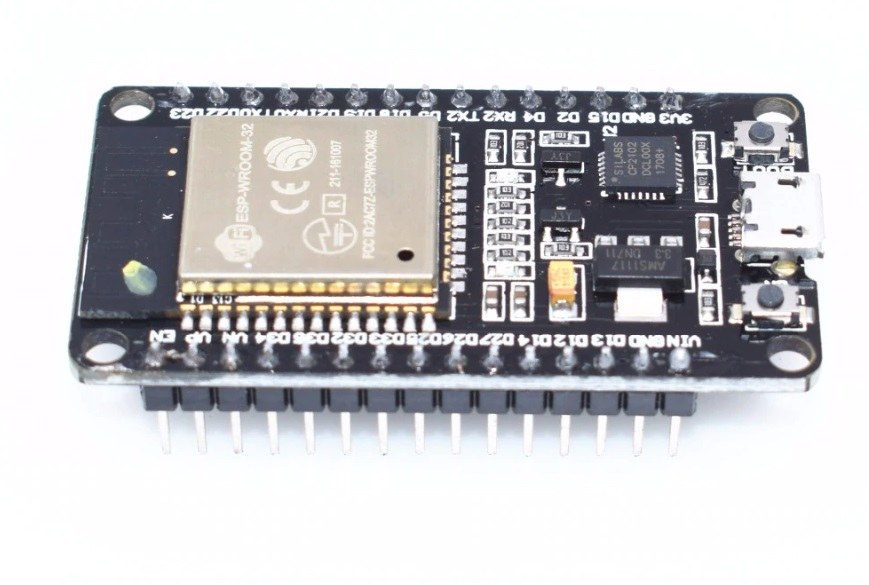
该项目主要使用ESP32微控制器和PCA9685 PWM控制器。ESP32是一个功能强大的微控制器,内置Wi-Fi功能,非常适合物联网项目。PCA9685是一个16通道PWM控制器,可以级联控制多达64个舵机。它通过I2C协议与ESP32进行通信,允许多个控制器连接并单独寻址。
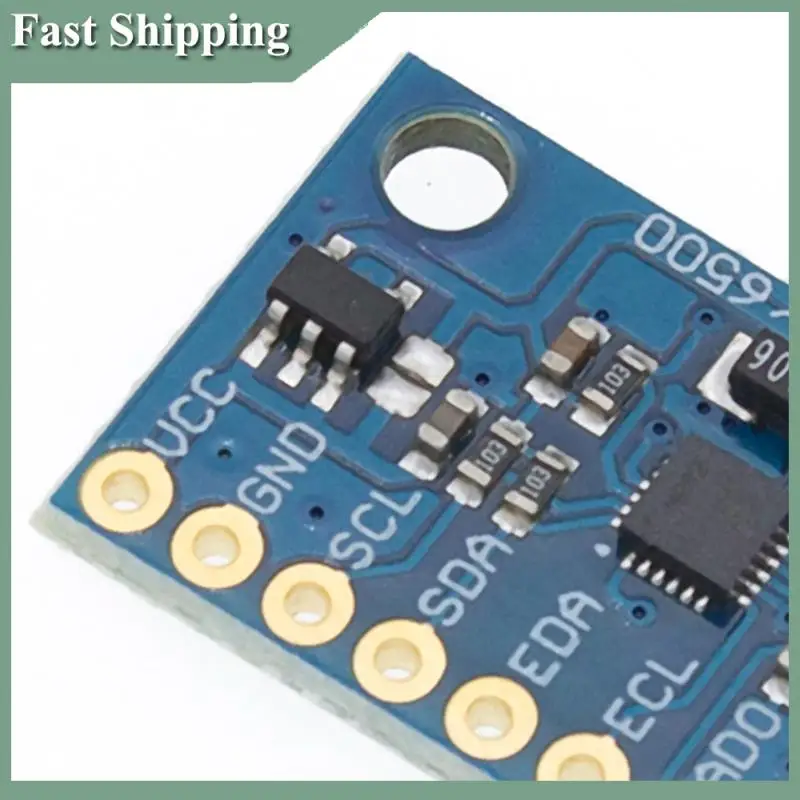
每个PCA9685模块的默认I2C地址为0x40。当使用多个模块时,可以通过焊接特定的跳线来更改它们的地址。例如,第一个模块可以是0x40,第二个可以是0x41,依此类推。这种级联能力使得在不需要ESP32上额外引脚的情况下控制多个舵机成为可能。
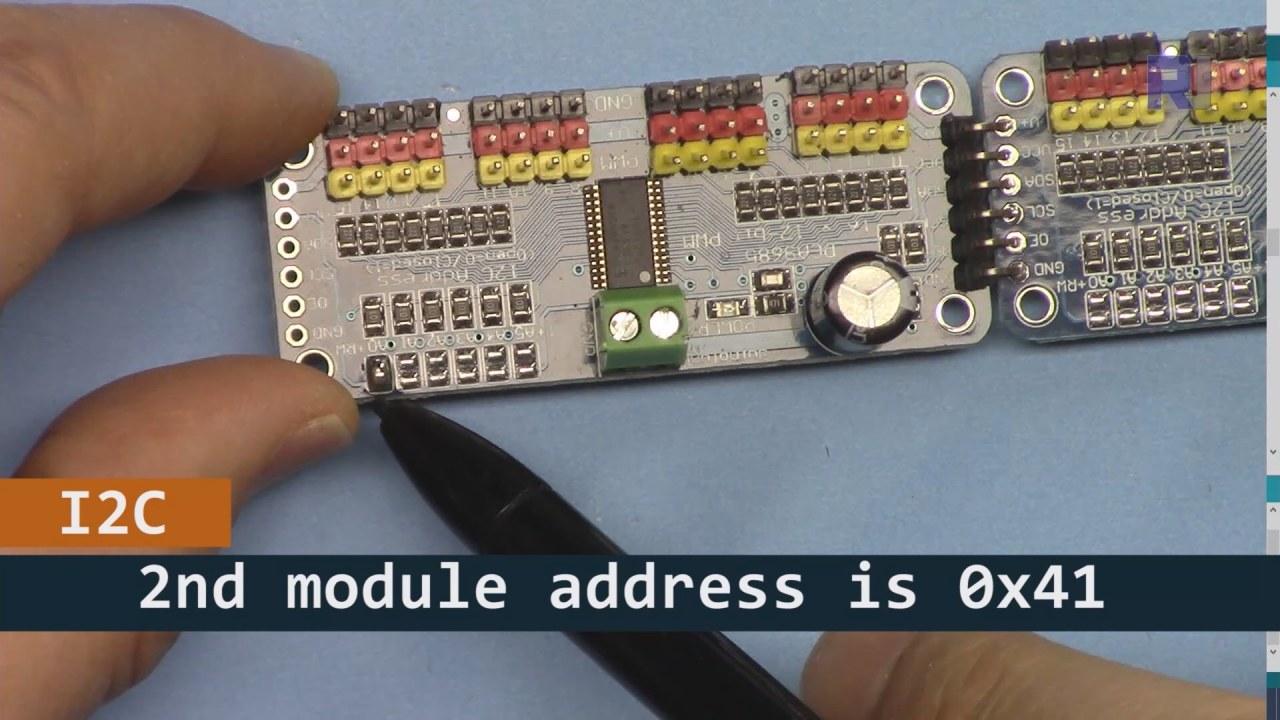
如上图所示,对于PCA9685板2(左侧),确保焊接该路径以设置I2C地址,以便与板1(右侧)不同。
数据表详情
| 制造商 | Adafruit |
|---|---|
| 零件编号 | PCA9685 |
| 逻辑/输入输出电压 | 2.3 V至5.5 V |
| 供电电压 | 2.3 V到5.5 V |
| 输出电流(每通道) | 25 毫安 |
| 峰值电流(每通道) | 100 毫安 |
| PWM频率指导 | 40赫兹到1000赫兹 |
| 输入逻辑阈值 | 0.3 Vcc(低)/ 0.7 Vcc(高) |
| 电压降 / RDS(开)/ 饱和度 | 0.5 V 最大 |
| 热限制 | 最高 125 °C |
| 包裹 | TSSOP-28 |
| 注释 / 变种 | 最多可连接64个伺服器,采用级联方式。 |
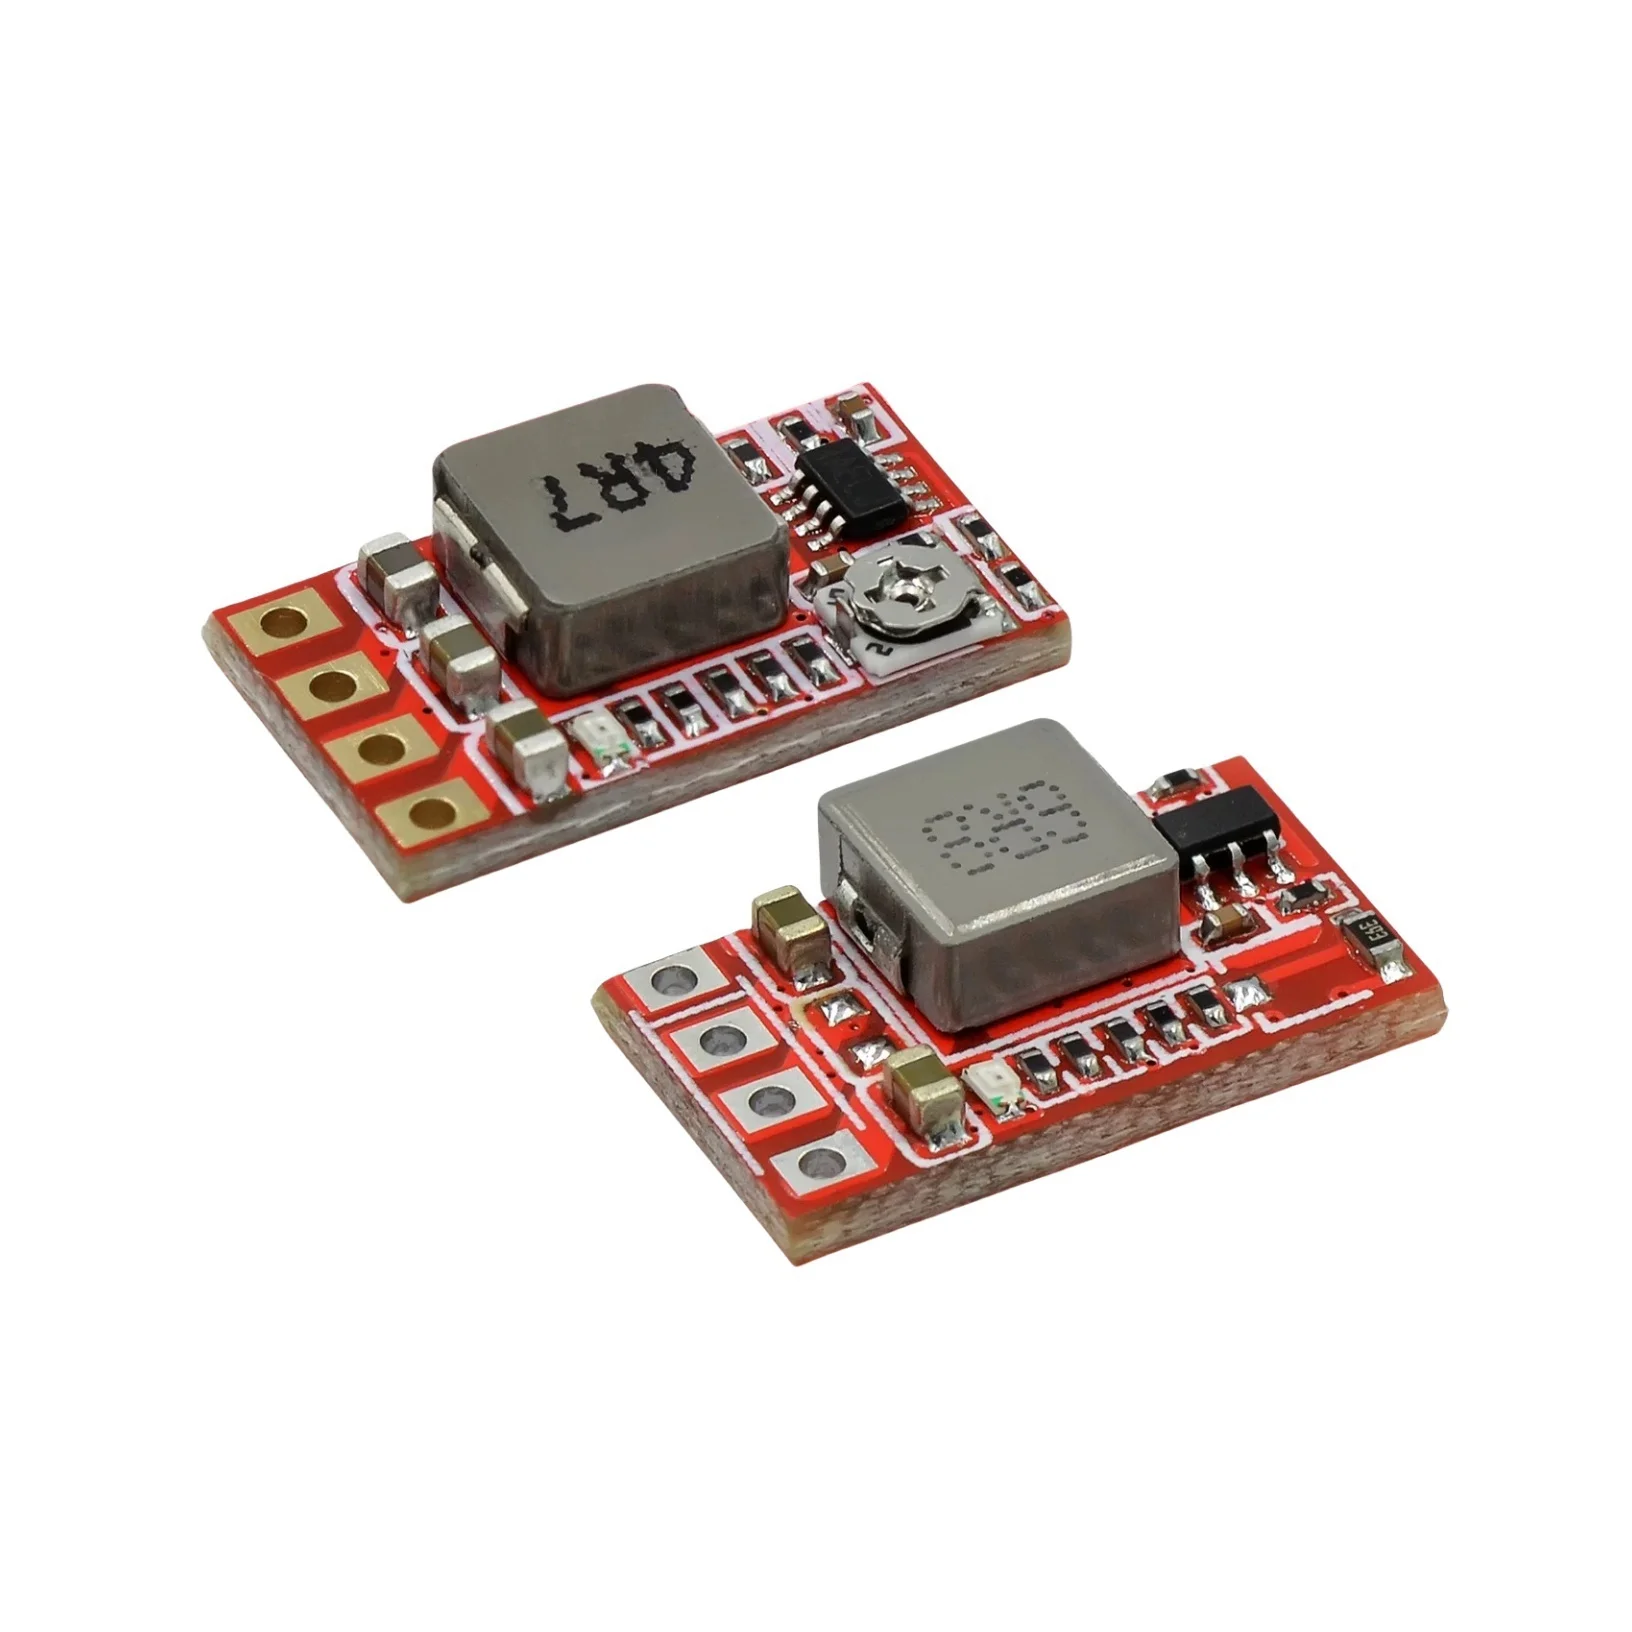
- 确保电源供应正常(推荐5V,2A)。
- 如有需要,请在SDA和SCL线路上使用上拉电阻。
- 使用多个PCA9685模块时,请仔细检查I2C地址。
- 考虑在高功率应用中进行散热。
- 单独测试伺服器以确保正常运行。
常见的I2C引脚映射:SDA= GPIO 21,SCL= GPIO 22.
接线说明

要接线PCA9685和ESP32,首先连接电源和接地。连接正极(V+将PCA9685的)连接到电源的5V输出。将PCA9685的地(GND)连接到ESP32的地。确保两个设备共享一个公共接地。
接下来,对于I2C通信,将PCA9685的SDA引脚连接到ESP32的GPIO 21,将SCL引脚连接到GPIO 22。如果您使用多个PCA9685模块,请确保通过焊接A0跳线来适当设置地址,将第二个模块的地址更改为0x41,以此类推。之后,您可以根据需要将伺服电机连接到PCA9685的PWM输出引脚。
代码示例与教程
代码首先包括必要的库,并初始化两个 PCA9685 板。标识符如maximumServo和servoAngle分别定义伺服电机的数量和当前角度。
Adafruit_PWMServoDriver board1 = Adafruit_PWMServoDriver(0x40);
Adafruit_PWMServoDriver board2 = Adafruit_PWMServoDriver(0x41);
int maximumServo = 32; // how many servos are connected这个摘录展示了PCA9685对象的初始化及其各自的地址。变量maximumServo设置可以控制的伺服电机的总数。
在setup()功能,电路板被初始化,Wi-Fi 连接被建立。所有舵机的初始位置通过循环设置。
void setup() {
  board1.begin();
  board2.begin();
  board1.setPWMFreq(60);  // Analog servos run at ~60 Hz updates
  board2.setPWMFreq(60);
  //initial position of all servos
  for(int i=0; i < maximumServo; i++) {
    if(i < 16) {
      board1.setPWM(i, 0, angleToPulse(allServoPosition[i]));
    } else {
      board2.setPWM(i-15, 0, angleToPulse(allServoPosition[i]));
    }
  }
}此代码配置PCA9685板并设置PWM频率。它将所有舵机初始化到其起始位置,这些位置已定义在allServoPosition数组。
最后,主循环处理传入的客户端请求,根据用户输入控制伺服器。
void loop() {
  server.handleClient();
  if (buttonPushed && (servoNumber >= 0 && servoNumber < maximumServo)) {
    if (servoNumber < 16) {
      board1.setPWM(servoNumber, 0, angleToPulse(allServoPosition[servoNumber]));
    } else {
      board2.setPWM(servoNumber-15, 0, angleToPulse(allServoPosition[servoNumber]));
    }
  }
  buttonPushed = 0;
}此循环不断处理客户端请求,并根据按下的按钮更新伺服位置。变量buttonPushed在每个动作后重置,以确保适当的控制。
有关完整代码,请参见文章下方的部分。
演示 / 期望内容
一旦一切设置完成,您应该能够通过一个网页界面单独控制每个舵机或同时控制所有舵机。您可以通过点击设备上与每个舵机对应的按钮来调整舵机的角度。系统应该能够快速响应,但请记住,电源限制可能会影响性能(视频中在14:30)。
常见的陷阱包括确保I2C地址正确分配以及为伺服电机提供足够的电力。如果伺服电机没有响应,请仔细检查您的接线和连接。
视频时间戳
- 00:00 开始
- 01:19 介绍
- 02:32 设置I2C地址
- 05:07 电线连接说明
- 07:44 准备 Arduino IDE 用于 ESP32
- 09:53 Arduino 代码解释
- 25:49 桌面演示
- 31:52 手机演示
图像


本教程是……的一部分: 使用 PCA9685 控制 16 或 32 伺服电机
/*
* Original PCA9685 Module library source: https://github.com/adafruit/Adafruit-PWM-Servo-Driver-Library
 *
 * This is the Arduino code PCA6985 32 channel servo controller
 * to control 32 Servo Motors over WiFi using ESP32 MCU
 *  get this code and wiring from for this video:  http://robojax.com/RJT365

 * Watch video for this code:  https://youtu.be/bvqfv-FrrLM
 *
 * Related Videos
V4 video of PCA9685 32 Servo with ESP32: https://youtu.be/JFdXB8Za5Os
V3 video of PCA9685 how to control 32 Servo motors https://youtu.be/6P21wG7N6t4
V2 Video of PCA9685 3 different ways to control Servo motors: https://youtu.be/bal2STaoQ1M
V1 Video introduction to PCA9685 to control 16 Servo  https://youtu.be/y8X9X10Tn1k
 *
 * Written by Ahmad Shamshiri for Robojax Video channel www.Robojax.com
 * Date: Feb 17, 2020, in Ajax, Ontario, Canada


or make donation using PayPal http://robojax.com/L/?id=64

 *  * This code is "AS IS" without warranty or liability. Free to be used as long as you keep this note intact.*
 * This code has been download from Robojax.com
    This program is free software: you can redistribute it and/or modify
    it under the terms of the GNU General Public License as published by
    the Free Software Foundation, either version 3 of the License, or
    (at your option) any later version.

    This program is distributed in the hope that it will be useful,
    but WITHOUT ANY WARRANTY; without even the implied warranty of
    MERCHANTABILITY or FITNESS FOR A PARTICULAR PURPOSE.  See the
    GNU General Public License for more details.

    You should have received a copy of the GNU General Public License
    along with this program.  If not, see <https://www.gnu.org/licenses/>.
 */
////////////////////// PCA9685 settings started
#include <Wire.h>

#include <Adafruit_PWMServoDriver.h>

// called this way, it uses the default address 0x40
Adafruit_PWMServoDriver board1 = Adafruit_PWMServoDriver(0x40);
Adafruit_PWMServoDriver board2 = Adafruit_PWMServoDriver(0x41);
int maximumServo = 32;//how many servos are connected

// Depending on your servo make, the pulse width min and max may vary, you
// want these to be as small/large as possible without hitting the hard stop
// for max range. You'll have to tweak them as necessary to match the servos you
// have!
// Watch video V1 to understand the two lines below: http://youtu.be/y8X9X10Tn1k
#define SERVOMIN  125 // this is the 'minimum' pulse length count (out of 4096)
#define SERVOMAX  575 // this is the 'maximum' pulse length count (out of 4096)

int servoAngle =0;
int servoStep = 10;

int stepDelay = 50;// 50 milliseconds
int servoAngleMin =0;
int servoAngleMax = 180;

// minimum angle of each servo
int allServoMin[]={
      0,    0,    0,    0,    0,    0,    0,    0,// 1 to 8
      0,    0,    0,    0,    0,    0,    0,    0,//9 to 16
      0,    0,    0,    0,    0,    0,    0,    0,//17 to 24
      0,    0,    0,    0,    0,    0,    0,    0};//25 to 32

//maximum value of each servo
int allServoMax[]={
      180,    180,    180,    180,    180,    180,    180,    180,// 1 to 8
      180,    180,    180,    180,    180,    180,    180,    180,//9 to 16
      180,    180,    180,    180,    180,    180,    180,    180,//17 to 24
      180,    180,    180,    180,    180,    180,    180,    180};//25 to 32

// initial position of servos
int allServoPosition[] ={
      0,    0,    0,    0,    0,    0,    0,    0,// 1 to 8
      0,    0,    0,    0,    0,    0,    0,    0,//9 to 16
      0,    0,    0,    0,    0,    0,    0,    0,//17 to 24
      0,    0,    0,    0,    0,    0,    0,    0};//25 to 32

int servoNumber = 100;//servo to move
int buttonPushed =0;
int allServo =0;

void handleServo();//this is prototype of function defined at the end of this code
int angleToPulse(int ang); //this is prototype of function defined at the end of this code
////////////////////////PCA9685 ended

#include "PCA9684_32Servo_ESP32.h"

#include <WiFi.h>
#include <WiFiClient.h>
#include <WebServer.h>
#include <ESPmDNS.h>

const char *ssid = "Robojax";
const char *password = "YouTube2020";

WebServer server(80);

const int led = 13;


/////////////////////////////////////
void handleRoot() {

String HTML_page = pageHeader_p1;

 if(allServo)
 {
 HTML_page.concat("<div class=\"btn\"><a class=\"angleButton colorAll\"  href=\"/servo?do=stop\">Stop Servo</a></div>");

 }else{
 HTML_page.concat("<div class=\"btn\"><a class=\"angleButton colorAll\"  href=\"/servo?do=all\">All Servo</a></div>");
 }

 for (int i=0; i < maximumServo; i++)
 {

  HTML_page.concat("<div class=\"btn\"><a class=\"angleButton colorBtn\"  href=\"/servo?move=");
  HTML_page.concat(i);
  HTML_page.concat("\">SRV ");
  HTML_page.concat(i+1);
  HTML_page.concat(" </a></div>");
 }

 HTML_page.concat("</body>\n</html>");
 server.send(200, "text/html", HTML_page);
}

void handleNotFound() {
  digitalWrite(led, 1);
  String message = "File Not Found\n\n";
  message += "URI: ";
  message += server.uri();
  message += "\nMethod: ";
  message += (server.method() == HTTP_GET) ? "GET" : "POST";
  message += "\nArguments: ";
  message += server.args();
  message += "\n";

  for (uint8_t i = 0; i < server.args(); i++) {
    message += " " + server.argName(i) + ": " + server.arg(i) + "\n";
  }

  server.send(404, "text/plain", message);
  digitalWrite(led, 0);
}


void setup() {
  board1.begin();
  board2.begin();
  board1.setPWMFreq(60);  // Analog servos run at ~60 Hz updates
  board2.setPWMFreq(60);
  //initial position of all servos
  for(int i=0; i < maximumServo; i++) {
    if(i < 16)
    {
      board1.setPWM(i, 0, angleToPulse(allServoPosition[i]) );
    }else{
      board2.setPWM(i-15, 0, angleToPulse(allServoPosition[i]) );
    }
  }//for end

    Serial.begin(115200);
    Serial.println("32 channel Servo test!");


  //Servo control using ESP32 from Robojax.com

  WiFi.mode(WIFI_STA);
  WiFi.begin(ssid, password);
  Serial.println("");


  // Wait for connection
  while (WiFi.status() != WL_CONNECTED) {
    delay(500);
    Serial.print(".");
  }

  Serial.println("");
  Serial.print("Connected to ");
  Serial.println(ssid);
  Serial.print("IP address: ");
  Serial.println(WiFi.localIP());


  if (MDNS.begin("robojaxESP32")) {
    Serial.print("MDNS responder started at http://");
    Serial.println("robojaxESP32");
  }

  server.on("/", handleRoot);
  server.on("/servo", HTTP_GET, handleServo);

  server.onNotFound(handleNotFound);
  server.begin();
  Serial.println("HTTP server started");
}

void loop() {
	server.handleClient();
  if(allServo ){

    for( int angle =servoAngleMin; angle <= servoAngleMax; angle +=servoStep){
      for(int i=0; i<16; i++)
        {

            board2.setPWM(i, 0, angleToPulse(angle) );
            board1.setPWM(i, 0, angleToPulse(angle) );
        }
        delay(stepDelay);
    }

// robojax PCA9865 32 channel Servo control
  delay(100);

  }//if pushed
  if(false){
  Serial.print("Servo #");
  Serial.print (servoNumber);
  Serial.print(" Angle ");
  Serial.println(allServoPosition[servoNumber]);
  }


  if( buttonPushed && (servoNumber >=0 && servoNumber < maximumServo) ){
    if(servoNumber < 16)
    {
      board1.setPWM(servoNumber, 0, angleToPulse(allServoPosition[servoNumber]) );
    }else{
      board2.setPWM(servoNumber-15, 0, angleToPulse(allServoPosition[servoNumber]) );
    }
  }

   buttonPushed =0;
}


/*
 * handleServo()
 * update the buttonPushed varialbe
 * returns nothing
 * Written by Ahmad Shamshiri on Dec 29, 2019
 * www.Robojax.com
 * http://youTube.com/robojaxTV
 */
void handleServo() {
  if(server.arg("do") == "all" )
  {
    allServo =1;

  }else{
    allServo =0;
  }
   int servoNumberRequested= server.arg("move").toInt();

  if(servoNumberRequested >=0 && servoNumberRequested < maximumServo)
  {

    buttonPushed = 1;
    if(allServoPosition[servoNumberRequested] == allServoMin[servoNumberRequested] ) {
     allServoPosition[servoNumberRequested] = allServoMax[servoNumberRequested];
    }else{
     allServoPosition[servoNumberRequested] = allServoMin[servoNumberRequested];
    }
    servoNumber =servoNumberRequested;
  }

  handleRoot();
}//handleServo() end


/*
 * angleToPulse(int ang)
 * gets angle in degree and returns the pulse width
 * also prints the value on seial monitor
 * written by Ahmad Shamshiri for Robojax, Robojax.com
 */
int angleToPulse(int ang){
   int pulse = map(ang,0, 180, SERVOMIN,SERVOMAX);// map angle of 0 to 180 to Servo min and Servo max
   //Serial.print("Angle: ");Serial.print(ang);
   //Serial.print(" pulse: ");Serial.println(pulse);
   return pulse;
}
|||您可能需要的东西
-
亚马逊亚马逊上的伺服电机amzn.to
-
亚马逊从亚马逊购买PCA9685amzn.to
-
易趣在eBay上购买PCA9685ebay.us
-
全球速卖通从AliExpress购买PCA9685s.click.aliexpress.com
-
全球速卖通从AliExpress购买SG90伺服电机180或360。s.click.aliexpress.com
-
Banggood从Bangood购买PCA9685banggood.com
资源与参考
-
外部PAC9685 Library (from GitHub)github.com
文件📁
没有可用的文件。