Using a Melexis MLX90614 Infrared Thermometer with an Arduino LCD1602
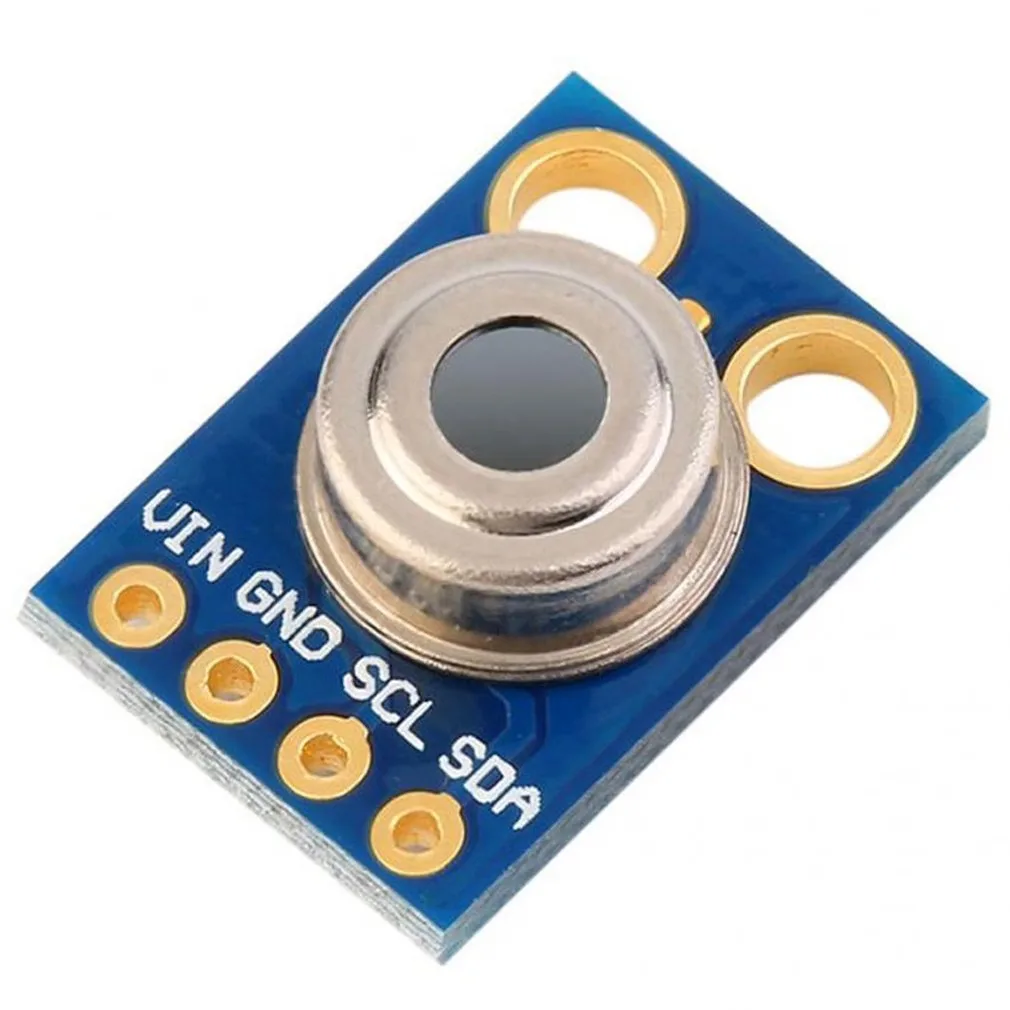
Measuring temperature without physical contact is a fascinating capability that opens the door to many practical and creative projects. The Melexis MLX90614 infrared thermometer makes this possible by detecting the thermal radiation emitted by objects, allowing you to measure temperature from a safe distance. This guide will show you how to connect this versatile sensor to an Arduino and display both the object and ambient temperatures on an I2C LCD screen (either a 16x2 or 20x4 character display).
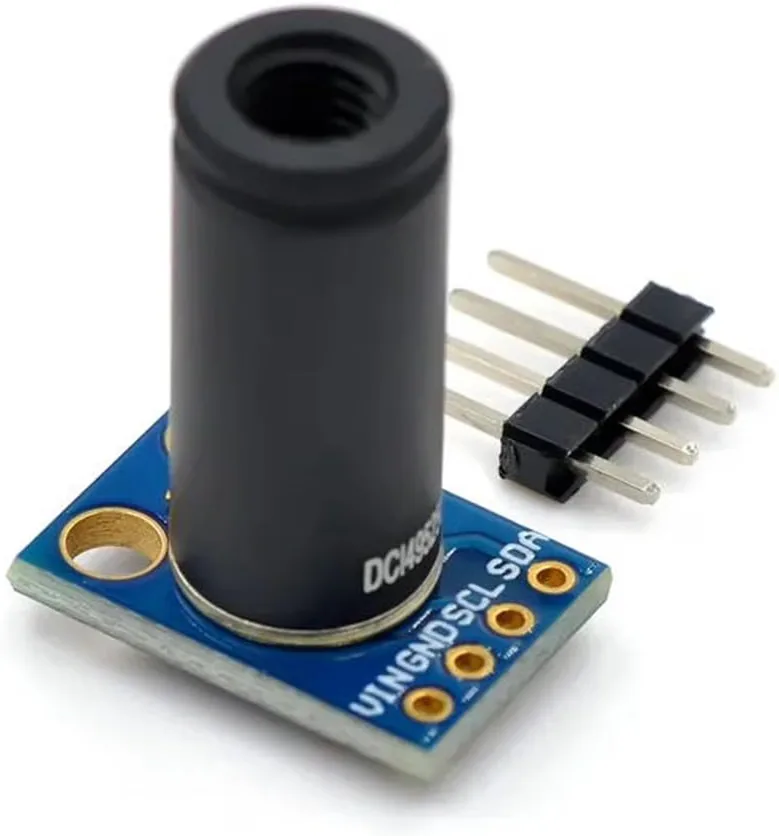
This project is perfect for a wide range of applications, such as:
- Building a touchless fever screening station for a clinic or office entry point.
- Monitoring the temperature of a 3D printer bed or hot-end without interfering with the print.
- Creating a safe, non-contact food temperature checker for cooking or brewing.
- Developing a simple human presence detector by measuring body heat signatures.
- Checking the temperature of moving machinery parts or electrical panels from a safe distance.
The MLX90614 sensor communicates over the I2C protocol, which means it requires only two data pins (SDA and SCL) plus power and ground. This makes wiring straightforward and leaves plenty of pins free for other components. By the end of this tutorial, you will have a working temperature display that can show readings in Celsius, Fahrenheit, or Kelvin, and you will understand how to customize the code for your specific needs.
Hardware Required
To build this project, you will need the following components:
- Arduino board (Uno, Nano, Mega, etc.)
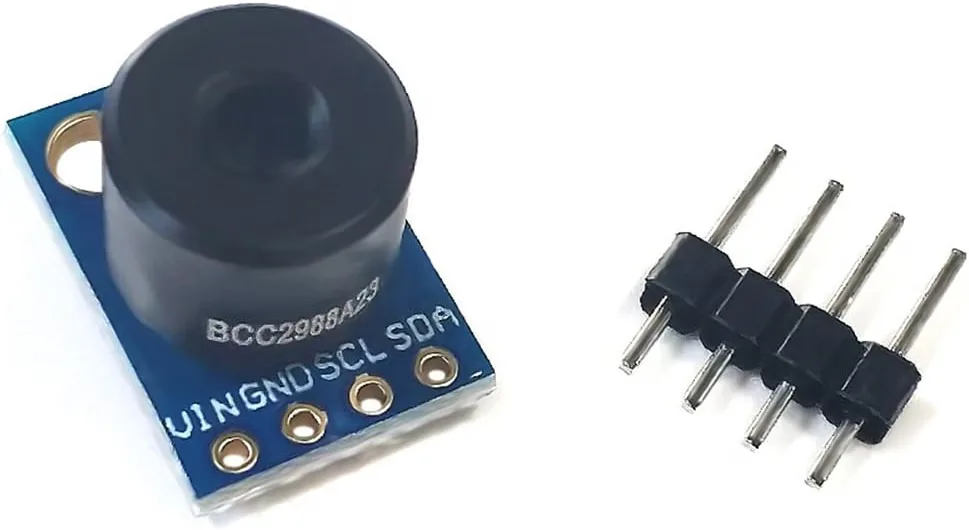
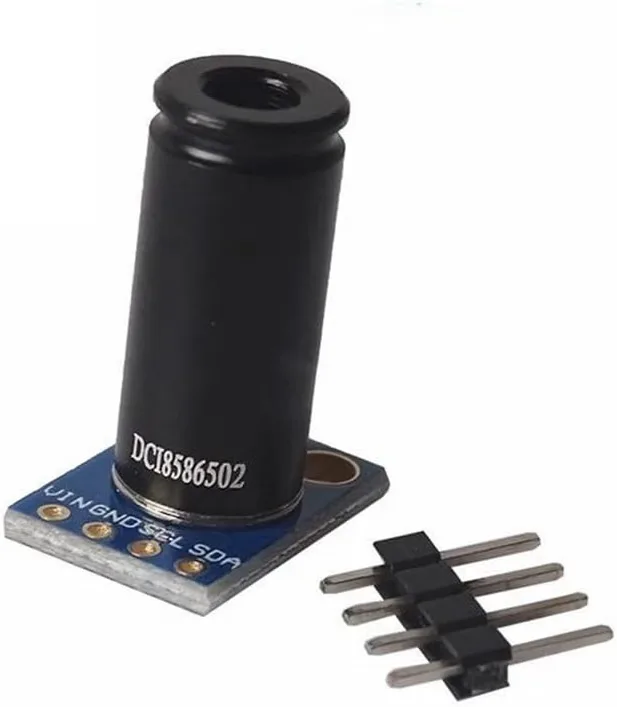
- MLX90614 infrared temperature sensor module
- I2C LCD display (16x2 or 20x4 characters)
- Jumper wires
- Breadboard (optional, for easier connections)
Wiring Guide
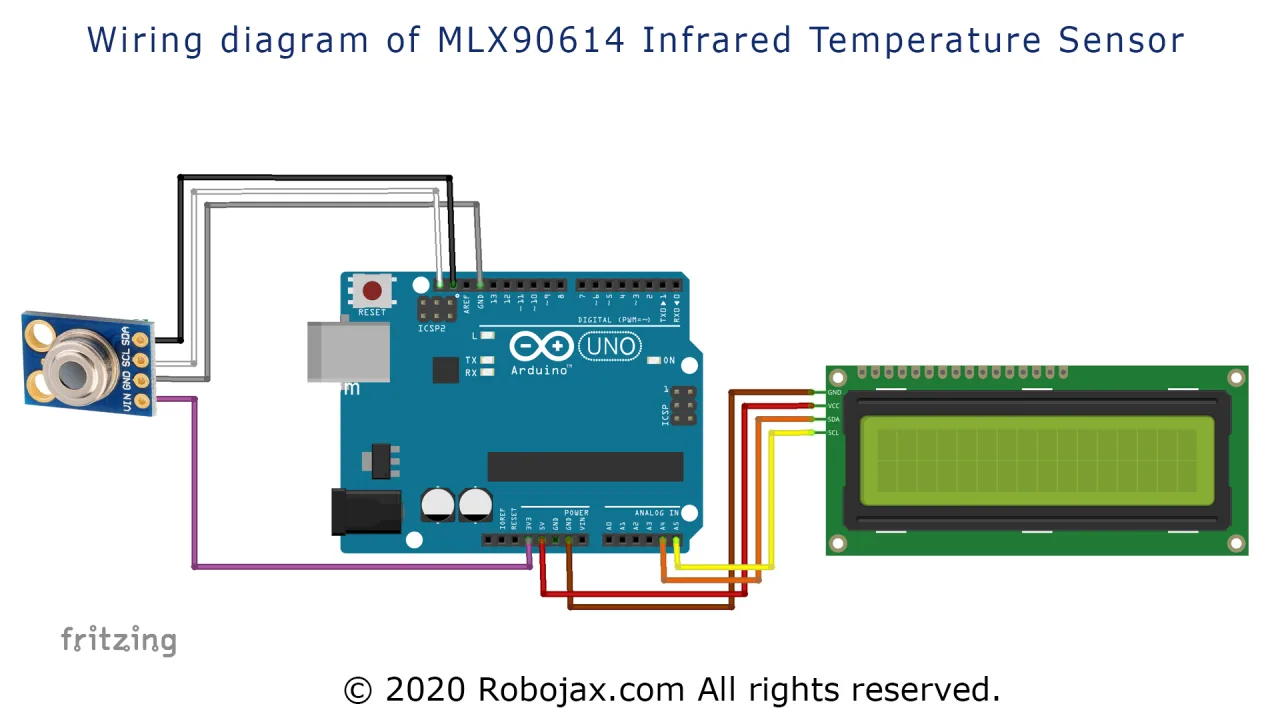
The wiring for this project is simple because both the MLX90614 sensor and the LCD display use the I2C communication protocol. This means they can share the same two data lines (SDA and SCL), which are connected in parallel. The sensor operates at 3.3V logic, but it can be powered from the Arduino's 3.3V output. The LCD module, however, typically requires 5V for its backlight and logic (in video at 03:15).
Here is the connection breakdown:
- MLX90614 VCC → Arduino 3.3V
- MLX90614 GND → Arduino GND
- MLX90614 SCL → Arduino A5 (SCL)
- MLX90614 SDA → Arduino A4 (SDA)
- LCD VCC → Arduino 5V
- LCD GND → Arduino GND
- LCD SCL → Arduino A5 (SCL)
- LCD SDA → Arduino A4 (SDA)
Since I2C is a bus protocol, you can connect up to 128 devices on the same two lines (in video at 03:44). If you are using an Arduino Uno or Nano, the SDA and SCL pins are located on A4 and A5 respectively. For other boards like the Mega, these pins are on different locations (20 and 21), so be sure to check your board's pinout.
Setting Up the Libraries
Before uploading the code, you need to install two essential libraries. The first is the Adafruit MLX90614 library, which handles the communication with the temperature sensor. The second is the LiquidCrystal I2C library, which simplifies controlling the LCD display over the I2C bus. These libraries can be installed through the Arduino Library Manager by searching for their names.
After installing the libraries, you must determine the I2C addresses of your connected devices. This is a critical step because both the sensor and the LCD have their own unique addresses. The code provided includes a special "I2C Scanner" sketch that you can upload to your Arduino to find these addresses. When you run the scanner with both devices connected, it will print two addresses to the Serial Monitor. In the video, the LCD was found at 0x3F and the MLX90614 sensor at 0x5A (in video at 06:28). Your devices may have different addresses, so it is essential to run the scanner and note the values.
Code Explanation
The code is designed to be flexible, allowing you to easily customize which temperature units are displayed and how the information is presented on the LCD. Here are the key user-configurable parts of the code (in video at 04:31):
LCD Configuration
At the top of the code, you will find the settings for your specific LCD display. You need to adjust these values to match your hardware:
const uint8_t I2C_ADDRESS = 0x3f;  // I2C address of your LCD
const uint8_t LCD_CHAR = 16;       // Number of characters per line (16 or 20)
const uint8_t LCD_ROW = 2;         // Number of lines on the display (2 or 4)
Change I2C_ADDRESS to the address you found using the I2C scanner. If you are using a 20x4 LCD, set LCD_CHAR to 20 and LCD_ROW to 4.
Displaying Temperature Units
The code uses a clever system of letters to represent different temperature readings. The main function printTemp('X') takes a single character argument to determine what to display. The mapping is as follows:
'C'- Object temperature in Celsius'D'- Ambient temperature in Celsius'F'- Object temperature in Fahrenheit'G'- Ambient temperature in Fahrenheit'K'- Object temperature in Kelvin'L'- Ambient temperature in Kelvin
In the loop() function, you can choose which readings to display by uncommenting the lines you need. For example, to show only Celsius readings for both object and ambient temperature, your loop would look like this:
void loop() {
  printTemp('C'); // object temperature in C
  delay(2000);
  printTemp('D'); // ambient temperature in C
  delay(2000);
}
If you want to display both Fahrenheit and Celsius, simply uncomment the additional lines. The delay of 2000 milliseconds (2 seconds) between readings gives you time to read the display.
Customizing Display Labels
You can change the text labels that appear on the LCD. The array typeName[] contains the labels for the object and ambient temperatures:
char *typeName[]={"Object:","Ambient:"};
You can modify these strings to display text in your preferred language, as long as it uses Latin characters (in video at 05:08).
Adding Conditional Actions
The code also includes a useful function getTemp('X') that returns the temperature as a floating-point number. This allows you to perform actions based on temperature thresholds. For example, you could turn on a relay or buzzer if the temperature exceeds a certain value:
if( getTemp('C') > 40)
{
  // do something here, like turn on a relay or buzzer
}
This is particularly useful for creating alarm systems or automated responses to temperature changes.
Demonstration
Once the code is uploaded and the wiring is correct, the LCD will begin displaying temperature readings. In the demonstration, the sensor was pointed at different objects to show how it responds. When pointed at a person's forehead, the sensor measured body temperature around 33-34°C (in video at 09:39). When pointed at a cooler surface, the readings dropped to about 26°C for the object and 28°C for the ambient temperature (in video at 09:52).
The sensor is quite stable and provides consistent readings. The video also demonstrates how to modify the code to display only Celsius readings by commenting out the lines for Fahrenheit and Kelvin. This is done by selecting the lines and using the Arduino IDE's comment feature (Ctrl+/ or Cmd+/), which adds double slashes (//) at the beginning of each line.
By default, the code displays readings in Celsius for both object and ambient temperature. You can easily switch to Fahrenheit or Kelvin by uncommenting the appropriate lines in the loop() function. The LCD will then alternate between the object and ambient readings every two seconds.
Chapters
- [00:00] Introduction to the MLX90614 with LCD project
- [01:20] Display options: LCD2004 and LCD1602
- [02:29] Wiring Explained
- [04:28] Code explained
- [04:53] Finding the I2C addresses
- [08:35] Demonstration
- [10:47] Closing remarks and credits
Images
++
/***************************************************
  This is a library example for the MLX90614 Infrared Temperature Sensor with LCD1602
Original Library and code source: https://github.com/adafruit/Adafruit-MLX90614-Library

This code has been mostly updated.
It displays the temperature on LCD1602 or LCD2004 in C, F, and K for object and for ambient.

 *
 * Watch video instructions for this code:  https://youtu.be/_iO2L4P_irw
Updated/written by Ahmad Shamshiri on June 28, 2020

 * in Ajax, Ontario, Canada. www.robojax.com

Introduction to MLX90614 Infrared Temperature Sensor: https://youtu.be/cFDSqiEIunw

 * Get this code and other Arduino codes from Robojax.com
Learn Arduino step by step in a structured course with all material, wiring diagrams, and libraries
all in one place. Purchase My course on Udemy.com http://robojax.com/L/?id=62

If you found this tutorial helpful, please support me so I can continue creating
content like this.

or make a donation using PayPal http://robojax.com/L/?id=64

 *  * This code is "AS IS" without warranty or liability. Free to be used as long as you keep this note intact.*
 * This code has been downloaded from Robojax.com
    This program is free software: you can redistribute it and/or modify
    it under the terms of the GNU General Public License as published by
    the Free Software Foundation, either version 3 of the License, or
    (at your option) any later version.

    This program is distributed in the hope that it will be useful,
    but WITHOUT ANY WARRANTY; without even the implied warranty of
    MERCHANTABILITY or FITNESS FOR A PARTICULAR PURPOSE.  See the
    GNU General Public License for more details.

    You should have received a copy of the GNU General Public License
    along with this program.  If not, see <https://www.gnu.org/licenses/>.

Origin
  Written by Limor Fried/Ladyada for Adafruit Industries.
  BSD license, all text above must be included in any redistribution
 ****************************************************/

#include <Wire.h>
#include <Adafruit_MLX90614.h>
char *typeName[]={"Object:","Ambient:"};

Adafruit_MLX90614 mlx = Adafruit_MLX90614();

#include <LiquidCrystal_I2C.h>
const uint8_t I2C_ADDRESS =0x3f;
const uint8_t LCD_CHAR= 16;
const uint8_t LCD_ROW= 2;
LiquidCrystal_I2C lcd(I2C_ADDRESS, LCD_CHAR,LCD_ROW);


void setup() {
  Serial.begin(9600);

  Serial.println("Robojax MLX90614 test");

   if (!mlx.begin()) //Begin returns 0 on a good init
  {
      lcd.print("MLX90614 Failed");
      lcd.setCursor(0,1);
      lcd.print("check wiring!");
    while (1)
      ;
  }
  Wire.begin();
  lcd.begin();
  lcd.backlight();
      lcd.print("Robojax MLX90614");
      lcd.setCursor(0,1);
      lcd.print("Infrared Temp.");
      delay(2000);
      clearCharacters(LCD_ROW-1,0, LCD_CHAR-1);


}//setup() end

void loop() {
  //Robojax Example for MLX90614 with LCD
  printTemp('C');//object temperature in C
  delay(2000);

  printTemp('D');//ambient temperature in C
  delay(2000);
//
//  printTemp('F'); //object temperature in F
//  delay(2000);
//
//  printTemp('G'); //ambient temperature in F
//  delay(2000);
//  if( getTemp('C')>40)
//  {
//    //do something here
//  }
//
//  printTemp('K'); //object temperature in K
//  delay(2000);
//  printTemp('L');//ambient temperature in K
//  delay(2000);


  //Robojax Example for MLX90614
}

/*
 * @brief returns temperature or relative humidity
 * @param "type" is a character
 *     C = Object Celsius
 *     D = Ambient Celsius
 *
 *     K = Object Kelvin
 *     L = Ambient Kelvin
 *
 *     F = Object Fahrenheit
 *     G = Ambient Fahrenheit

 * @return returns one of the values above
 * Usage: to get Fahrenheit type: getTemp('F')
 * to print it on serial monitor Serial.println(getTemp('F'));
 * Written by Ahmad Shamshiri on March 30, 2020.
 * in Ajax, Ontario, Canada
 * www.Robojax.com
 */
float getTemp(char type)
{
   // Robojax.com MLX90614 Code
  float value;
    float tempObjec = mlx.readObjectTempC();//in C object
    float tempAmbient = mlx.readAmbientTempC();
   if(type =='F')
   {
    value = mlx.readObjectTempF(); //Fahrenheit Object
   }else if(type =='G')
   {
    value = mlx.readAmbientTempF();//Fahrenheit Ambient
   }else if(type =='K')
   {
    value = tempObjec + 273.15;// Object Kelvin
   }else if(type =='L')
   {
    value = tempAmbient + 273.15;//Ambient Kelvin
   }else if(type =='C')
   {
    value = tempObjec;
   }else if(type =='D')
   {
    value = tempAmbient;
   }
   return value;
    // Robojax.com MLX90614 Code
}//getTemp

/*
 * @brief nothing
 * @param "type" is a character
 *     C = Object Celsius
 *     D = Ambient Celsius
 *
 *     K = Object Kelvin
 *     L = Ambient Kelvin
 *
 *     F = Object Fahrenheit
 *     G = Ambient Fahrenheit

 * @return prints temperature value in serial monitor
 * Usage: to get Fahrenheit type: getTemp('F')
 * to print it on serial monitor Serial.println(getTemp('F'));
 * Written by Ahmad Shamshiri on March 30, 2020 at 21:51
 * in Ajax, Ontario, Canada
 * www.Robojax.com
 */
void printTemp(char type)
{
 clearCharacters(1,0, LCD_CHAR-1 );
  // Robojax.com MLX90614 Code
  float tmp =getTemp(type);
      lcd.setCursor(0,1);

  if(type =='C')
  {

      lcd.print(typeName[0]);
      lcd.print(" ");
      lcd.print(tmp);
      lcd.print((char)223);//
      lcd.print("C");


  }else if(type =='D')
  {
      lcd.print(typeName[1]);
      lcd.print(" ");
      lcd.print(tmp);
      lcd.print((char)223);//
      lcd.print("C");
  }else if(type =='F')
  {
      lcd.print(typeName[0]);
      lcd.print(" ");
      lcd.print(tmp);
      lcd.print((char)223);//
      lcd.print("F");
  }else if(type =='G')
  {
      lcd.print(typeName[1]);
      lcd.print(" ");
      lcd.print(tmp);
      lcd.print((char)223);//
      lcd.print("F");
  }

  else if(type =='K')
  {
      lcd.print(typeName[0]);
      lcd.print(" ");
      lcd.print(tmp);
      lcd.print((char)223);//
      lcd.print("K");
  }
  else if(type =='L')
  {
      lcd.print(typeName[1]);
      lcd.print(" ");
      lcd.print(tmp);
      lcd.print((char)223);//
      lcd.print("K");

  }

// Robojax.com MLX90614 Code
}//printTemp(char type)


/*
   clearCharacters(uint8_t row,uint8_t start, uint8_t stop)
 * @brief clears a line of display (erases all characters)
 * @param none
 * @return does not return anything
 * Written by Ahmad Shamshiri
 * www.Robojax.com code May 28, 2020 at 16:21 in Ajax, Ontario, Canada
 */
void clearCharacters(uint8_t row,uint8_t start, uint8_t stop )
{
    for (int i=start; i<=stop; i++)
    {
    lcd.setCursor (i,row); //
    lcd.write(254);
    }

}//clearCharacters
Things you might need
-
Amazon
-
AmazonMLX90614 Non-Contact sensor on Amazon Canadalink.amazon
-
eBay
-
AliExpressMLX90614 Non-Contact sensor on AliExpresss.click.aliexpress.com
Resources & references
-
Internal
Files📁
Other files
-
Adafruit MLX90614 library (from Robojax)
robojax_MLX90614-_Adafruit_Library-master.zip -
Melexis MLX90614 datasheet (PDF)
robojax_MLX90614_Datasheet-Melexis.pdf