Matrice LED 8x8 folosind un modul Arduino MAX7219
În acest tutorial, vom învăța cum să controlăm o matrice LED 8x8 folosind un modul MAX7219 cu un Arduino. MAX7219 simplifică controlul mai multor LED-uri, permițându-ne să afișăm caractere și modele cu ușurință. La sfârșitul acestui proiect, vei putea afișa cuvântul "ROBOJAX" pe matrice.
Pentru a realiza acest lucru, vom utiliza biblioteca LedControl, care este special concepută pentru a interfața cu MAX7219. Această bibliotecă ne permite să trimitem date către matricea LED cu un efort minim. Dacă doriți o înțelegere mai clară a cablării și codului, asigurați-vă că verificați videoclipul asociat (în videoclip la 0:30).
Hardware explicat
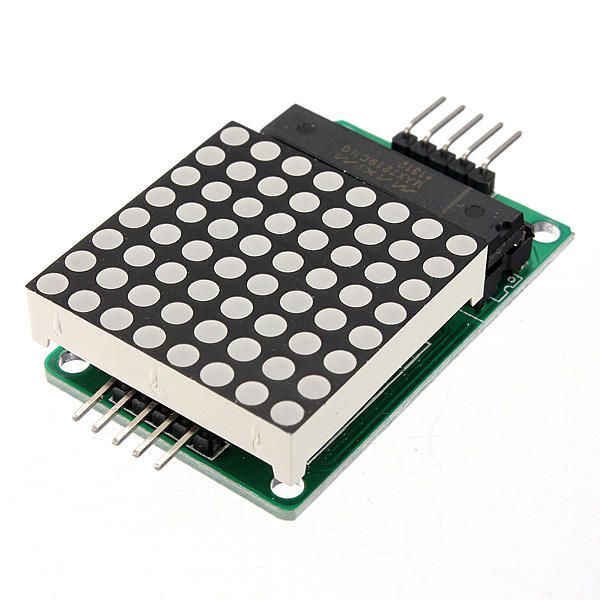
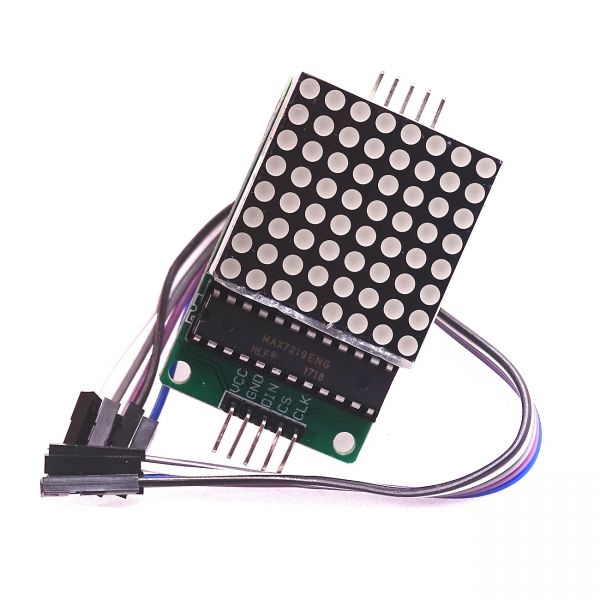
Componentele principale ale acestui proiect includ modulul MAX7219 și matricea LED 8x8. MAX7219 este un circuit integrat care gestionează afișarea LED-urilor, manipulând semnalele de comunicare și control de la Arduino. Acesta utilizează o interfață serială, ceea ce înseamnă că putem controla multe LED-uri cu doar câteva pini de la Arduino.
Matricea LED 8x8 constă din 64 de LED-uri individuale aranjate într-o grilă. Fiecare LED poate fi aprins sau stins prin trimiterea comenzilor corespunzătoare prin intermediul MAX7219. Acest lucru permite afișarea diferitelor caractere și grafice pe matrice.
Detalii fișă tehnică
| Producător | Maxim Integrated |
|---|---|
| Număr de parte | MAX7219 |
| Tensiune logică/IO | 3.3V la 5.5V |
| Tensiune de alimentare | 4.0V până la 5.5V |
| Curent de ieșire (pe canal) | 40 mA max |
| Curent de vârf (pe canal) | 100 mA max |
| Ghid pentru frecvența PWM | 100 Hz |
| Praguri logici de intrare | 2.0V (înalt) / 0.8V (scăzut) |
| Cădere de tensiune / RDS(on)/ saturație | 0.2V tip. |
| Limite termice | 150°C |
| Pachet | 16-DIP |
| Note / variante | Configurație cu anod comun |
- Asigurați o alimentare electrică corespunzătoare (4.0V până la 5.5V).
- Utilizați rezistențe de limitare a curentului pentru fiecare LED pentru a preveni deteriorarea.
- Păstrați cablurile scurte pentru a evita interferențele.
- Monitorizați disiparea căldurii; utilizați un radiator dacă este necesar.
- Verificați din nou conexiunile pin pentru a evita neînțelegerile.
Instrucțiuni de cablare
Pentru a conecta MAX7219 la Arduino, conectați următoarele pini:
- Conectează-l
VCCpinul MAX7219 la 5V-ul Arduino-ului. - Conectează-l
GNDpin la masa Arduino-ului. - Conectează-te la
DINpin (Date In) la pinul 12 al Arduino. - Conectează-l
CLKpin (Ceas) la pinul Arduino 11. - Conectează-l
CSpin (Chip Select) la pinul 10 al Arduino.
Asigurați-vă că verificați dacă toate conexiunile sunt sigure înainte de a porni circuitul. Cablarea este simplă, dar dacă întâmpinați probleme, revizuiți conexiunile cu atenție (în video la :45).
Exemple de cod și ghiduri
În cod, începem prin a include biblioteca LedControl, care este esențială pentru comunicarea cu MAX7219. Excerptul următor inițializează obiectul LedControl:
LedControl lc=LedControl(12,11,10,1);Această linie setează pinul de date, pinul de ceas, pinul de selecție a cipului și numărul de dispozitive (1, în acest caz). Apoi, însetup()funcția, activăm MAX7219 și setăm intensitatea afișajului:
lc.shutdown(0,false);
lc.setIntensity(0,8);
lc.clearDisplay(0);
Aceasta asigură că afișajul este activ și pregătit să arate caractere. Funcția principală care conduce afișajul estewriteArduinoOnMatrix(), care iluminează secvențial rândurile matricei pentru a afișa litere.
Demonstrație / Ce să aștepți
Odată ce totul este conectat și codul este încărcat, matricea LED ar trebui să afișeze cuvântul "ROBOJAX". Dacă afișajul nu funcționează, verificați probleme precum conexiuni slabe sau asignări incorecte ale pinilor. În plus, asigurați-vă că sursa de alimentare este adecvată (în video la 2:30).
Capitole
- Introducere (0:00)
- Prezentare generală a hardware-ului (0:30)
- Instrucțiuni de cablare (1:45)
- Prezentare cod (2:15)
- Demonstrație (3:00)
Imagini
/*
 * This video shows you how to use the MAX7219 module with an 8x8 LED matrix to display text or any characters on the LED.
 * Watch YouTube video: https://youtu.be/AAiDwBKs9uE
 *
 * Written by Ahmad Shamshiri for Robojax.com
 * on February 26, 2017 in Ajax, Ontario, Canada
 * Get this code and other Arduino codes from Robojax.com
 * Learn Arduino step by step in a structured course with all materials, wiring diagrams, and libraries
 * all in one place.

 ****************************
 * Get early access to my videos via Patreon and have your name mentioned at the end of every
 * video I publish on YouTube here: http://robojax.com/L/?id=63 (watch until the end of this video for a list of my Patrons)
 ****************************

 * Or make a donation using PayPal http://robojax.com/L/?id=64

 * This code is "AS IS" without warranty or liability. Free to be used as long as you keep this note intact.
 * This code has been downloaded from Robojax.com
    This program is free software: you can redistribute it and/or modify
    it under the terms of the GNU General Public License as published by
    the Free Software Foundation, either version 3 of the License, or
    (at your option) any later version.

    This program is distributed in the hope that it will be useful,
    but WITHOUT ANY WARRANTY; without even the implied warranty of
    MERCHANTABILITY or FITNESS FOR A PARTICULAR PURPOSE.  See the
    GNU General Public License for more details.

    You should have received a copy of the GNU General Public License
    along with this program.  If not, see <https://www.gnu.org/licenses/>.
*/


// We always have to include the library
// Based on a project posted https://github.com/wayoda/LedControl
#include "LedControl.h"

 /*
  Now we need a LedControl to work with.
  // Customized for RoboJax.com on February 26, 2017 in Ajax, Ontario, Canada.
  ***** These pin numbers will probably not work with your hardware *****
  pin 12 is connected to the DataIn
  pin 11 is connected to the CLK
  pin 10 is connected to CS
  We have only a single MAX72XX.
  */
 LedControl lc=LedControl(12,11,10,1);

 /* we always wait a bit between updates of the display */
 unsigned long delaytime=600;

 void setup() {
   /*
    The MAX72XX is in power-saving mode on startup,
    we have to do a wakeup call
    */
   lc.shutdown(0,false);
   /* Set the brightness to a medium value */
   lc.setIntensity(0,8);
   /* and clear the display */
   lc.clearDisplay(0);
 }

 /*
  This method will display the characters for the
  word "Arduino" one after the other on the matrix.
  (you need at least 5x7 LEDs to see the whole characters)
  */
 void writeArduinoOnMatrix() {
   /* here is the data for the characters */

   // K
   byte R[8]={B11111100,B10000100,B10000100,B11111000,B10100000,B10010000,B10001000,B10000100};
   byte O[8]={B00011000,B00100100,B01000010,B01000010,B01000010,B01000010,B00100100,B00011000};
   byte B[8]={B11111100,B10000100,B10000100,B11111000,B10001000,B10000100,B10000100,B11111100};
   byte J[8]={B00011110,B00000100,B00000100,B00000100,B10000100,B10000100,B01000100,B00111000};
   byte A[8]={B00111000,B01000100,B10000010,B11111110,B10000010,B10000010,B10000010,B10000010};
   byte X[8]={ B10000001,B01000010,B00100100,B00011000,B00011000,B00100100,B01000010,B10000001};
   byte love[8]={ B00000000,B01100110,B10011001,B10011001,B10000001,B01000010,B00100100,B00011000};


   /* Letter R */
   for (int i=0; i<8; i++){
   lc.setRow(0,i,R[i]);

   }

   delay(delaytime);
   for(int i=0; i<8; i++){
       lc.setRow(0,i,0);// this is for blank
   }
 //////////////// END of Letter R ///////

   /* Letter O */
   for (int i=0; i<8; i++){
   lc.setRow(0,i,O[i]);

   }

   delay(delaytime);
   for(int i=0; i<8; i++){
       lc.setRow(0,i,0);// this is for blank
   }
 //////////////// END of Letter O ///////


   /* Letter B */
   for (int i=0; i<8; i++){
   lc.setRow(0,i,B[i]);

   }

   delay(delaytime);
   for(int i=0; i<8; i++){
       lc.setRow(0,i,0);// this is for blank
   }
 //////////////// END of Letter B ///////

   /* Letter O */
   for (int i=0; i<8; i++){
   lc.setRow(0,i,O[i]);

   }

   delay(delaytime);
   for(int i=0; i<8; i++){
       lc.setRow(0,i,0);// this is for blank
   }
 //////////////// END of Letter O ///////

   /* Letter J */
   for (int i=0; i<8; i++){
   lc.setRow(0,i,J[i]);

   }

   delay(delaytime);
   for(int i=0; i<8; i++){
       lc.setRow(0,i,0);// this is for blank
   }
 //////////////// END of Letter J ///////

   /* Letter A */
   for (int i=0; i<8; i++){
   lc.setRow(0,i,A[i]);

   }

   delay(delaytime);
   for(int i=0; i<8; i++){
       lc.setRow(0,i,0);// this is for blank
   }
 //////////////// END of Letter A ///////

   /* Letter X */
   for (int i=0; i<8; i++){
   lc.setRow(0,i,X[i]);

   }

   delay(delaytime);
   for(int i=0; i<8; i++){
       lc.setRow(0,i,0);// this is for blank
   }
 //////////////// END of Letter X ///////


   /* love */
   for (int i=0; i<8; i++){
   lc.setRow(0,i,love[i]);

   }

   delay(delaytime);
   delay(delaytime);
   for(int i=0; i<8; i++){
       lc.setRow(0,i,0);// this is for blank
   }
 //////////////// END of Letter love ///////

 }// writeArduinoOnMatrix()  end


 void loop() {
   writeArduinoOnMatrix();

}/*
* This video shows you how to use the MAX7219 module with an 8x8 LED matrix to display text or any characters on the LED.
* Watch YouTube video: https://youtu.be/AAiDwBKs9uE
*
* Written by Ahmad S. for Robojax.com
* on February 26, 2017 in Ajax, Ontario, Canada
* Permission granted to share this code, given that this
* note is kept with the code.
* Disclaimer: This code is "AS IS" and for educational purposes only.
*/
// We always have to include the library
// Based on a project posted on https://github.com/wayoda/LedControl
#include "LedControl.h"
/*
Now we need a LedControl object to work with.
// Customized for RoboJax.com on February 26, 2017 in Ajax, Ontario, Canada.
***** These pin numbers will probably not work with your hardware *****
pin 1 is connected to the DataIn
pin 4 is connected to the CLK
pin 53 is connected to CS
We have only a single MAX72XX.
*/
LedControl lc=LedControl(1,4,53,1);// this line determines if this code can work with Arduino Mega or Arduino UNO
/* we always wait a bit between updates of the display */
unsigned long delaytime=600;
void setup() {
/*
The MAX72XX is in power-saving mode on startup,
we have to do a wakeup call
*/
lc.shutdown(0,false);
/* Set the brightness to a medium value */
lc.setIntensity(0,8);
/* and clear the display */
lc.clearDisplay(0);
}
/*
This method will display the characters for the
word "Arduino" one after the other on the matrix.
(you need at least 5x7 LEDs to see the whole characters)
*/
void writeArduinoOnMatrix() {
/* here is the data for the characters */
// K
byte R[8]={B11111100,B10000100,B10000100,B11111000,B10100000,B10010000,B10001000,B10000100};
byte O[8]={B00011000,B00100100,B01000010,B01000010,B01000010,B01000010,B00100100,B00011000};
byte B[8]={B11111100,B10000100,B10000100,B11111000,B10001000,B10000100,B10000100,B11111100};
byte J[8]={B00011110,B00000100,B00000100,B00000100,B10000100,B10000100,B01000100,B00111000};
byte A[8]={B00111000,B01000100,B10000010,B11111110,B10000010,B10000010,B10000010,B10000010};
byte X[8]={ B10000001,B01000010,B00100100,B00011000,B00011000,B00100100,B01000010,B10000001};
byte love[8]={ B00000000,B01100110,B10011001,B10011001,B10000001,B01000010,B00100100,B00011000};
/* Letter R */
for (int i=0; i<8; i++){
lc.setRow(0,i,R[i]);
}
delay(delaytime);
for(int i=0; i<8; i++){
lc.setRow(0,i,0);// this is for blank
}
/////////////// END of Letter R ///////
/* Letter O */
for (int i=0; i<8; i++){
lc.setRow(0,i,O[i]);
}
delay(delaytime);
for(int i=0; i<8; i++){
lc.setRow(0,i,0);// this is for blank
}
/////////////// END of Letter O ///////
/* Letter B */
for (int i=0; i<8; i++){
lc.setRow(0,i,B[i]);
}
delay(delaytime);
for(int i=0; i<8; i++){
lc.setRow(0,i,0);// this is for blank
}
/////////////// END of Letter B ///////
/* Letter O */
for (int i=0; i<8; i++){
lc.setRow(0,i,O[i]);
}
delay(delaytime);
for(int i=0; i<8; i++){
lc.setRow(0,i,0);// this is for blank
}
/////////////// END of Letter O ///////
/* Letter J */
for (int i=0; i<8; i++){
lc.setRow(0,i,J[i]);
}
delay(delaytime);
for(int i=0; i<8; i++){
lc.setRow(0,i,0);// this is for blank
}
/////////////// END of Letter J ///////
/* Letter A */
for (int i=0; i<8; i++){
lc.setRow(0,i,A[i]);
}
delay(delaytime);
for(int i=0; i<8; i++){
lc.setRow(0,i,0);// this is for blank
}
/////////////// END of Letter A ///////
/* Letter X */
for (int i=0; i<8; i++){
lc.setRow(0,i,X[i]);
}
delay(delaytime);
for(int i=0; i<8; i++){
lc.setRow(0,i,0);// this is for blank
}
/////////////// END of Letter X ///////
/* love */
for (int i=0; i<8; i++){
lc.setRow(0,i,love[i]);
}
delay(delaytime);
delay(delaytime);
for(int i=0; i<8; i++){
lc.setRow(0,i,0);// this is for blank
}
/////////////// END of love ///////
}// writeArduinoOnMatrix() end
void loop() {
writeArduinoOnMatrix();
}Lucruri de care ai putea avea nevoie
-
AmazonMax7219 8x8 Matrix on Amazonamzn.to
-
eBayMax7219 8x8 Matrix on eBayebay.us
-
AliExpressMax7219 8x8 Matrix on AliExpresss.click.aliexpress.com
Resurse și referințe
-
DocumentațieView different board pin assignments for SPIarduino.cc
-
Extern
Fișiere📁
Alte fișiere
-
Biblioteca Matrix MAX7219 de la Robojax
robojax-MAX7219-matrix.zip0.01 MB -
8-Digit LED Display Library (from Robojax.com)
robojax_MAX7291_8_digits.zip