Arduino代碼同影片,用於SSD1306 OLED 128 x 64顯示屏
喺呢個教學入面,我哋會探討點樣將SSD1306 OLED 128 x 64顯示屏同Arduino一齊用。SSD1306係一個多功能顯示屏,可以輕鬆顯示文字、圖形同各種形狀。睇完呢篇文章之後,你就會識得設定個顯示屏,同埋執行示範佢功能嘅代碼。
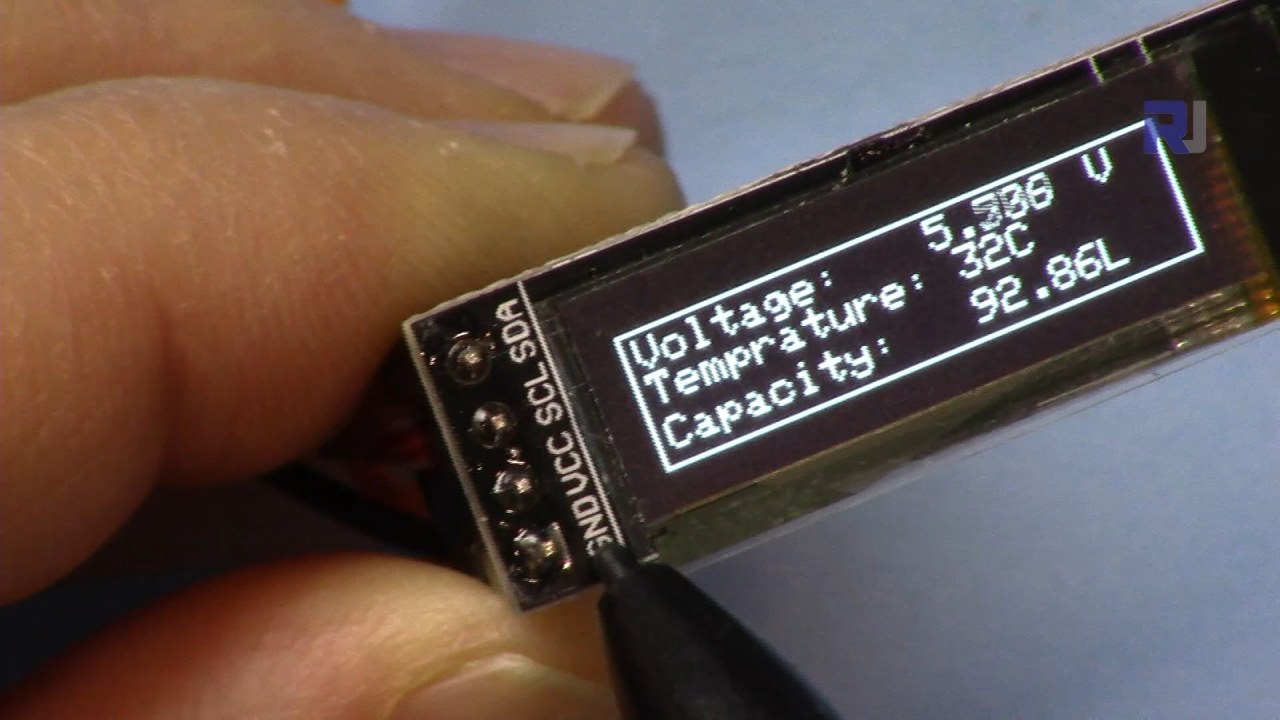
我哋會逐步指導你點樣接駁硬件,並提供代碼片段幫你了解程式入面用到嘅主要識別碼。想睇更視覺化嘅解釋,記得睇埋相關嘅影片(影片00:00位置)。
硬件解說
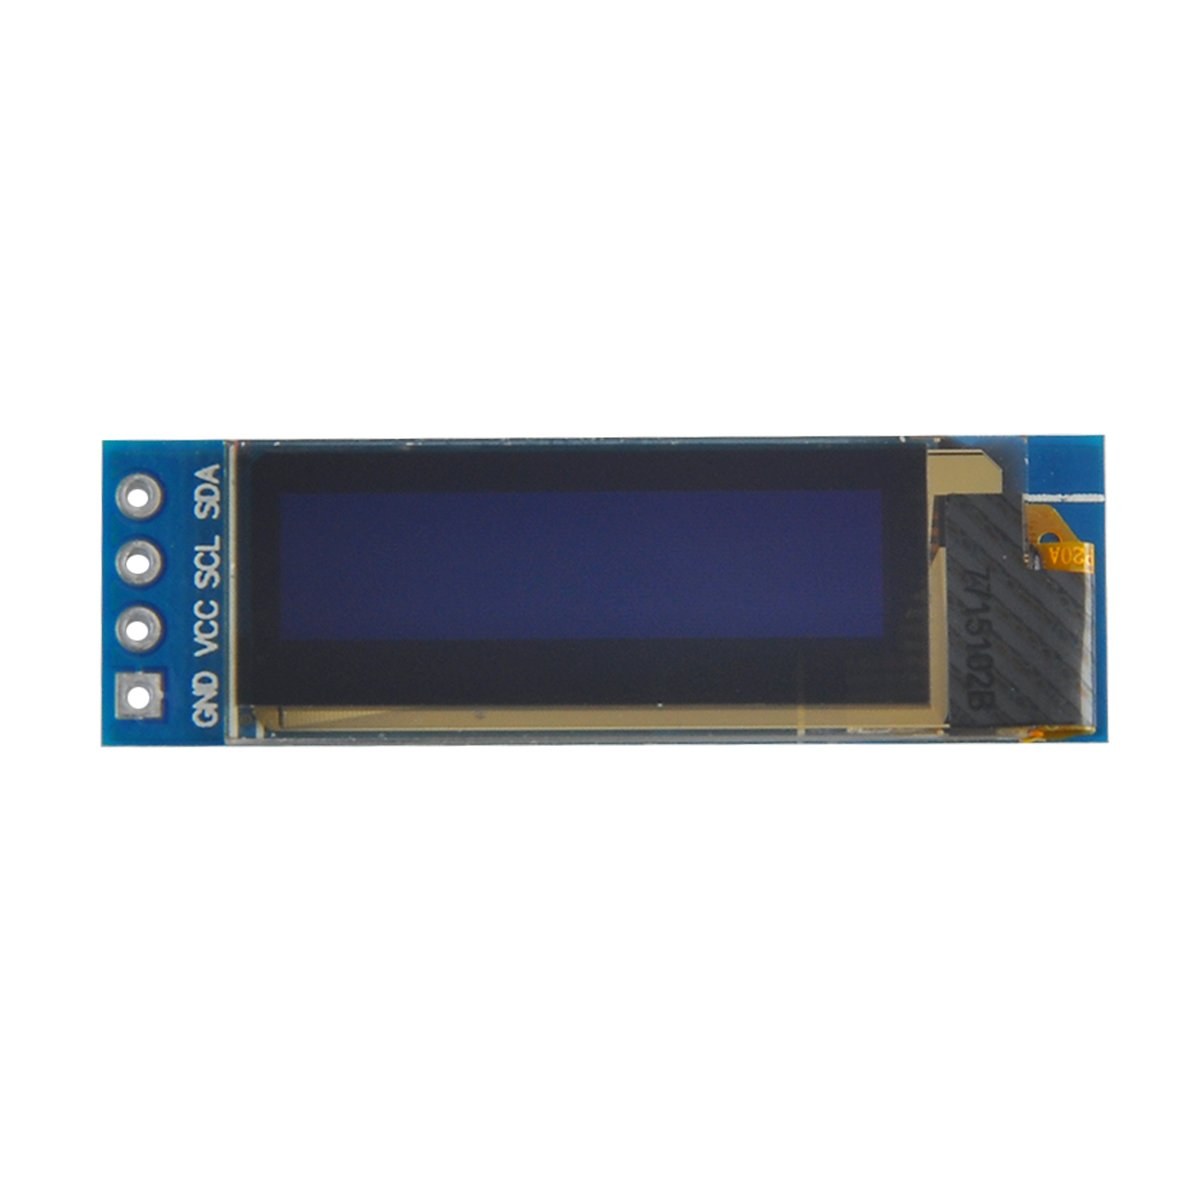
呢個項目嘅主要組件包括Arduino板同SSD1306 OLED顯示屏模組。SSD1306顯示屏用I2C通訊協議,只需要兩條數據線就可以簡化接線:SDA負責數據,SCL負責時鐘信號。個顯示屏喺3.3V至5V之間嘅電壓操作,所以同大部分Arduino板都兼容。
除咗顯示屏之外,你仲需要杜邦線將模組連接到Arduino。接線包括VCC接電源、GND接地、SDA接Arduino嘅數據針腳、SCL接時鐘針腳。呢個設定令Arduino同OLED顯示屏之間可以輕鬆通訊。
數據手冊詳情
| 製造商 | Adafruit |
|---|---|
| 零件編號 | SSD1306 |
| 邏輯/IO電壓 | 3.3 V - 5 V |
| 供電電壓 | 3.3 V - 5 V |
| 顯示解像度 | 128 x 64像素 |
| I2C地址 | 0x3C |
| 接口 | I2C |
| 封裝 | 模組 |
- 確保接線正確:VCC接3.3V或5V,GND接地,SDA接A4,SCL接A5(適用於Arduino Uno)。
- 如果顯示屏冇內置上拉電阻,就需要喺SDA同SCL線上加。
- 確認代碼入面嘅I2C地址設定正確,通常呢款顯示屏係0x3C。
- 用一個合適嘅函式庫好似Adafruit_SSD1306,方便整合。
- 畫新圖形之前要清除顯示屏,避免有重疊嘅殘影。
接線指示
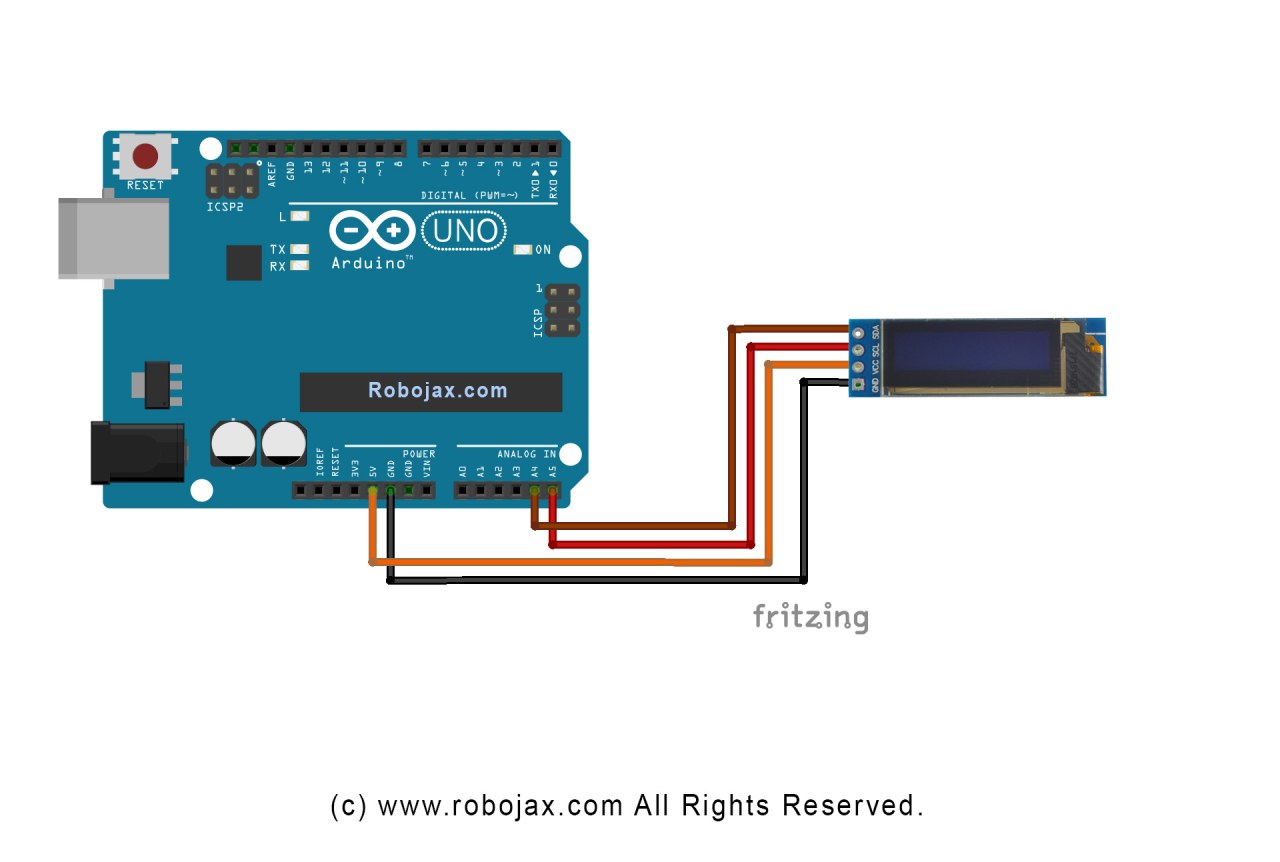
要將SSD1306 OLED顯示屏接到Arduino,跟住以下步驟:
將OLED顯示屏嘅VCC針腳連接到Arduino嘅5V(或3.3V)針腳。跟住,將顯示屏嘅GND針腳連接到Arduino嘅接地針腳。至於I2C通訊,將顯示屏嘅SDA針腳連接到Arduino嘅A4針腳,SCL針腳就接到A5針腳。呢個設定令Arduino可以用I2C協議同OLED顯示屏通訊。
確保所有接線都穩固,同埋再檢查一下你用嘅電壓啱唔啱你嗰款顯示屏型號。如果你用嘅係其他Arduino型號,SDA同SCL針腳可能唔同(例如Arduino Mega嘅SDA喺針腳20,SCL喺針腳21)。
代碼示例同解說
喺代碼入面,我哋初始化顯示屏並設定參數好似I2C地址同尺寸。一個主要識別碼係display,佢代表SSD1306顯示屏嘅實例。以下係setup函數入面嘅片段:
void setup() {
  Serial.begin(9600);
  display.begin(SSD1306_SWITCHCAPVCC, 0x3C);  // 用I2C地址0x3C初始化
}喺呢個片段入面,display.begin函數用指定嘅I2C地址初始化顯示屏。一定要將地址同你嘅顯示屏匹配,先可以確保通訊正常。
跟住,喺loop函數入面,我哋用display.clearDisplay()方法清除畫面,先至畫新內容。我哋可以用setTextSize同setCursor方法設定文字大小同位置:
void loop() {
  display.clearDisplay();
  display.setTextSize(2);
  display.setCursor(2,1); // 將游標設喺左上角
  display.println("Robojax"); // 顯示文字
}
呢度,文字"Robojax"顯示喺屏幕嘅(2,1)座標位置。咁就可以精確噉將文字放喺OLED顯示屏上面。
最後,要將改動顯示出嚟,我哋要呼叫display.display()。呢個函數會將所有緩衝咗嘅指令發送到顯示屏,更新佢嘅內容:
display.display();呢行應該係你loop函數入面嘅最後一行,確保所有繪圖指令都執行到。如果漏咗呢一步,顯示屏上面就乜都唔會顯示。
記住,完整代碼會喺文章下面載入,方便你參考。
示範 / 預期效果
將代碼上傳到Arduino之後,你應該會見到OLED屏幕上面顯示"Robojax"呢個字。代碼仲會示範捲動文字,同埋喺顯示屏上面畫線、形狀同其他圖形。留意一啲常見問題,好似接線錯誤或者I2C地址唔啱,呢啲都會令顯示屏無法正常運作(影片10:00位置)。
影片時間戳
- 00:00 - SSD1306 OLED顯示屏簡介
- 02:30 - 接駁顯示屏
- 05:00 - 代碼解說
- 08:00 - 顯示屏功能示範
- 10:00 - 常見問題同疑難排解
圖片

/*
 * Original source: https://github.com/adafruit/Adafruit_SSD1306
 * This is the Arduino code for the SSD1306 OLED 128 x 64 Display.
 * Watch the video for details and demo: http://youtu.be/UmYiHTOz-5k
 * This code has been modified to print specific elements such as text, lines, circles, rectangles, etc.
 * I have added a custom method to make printing text easy.

 If you get the error: Adafruit_GFX.h not found, download the Adafruit-GFX Library from:
 https://github.com/adafruit/Adafruit-GFX-Library

 Purchase this OLED module from Amazon: https://amzn.to/36zFvTb

 *  *
 * Written by Ahmad Shamshiri for Robojax Video channel, www.Robojax.com
 * Date: December 17, 2017, in Ajax, Ontario, Canada
 * Permission granted to share this code, provided that this
 * note is kept with the code.
 * Disclaimer: This code is "AS IS" and for educational purposes only.
 * This code has been downloaded from https://robojax.com
 *
 */

/*********************************************************************
This is an example for our monochrome OLEDs based on SSD1306 drivers.

  Pick one up today in the Adafruit shop!
  ------> http://www.adafruit.com/category/63_98

This example is for a 128x64 size display using I2C to communicate.
3 pins are required to interface (2 I2C and one reset).

Adafruit invests time and resources providing this open source code,
please support Adafruit and open-source hardware by purchasing
products from Adafruit!

Written by Limor Fried/Ladyada for Adafruit Industries.
BSD license, check license.txt for more information.
All text above, and the splash screen must be included in any redistribution.
*********************************************************************/

#include <SPI.h>
#include <Wire.h>
#include <Adafruit_GFX.h>
#include <Adafruit_SSD1306.h>

#define OLED_RESET 4
Adafruit_SSD1306 display(OLED_RESET);

#define NUMFLAKES 10
#define XPOS 0
#define YPOS 1
#define DELTAY 2


#define LOGO16_GLCD_HEIGHT 16 // do not change this. Error in video
#define LOGO16_GLCD_WIDTH  16 // do not change this. Error in video
static const unsigned char PROGMEM logo16_glcd_bmp[] =
{ B00000000, B11000000,
  B00000001, B11000000,
  B00000001, B11000000,
  B00000011, B11100000,
  B11110011, B11100000,
  B11111110, B11111000,
  B01111110, B11111111,
  B00110011, B10011111,
  B00011111, B11111100,
  B00001101, B01110000,
  B00011011, B10100000,
  B00111111, B11100000,
  B00111111, B11110000,
  B01111100, B11110000,
  B01110000, B01110000,
  B00000000, B00110000 };

    // look at line 27 to 30 of Adafruit_SSD1306.h inside the library to select the dimensions
#if (SSD1306_LCDHEIGHT != 64)
#error("Height incorrect, please fix Adafruit_SSD1306.h!");
#endif

void setup()   {
  Serial.begin(9600);

  // by default, we'll generate the high voltage from the 3.3v line internally! (neat!)
  display.begin(SSD1306_SWITCHCAPVCC, 0x3C);  // initialize with the I2C addr 0x3D (for the 128x64)
  // init done

}


void loop() {
 display.clearDisplay();
  robojaxText("Values", 3, 0, 2, false);
  robojaxText("V: 41v", 3, 22, 2, false);
  robojaxText("Temperature: 32C", 4, 45, 1, true);
  display.drawLine(1, 37, 100, 37, WHITE);
  display.drawRect(1, 20, 100,40, WHITE);
  //display.drawCircle(63,31, 31, WHITE);
   //display.startscrollright(0x00, 0x0F);
  display.display();
   delay(20000);
}

/*
 * robojaxText(String text, int x, int y, int size, boolean d)
 * text is the text string to be printed.
 * x is the integer x position of the text.
 * y is the integer y position of the text.
 * size is the text size (1, 2, 3, etc.).
 * d is a boolean value (true or false).  Its purpose is unclear, use true.
 */
void robojaxText(String text, int x, int y,int size, boolean d) {

  display.setTextSize(size);
  display.setTextColor(WHITE);
  display.setCursor(x,y);
  display.println(text);
  if(d){
    display.display();
  }

  delay(100);
}/*
* Original source: https://github.com/adafruit/Adafruit_SSD1306
* This is the Arduino code for the SSD1306 OLED 128 x 64 Display
* watch the video for details and demo http://youtu.be/UmYiHTOz-5k
* This code has been modified to print specific elements such as text, lines, circles, rectangles, etc.
* *
* *
* Written by Ahmad Shamshiri for Robojax Video channel www.Robojax.com
* Date: December 15, 2017, in Ajax, Ontario, Canada
* Permission granted to share this code given that this
* note is kept with the code.
* Disclaimer: this code is "AS IS" and for educational purposes only.
* This code has been downloaded from https://robojax.com
*
*/
/*********************************************************************
This is an example for our Monochrome OLEDs based on SSD1306 drivers
Pick one up today in the Adafruit shop!
------> http://www.adafruit.com/category/63_98
This example is for a 128x64 size display using I2C to communicate.
3 pins are required to interface (2 I2C and one reset).
Adafruit invests time and resources providing this open source code,
please support Adafruit and open-source hardware by purchasing
products from Adafruit!
Written by Limor Fried/Ladyada for Adafruit Industries.
BSD license, check license.txt for more information
All text above, and the splash screen must be included in any redistribution
*********************************************************************/
#include <SPI.h>
#include <Wire.h>
#include <Adafruit_GFX.h>
#include <Adafruit_SSD1306.h>
#define OLED_RESET 4
Adafruit_SSD1306 display(OLED_RESET);
#define NUMFLAKES 10
#define XPOS 0
#define YPOS 1
#define DELTAY 2
#define LOGO16_GLCD_HEIGHT 16 // do not change this. Error in video
#define LOGO16_GLCD_WIDTH 16 // do not change this. Error in video
static const unsigned char PROGMEM logo16_glcd_bmp[] =
{ B00000000, B11000000,
B00000001, B11000000,
B00000001, B11000000,
B00000011, B11100000,
B11110011, B11100000,
B11111110, B11111000,
B01111110, B11111111,
B00110011, B10011111,
B00011111, B11111100,
B00001101, B01110000,
B00011011, B10100000,
B00111111, B11100000,
B00111111, B11110000,
B01111100, B11110000,
B01110000, B01110000,
B00000000, B00110000 };
// look at line 27 to 30 of Adafruit_SSD1306.h inside the library to select the dimensions
#if (SSD1306_LCDHEIGHT != 64)
#error("Height incorrect, please fix Adafruit_SSD1306.h!");
#endif
void setup() {
Serial.begin(9600);
// by default, we'll generate the high voltage from the 3.3v line internally! (neat!)
display.begin(SSD1306_SWITCHCAPVCC, 0x3C); // initialize with the I2C addr 0x3D (for the 128x64)
// init done
}
void loop() {
display.clearDisplay();
display.setTextSize(2);
display.setTextColor(WHITE);
display.setCursor(2,1);// set the cursor at x=2, y=1 which is top left corner of display
display.println("Robojax");// the actual text
display.setCursor(2,18);
display.println("YouTube");// set the cursor at x=2, y=18 which is top left under the first text line
display.drawLine(0,16, display.width()-1, 16, WHITE); // drawing from the point x=0, y=16 to x=64-1 y=16
display.display();
display.startscrollright(0x00, 0x0F);
delay(2000);
display.stopscroll();
delay(1000);
display.startscrollleft(0x00, 0x0F);
delay(2000);
display.stopscroll();
delay(1000);
display.startscrolldiagright(0x00, 0x07);
delay(2000);
display.startscrolldiagleft(0x00, 0x07);
delay(2000);
display.stopscroll();
delay(10000);
}/*********************************************************************
Original source: http://playground.arduino.cc/Main/I2cScanner
This program will find the I2C address on the I2C device. Just upload the code into your Arduino
and open the serial monitor and wait. It will display the I2C address as 0x3C or similar.
* Please view other RoboJax codes and videos at http://robojax.com/learn/arduino
* If you are sharing this code, you must keep this copyright note.
*
*********************************************************************/
#include <Wire.h>
void setup()
{
Wire.begin();
Serial.begin(9600);
while (!Serial); // Leonardo: wait for serial monitor
Serial.println("\nI2C Scanner");
}
void loop()
{
byte error, address;
int nDevices;
Serial.println("Scanning...");
nDevices = 0;
for(address = 1; address < 127; address++ )
{
// The i2c_scanner uses the return value of
// the Wire.endTransmission to see if
// a device did acknowledge the address.
Wire.beginTransmission(address);
error = Wire.endTransmission();
if (error == 0)
{
Serial.print("I2C device found at address 0x");
if (address<16)
Serial.print("0");
Serial.print(address,HEX);
Serial.println(" !");
nDevices++;
}
else if (error==4)
{
Serial.print("Unknown error at address 0x");
if (address<16)
Serial.print("0");
Serial.println(address,HEX);
}
}
if (nDevices == 0)
Serial.println("No I2C devices found\n");
else
Serial.println("done\n");
delay(5000); // wait 5 seconds for next scan
}文件📁
数据表 (pdf)
-
SSD1306 display datasheetSSD1306 is a single-chip CMOS OLED/PLED driver with controller for organic / polymer light emitting diode dot-matrix graphic display system. It consists of 128 segments and 64commons. This IC is designed for Common Cathode type OLED panel. The SSD1306 embeds with contrast control, display RAM and oscillator, which reduces the number of external components and power consumption. It has 256-step brightness control. Data/Commands are sent from general MCU through the hardware selectable 6800/8000 series compatible Parallel Interface, I2C interface or Serial Peripheral Interface. It is suitable for many compact portable applications, such as mobile phone sub-display, MP3 player and calculator, etc.
SSD1306_display_datasheet.pdf1.79 MB